How to get started using Sound Recorder app on Windows 11
On Windows 11, you can use the Sound Recorder app to quickly record audio in any situation, such as conversations, interviews, lectures, and podcasts.
In the Microsoft Store and across the web, you can find many different audio recording apps, but the Sound Recorder app is easy to use with the basic features that you may need, and it comes already built into the operating system.
In this how-to guide, I will outline the steps to use the Sound Recorder app on Windows 11.
The Sound Recorder app should be installed on your computer, but if not, you can download it directly from this Microsoft Store page by clicking the "Get (or Install)" button.
How to use Sound Recorder on Windows 11
Once you connect a microphone, you can continue with the instructions to start recording audio on Windows 11 without third-party tools.
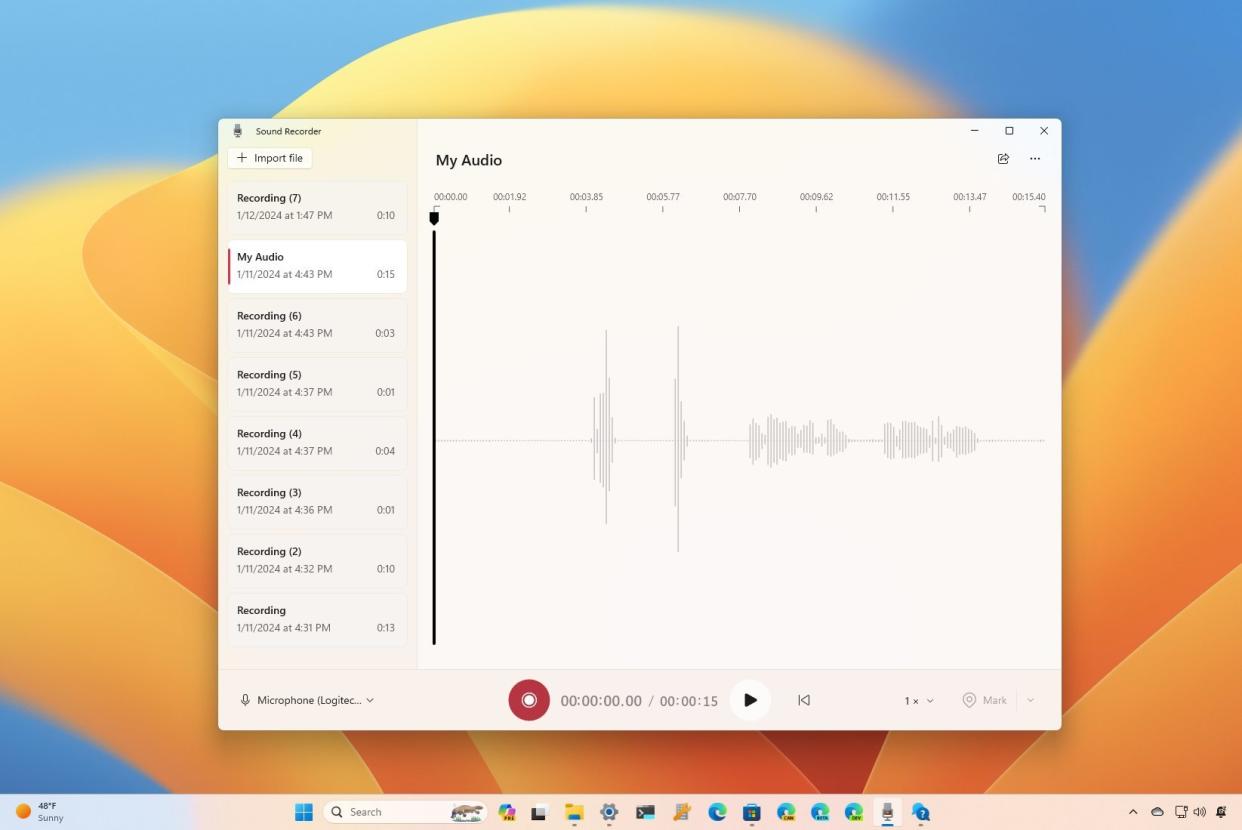
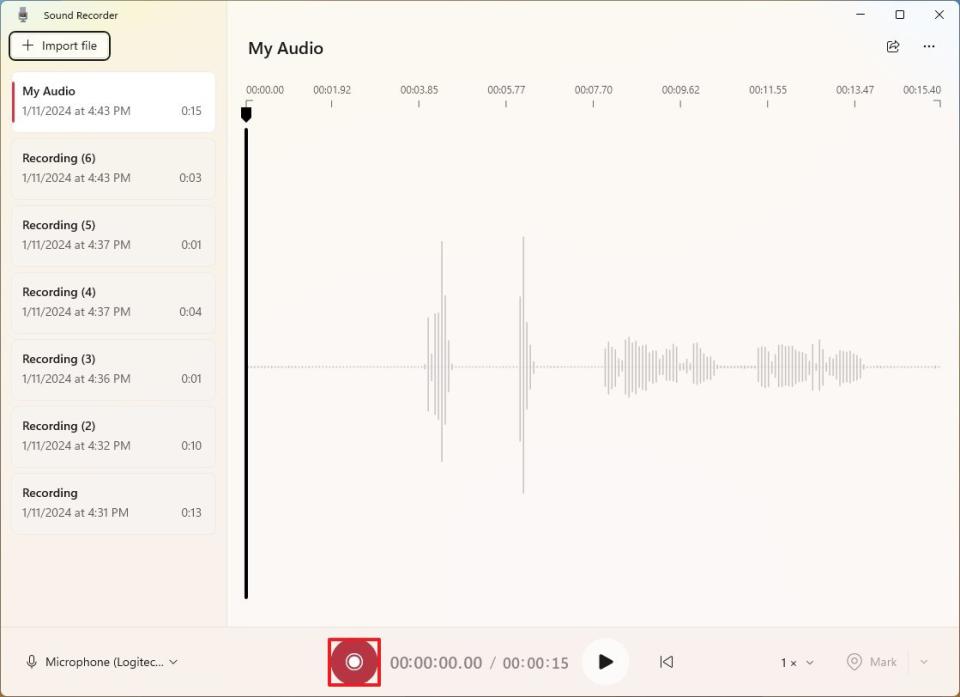
Record audio
To record audio on Windows 11, use these steps:
Open Start.
Search for Sound Recorder and click the top result to open the app.
(Optional) Click the mic button in the bottom-left corner and choose the recording device you want to use if you have multiple microphones.
Click the Record button ("Ctrl + R").
Click the Mark button ("Ctrl + M") to mark a point in the recording.
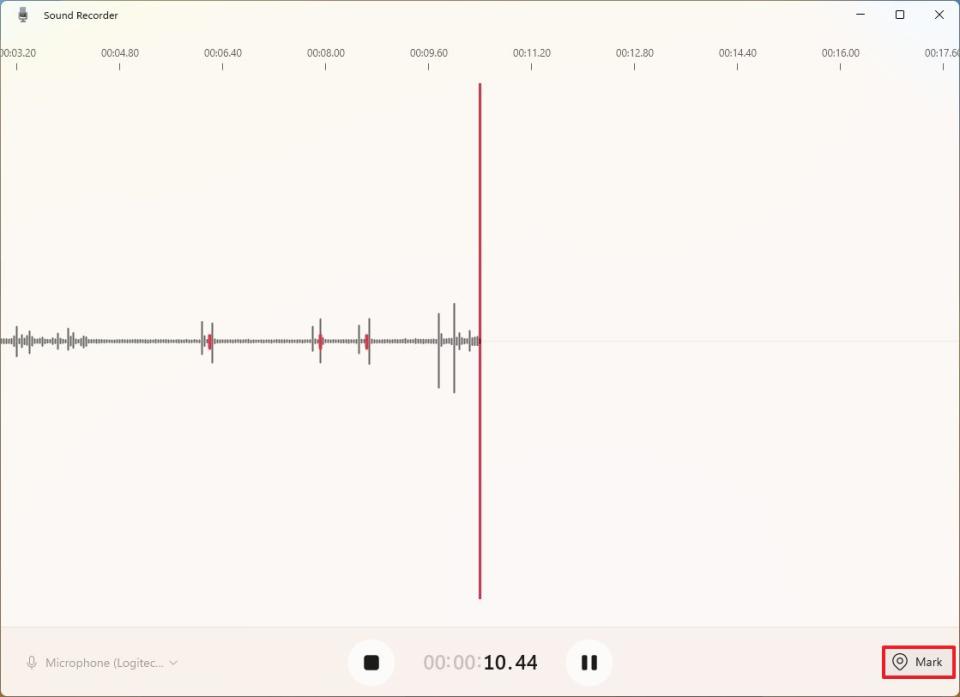
Quick note: This option won't interrupt the recording, but you can quickly jump to important parts of the file when listening to the track. The setting is available while recording or listening to the audio file.
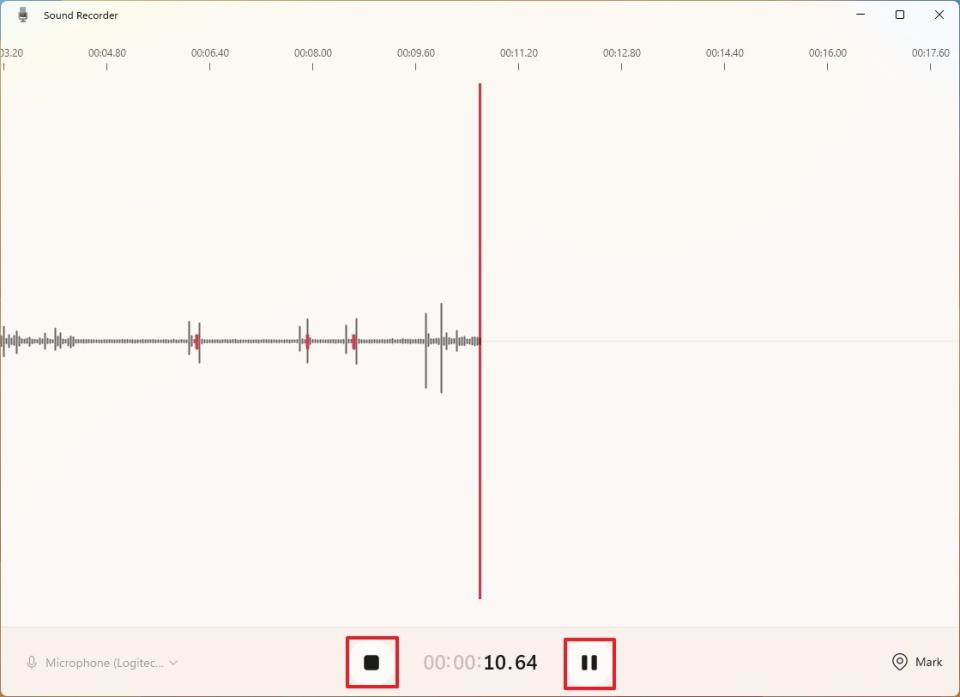
Click the Pause button ("Alt + P" or "Space key") to stop the recording without separating the track to keep everything in one file.
Click the Stop button ("Escape" or "Enter key") to finish the recording.
After you complete the steps, the file with the audio will be saved in the "Sound Recordings" folder available through the "Documents" folder.
Playback audio
To playback audio from the Sound Recorder, use these steps:
Open Start.
Search for Sound Recorder and click the top result to open the app.
Choose the file from the left pane.
Click the Play button ("Space key").
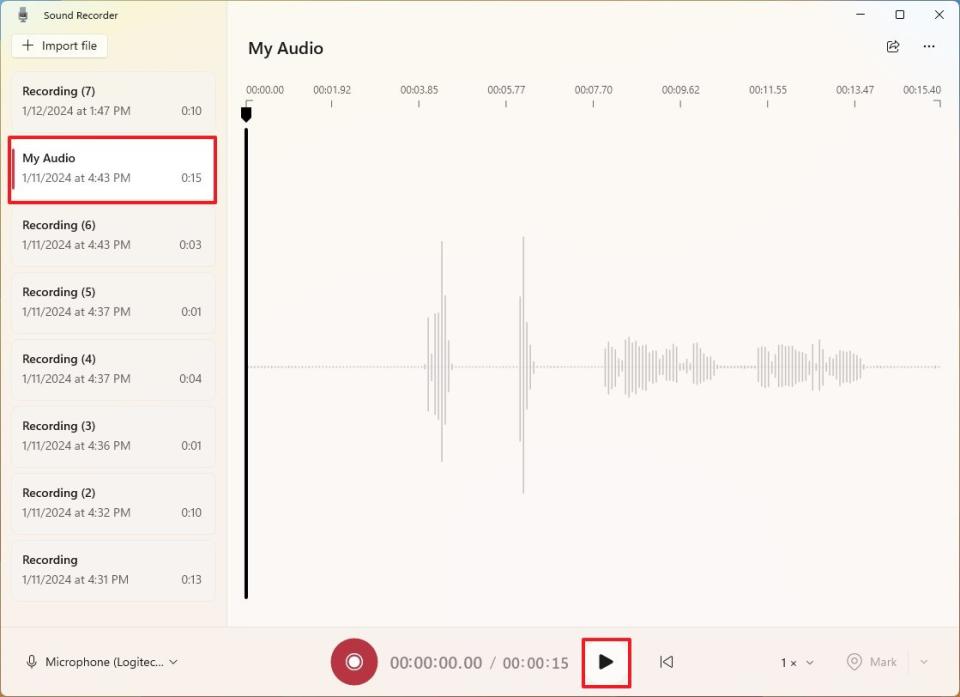
Once you complete the steps, the recording will play, and you can click the "Pause" button to control the audio.
Rename audio
To change the name of an audio file, use these steps:
Open Start.
Search for Sound Recorder and click the top result to open the app.
Right-click the file and choose the Rename option.
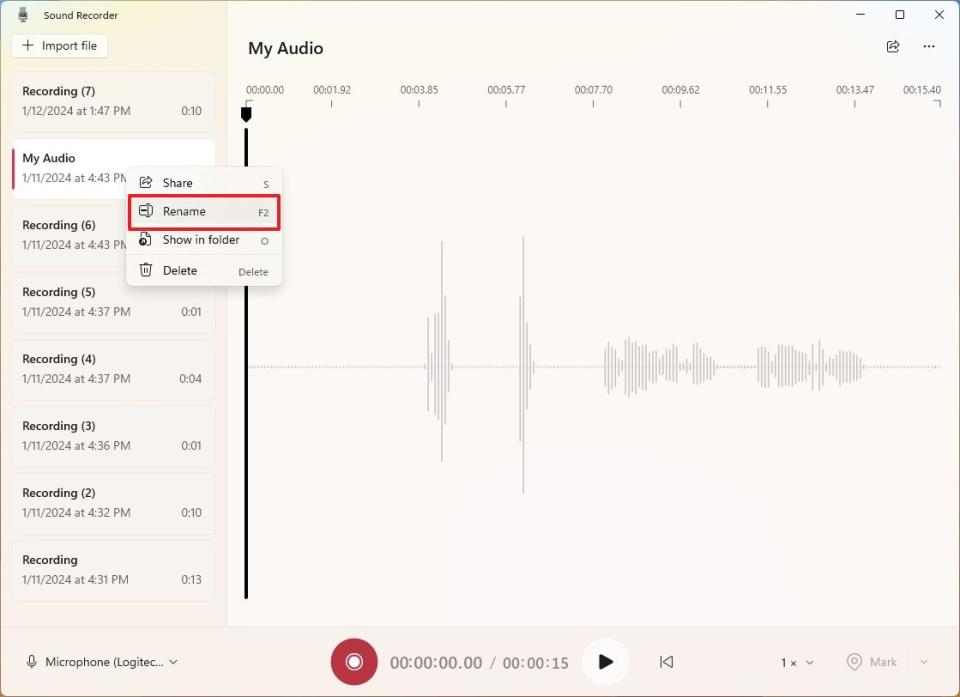
Confirm the new name.
Click the Rename button.
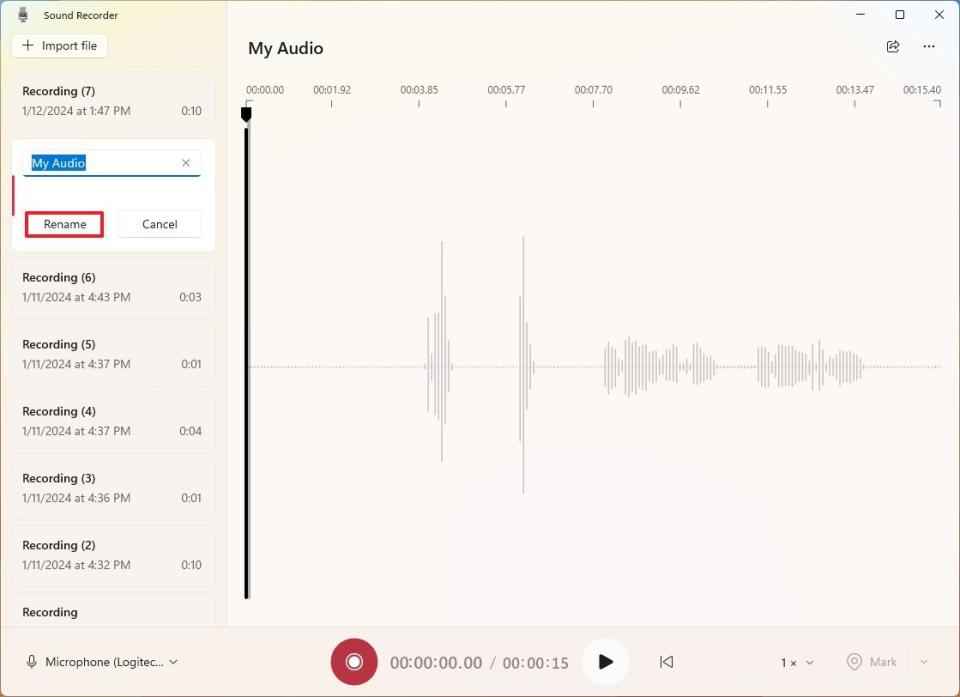
After you complete the steps, the new name will apply in the app and the file. If the file is selected, you can also access the option to change the name from the "More options for recordings" menu in the top-right corner.
If you want to delete a file, right-click the item from the left side and choose the "Delete" option.
Share audio
To share an audio file with other people from within the Sound Recorder app, use these steps:
Open Start.
Search for Sound Recorder and click the top result to open the app.
Right-click the file and choose the Share option.
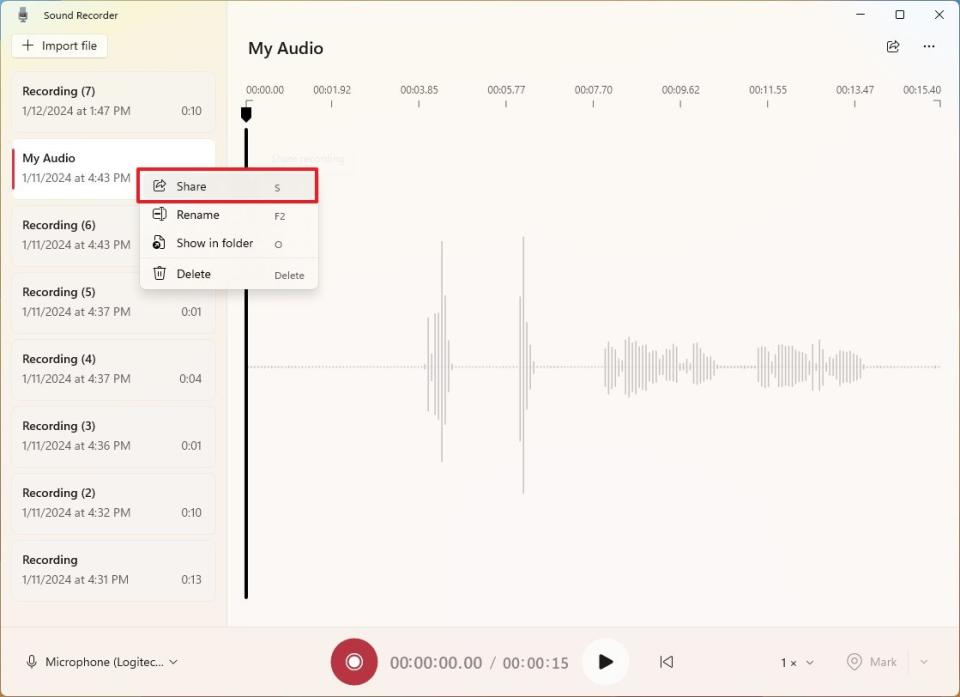
Choose the sharing method, including email, app, or through the Nearby Sharing feature.
Continue with the on-screen direction to complete the process.
Alternatively, you can always use the "Show in folder" option from the Sound Recorder context menu to access the folder containing your recordings to grab the file manually for sharing.
Change settings
To change the audio format or recording quality on Windows 11, use these steps:
Open Start.
Search for Sound Recorder and click the top result to open the app.
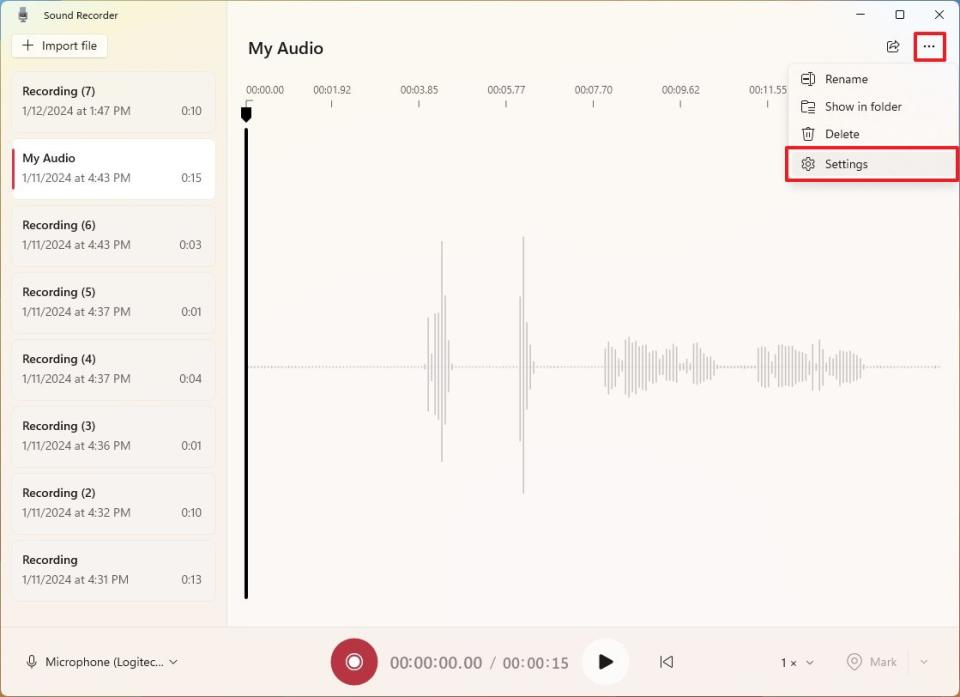
Click the "More options for recordings" menu from the top-right corner and choose the Settings option.
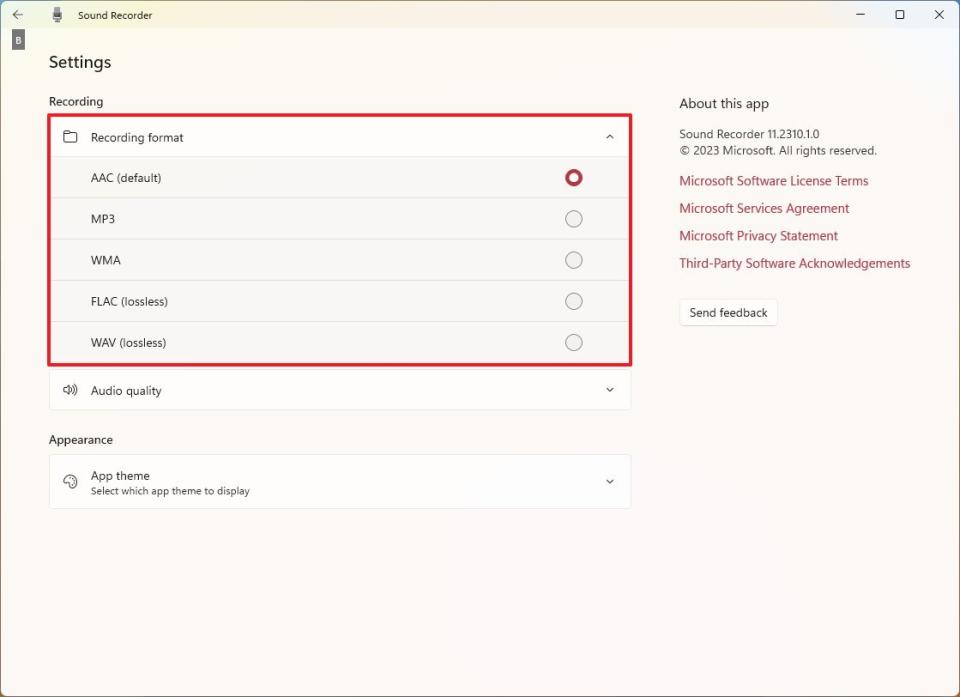
Click the Recording format setting.
Select the audio format you want to use, including AAC, MP3, MWA, FLAC, or WAV.
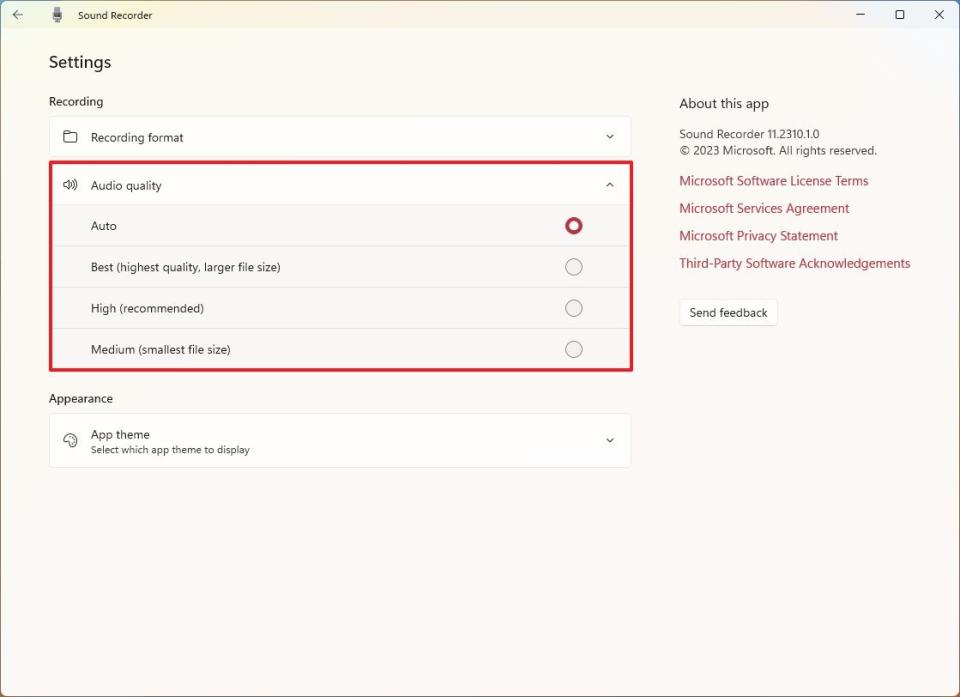
Click the Audio quality setting.
Select the quality option for your recording, including Auto, Best, High, or Medium.
Once you complete the steps, the new configuration will apply, and the app will use these settings on your next recording.
Import audio
To import an audio file to the Sound Recorder app, use these steps :
Open Start.
Search for Sound Recorder and click the top result to open the app.
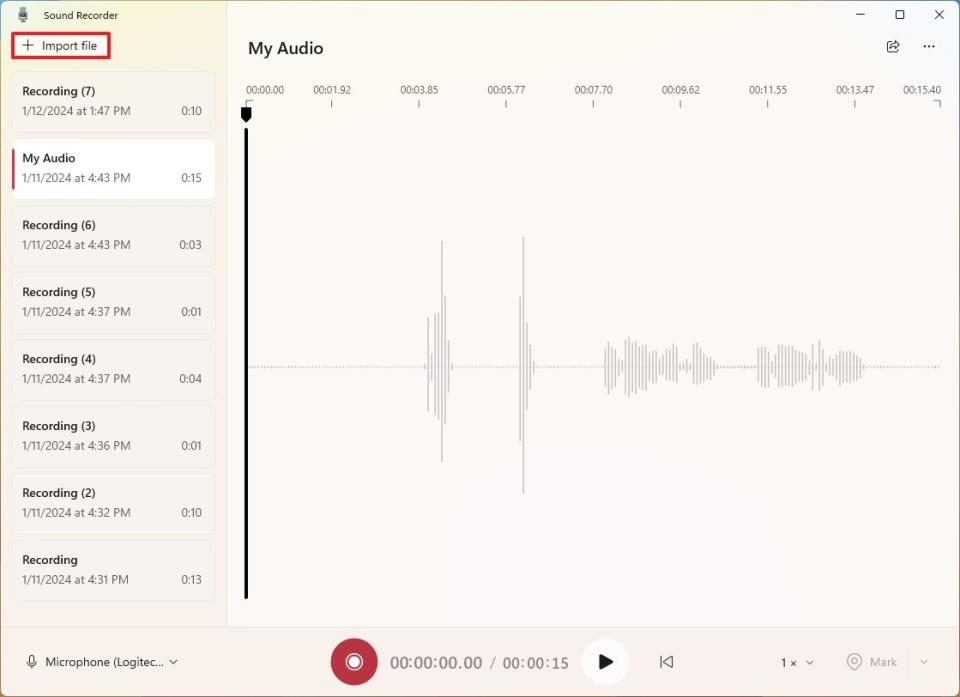
Click the Import file button.
Select the audio file.
Click the Open button.
After you complete the steps, the file will appear in the left navigation pane, ready for playback.
How to fix Sound Recorder on Windows 11
If the app doesn't seem to work, the problem could be related to the microphone or privacy settings.
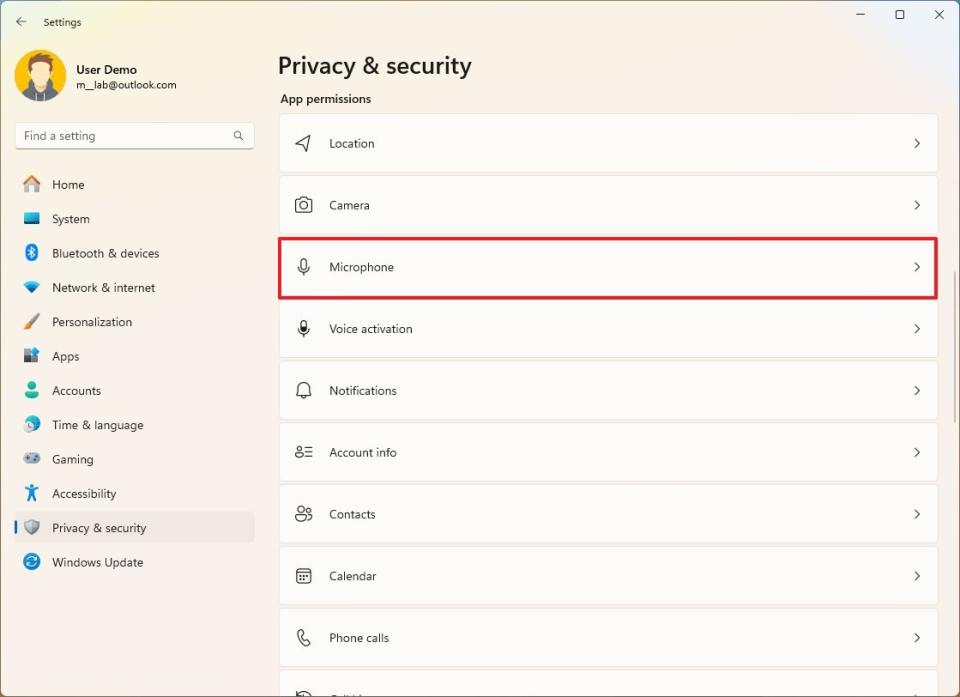
Fix microphone access
To fix app access to the microphone on Windows 11, use these steps:
Open Settings.
Click on Privacy & security.
Click the Microphone page on the right side.
Turn on the Microphone access toggle switch (if applicable).
Turn on the Sound Recorder toggle switch.
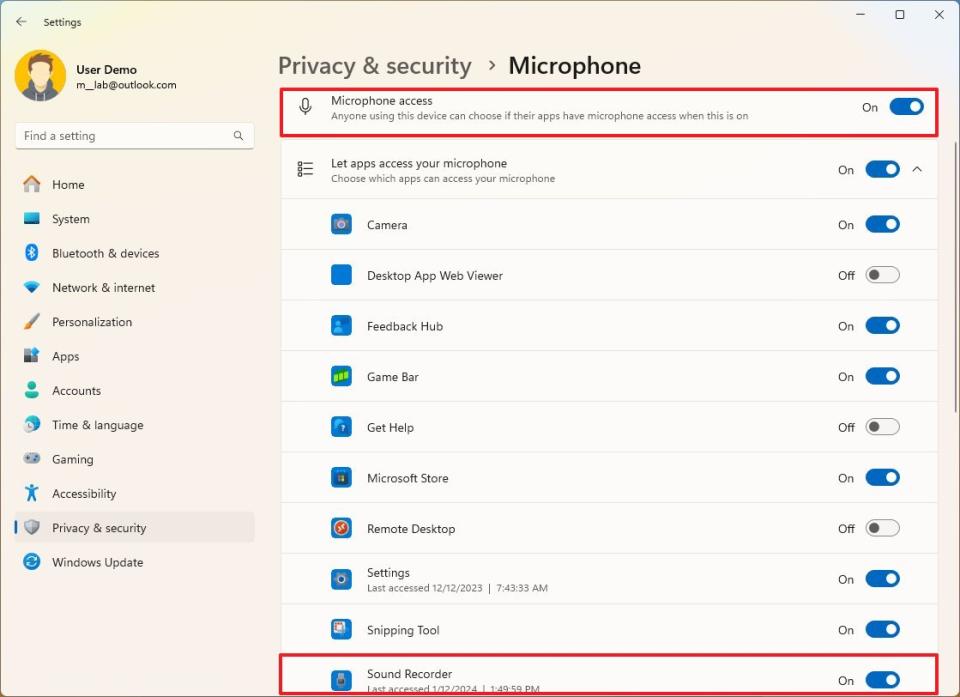
Once you complete the steps, you should be able to use the microphone with the Sound Recorder app.
Fix microphone issues
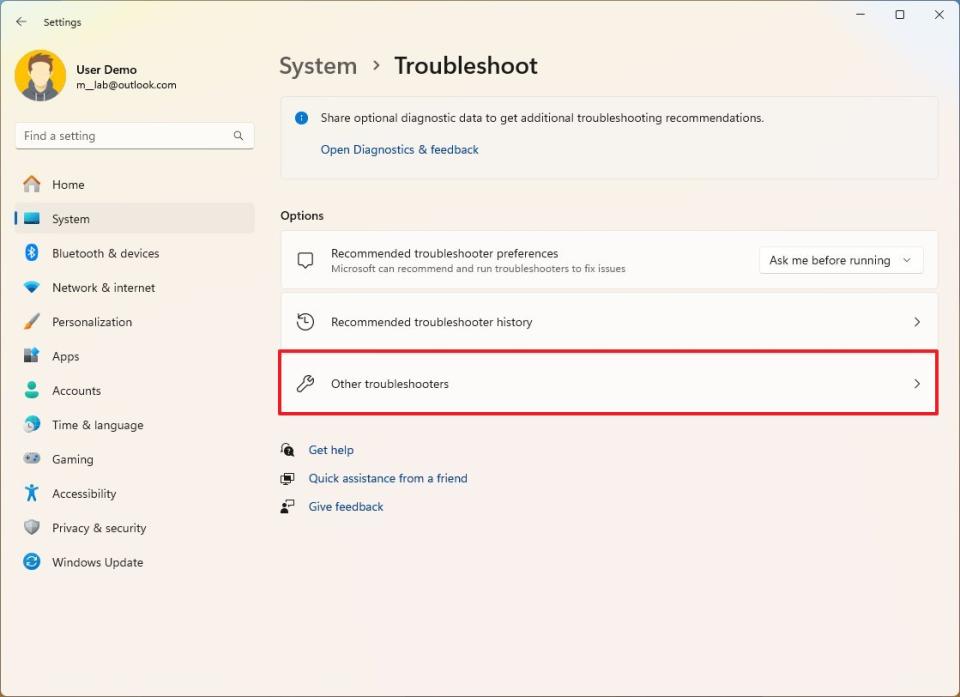
To troubleshoot and resolve issues with the microphone, use these steps:
Open Settings.
Click on System.
Click the Troubleshoot page on the right side.
Click the Other troubleshooters setting.
Click the Run button for the Audio troubleshooter.
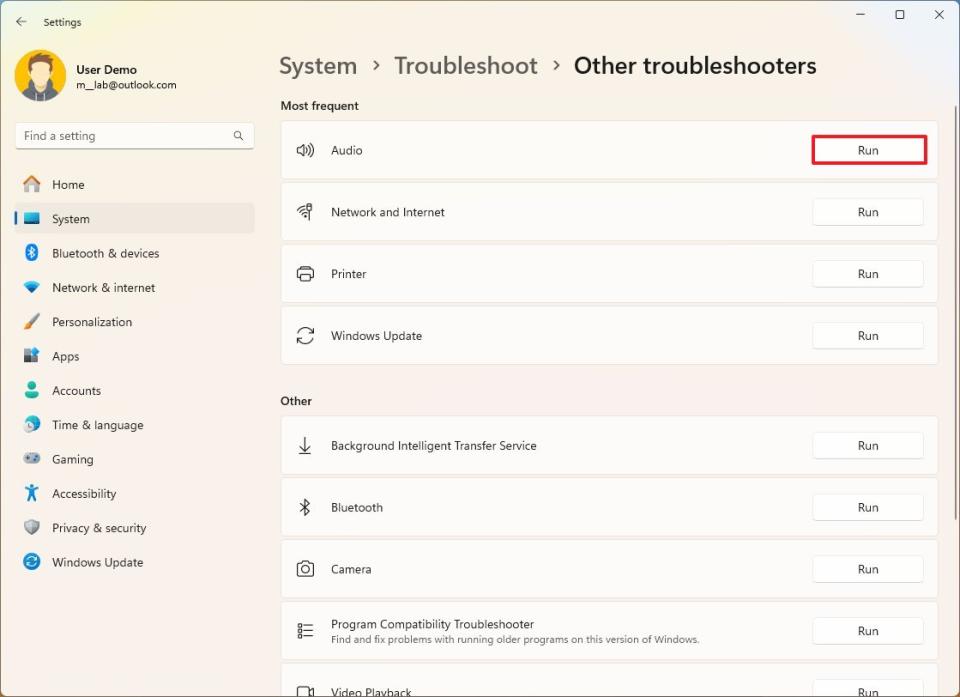
Click the Yes button in the Get Help app.
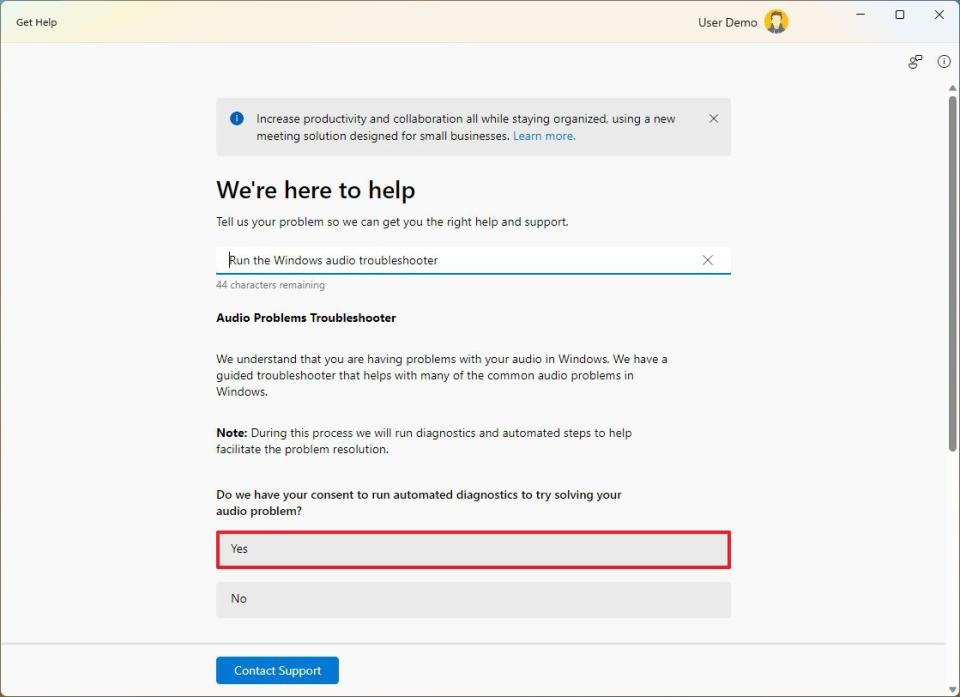
Continue with the on-screen directions to complete the process.
After you complete the steps, the system will scan and fix the problem with the microphone, and it should now work with the Sound Recorder app.
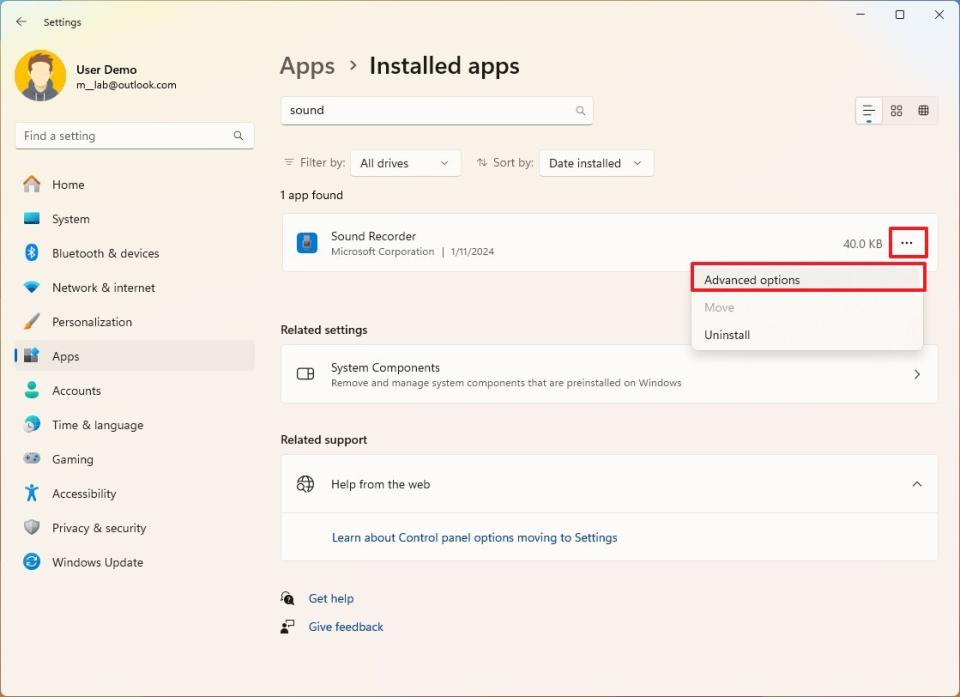
Fix Sound Recorder problems
To fix problems with the Sound Recorder app on Windows 11, use these steps:
Open Settings.
Click on Apps.
Click the Installed apps page on the right side.
Click the menu button (three dots) on the right side for Sound Recorder and click on Advanced options.
Under the "Reset" section, click the Repair button.
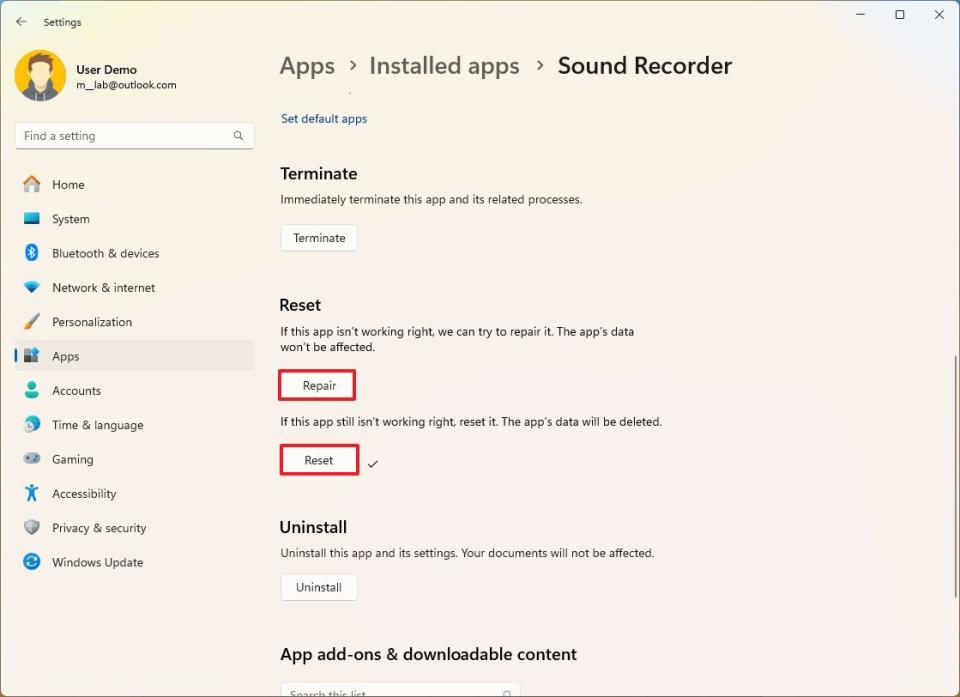
(Optional) Click the Reset button.
These options won't delete your recordings, but the reset option will delete the app's data, meaning that the next time you open the app, the files won't appear in the left pane. However, you can use the import option to add them again.
Although the Sound Recorder app is similar to the Voice Recorder app on Windows 10, one of the biggest differences is that the app for Windows 11 doesn't include the audio trimming feature.
More resources
For more helpful articles, coverage, and answers to common questions about Windows 10 and Windows 11, visit the following resources:

