How to screen record on Windows 11 or 10
On Windows 11 (or 10), you now have multiple ways to record the screen on your computer using the Snipping Tool, Clipchamp, and Xbox Game Bar app. Although you can find many other free and paid apps, if you want something simple to create a presentation, tutorial, or record an error to share with technical support, the tools built into the operating system are perhaps all you need.
However, each solution has its pros and cons. For instance, the Snipping Tool app makes it super simple to record the screen and share the capture, but it doesn't include an audio recording feature.
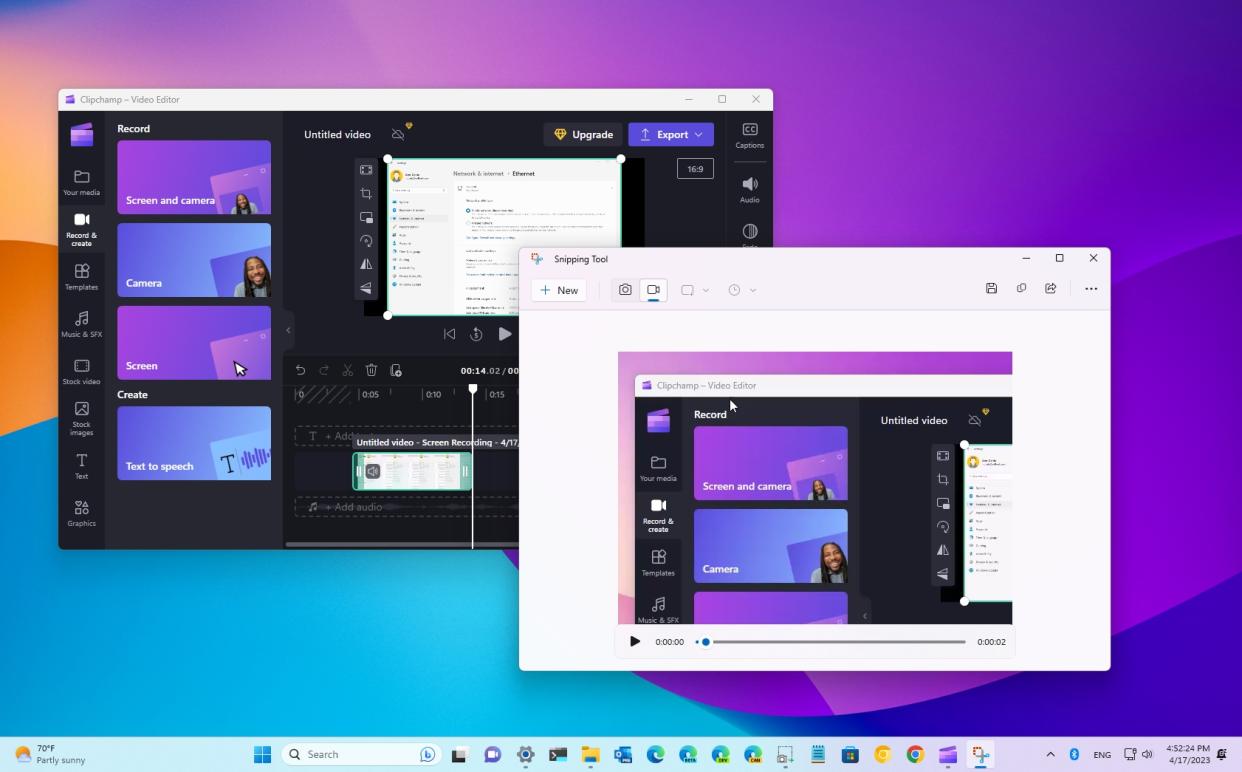
The Clipchamp app is a web-based video editing application from Microsoft that can screen record the desktop, an app, or a region of the screen. It also supports audio recording, the ability to show your computer's camera as part of the recording, and you can edit the video. The only caveat is that it is a freemium application, meaning you will need a Microsoft 365 subscription to unlock some of the features or a premium Clipchamp subscription to access everything. However, you can use it without a subscription to record the desktop with a video resolution of up to 720p.
The Xbox Game Bar hasn't been designed as a productivity tool but includes a feature that allows you to screen record an application. The downside of this solution is that you can't record the desktop or File Explorer. However, unlike Snipping Tool, the app allows audio recording.
This how-to guide will walk you through two ways to screen record on Windows 11 without using third-party software.
Screen record with Snipping Tool app
To record the screen or an app with the Snipping Tool app on Windows 11, use these steps:
Open Start.
Search for Snapping Tool and click the top result to open the app.
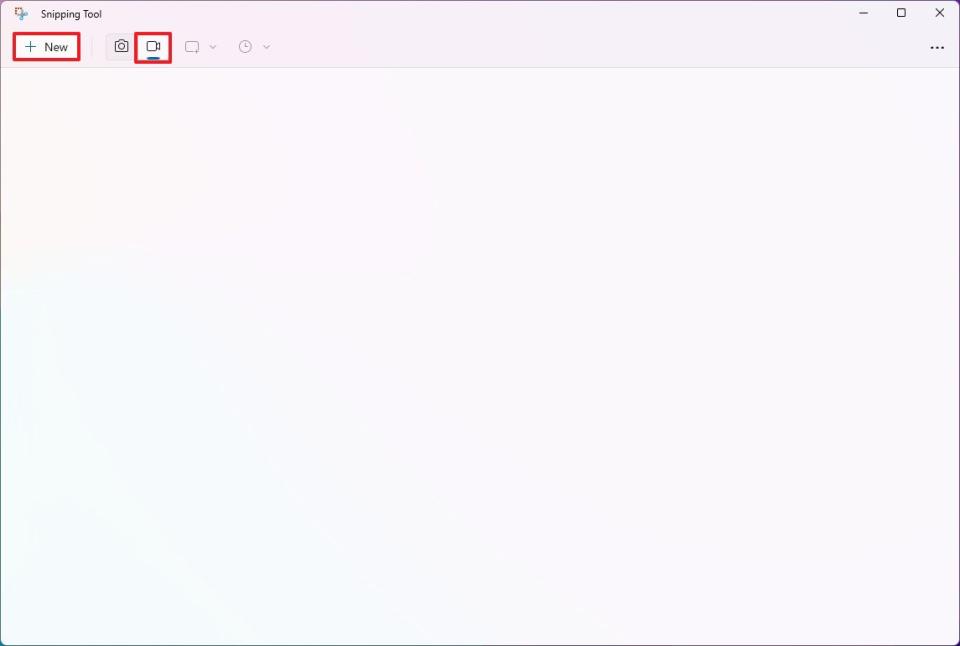
Click the Record button.
Click the New button.
Choose an area of the screen to record.
Click the Microphone menu and choose the voice capture device. (Choose the "Mute" button to disable audio capture.)
(Optional) Click the "Mute system audio" button to prevent the app from recording audio from your computer.

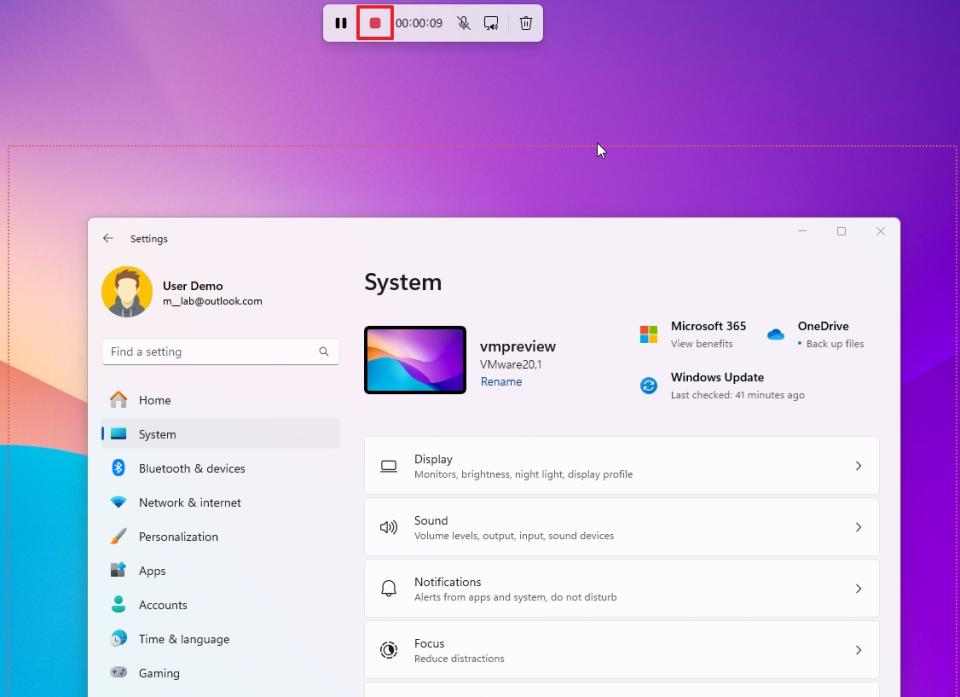
Click the Start button.
Continue with the interaction you want to capture.
Click the Stop button.
Quick note: You can click the "Delete" (trash) button to discard the recording and start over.
(Optional) Click the Play button to playback the screen recording.
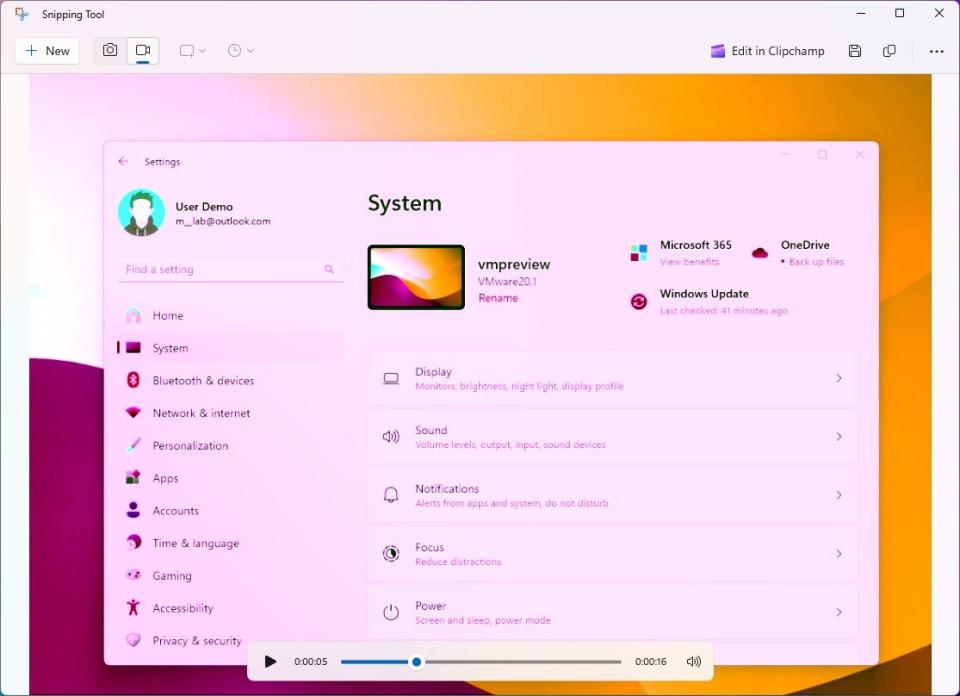
Click the Save button.
Choose the location to store the video recording.
Click the Save button one more time.
Once you complete the steps, the app will create a video file with the screen recording that you can now share with others.
Screen record with Clipchamp
To record the screen on Windows 11 with the Clipchamp app, use these steps:
Open Start.
Search for Clipchamp and click the top result to open the app.
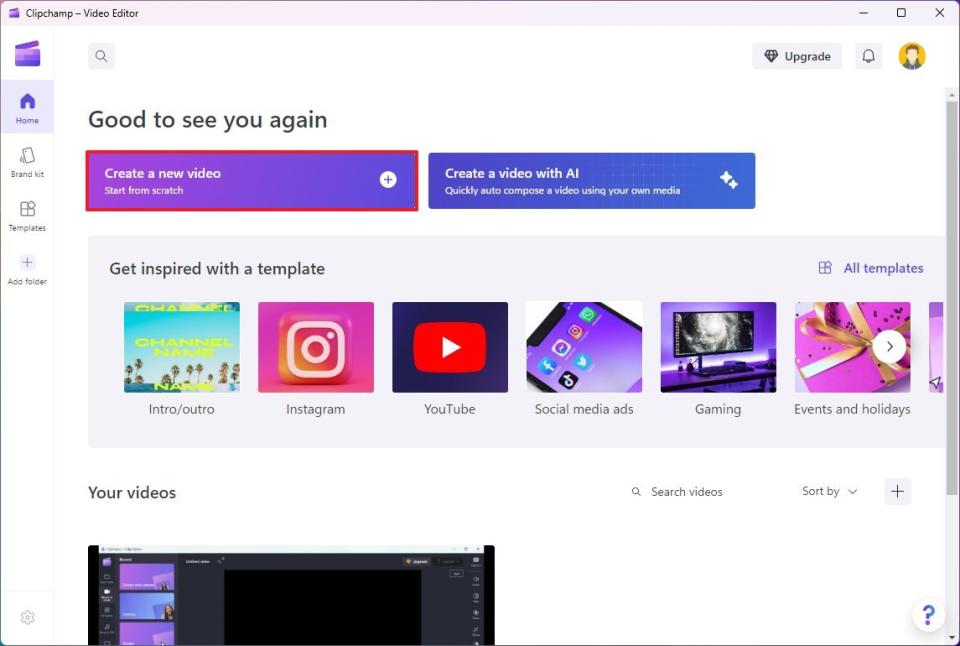
Click the "Create a new video" option from the "Home" tab.
Quick note: If this is your first time opening the app, you will need to agree to the terms and sign in with your Microsoft account. If you can't find the app on your computer, you can download it from this page.
Click on Record & create.
Under the "Record" section, choose one of the recording options, including "Screen and camera," "Camera," or "Screen."

Click the Record button at the bottom-left corner.

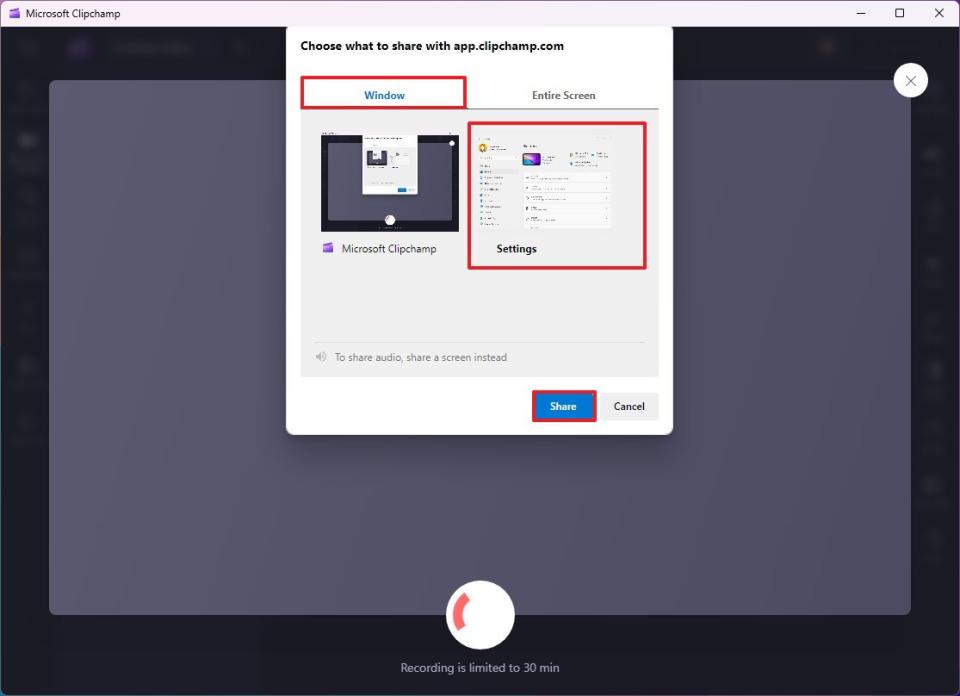
Choose the area to screen record, including "Window" or "Entire Screen."
Select the screen recording area.
(Optional) Check the "Also share system audio" option (if available).
Click the Share button.
Quick note: The share button only means to start recording. You won't be streaming anything outside the device.
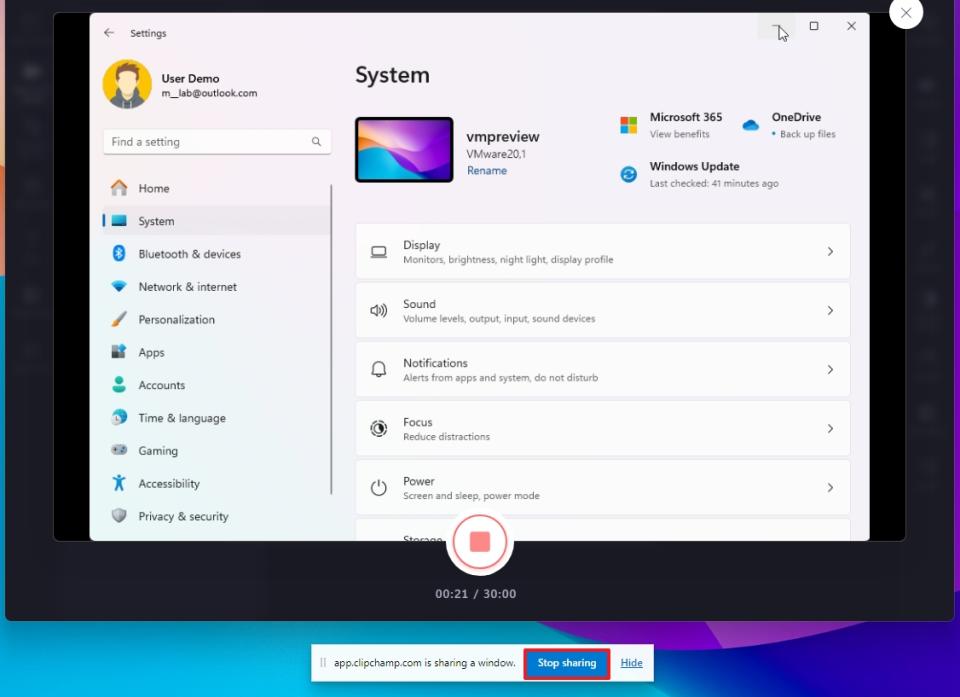
Continue with the interaction you want to capture.
Click the "Stop sharing" button.
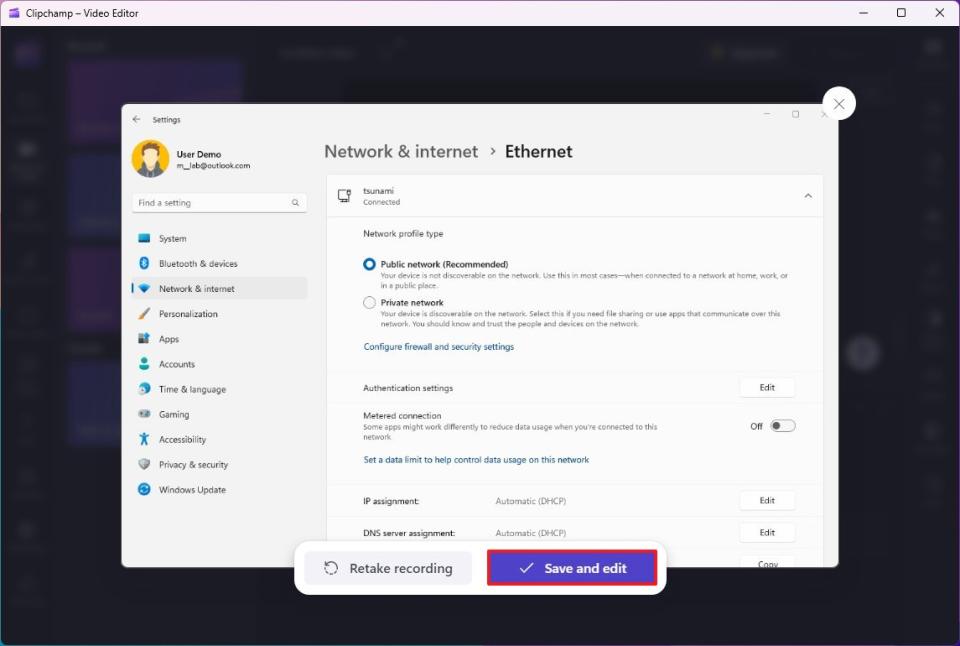
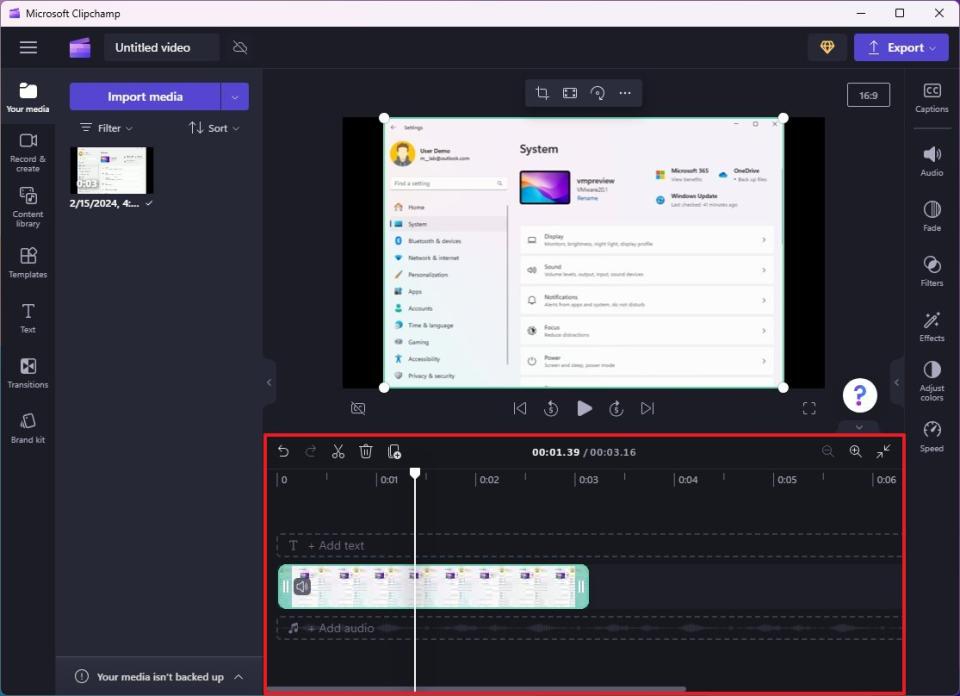
Click the "Save and edit" button.
(Optional) Use the available tools to cut or trim the video or adjust colors, audio, or video speed.
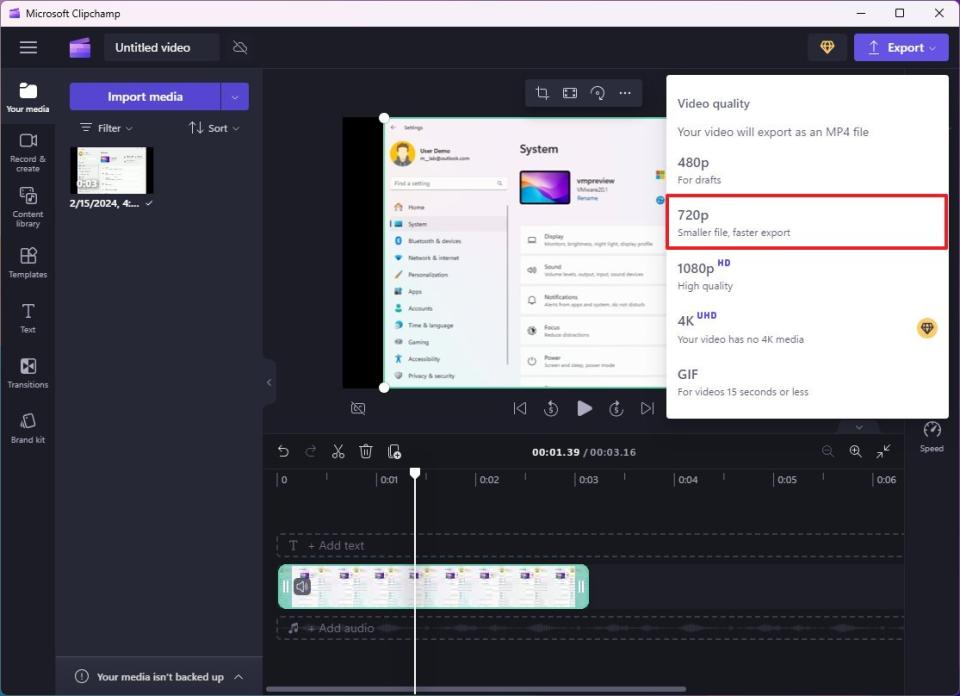
Click the Export button from the top-right corner and select the 720p option to save the capture to your computer.
After you complete the steps, the screen recording will be saved in the "Downloads" folder as a ".mp4" file, which you can share with anyone.
Screen record with Xbox Game Bar
To record the screen with the Xbox Game Bar, use these steps:
Open any app to record and keep it in focus.
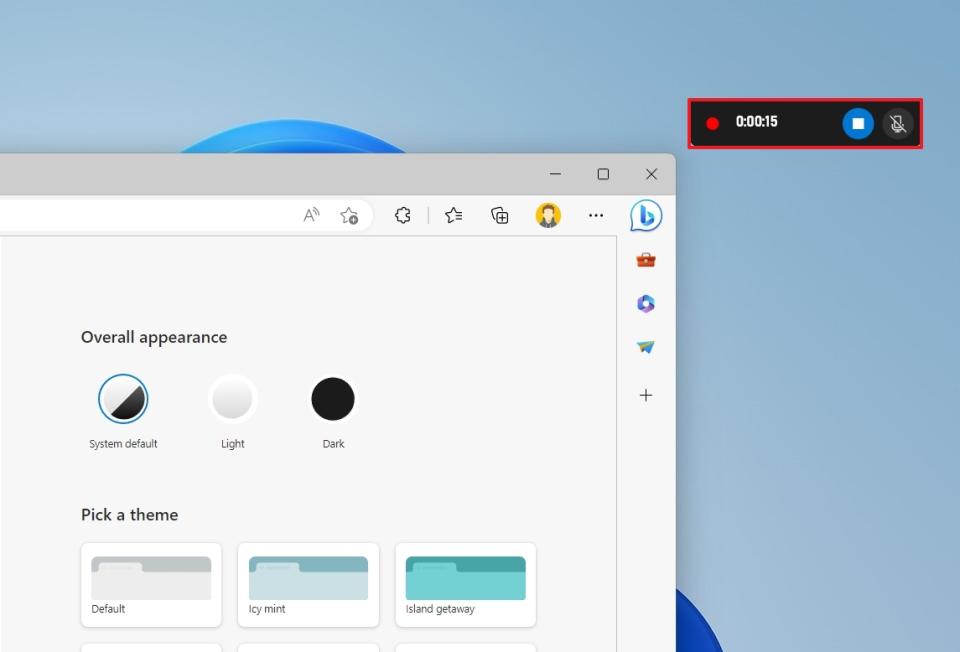
Use the "Windows key + Alt + R" keyboard shortcut to start the screen recording.
Quick note: Since you can't record the desktop or File Explorer, you will have to open the app while keeping it in focus and perform the shortcut.
Continue with the interaction you want to capture.
(Optional) Click the microphone button using the available controllers to narrate while recording the video.
Quick tip: If you can't record sound, your privacy settings may be blocking the app. You can fix this issue using Settings > Privacy > Microphone and then turn on the toggle switch for "Xbox Game Bar" to allow access to your microphone.
Use the "Windows key + Alt + R" keyboard shortcut again to stop the screen recording. Or click the Stop button (or minimize the app) to terminate the session.
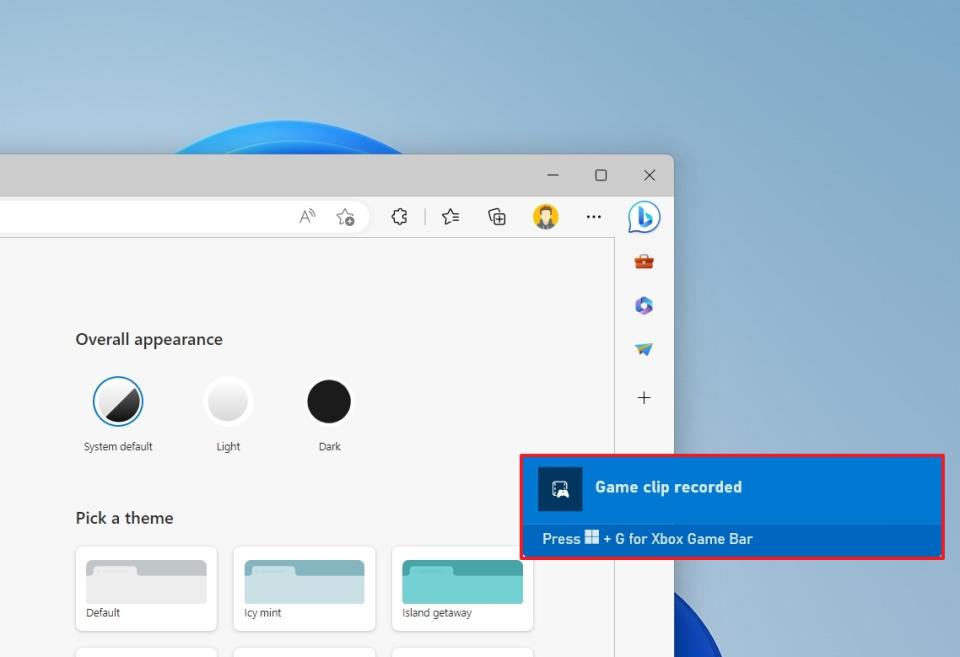
After you complete the steps, the screen recording will be saved automatically in the "Captures" folder inside the "Videos" folder.
Alternatively, you can use the "Windows key + G" keyboard shortcut, click the "Show all captures" option, and in the "Gallery" module, click the "Open folder location" button.
More resources
For more helpful articles, coverage, and answers to common questions about Windows 10, visit the following resources:

