How to install PS5 SSD in 2024
Installing an M.2 SSD in your PS5 is the most efficient way of increasing the storage of your console, which is essential if you're consistently downloading games onto your system. However, installing an SSD can be daunting if you're a newcomer, but once you know what you're doing it'll only take you a few minutes to complete. However, to make the entire process easier, we've pulled together a beginner-friendly guide to walk you through the process.
The PS5 is a truly remarkable console from a hardware perspective, but it's got a serious storage limitation. While the box claims to have 825GB of usable space, you've only got 677.2GB when accounting for the system OS and other essential files. If you're using the more recent PS5 Slim model, then you have slightly more storage at your disposal with 1TB of usable space (with roughly 150GB of this taken up by the system).
As the best PS5 games keep getting bigger, you'll soon find yourself running out of room no matter which model you are using. Installing an M.2 SSD in your PS5 alleviates that worry. That's why getting yourself one of the best SSDs for PS5 is essential.
You will need to go the internal route to have native compatibility with the PS5's internal NVMe SSD. If you've been considering one of the best PS5 external hard drives then keep in mind that you can't run games from them, only store them to install for later - making installing an M.2 SSD the preferred choice. For the full experience on console, we're also bringing you the best monitors for PS5 and the best PS5 controllers, too.
How to install an M.2 SSD in your PS5
Before we get started, it's important to note that not every NVMe drive will fit inside your PS5. You will need a Gen 4.0 model with a minimum speed of 5,500 MB/s sequential or faster. A PS5 SSD heatsink is also needed; some models come with them pre-installed, others can be DIY'd. Sometimes the heatsink can also act as the M.2 cover, as you'll see further down the page.
Here are the full specifications to Sony's standards:
Before getting started
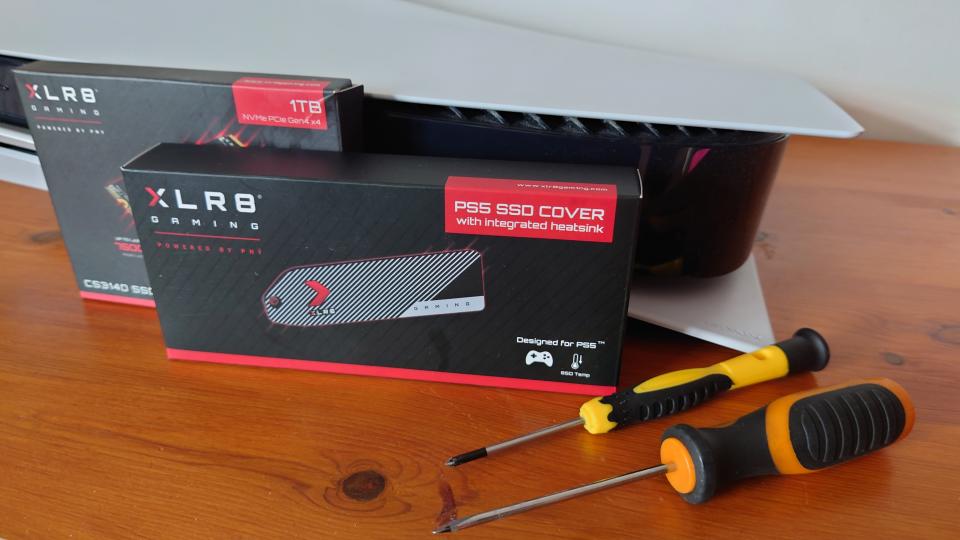
There isn't too much that goes into installing an M.2 SSD into your PS5, but you will need a couple of items. As well as the PS5 SSD itself, you will require a sizable flat head screwdriver (which is used to secure and take off the stand whether mounted horizontally or vertically), as well as a #1 Phillips screwdriver (size 01) which is used for the M.2 port itself.
It also helps greatly to have the PS5 console itself on a flat wooden surface, as the console doesn't sit flush on its side due to the side panel design. Good lighting is important so you can see what you're doing, too.
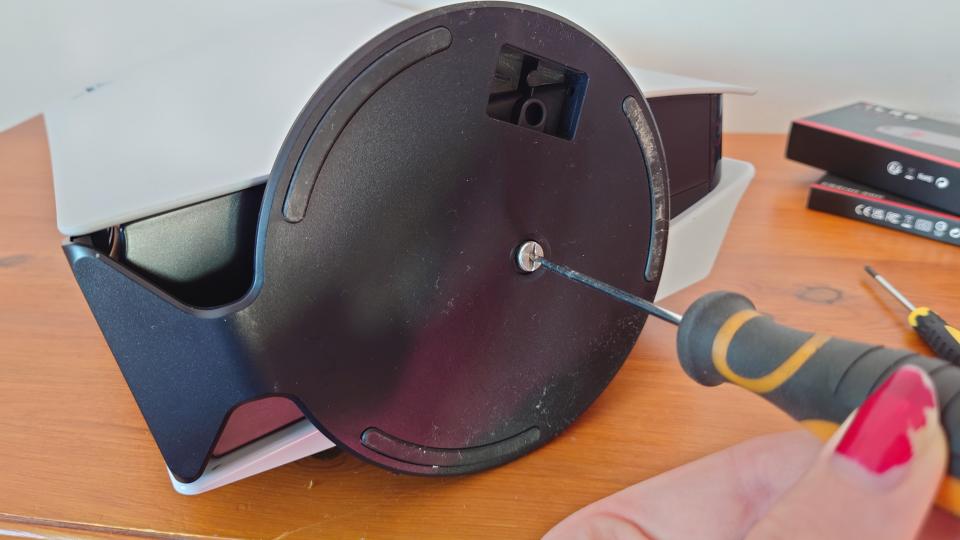
Using the flathead screwdriver, you can remove the stand which comes with the PS5 console. This could be mounted horizontally or vertically, but either way, it'll need to come off before you get to what's underneath the side panels. Simply turn the large screw and it'll come loose. After that, put the stand and screw to one side.
Opening up the PS5
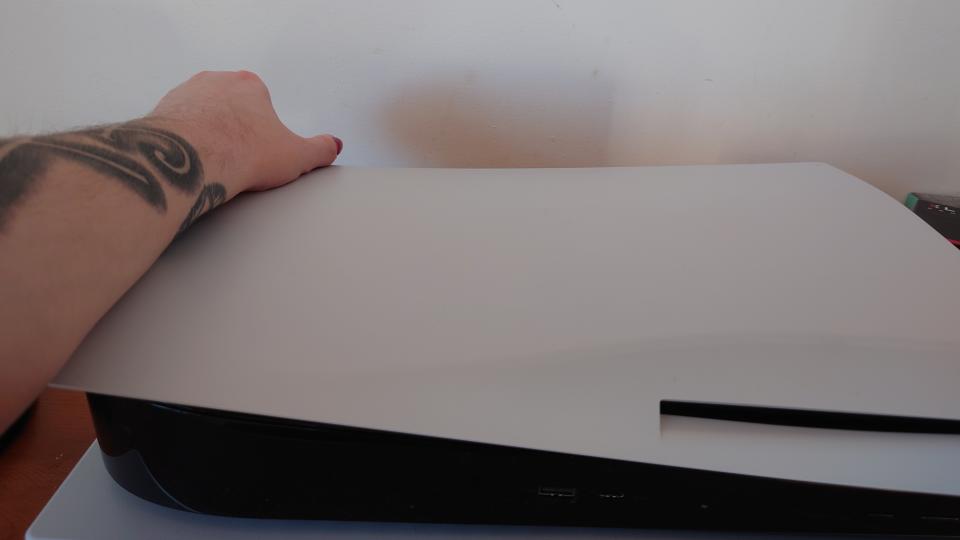
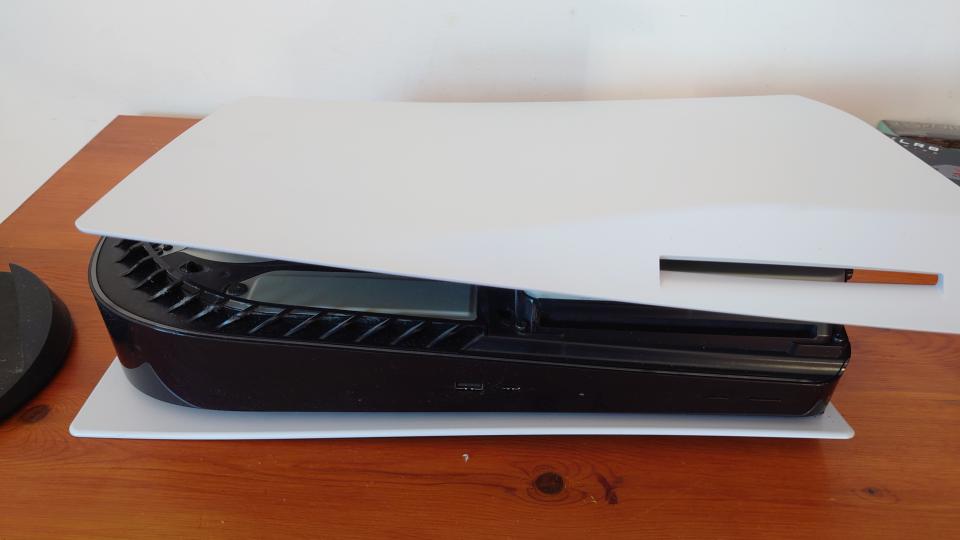
You will need to take the disc-drive side cover off so you can access the PS5's M.2 port. This could be a little tricky, and require some force but it's easy when you know how. What you need to do is firmly grip the top left corner and raise it up. Then, with your other hand, you slide the cover to the right and it should come away. It doesn't need more than a gentle push if you've applied enough force in the top; there's a plastic clip which is disengaged from the steel frame there.
Installing the M.2 SSD
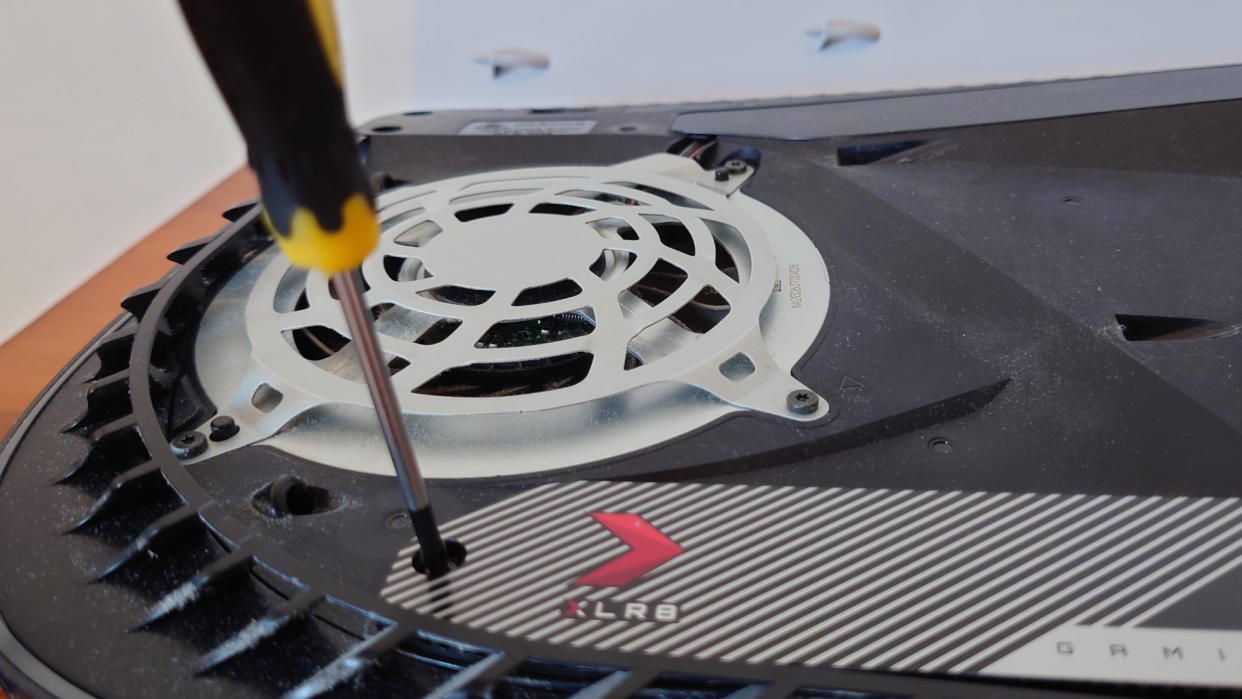
Now that the side panel has been removed, your next action is to take the PS5's M.2 port cover off, and that's where the Phillips head screwdriver comes in handy. Once it's off, you'll notice that there's a space for your NVMe SSD of choice, and that's where we get to our drive of choice right now, the PNY XLR8 Gaming Kit for PS5.
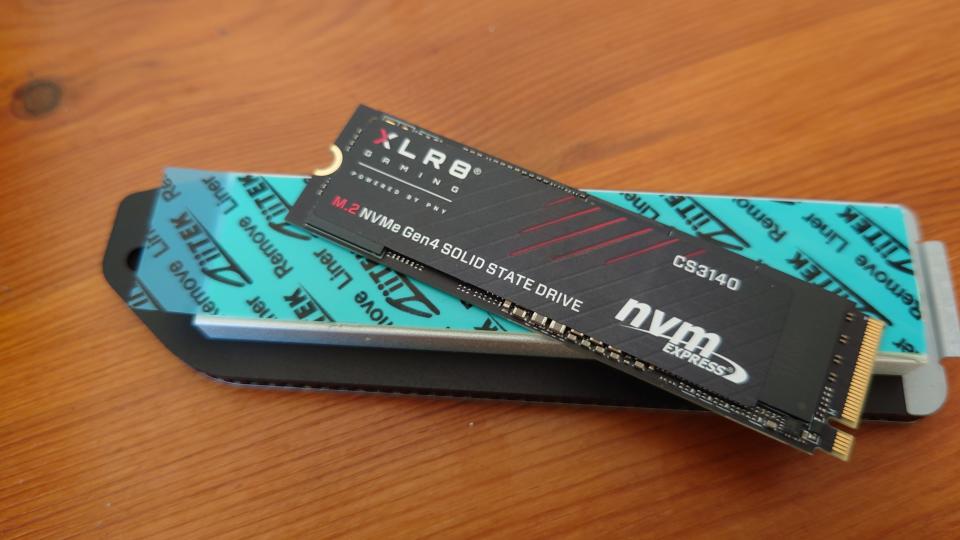
What makes this kit different to some other SSDs for PS5 which come wrapped in their own heatsink, is that this one features a standalone heatsink engineered with the console in mind. The cover replaces the stock grey one which is claimed to improve overall airflow. I've used this drive in my console and my gaming PC and can personally vouch for its performance.
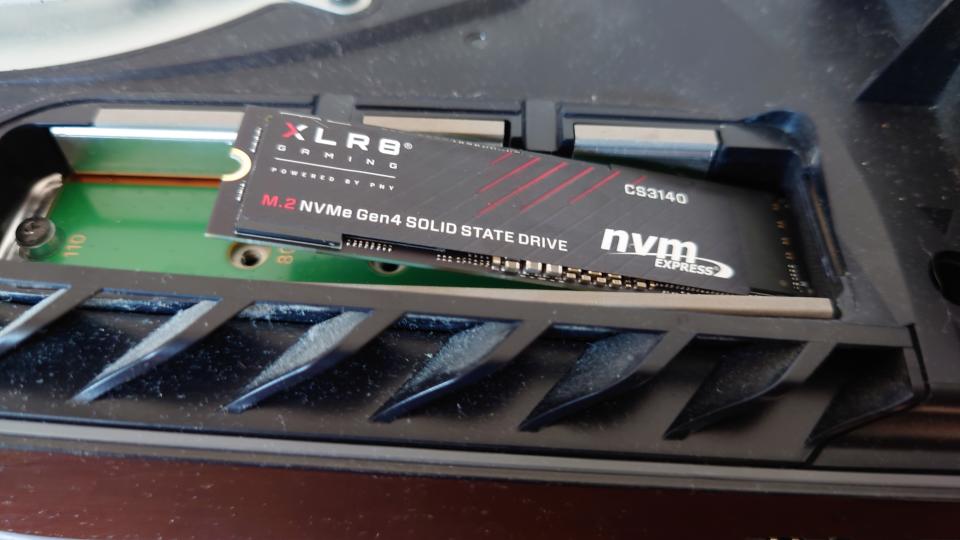
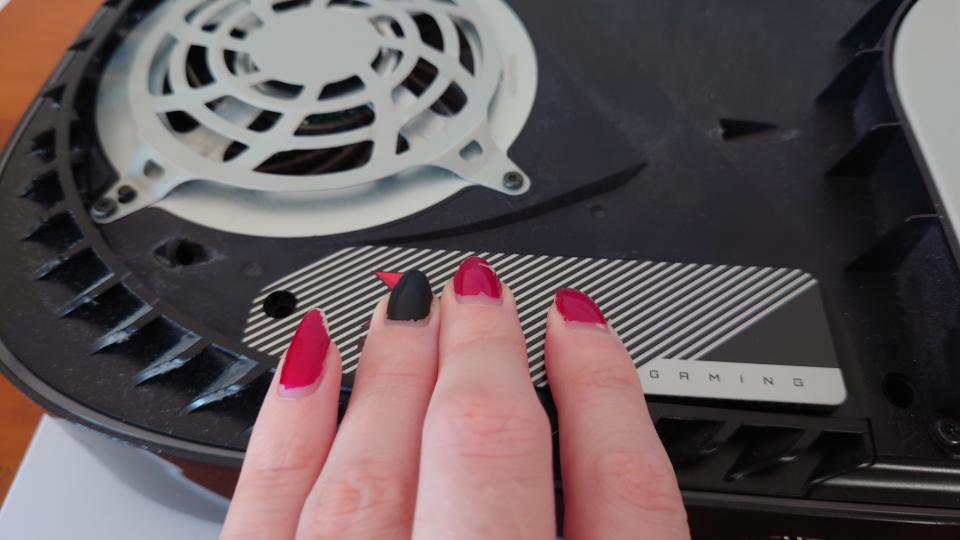
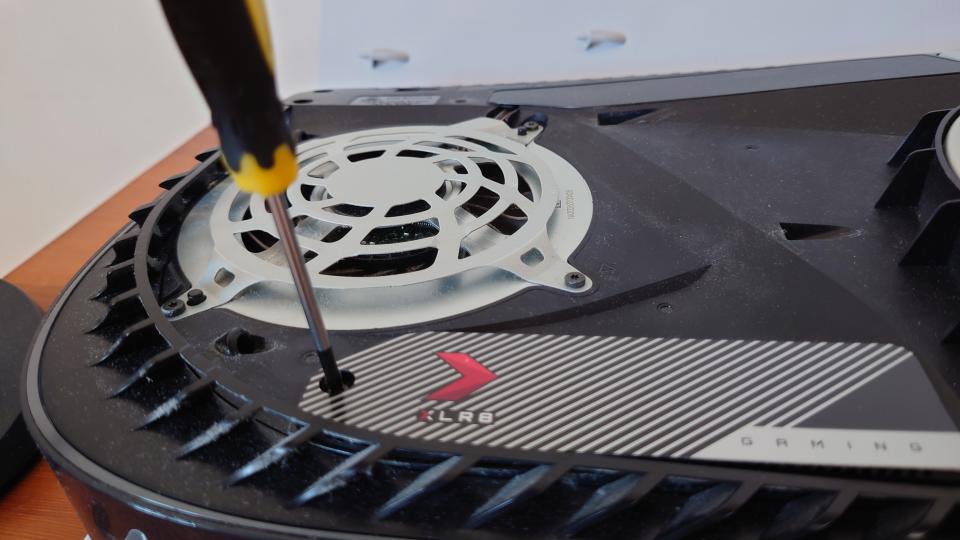
Regardless of which model of SSD for PS5 you opt for, the rule is the same. All drives must be carefully inserted at a 45-degree angle. This is so the NVMe M.2 connecting pins can make proper contact. Following this, you must gently hold the drive down and screw it into place with the standfirst that comes inside the port.
Our particular storage drive features its own dedicated M.2 cover which replaces the original. This one uses a sticky thermal pad which attaches itself to the NVMe itself to aid cooling. Speaking of which, there's a thick aluminium heatsink which keeps the entire port chill meaning you should be able to get slightly faster sequential performance as the SSD itself isn't being thermal throttled.
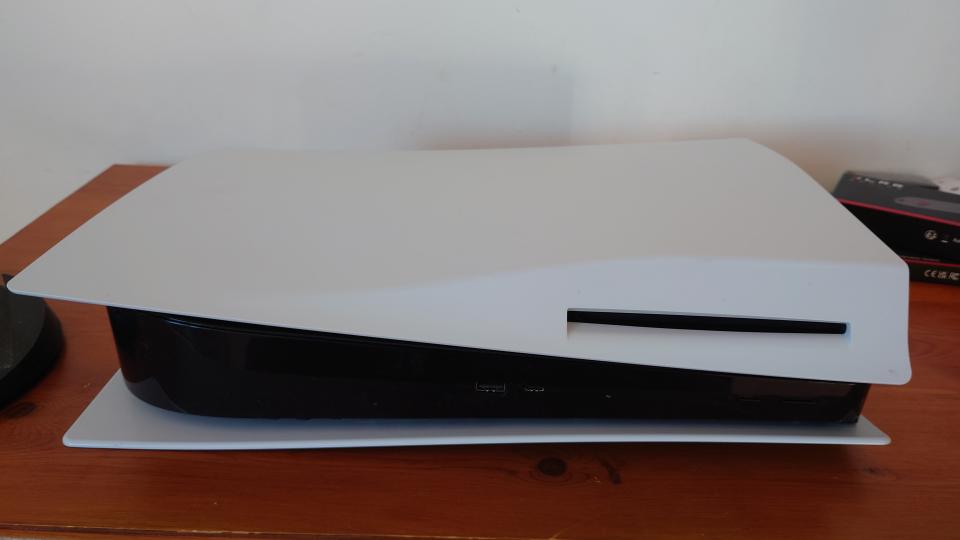
Once that's all out the way then you just need to slide the PS5 cover back on. This is much easier than taking it off; line it up with where it roughly sits on the system and push to the left, when you hear and feel a click you'll know it's done. Now you're ready to plug your console's HDMI lead and power cable back in for the last step of the process.
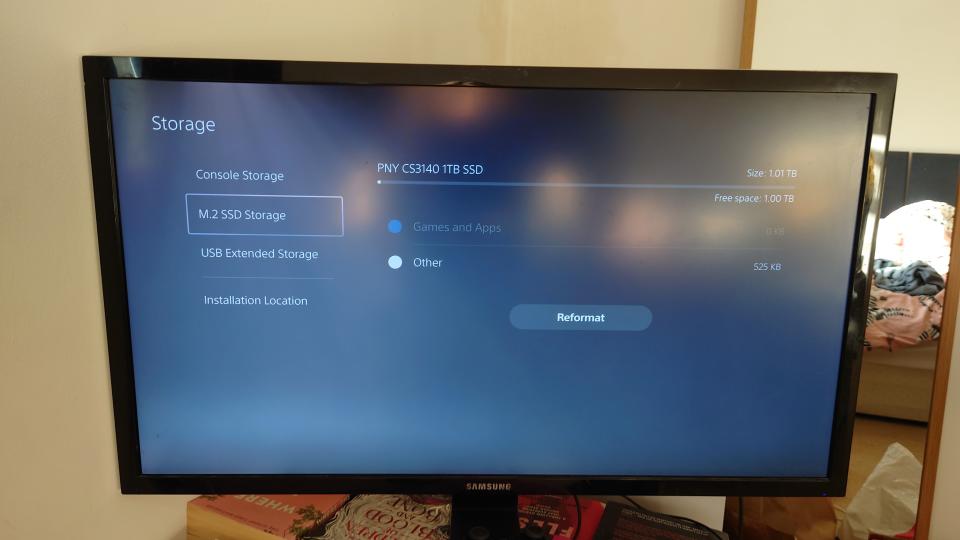
Formatting the PS5 SSD
There's just one thing standing between you and having that extra overhead on your PS5 system - the formatting. If you've successfully installed the drive properly, you'll be greeted with a screen at boot-up telling you that the M.2 SSD you've put in your machine needs to be formatted before it can be used.
Luckily, this only takes a few seconds at most and then you're given Sony's internal benchmark which relays the read speeds. We were given a figure of 6,198 MB/s which is significantly above the minimum recommended sequential figure of 5,500 MB/s needed.

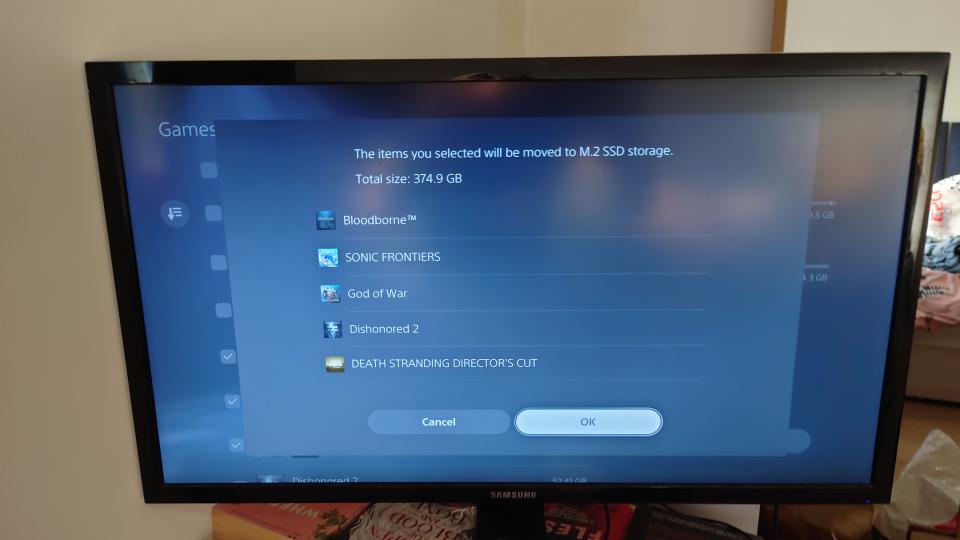
Now that's out of the way you're ready to start transferring some of your larger titles onto the NVMe M.2 drive, or you can skip all that altogether and start loading it up as well.
If you're somewhat of a heavy user, like I am, then no doubt you like to keep your backlog list installed and ready to experience without having to delete and re-install which can take hours depending on your internet connection. Given the size of games these days, such as God of War Ragnarok (84 GB), you'll want all the room you can get, especially if you're using the PS5 Digital Edition or prefer downloading games instead of getting discs. Regardless of the delivery method, they still need to be installed to play!
That's it! You're now ready to download and install all of your favorite games with far fewer limitations on storage space. There are now far fewer barriers between you and the system's heavy hitters such as Horizon Forbidden West, Spider-Man: Miles Morales, and Gran Turismo 7. With more first-party titles on the way, you won't have to worry about storage for a fair while now, especially if you've gone for 2TB and above.

