How to customize Widgets feed to see news you'll actually enjoy on Windows 11
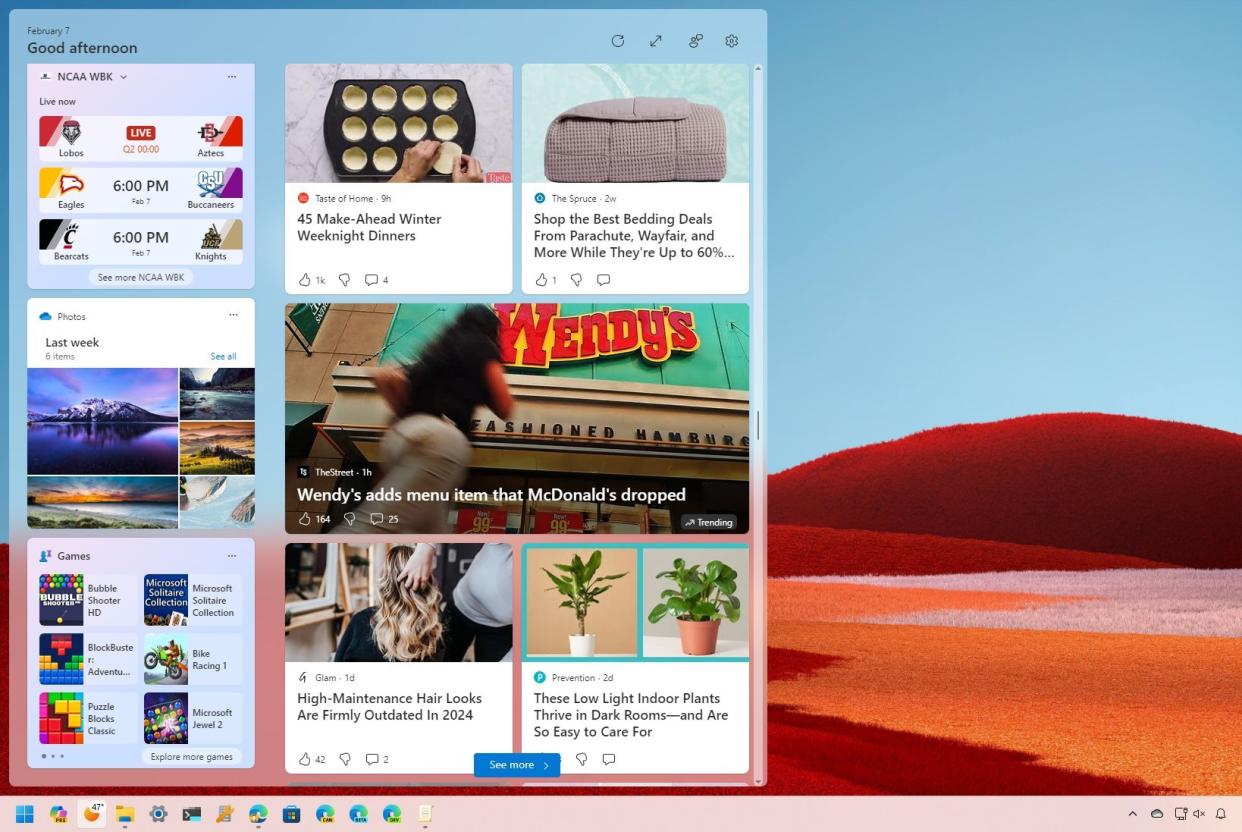
On Windows 11, the Widgets dashboard in the experience appears from the screen's left side when clicking the Taskbar icon (or using the "Windows key + W" keyboard shortcut), giving you quick access to various types of informational content (weather, news, sports, stocks, traffic, entertainment, tasks, and family activities) right at your fingertips.
However, the true potential of the feature lies in its customization capabilities, allowing you to curate a news feed that resonates with your unique preference and lifestyle. Otherwise, you will end up with only clickbait and those typical headlines designed for the media to sell news without adding value.
In this how-to guide, I will walk you through the steps to customize the news feed to get the most out of the Widgets experience on Windows 11.
How to customize Widgets news feed on Windows 11
The Widgets feature allows you to customize the feed in a couple of ways, and if you still don't like the experience, you can completely turn off the feed to use the feature with only the available app widgets.
Choose your news interests
To customize the news feed to see more interesting stories, use these steps:
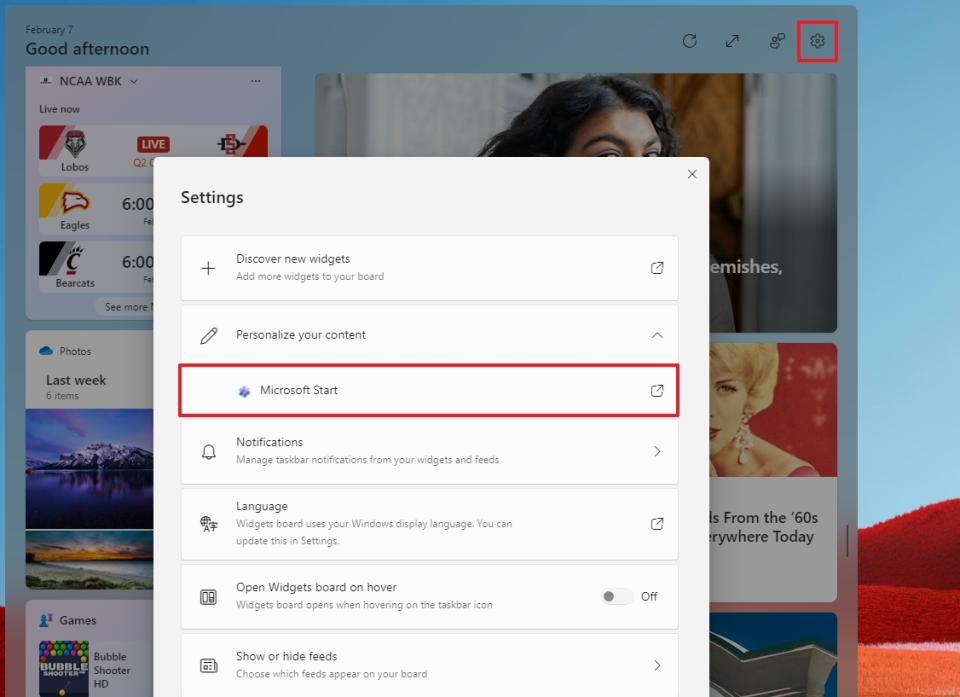
Open Widgets dashboard.
Click the Settings (gear) button from the top-right corner.
Click the Personalize your content setting.
Click the Microsoft Start option.
Click the See more button.
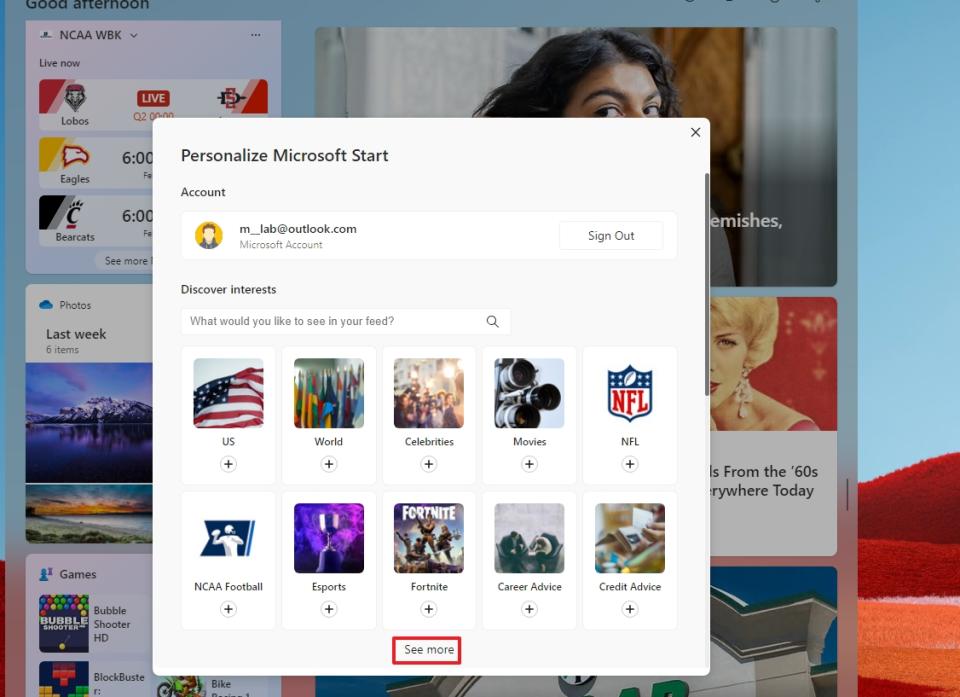
Choose the topic to customize from the "Discover interests" pane.
Click the Plus button for the interests you like.
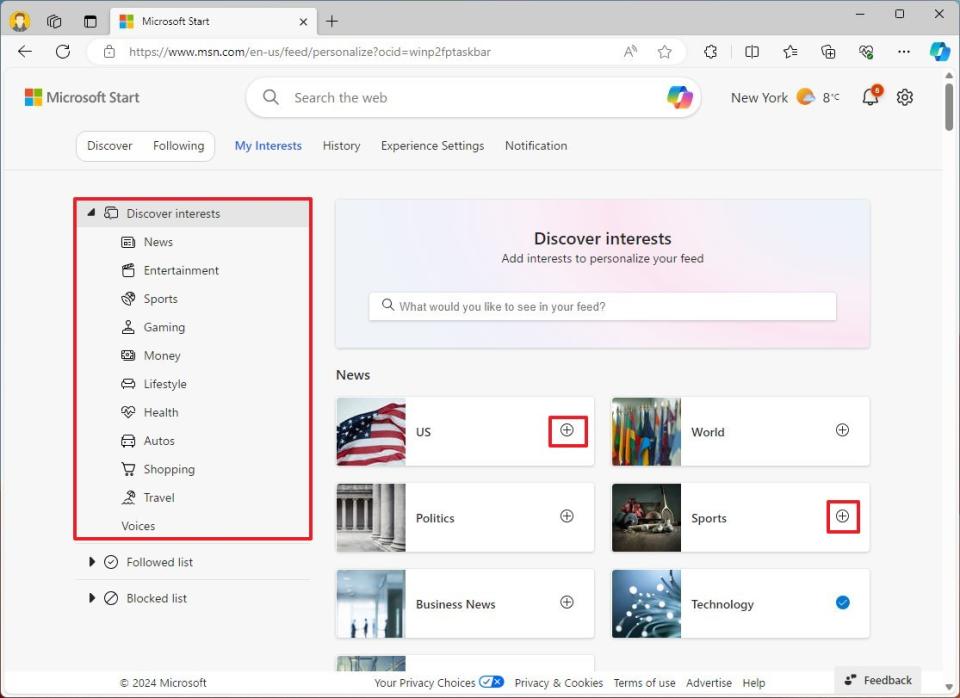
Repeat steps 6 and 7 to customize your interests for the Widgets feed.
(Optional) Click on Followed list from the left pane.
Review your current sources and news topics.
Quick note: You can click on any of the items to remove them from the list.
(Optional) Click on Blocked list from the left pane.
Review the contents you previously blocked.

Quick note: You can click the Unblock (red) button to make the source available again in the feed. Or you can click the Plus button to follow the news source again.
Once you complete the steps, the news feed will start showing stories based on your interests.
If you are still coming across stories that are not relevant, you will have to train the feed manually with the steps below.
Train the news feed
To train the news feed to see more stories tailored to your liking, use these steps:
Open Widgets dashboard.
Click the Thumb Up to like the story and let the system know the content you like, or click the Thumb Down to see fewer stories of this type.
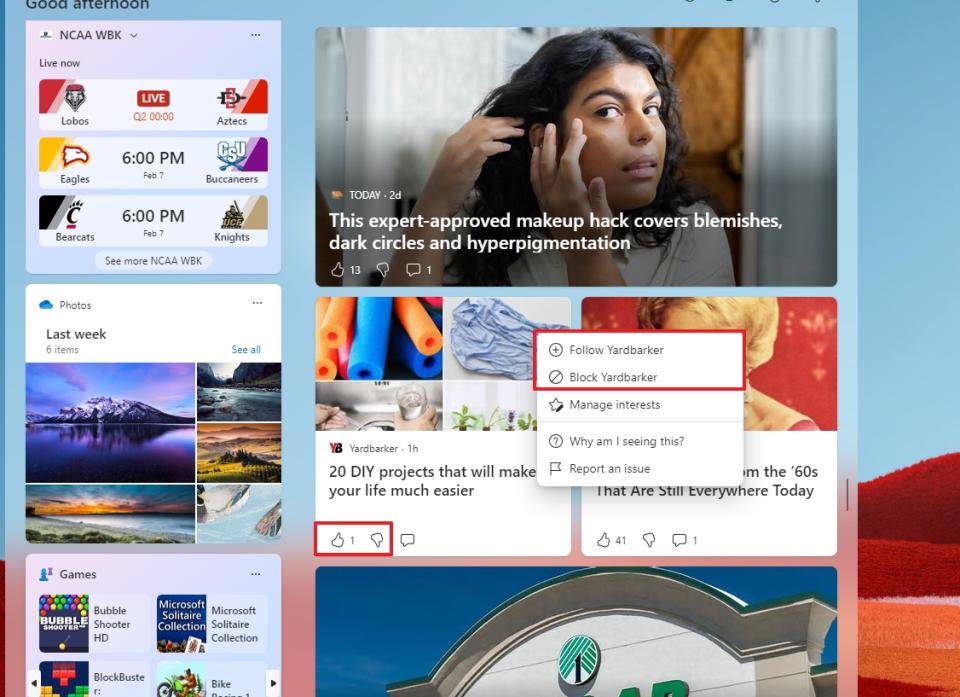
Click the X button to hide a specific story.
Click the menu (three dots) and choose to follow or block the source.
Quick tip: Hovering over the story will also reveal an option to follow the new source.
After you complete the steps, your input will help to improve the news feed experience.
Disable the news feed
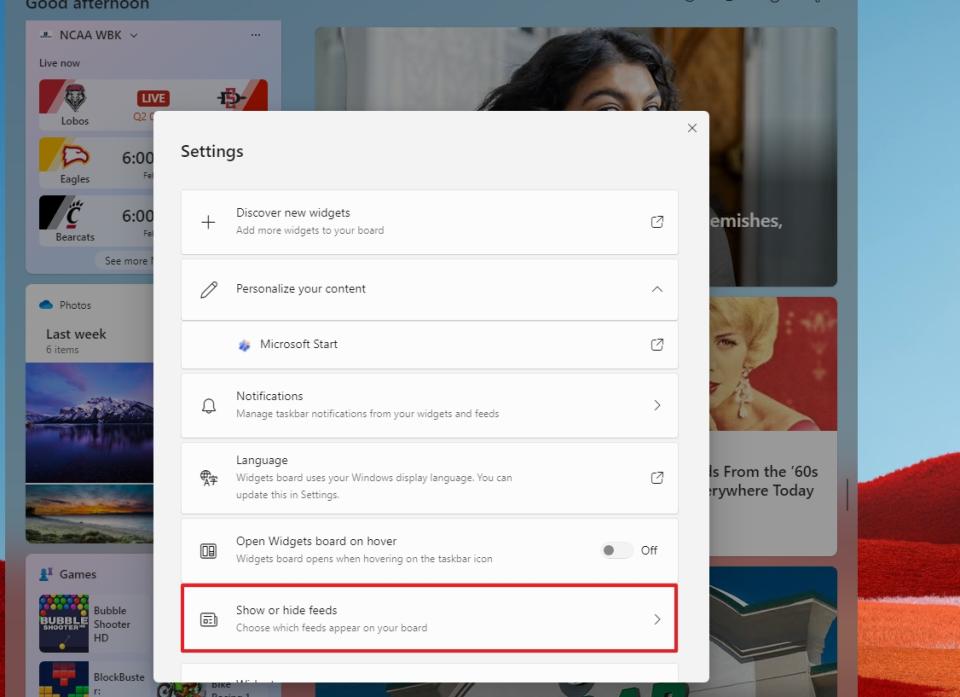
To turn off the news feed permanently for the Widgets dashboard, use these steps:
Open Widgets dashboard.
Click the Settings (gear) button from the top-right corner.
Click the "Show or hide feeds" setting.
Turn off the Microsoft Start toggle switch.
Click the Turn off button.
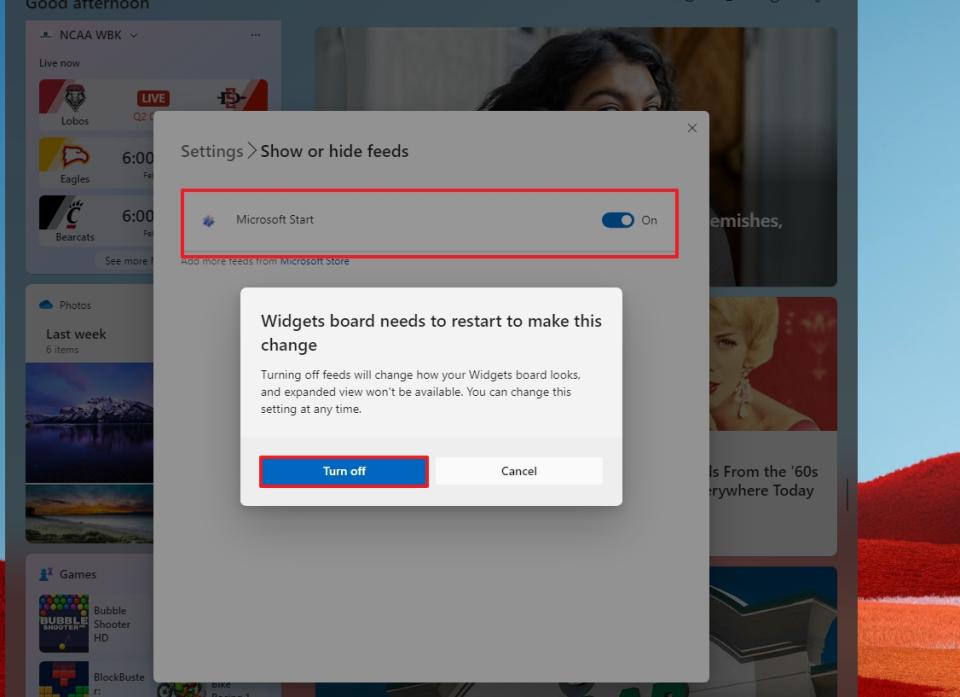
Once you complete the steps, the news feed will no longer be available in the Widgets dashboard.
It's important to note that Microsoft is testing this last feature, meaning that if you don't find it, you may have to wait a little longer, depending on when you're reading this guide.
More resources
For more helpful articles, coverage, and answers to common questions about Windows 10 and Windows 11, visit the following resources:

