Yes, You Can Restore Your Deck Yourself, and Here’s Exactly How To Do It

If you purchase an independently reviewed product or service through a link on our website, SPY.com may receive an affiliate commission.
Table of Contents
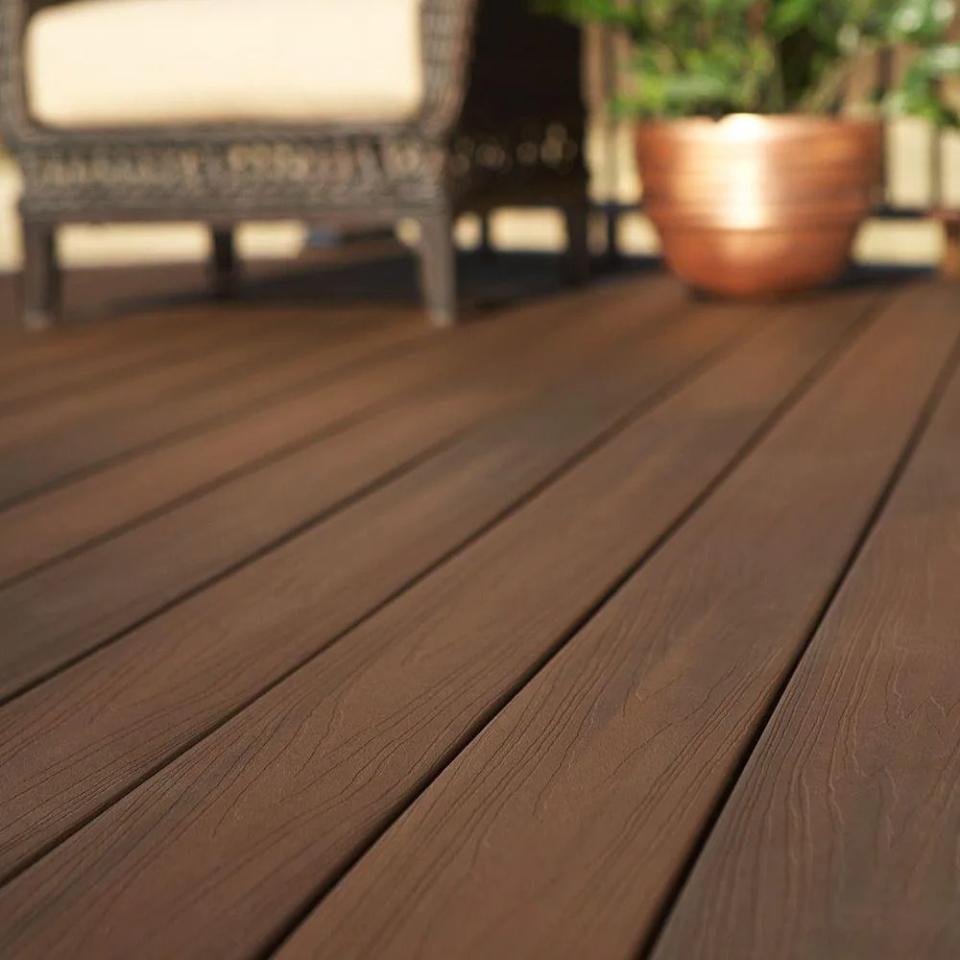
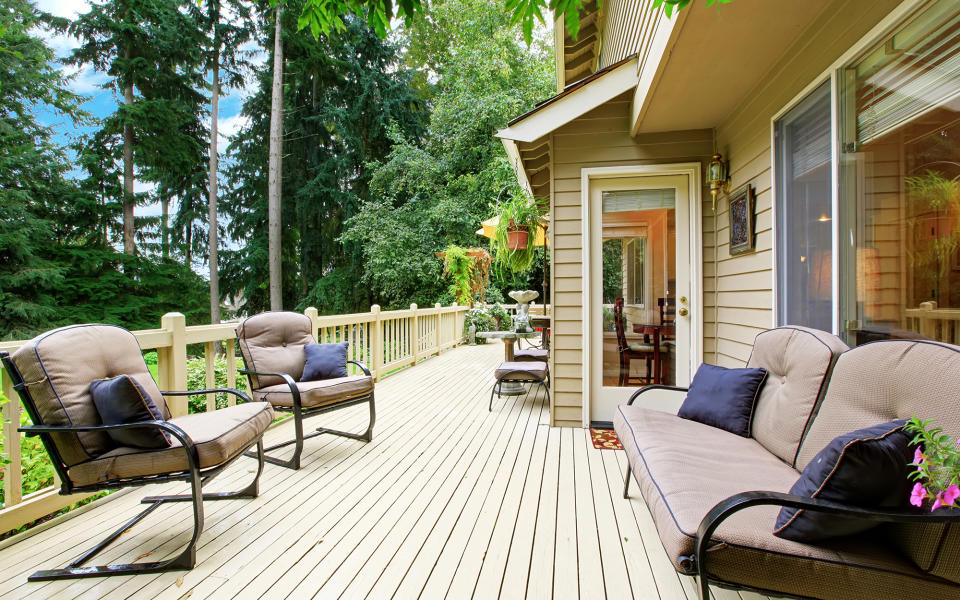
When the sun starts shining and the days get longer, it’s time to get outside with friends and family. Nothing beats an afternoon spent on the deck, laughing, grilling food and sipping cold drinks. But is your deck ready for spring? If you can’t answer with a resounding “yes,” then chances are it’s a hard “no.”
Today's Top Deals
Save 15% on This Meat Thermometer That Has Over 80,000 Perfect Reviews
This TikTok-Famous Cleaning Paste Is a Must-Have for Spring Cleaning
This Mattress Protector Has Over 172,000 5-Star Reviews — Save 10% If You Buy Now
We have good news, though: We’ve created a guide for spring deck restoration that will show you how to perform (relatively) simple DIY deck repairs and get your deck ready for warmer weather. We also interviewed Bob Glass, the Merchant of Paints and Stains and a team member at The Home Depot, the go-to solution center for every home project. Keep reading to hear his go-to tips for deck restoration and favorite products for getting the job done.
Spring is also the perfect time to get started on a new deck repair project, as The Home Depot is offering big discounts on the essentials that homeowners need to step into spring. We’ve already published a Spring Landscaping Guide for 2022, complete with deals and tips from The Home Depot.
Shop Outdoor Living and Decorating at The Home Depot
Keep reading to learn about common deck issues and how to fix them, and how to prepare your outdoor space for the season with a deck restoration. The Home Depot has great deals on everything you need from outdoor furniture to fire pits, lumber, screws, power washers and wood stain for sealing in just the right finish.
You can order everything you need online and pick it up at the nearest The Home Depot location.
In this deck restoration guide, we’ll cover:
Step 1: How to Check Your Deck for Damage
Step 2: How to Replace Damaged Boards and Hardware
Step 3: How to Clean and Pressure Wash Your Deck
Step 4: How to Stain and Reseal Your Deck
Step 5: Decorate Your Deck for Spring With The Home Depot
Step One: Check for Damage
The first step in learning how to restore your deck for spring is to check for damage. Winter can be very hard on outdoor structures, and it’s important to assess the deck’s condition before scheduling any backyard bashes. It’s best to start with a bottom-up inspection.
Glass described some telltale signs of deck damage including “broken, rotted or warped deck boards.”
He also added, “If you notice raised or exposed nails, pry them out and replace them with wood screws. Fill holes in boards with exterior wood filler. Replace any other hardware that looks rusted.”
Inspect the Support Posts
Get a good look at the support posts. They should sit on top of poured concrete footings, and they should be rot- and moisture-free. Tap the bottom of the support post with a hammer and take note of whether it feels solid or soft. Soft support posts could be wicking up moisture from the ground, and that can cause them to rot.
You’ll want to check any hardware connecting the support posts to the support beams, as well. Also, check the wood for any obvious points of rot or damage.

Inspect the Joists
The joists make up the main structure of the deck. They typically run from the house to the edge of the deck, perpendicular to the deck boards above.
Joists are susceptible to rot, insect damage or even cracking and splintering due to age. If they rot, the damage is typically on the top few inches of the board. Carpenter ants and termites will attack wood with high moisture content, so be sure to check parts of the deck that might not dry as quickly as the rest. Also, look for almost perfectly round holes bored into the wood—a sure sign of carpenter bee damage.
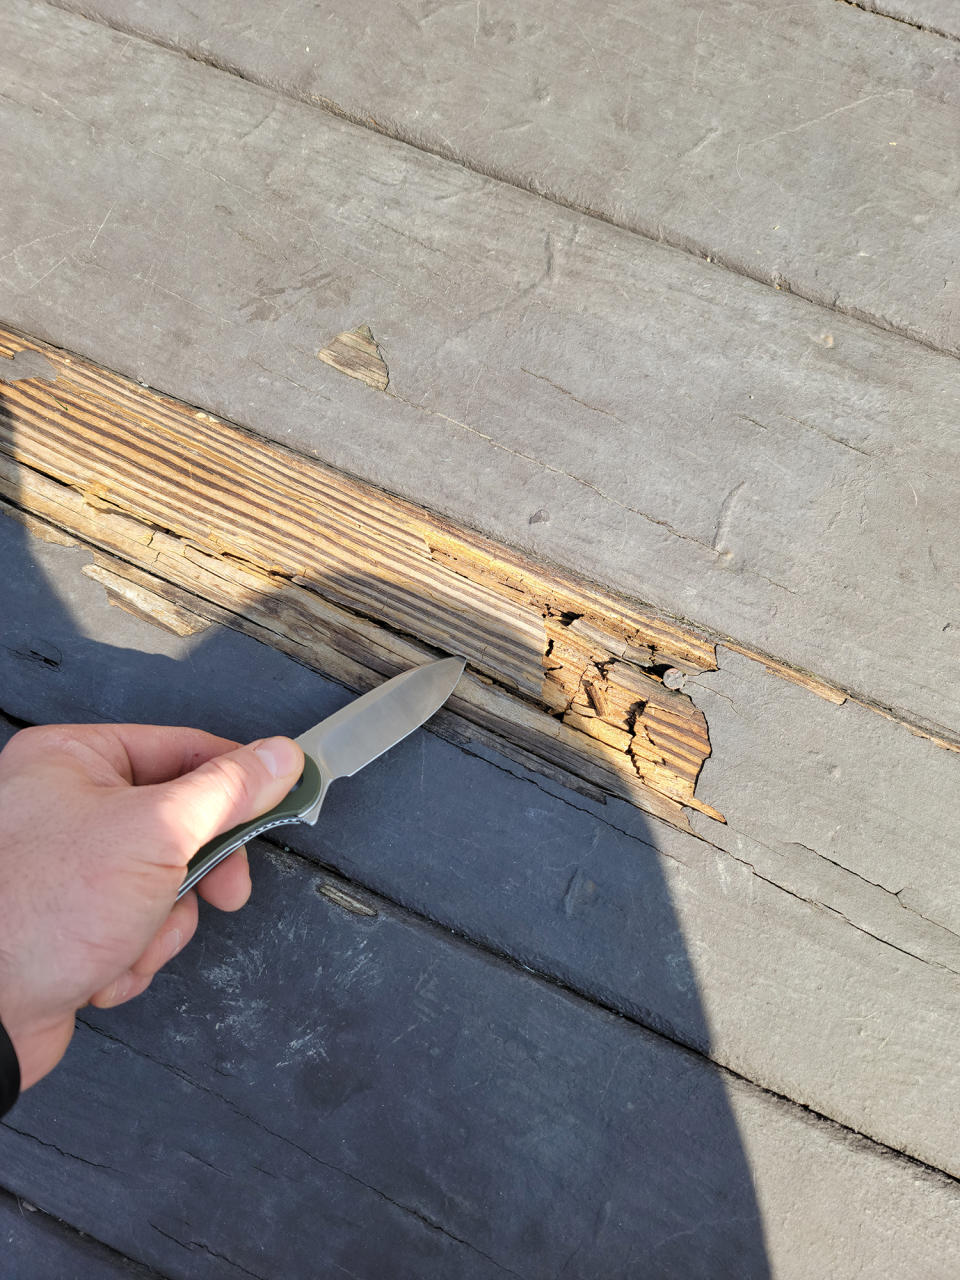
Get a Look at the Deck Boards
One of the most common issues to look for on a deck is deck board damage. Again, this can be from rot, bugs or age. It can also be the result of the sun’s damaging rays breaking down the wood’s fiber over time.
Be on the lookout for any areas that feel spongy or bouncy. Also, look for discoloration, flaking finish or excessive splintering. Pay extra attention to the boards directly under the eaves of the home as they often collect water from rain or snow as it falls. Replacing deck boards is not a super-complicated process, and should be done promptly if you find one that needs it, to avoid further damage and potential injury.
Check the Railings
Whether they’re vinyl, wood, metal or a combination, railings need to be sturdy and trustworthy. If not, you’ll never feel at ease having folks over, swapping stories and soaking up the sunshine while leaning against them.
Start underneath the deck, if possible. Check each post for loose hardware, rotting, insect damage or compromised strength. Above the deck, check the posts for signs of rot, excessive moisture, cracking, splintering or broken or badly worn hardware. Any of these can result in a weak spot where handrails might be most likely to fail.
Step Two: Replace Damaged Boards and Hardware
Trying to ignore damaged boards is not worth the risk, and replacing deck boards is a key part of deck restoration. Damaged or rotten boards can give way underfoot or separate from the structure, compromising the safety of the entire deck.
Replacing deck boards takes just a few steps, and it’s best to start with the same bottom-up approach.
Materials:
6×6 posts
4×4 posts
2×8, 2×10, or 2×12 pressure treated lumber in necessary lengths
Deck boards (pressure-treated or composite)
Replacement spindles
Exterior grade deck screws
9-gauge exterior joist hanger nails
Joist hangers
Hurricane ties
Railing brackets
Galvanized carriage bolts, washes and nuts
Buy: Shop Decking Materials at The Home Depot Check Prices
Replace Posts First
Start by replacing any damaged support posts, as any deck is only as good as its foundation. Be sure to prop the deck up with temporary supports before removing the damaged post. This can typically be a spare 6×6 post positioned carefully near the existing post. Also, work on one post at a time for safety’s sake.
1. Detach the post from the beam by removing the nails, metal brackets or bolts holding the joint together.
2. Remove the nails or screws from the bracket holding the support post to the footing.
3. Carefully remove the post, ensuring the temporary support post is adequately holding the beam.
4. Use the old post as a template for the new one. Transfer notches and cut-outs from the old post to the new one, and cut it to length.
5. Slide the new post into place. It’s typically easiest to install the base of the post before the top. If persuasion with a sledgehammer is necessary, be sure to use a piece of scrap wood as a sacrificial tapping block to prevent damaging the new post.
6. Attach the post using new hardware and brackets, if necessary.
7. Carefully remove the temporary support and repeat at the next post, if necessary.
Handle Joist Damage
Joist damage can be a serious problem, and while it may be a bit of work, the following steps will help.
1. Locate the joist in question from the top of the deck.
2. Remove all the screws connecting the deck boards to the damaged joist. If necessary, remove the railing to access screws underneath. Cut any screws that don’t come out willingly by sliding a reciprocating saw blade between the joist and the bottom of the deck board.
3. Remove the rim joist (the outer joist that spans across the ends of all the joists) as well as any bolts connecting the railing post to the joists.
4. Install a scrap piece of wood spanning from the joists on either side of the damaged joist. Be sure to use two or three screws driven up through the scrap piece and into the joists on each end.
5. Remove the hurricane tie connecting the joist to any beams.
6. Carefully remove the joist hanger. If all the screws are removed from the deck boards, the joist should be loose, but probably sandwiched between the deck’s upper surface and the support beam.

7. Strike the bottom of the joist in one direction and the top in the opposite direction until it falls over. Slide it out the front of the deck.
Note: Joists can be very heavy, especially if wet and rotten. Be very careful and enlist help if necessary.
8. Use this joist as a template for the new one. Either place the old joist on top of the new one and mark it to length, or measure and mark the new joist according to the old joist’s dimensions.
9. Slide the new joist over the beam and underneath the deck, ensuring that it rests on the piece of scrap attached to the two neighboring joists.
10. Stand the joist up by twisting and striking the top and bottom of the board in opposite directions. This may require help, and be sure to use scrap wood as a sacrificial striking surface whenever possible. Adjust the joist’s positioning so it aligns with the previous joist’s location.
11. Use the sacrificial board and a small sledgehammer to tap the joist up against the ledger board. Install a new joist hanger and hurricane tie using the joist hanger nails to hold the joist in place.
12. Reinstall the rim joist and screw through the deck boards and into the new joist with exterior grade screws.
Sturdy Those Railings
Sturdy deck railings are vital to keeping folks safe during get-togethers, gatherings and cookouts. Luckily, they’re typically fairly easy to prepare for spring.
1. Remove any damaged railing sections from the posts. This will include sections with broken brackets, spindles, rails or other components. In most cases, these are impossible to repair in place, so it’s best to remove them completely.
2. Start by replacing any broken or damaged spindles. For wood spindles, remove the screws holding them into the top and bottom rails. For metal spindles, it may be possible to simply separate the top and bottom railing as these spindles typically sit inside brackets or over top of small pegs. For vinyl railings, it may be necessary to replace the entire railing.
3. If the posts need to be replaced, do it before replacing the railings. Remove the carriage bolts and nuts attaching them to the deck’s framing. Remove the posts and use them as a template for cutting the new posts. Reinstall them and bolt them back into place.
Note: If the deck boards around the post need replacing, it may be worth waiting until that part of the process is complete before reinstalling posts or railings.
4. Reinstall the railings by reusing the old brackets or by replacing them with new brackets. Attach the brackets to the railings first before screwing them to the railings.
Replace the Deck Boards
Deck boards take a beating, and they’re often the first deck component to fail. This is a common issue, and thankfully replacing deck boards is typically straightforward.
Glass mentioned that “warped or raised” boards can be smoothed down with an “orbital sander to make them level with the surrounding boards.”
DEWALT 3 Amp Orbital Sander

Buy: DEWALT 3 Amp Corded Orbital Sander $84.00
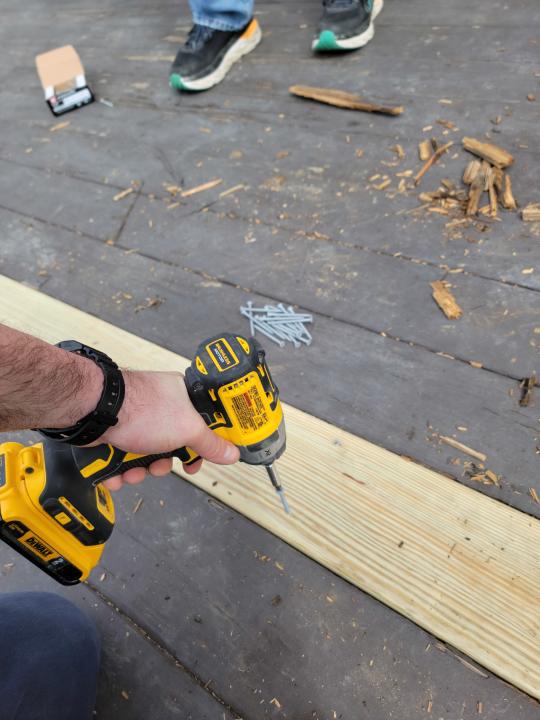
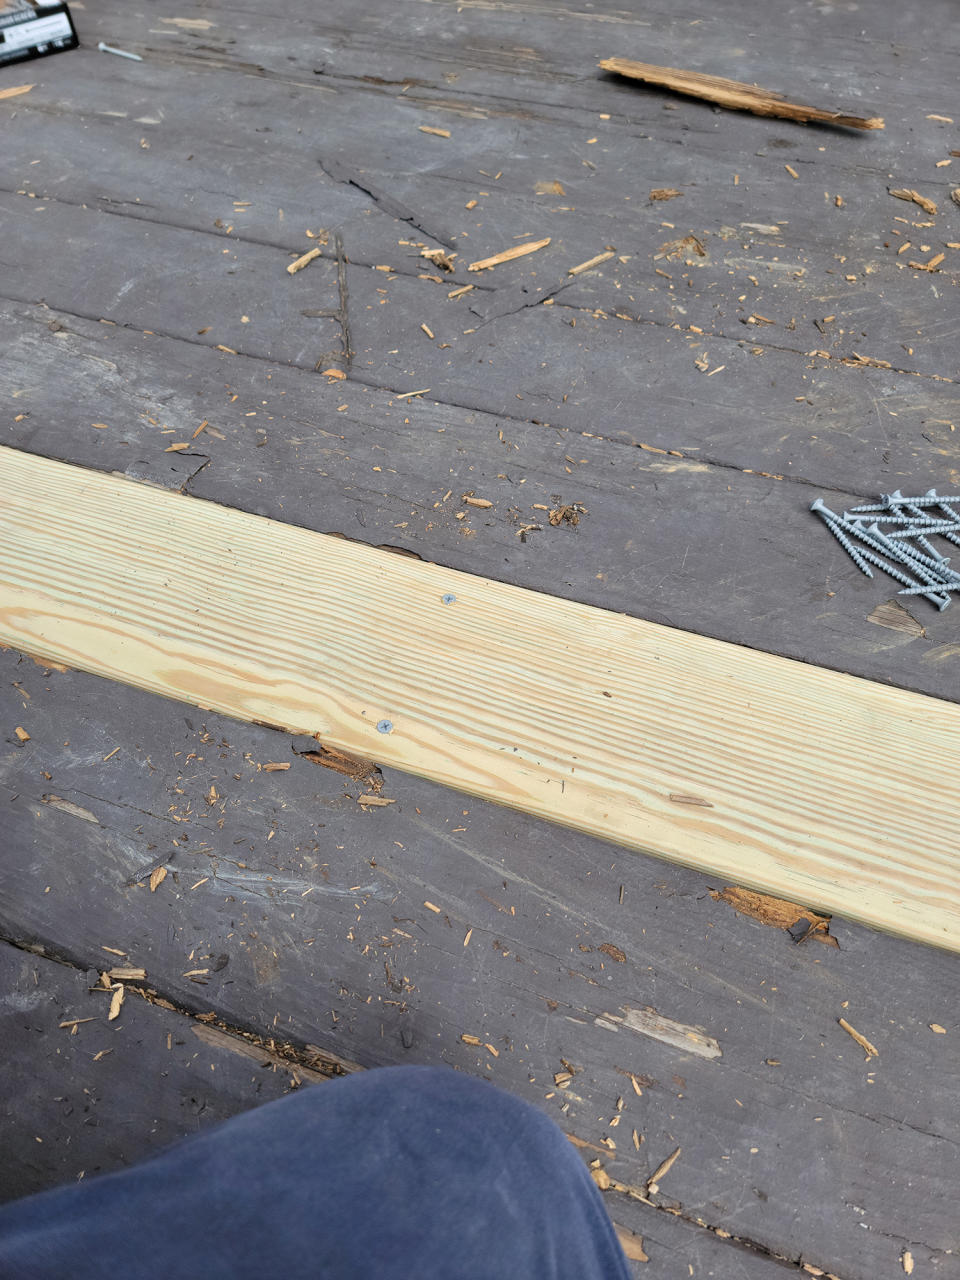
1. Identify the damaged deck board and remove it from the deck. There should be at least two screws holding the deck board down at each joist location. Remove the screws and the board.
Note: Be sure that any guests, children or pets don’t walk on the deck while the board is removed to avoid anyone accidentally stepping in the gap and getting hurt.
2. Use the old deck board as a template for the new board. Lay the old board on top of the new one and use a pencil to mark the new board to length. Cut the new board to length.
Note: If the old board is damaged and breaks during removal, use a tape measure to determine the length of the new board. It’s also possible to install a full-length board and then cut it to length.
3. Place the new board perfectly parallel to the gap left by the old board. Mark the locations of the joists on the new board by aligning a speed square with the center of the joist and drawing a light pencil mark across the board.
4. Pre-drill two holes along each pencil mark. The holes should be approximately 1 inch from the edge of the board, but some composite decking manufacturers may have more specific placements.
5. Place the board in the gap and drive a screw through each of the pre-drilled holes. Do not overdrive the screw so far that the head creates a deep depression in the top of the deck board or it will collect water.
6. If the board was intentionally left long, use a circular saw to trim it to length.
Trex 1 in. x 6 in. x 15 ft. Enhance Naturals Rocky Harbor Composite Deck Boards

Buy: Trex Enhance Naturals Deck Board $41.57
Fiberon ArmorGuard Brazilian Walnut Composite Decking Board
Buy: Fiberon ArmorGuard Brazilian Decking Board $35.98
Makita 18-Volt Lithium-Ion Brushless Circular Saw Kit
FREE GIFT WITH PURCHASE
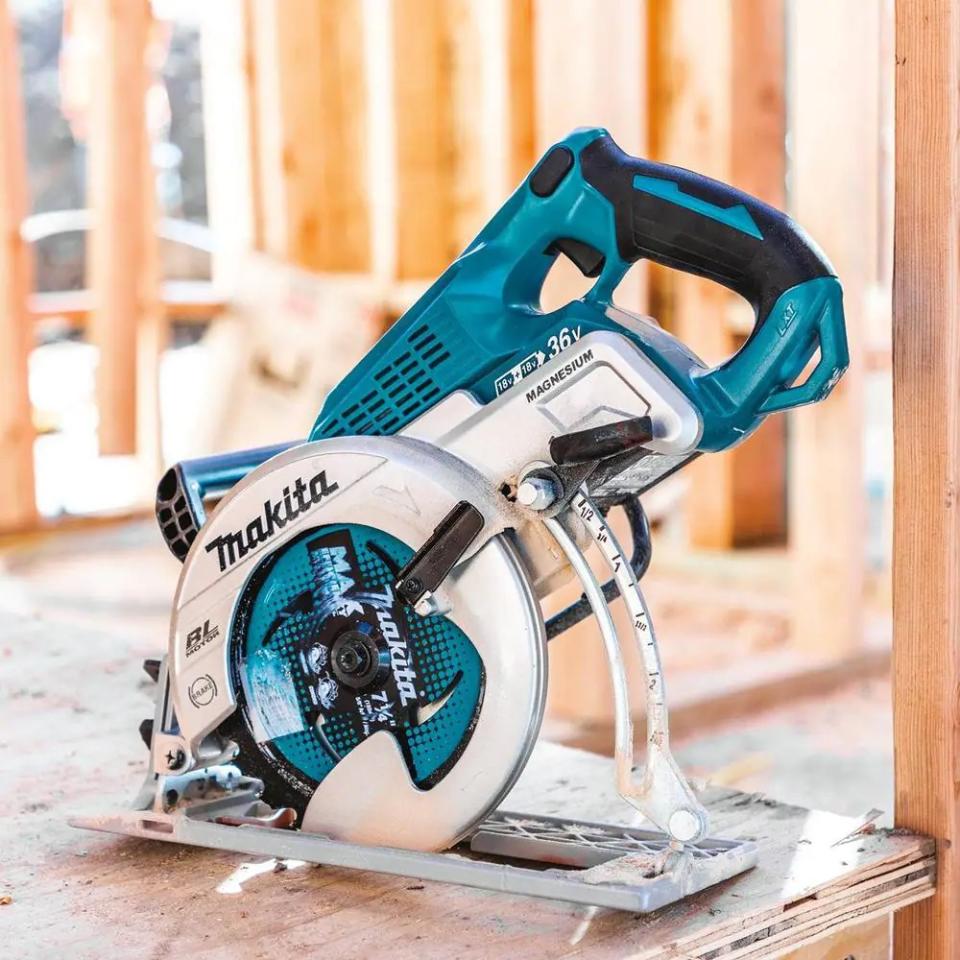
Buy: Makita 18-Volt Circular Saw Kit $349.00
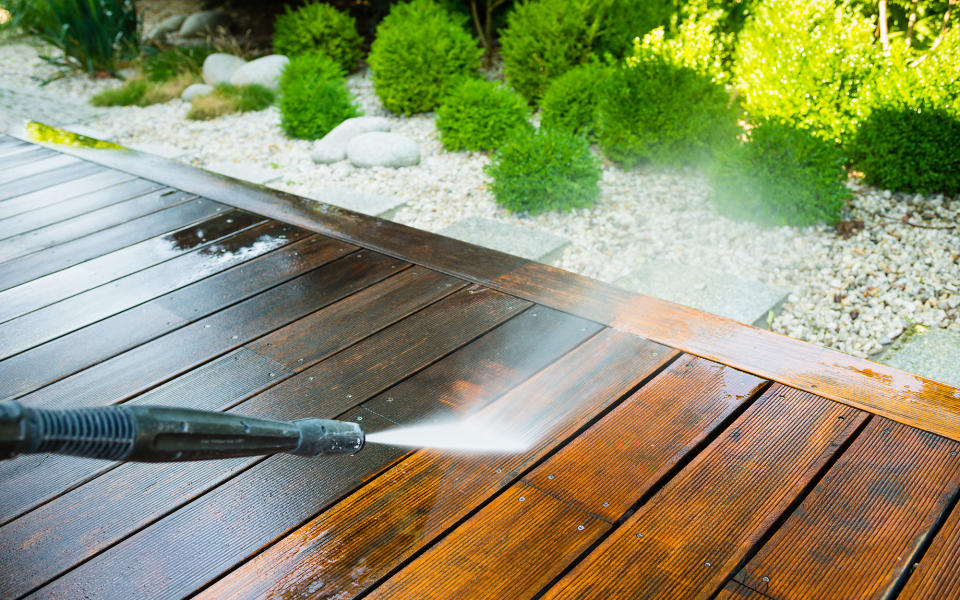
Step Three: Pressure Wash Your Deck
For the lucky ones, the path to getting a deck ready for spring may only require a quick pressure washing. This doesn’t require a lot of tools, and the steps are pretty straightforward. Very often, small, affordable electric-powered pressure washers are more than capable of handling deck jobs. For folks who need a bit more power, consider renting a gas-powered model.
How to Prepare Your Deck for Pressure Washing
Pressure washing is intense, so check to make sure your deck materials are strong enough to handle the power. These machines can damage wood if used improperly, according to Glass.
He also recommends the following steps before whipping out the pressure washer:
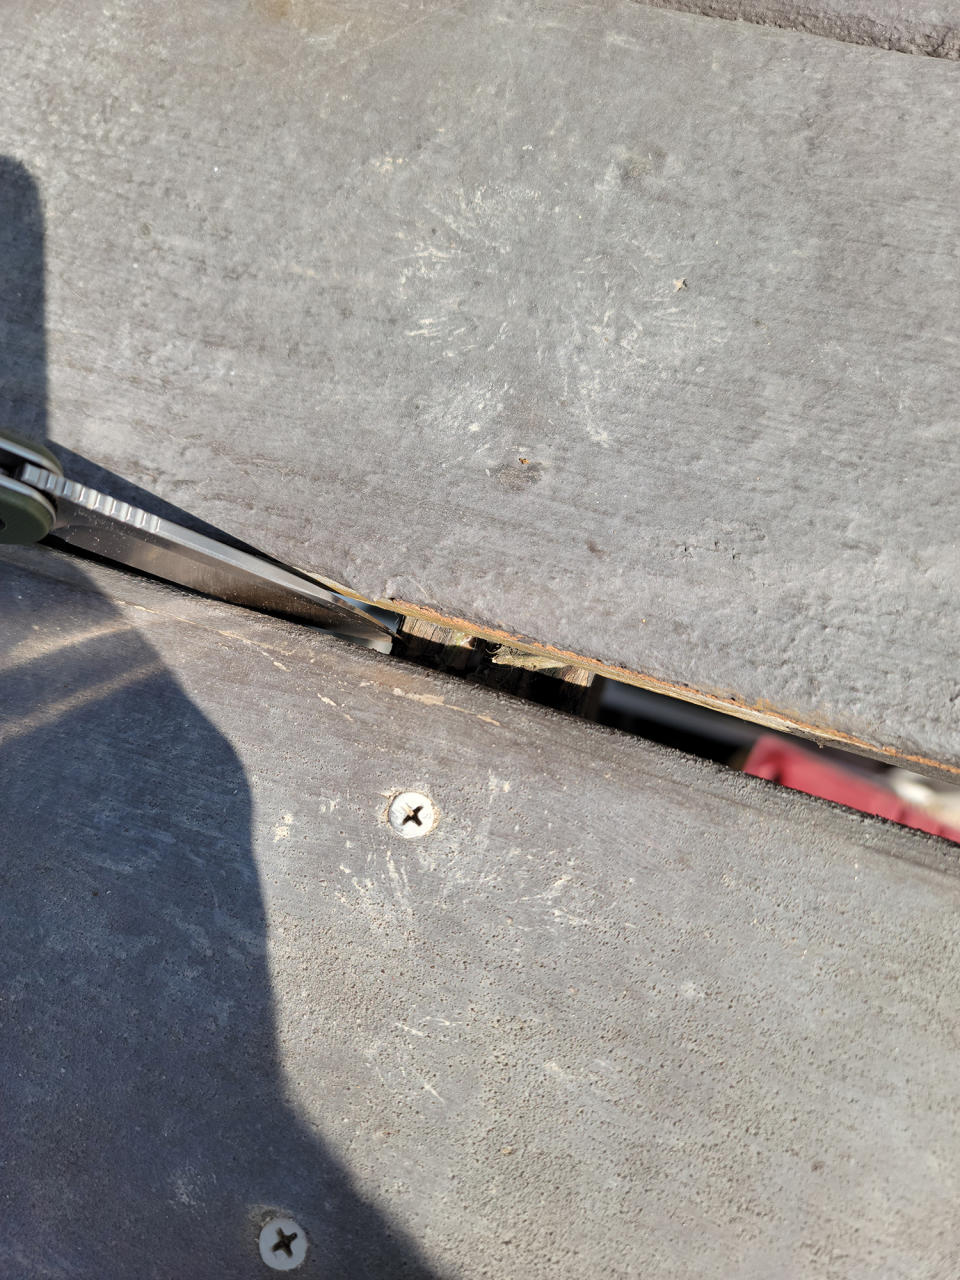
“Always start by sweeping the deck. Use a putty knife to remove any debris from between deck boards that a broom or scrub brush can’t reach,” said Glass.
“Clean the deck by spraying a biodegradable outdoor cleaner that removes mildew and scrub with a stiff bristle brush, if necessary. The Windex 32 fl oz Blue Bottle Outdoor Sprayer is a great option! Lastly, rinse the deck with a garden hose.”
Windex Blue Bottle Outdoor Sprayer

Buy: Windex Blue Bottle Outdoor Sprayer $9.88 (orig. $10.98) 10% OFF
Power washing is a great thing to do before restaining or refinishing a deck, since you’ll want to remove all the dirt and grime from the winter before adding a coat of anything protective.
Here are the steps to follow to get it done:
1. Use the lowest possible pressure that will get the job done. Usually, this is around 500 to 600 PSI (for soft woods like pine and cedar), but some decks might require more pressure. Never exceed 1,200 PSI or you’ll likely end up replacing more boards than you clean.
2. Use a 40- to 60-degree fan tip, as either will cover a wide enough area to work quickly, but still be concentrated enough to be effective.
3. Start in one corner of the deck and work across the deck boards. Point the wand up slightly before squeezing the trigger. Once the spray is up to pressure, lower the tip of the wand to within 6 to 10 inches of the deck’s surface.
4. Use short, sweeping motions, keeping the fan pattern perpendicular to the boards, and maintaining a consistent distance from the deck. Slightly overlap each pass to ensure there aren’t any noticeable lap marks. Continue across the entire deck surface, including the railings and spindles, if necessary.
5. After pressure washing, let the deck dry for a few hours in sunlight. Once dry to the touch, give the deck surface a light sanding with 100-grit sandpaper. This will knock down any fibers that might be standing from the pressure washing, creating a smoother surface that will better accept stain or paint. Be sure to sweep off the deck after sanding.
Note: Pressure washing may reveal damaged deck boards and broken spindles. If this occurs, refer back to the earlier steps in this guide.
Sun Joe 2030 MAX Electric Pressure Washer

Buy: Sun Joe 2030 Electric Pressure Washer $169.00
Step Four: Stain and Seal Your Deck
One of the last steps necessary when preparing a deck for spring is staining or sealing. This step is important because it will protect all the hard work you just put into repairing deck boards and railings. If the process for how to restain a deck sounds complicated, we assure you it’s not. The trickiest part is actually timing the restaining correctly after your pressure washing.
Please note that if it was necessary to replace any wood components with new lumber, it’s important to wait for the wood to dry completely before staining or sealing. If it’s a simple pressure washing, be sure to wait a few days. In either case, wet wood will prevent stain or sealer from penetrating the wood, so make sure you give ample time before completing a deck refinishing.
Materials:
Paint roller
Paint tray
Paintbrush
Paint sprayer (optional)
Stain or sealer
Wood cleaner
Glass added that you should “choose a roller that can hold a good amount of stain and spread it out quickly.”
“Look for rollers with a nap of 1/4 to 3/16 inches for a smooth deck surface and a nap of 3/8 to 1/2 inch for rougher or textured wood surfaces. As for roller materials, polystyrene fibers and foam are suitable for this task. The 9-in. 5-Wire Heavy-Duty Roller Frame is a great option,” said Glass.”
“Wood cleaner is important to use before staining to ensure the coats are applied evenly and do not peel when dry. We recommend the 30 Seconds 2.5 Gal. Outdoor Cleaner Concentrate. A scrub brush like the HDX Tile and Grout Brush is also great for working in the wood cleaner and removing residue,” said Glass.
Buy: Shop for Wood Stain & Seal Products at The Home Depot Check Prices
When you have your materials, follow these steps:
1. Choose the stain or sealer. Oil-based stains and sealers often penetrate the wood better than water-based products, but they take longer to dry and they’re harder to clean up. Water-based products are easier to apply and clean up, and their fumes are generally less noxious.
2. Make sure the deck is clean and dry. Pressure washing the deck and then waiting a few days for it to dry is the best bet. Sweep or blow any debris off the deck.
3. When refinishing a deck, you’ll want to work in stages. Stain the railings first, using the paintbrush to work the stain or sealer into all the nooks and crannies. Working in small areas, overlap the previous strokes, and maintain a wet edge.
4. With railings done, move to the deck’s surface. Work in small areas, approximately 3-feet-wide by 3-feet-long. Overlap the previous passes, being sure to maintain a wet roller to prevent lap marks.
Note: During a deck refinish, take care not to stain yourself into a corner. Generally speaking, it makes sense to start on the end of the deck furthest from the stairs, and then work toward them, staining one stair at a time on the way down.
4. For water-based stains, wait 24 hours before walking on the deck, and 48 hours before regular use. For oil-based stains, be sure to wait at least 72 hours before using the deck at all. After the stain is done drying, the bulk of the work for your deck restoration is done, and you can move on to the most fun part.
9-in. Metal Paint Roller Tray
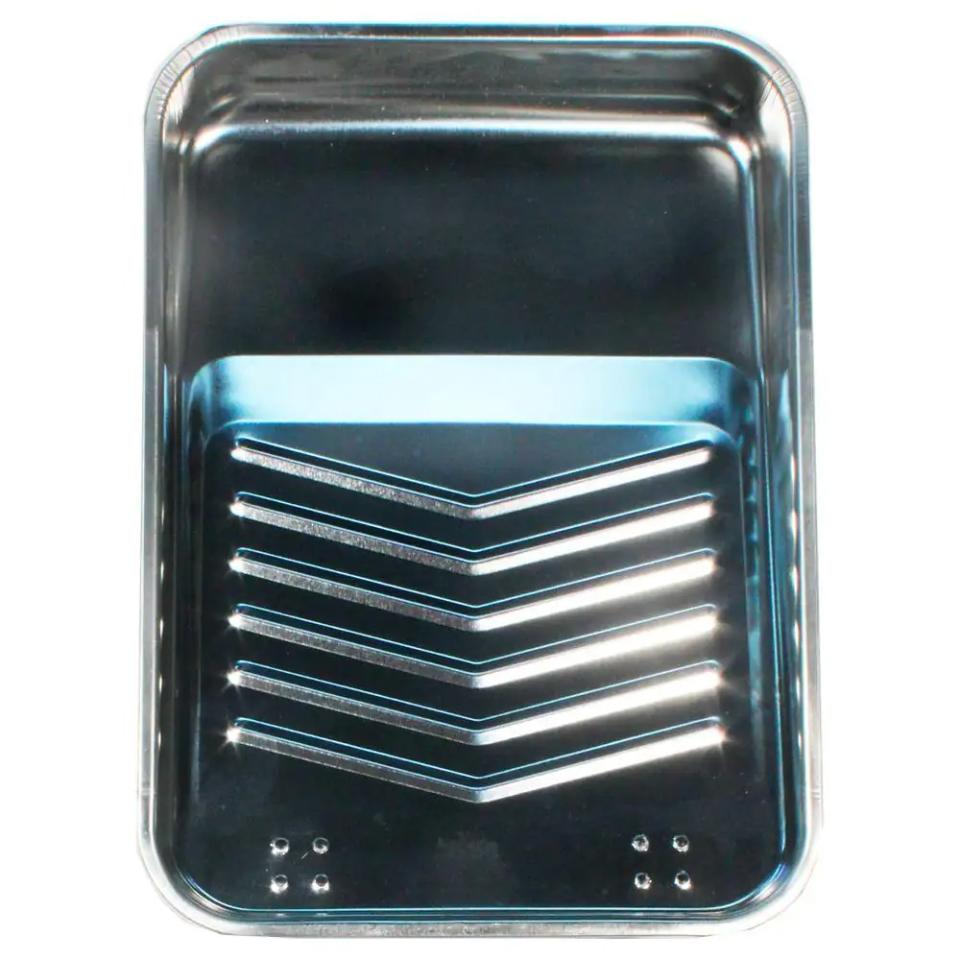
Buy: 9 Inch Metal Paint Roller Tray $3.78
9-in. 5-Wire Heavy-Duty Roller Frame

Buy: 9 Inch 5-Wire Heavy-Duty Roller Frame $4.18
30 Seconds Outdoor Cleaner Concentrate
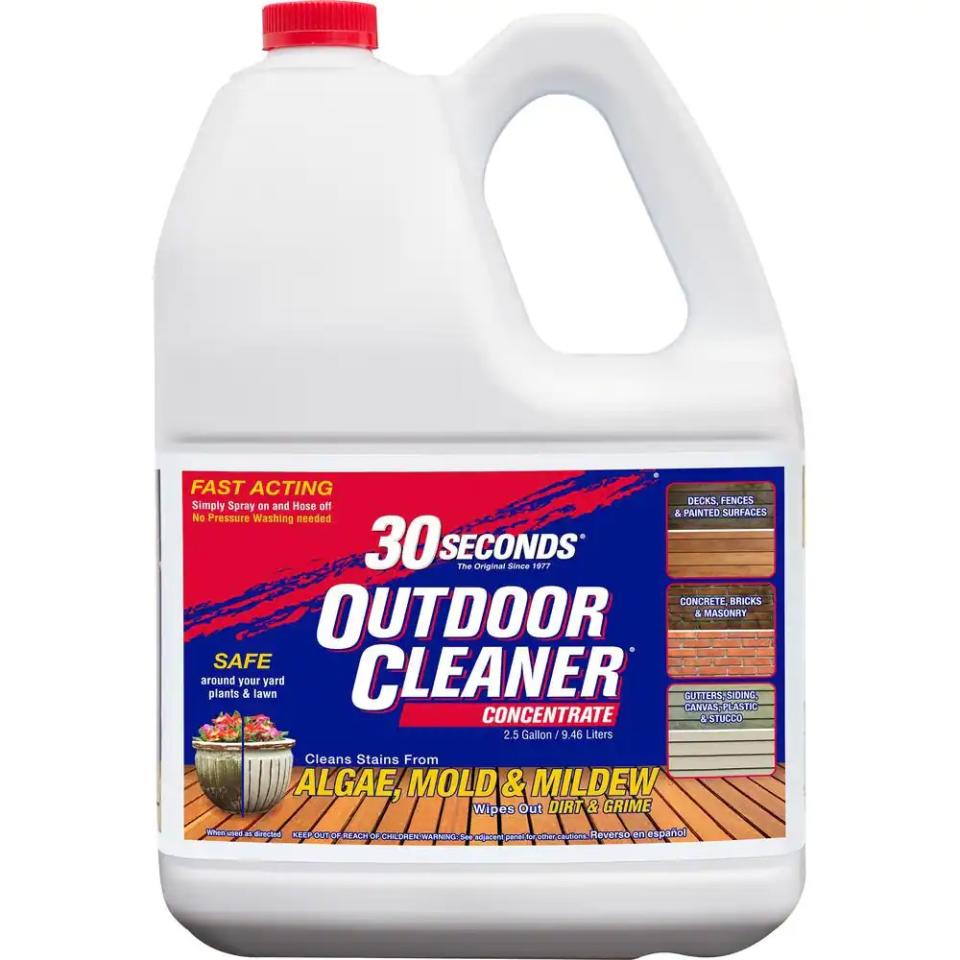
Buy: 30 Seconds 2.5 Gal. Outdoor Cleaner Concentrate $24.78
HDX Tile and Grout Brush
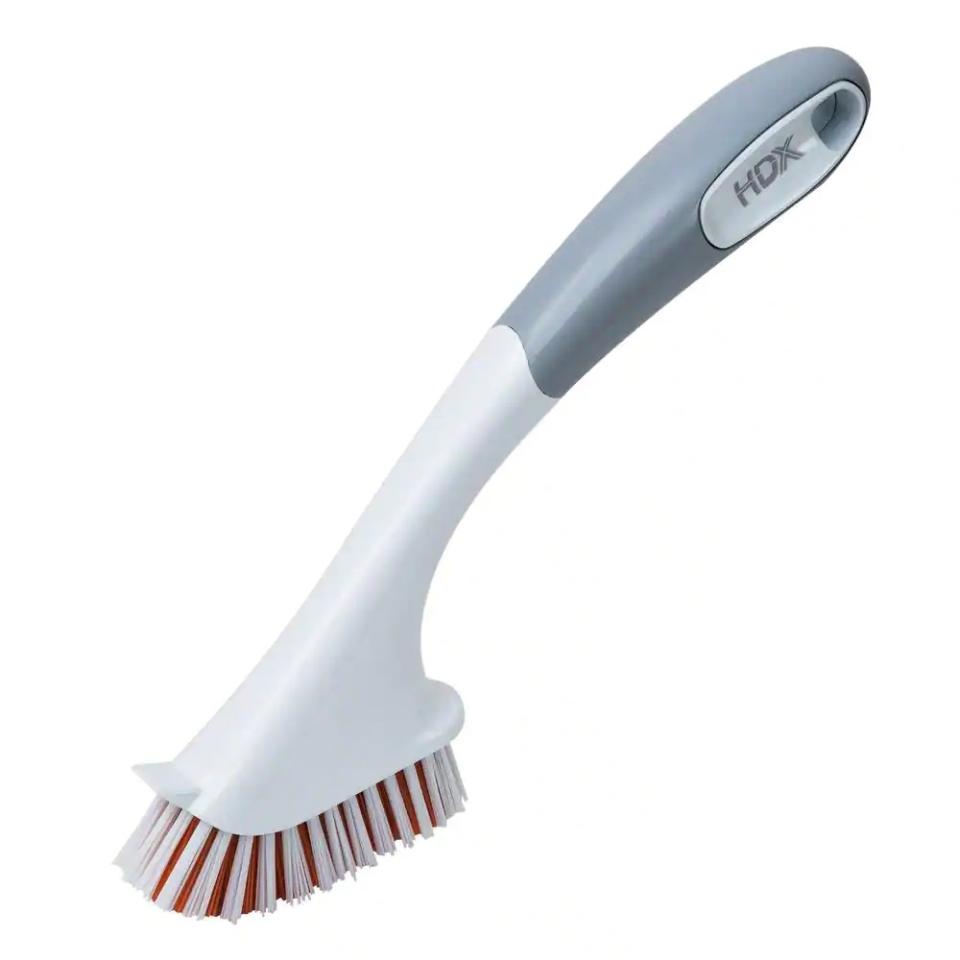
Buy: HDX Tile and Grout Brush $3.97
BEHR PREMIUM 1 Gallon Semi-Transparent Exterior Wood Stain and Sealer

Buy: BEHR PREMIUM Semi-Transparent Exterior Wood Stain $45.98
Step Five: Decorate Your Deck With The Home Depot
The last step in your deck restoration for spring is the most fun: decorating! Once you’ve refinished your deck’s surface, ensured the hinges are up to code and repaired any loose floorboards, it’s time to make it enjoyable with the help of a few top-selling products from The Home Depot.
A little goes a long way when it comes to outdoor decor, so don’t overthink it. Some outdoor lights, a couch and a grill for summer cookouts are most of what you need.
Hamilton Bay 24-Light Indoor/Outdoor 48 ft. String Light
This 48-foot string of lights comes with Edison bulbs and long-lasting LEDs that are the perfect accent to a deck for spring and summer. They’re weather-resistant, durable and have a brightness of 40 lumens for plenty of light when it’s dark outside. The LEDs are designed to save money on your electric bill and you can link up to 11 strings together at once due to the energy-efficient design.

NexGrill 4-Burner Propane Gas Grill
$50 OFF
Things just taste better coming off a grill in the summer. This propane gas grill from Nexgrill has four stainless steel burners for even heat and stainless steel cooking grates designed for easy cleaning. The grill is built with a durable stainless steel construction and even has a grease cup for after your meal. It also has four caster wheels that unlock so you can move it around your deck and easily free up space. It’s also currently discounted $50.00, so if you’re in the market for a new grill this is a great price.

Buy: Nexgrill 4-Burner Propane Gas Grill $299.00 (orig. $349.00) 14% OFF
StyleWell Park Pointe 4-Piece Wicker Patio Set
Lastly, a crucial component of a successful outdoor deck space is a good place to sit. This Park Pointe patio set from StyleWell comes with a loveseat and two chairs, enough to comfortably seat four people. It also comes with a coffee table to round out the ensemble. The steel frames for the furniture are designed to be rust- and weather-resistant, and the all-weather wicker is handwoven.

Buy: StyleWell Park Pointe 4-Piece Wicker Patio Set $599.00
Hampton Bay 42,000 BTU Gold Gas Patio Heater
Keep the fun going all night long with this gas patio heater, and use your patio in multiple seasons by adding a convenient, portable source of heat. Hampton Bay outdoor furniture is known for its elegant design and durable construction, and this one will make your deck look like the chic restaurant patio of your dreams.

Buy: Hampton Bay Gas Patio Heater $249.00
Hampton Bay Sun Shade & Patio Sets
If you’re more worried about keeping cool on hot summer days, then you’ll want some form of sun protection for your newly restored deck. This Hampton Bay Sun Shade is 11-feet wide and has a built-in LED light. The fabric is high-quality and durable enough to fit into your outdoor decor. The octagon shape of the umbrella also provides plenty of shade throughout the day, so you can make any area of your deck cooler and more comfortable.

Buy: Hampton Bay Sun Shade & Patio Sets $599.00
Buy: Hampton Bay Glenridge Falls 7-Piece Metal Outdoor Dining Set $799.00
Enjoy Your Deck This Spring
With those tips on inspecting, repairing, cleaning, staining and decorating, you should have a solid grasp on how to get your deck ready for spring. All that’s left is to make a few phone calls, invite some friends and family over and kick back on your fresh, clean and safe deck this season.
Editor’s Note: SPY’s Senior E-Commerce Editor Taylor Galla contributed additional research and writing to this article.
More Top Deals from SPY
Save 20% When You Upgrade Your Home With this Amazon Thermostat
This Wall Surge Protector Has a Near Perfect Rating on Amazon — Right Now It's Over 40% Off
This Highly Rated At-Home COVID Test Is Only $3 a Piece Right Now
Best of SPY

