What Side of a Cheese Grater Should You Use for Each Type of Cheese?
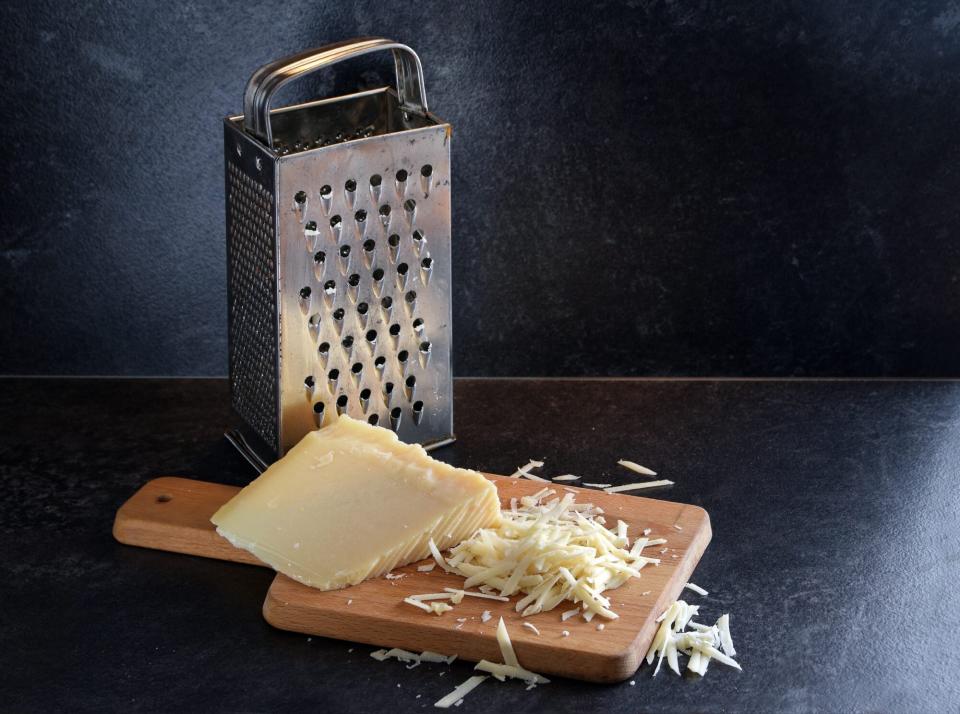
The box grater is one of the most handy and efficient kitchen tools, and that's because each of its four sides serves a different purpose: Two sides have holes for straightforward grating (one large and one fairly small), one side is meant for slicing (like a mandoline, but not nearly as sharp), and the last side has tiny punched-out holes designed for zesting (or very finely grating).
Maren Winter / EyeEm / Getty Images
In recent years, the microplane zester has muscled its way onto the list of essential kitchen tools, edging out box graders in popularity. Some question whether or not the box grater, which takes up more room, is obsolete or not. Keep in mind that it's four tools in one, and when it comes to grating cheese, all four functions come in handy, which is reason enough to keep your box grater in your kitchen cabinets-unless it's worn out, that is. All sentimental attachments aside, if you're using a vintage aluminum grater that you found at a yard sale or inherited from your grandmother, consider upgrading to a stainless steel model ($19.99, amazon.com). Aluminum models rust easily and grow dull over time.
Related: Our Guide to the Main Types of Cheese
How to Use a Box Grater
Use the largest shredding holes for semi-hard cheese like cheddar, Monterey Jack, Gruyère, and Fontina when making tacos, quesadillas, nachos, cheese toasts, and casseroles like macaroni and cheese. (To truly up your grilled cheese or tuna melt game, try swapping out the plastic-wrapped singles with freshly grated cheddar or Gruyère.) Some recipes may call for larger shreds of Parmesan or other hard cheeses when you want the texture to be as pronounced as its flavor. You'll also use the large side when grating fresh produce like zucchini, carrots, or apples.
The smaller shredding holes are designed to finely grate cheese, chocolate, vegetables, and more. Use it whenever a recipe calls for finely grated Parmesan, Pecorino Romano, Asiago, or ricotta salata to garnish pasta dishes, grains, green salads, and soups.
The tiniest holes on the grater (the ones that look like teeth) produce the finest strands of cheese. If you want to replicate the pre-grated hard cheese (some call it "cheese dust") sold in plastic tubs or cardboard cans at the grocery store, choose this side. It should produce a consistency so fine that the cheese easily dissolves into salad dressings, sauces, and casseroles. This side is also used to grate nutmeg and zest citrus. It's also the one most likely to cut your knuckles if you're not careful, and the one that's the biggest drag to clean, so use it judiciously.
Finally, the side with the wide horizontal slots is designed for slicing. It's not as effective as a mandoline or sharp knife, but it works well for making quick slices of cheese (or vegetables like cucumber or potatoes). Use it to make wide shavings of hard and semi-hard cheeses-when you want to garnish a pasta dish or salad with evenly thick shaved Parm or Pecorino or add a few thin slices of cheddar, aged Gouda, or Gruyère to a sandwich.
How to Clean a Box Grater
Box graters are easy to use but can be tricky to clean. Those grooves can be tough to reach, and foods can quickly build up on the surface. Cheese, in particular, tends to cling to the box grater and will harden if left too long. To keep yours in top form, clean it immediately after each use. Wash with hot, soapy water and a brush or abrasive sponge. If you do find hardened bits of cheese, soak the grater overnight in soapy water, or try running it in the dishwasher. Most sturdy models can handle the high heat of the machine.
These Pro Tips Will Help You Get the Most From Your Box Grater
Don't try to grate any soft cheese with a box grater. Things like fresh mozzarella, with its high water content, or goat cheese, will simply fall apart and make a mess. You're better off slicing, crumbling, or tearing these cheeses by hand. If you want to prevent cheese from sticking, very lightly spray or brush the holes with oil before grating, to make cleanup easier.
You can also try freezing your cheese briefly before grating. This is especially helpful for low-moisture supermarket varieties of mozzarella. The next time you make pizza or panini at home, place the mozzarella in the freezer for 15 to 30 minutes before you grate. It should shred more cleanly, with no compromise in texture or flavor.

