8 Cheap and Easy Hacks to Improve Your Bathroom
Find simple and inexpensive ways to make your bathroom look and function better.
Low Pressure in Showerhead
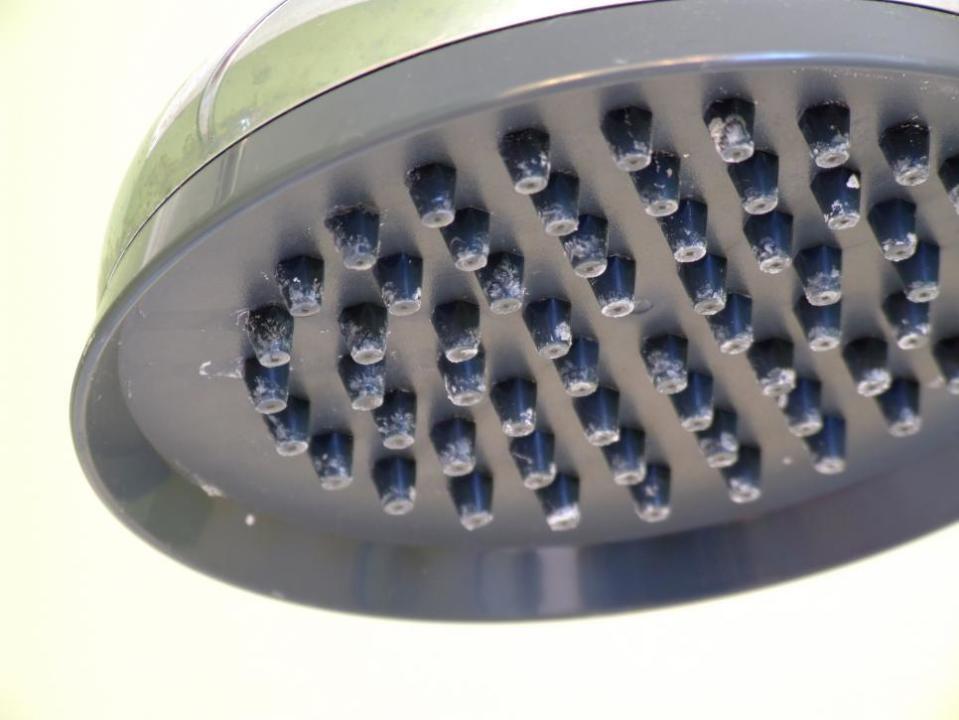
Most showerheads and faucets now come with water-saving devices called reducers. They’re great for saving water (and money), but sometimes these models are not as powerful as you would like. To remove the water reducer, unscrew the showerhead off its arm. Look inside for the reducer; it is usually a bright color. Remove the gasket that holds the reducer in place then remove the reducer. Another cause of bad water pressure is hard water which can leave mineral deposits in a showerhead and restrict water flow. To clean a showerhead, soak it in vinegar to loosen and remove deposits. Boiling the vinegar, letting it cool a bit, then placing the showerhead in it will make it work even faster. If your water pressure hasn’t improved, check the shut off valves (both cold and hot) for your shower to see if they’re not open as fully as they could be.
Dingy Faucet Handles
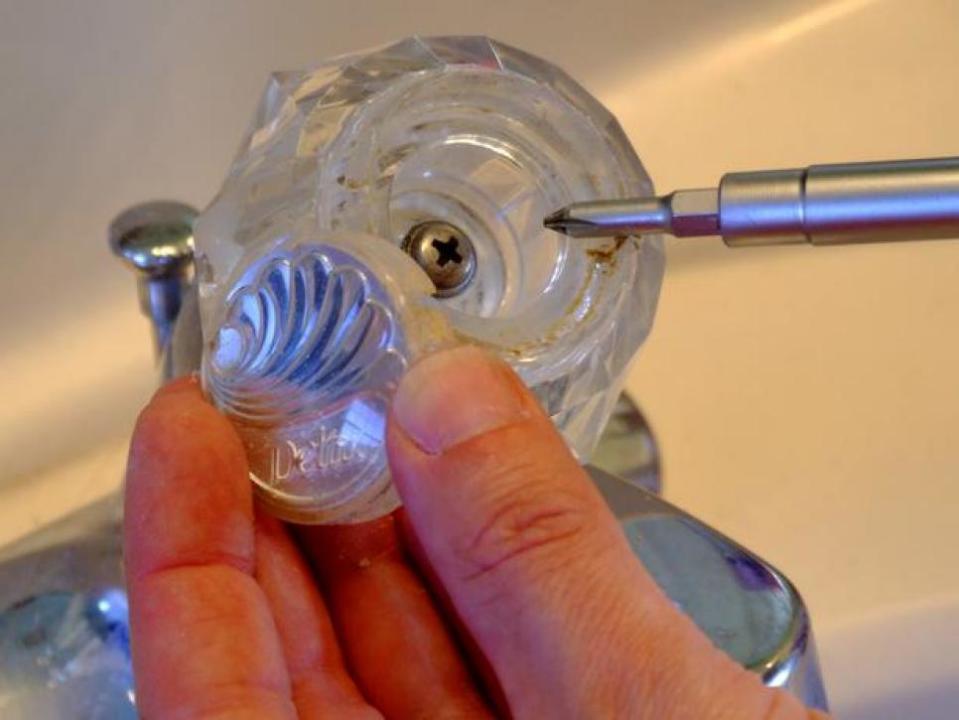
While we’d all probably like to replace our faucets, but sometimes the budget doesn’t allow it. Those original one-handled clear plastic faucet handles can get a bit funky over time from hard water deposits or simple daily use. You can pick up replacements at the home center for a few dollars, or if they’re in good shape, save money by removing them (all it takes is a screwdriver) and giving them a soak in vinegar and a good scrubbing with an old toothbrush. You’ll be surprise at how well they’ll shine and gleam.
Exhaust Fan Woes
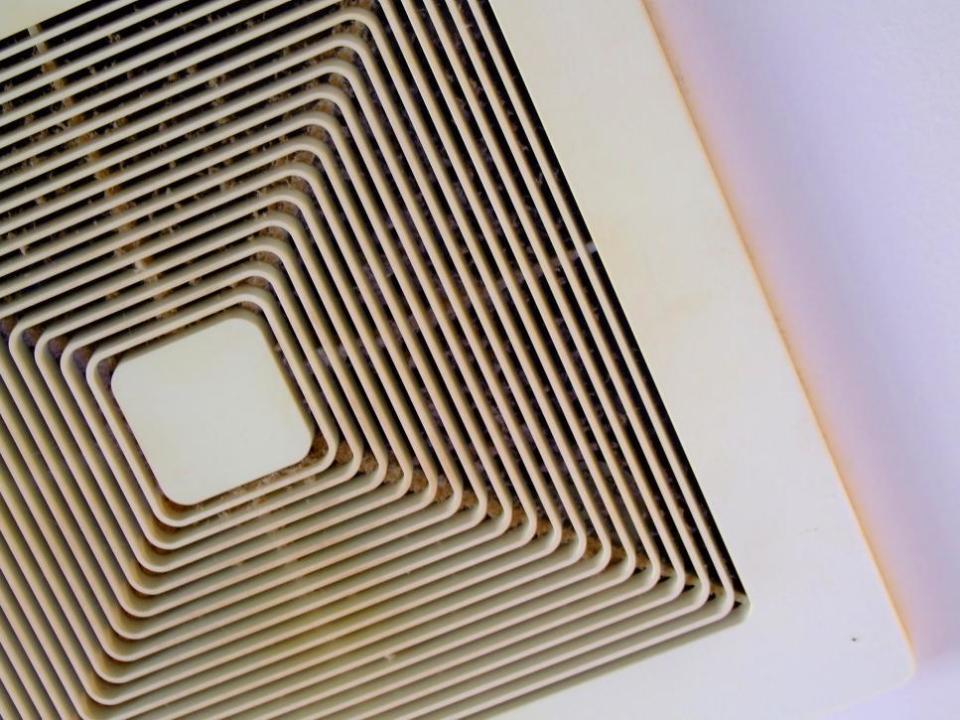
Over time, dust builds up in the fan slits and makes it work less efficiently and effectively. You can test the fan’s strength by placing one square of toilet paper in front of it when running to see how much air it is drawing in (however, this may only show you how strong a fan you have installed). If replacement isn’t an option, give the fan a good cleaning with a vacuum hose fitted with a brush attachment. It’s also possible there could be a blockage in the exhaust pipe. To clean this, you can use a dryer vent brush, which has a flexible long handle with a brush on the end.
Cabinet Facelift
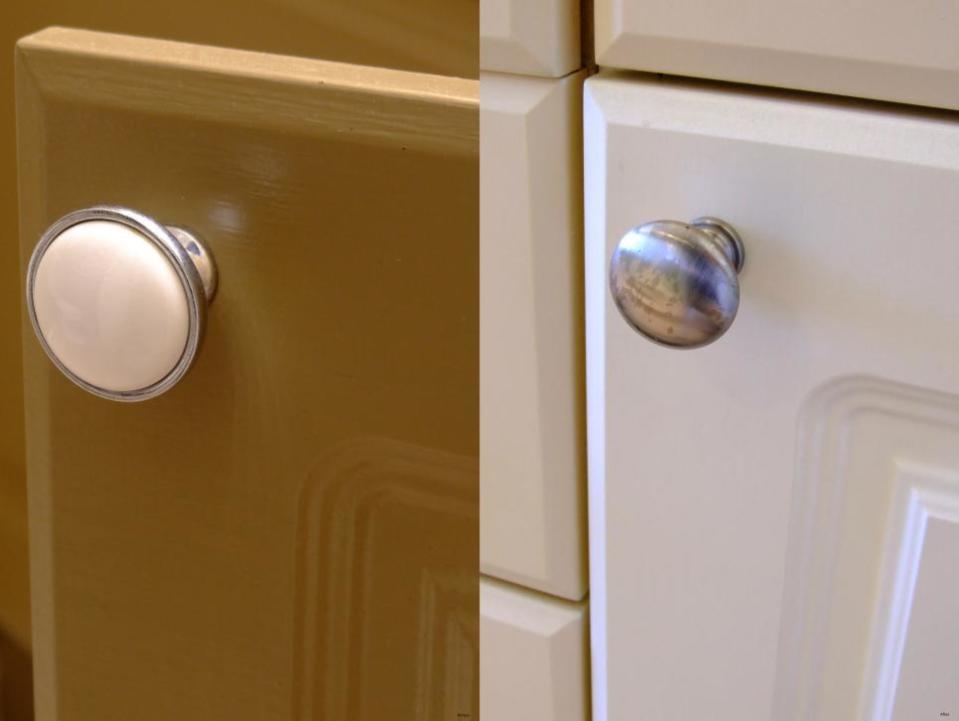
If your bathroom cabinets are looking dingy but are still in good functioning shape, there’s no need to feel stuck if your budget is limited. Even builders’ grade laminate covered cabinets can be freshened up. There are kits available that include all primers and paint/epoxy layers, or you can simply sand, prime and paint using ordinary materials. To make the job easier, remove all the doors, drawers, hardware and work on these parts in a clean workspace away from the bathroom. It’s best to use rollers or foam brushes to get a smooth finish, and you should top it off with a coat of polyurethane or polycrylic. For the finishing touch, pick up some new knobs and pulls.
Broken Tile
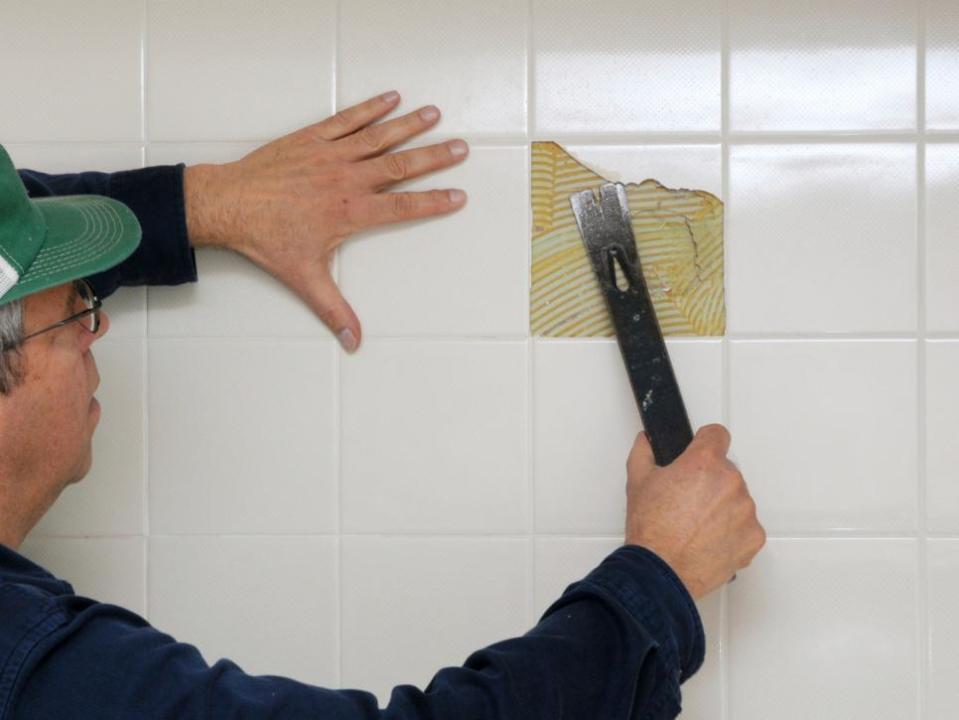
Photo by Les Palenik
Cracked or broken tile is not only unsightly, but can also be a trip hazard, a sharp exposed edge, or an entry point for leaks. Cut around the broken or cracked tile at the grout line using a tile saw attachment for a rotary tool. If it’s not loose, you’ll need to break up the tile using a hammer or a cold chisel. Make sure you protect the surrounding good tile. Clean the area thoroughly and check to see if there is a void that may have cause the tile to crack. If so, apply a leveler compound, smooth, and allow to set. Apply mortar to the back of the tile and area it’s being inserted, and set in place, making sure it is level with the surrounding tile. Allow the mortar to set and apply grout. When this sets, apply a grout sealer.
Boring Mirror

Have you ever taken off one of those giant double-vanity mirrors that builders cement to the wall? Believe me, it’s a rough chore when balancing to keep the mirror intact (7 years is too much bad luck for my taste) as well as minimizing the damage to the drywall that can create a lot of extra work in patching and repairing. A simply solution is to keep the mirror and dress it up with molding. Just about any type of molding will work, but one with a rabbet on the back edge will allow it to fit up against the edge of the mirror and extend past it, giving a nice finished look. Since this inside part of the molding will be reflected back, paint it black or the same color as the rest of the molding. Miter the corners and it’ll look like a perfect frame.
Dirty Grout
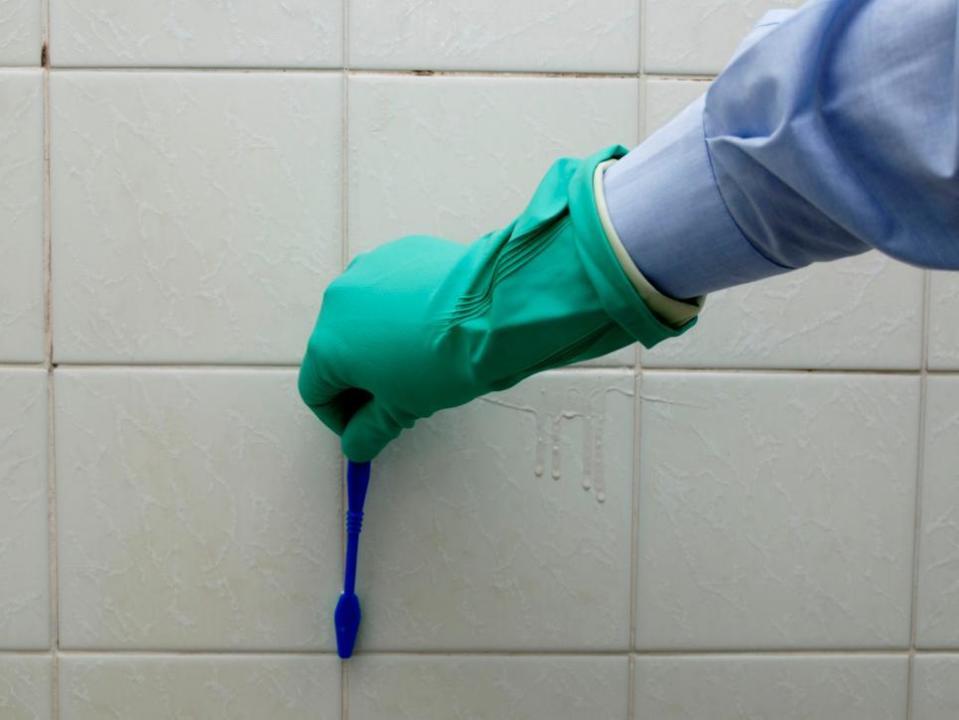
Photo by John Shepherd
A big mistake homeowners often make is not sealing the grout lines after doing a tile job, or not requesting the grout be sealed after having the job done for them. It won’t take long to regret this decision when irregular color patterns start showing up in the grout. But all isn’t lost. Manufacturers have vastly improved grout cleaning products that will get the job done. However, these products are pretty noxious and you’ll need to take a lot of precautions. An alternative is a mixture of hydrogen peroxide and baking soda, and there is always the option of use a steam spot cleaner. No matter what you use, you’ll need some elbow grease and heavy-duty brushes. Once you’ve cleaned the grout and allowed adequate drying time, seal the grout. Be sure to check the manufacturer’s recommendation on any addition steps to take before applying the sealer.
Preventing Mold
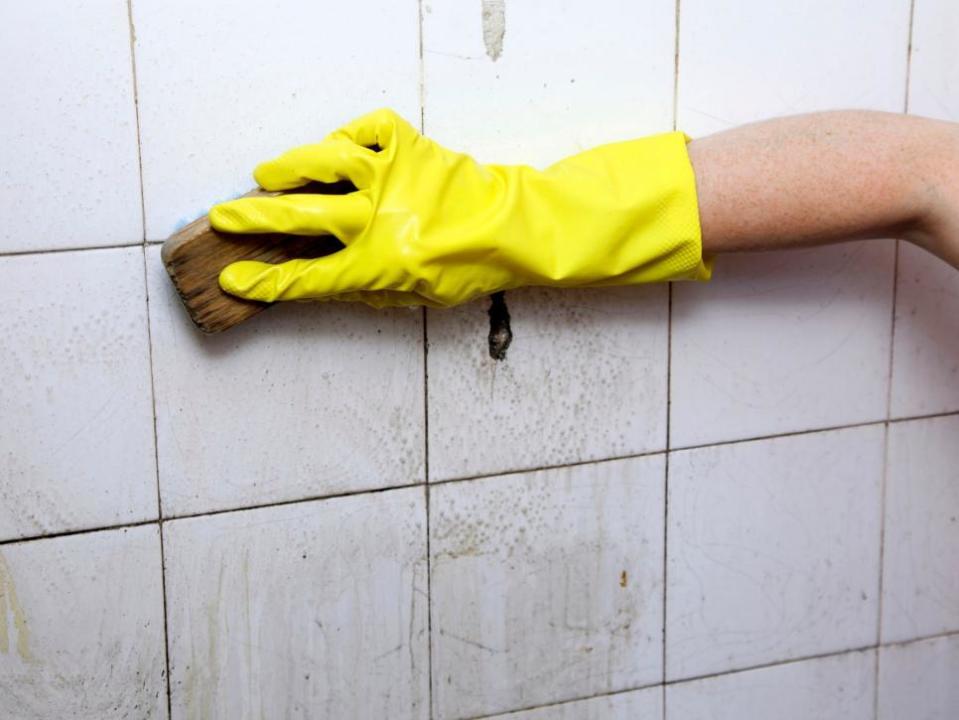
Photo by Voyagerix
Mold needs moisture and because your bathroom is the wettest place in the house, it’s always the first place to develop those unsightly spots. The first step to preventing the accumulation of mold is to allow proper air circulation. An exhaust fan will help to draw out moisture, but don’t discount the simple act of keeping the bathroom door or window open. If you have a shower curtain, make sure to open it all the way when you’re done showering to allow air to flow around the curtain and water to drain away. Use a squeegee to wipe moisture off of the shower walls and door. A slow drain keeps moisture longer, so make sure it is working properly. Be on the lookout for leaks, particularly in hidden areas like toilet and sink shut off valves. The latter are usually behind or enclosed within a vanity and can be leaking slowly without being noticed. It goes without saying that regularly cleaning will also prevent the build up of mold.

