How to Can Pickles, Step by Step

By Joe Sevier. Photos by: Chelsea Kyle.
I've paraphrased Ferris Bueller's Day Off before, and I'll do it again (probably many, many times): Summer moves pretty fast, if you don't stop to pickle something, you could miss it. And if you've never put up classic dill pickles before, this is the time to tackle the task (that's canners' lingo for pickling and storing: to put up).
Of course you could make quick pickles any night of the week, any week of the year. But when fresh produce is in season, it's more flavorful—cheaper, too. So right now, when farmers' markets are abundant with colorful, crisp fruits and vegetables, it's the time to take a weekend to learn how to can pickles. That way, you can enjoy those same fruits and vegetables a few months from now, when nothing is sprouting out of the ground.
The recipe we're using is a pretty basic one for kosher dill cucumber pickles—so called not because of any religious affiliation, but because they're made in the style of New York kosher delis, characterized by the addition of garlic. You could really use the same method for whatever vegetable you have on hand: zucchini would be great—or carrots or green beans. For today though, let's keep it classic. Here's how to make and can dill pickles:
Get this recipe: Fast Favorite Garlic Dill Pickles
1. Fill a large pot with hot water
Obviously, if you have a canning pot with a fitted rack, use it here. Otherwise you can hack it with a large stock pot. To do so, you will also need something to lift the glass canning jars off the bottom of the pot. You could use a round metal cooling rack, if you have one that fits neatly (and flat) in your stock pot. No canning pot or cooling rack? Scrunch a long piece of aluminum foil into a snake and then curl it into a spiral to fit in the bottom of your stock pot. Make the spiral loose enough so that water can circulate between the coils, but tight enough so that the canning jars can sit upright on them without tipping over. Finally, the pot should be tall enough so that you can fill it with water to at least one inch higher than the filled jars.
2. Submerge canning jars in the hot water and bring to a boil
For this recipe, you can use either 2 quart-sized jars or 4 pint-sized jars. You can easily double the recipe to make 4 quart jars or 8 pint jars if you'd like—just double the recipe below. Quart jars will easily fit whole pickles or spears, while pint jars are better suited to pickle chips. Arrange the jars (without their lids or rings) on a rack or your makeshift foil coil and add enough hot water from the tap to cover them by one inch. Bring the water to a boil over high heat, and immediately turn the heat off. Leave the jars submerged until ready to use them.
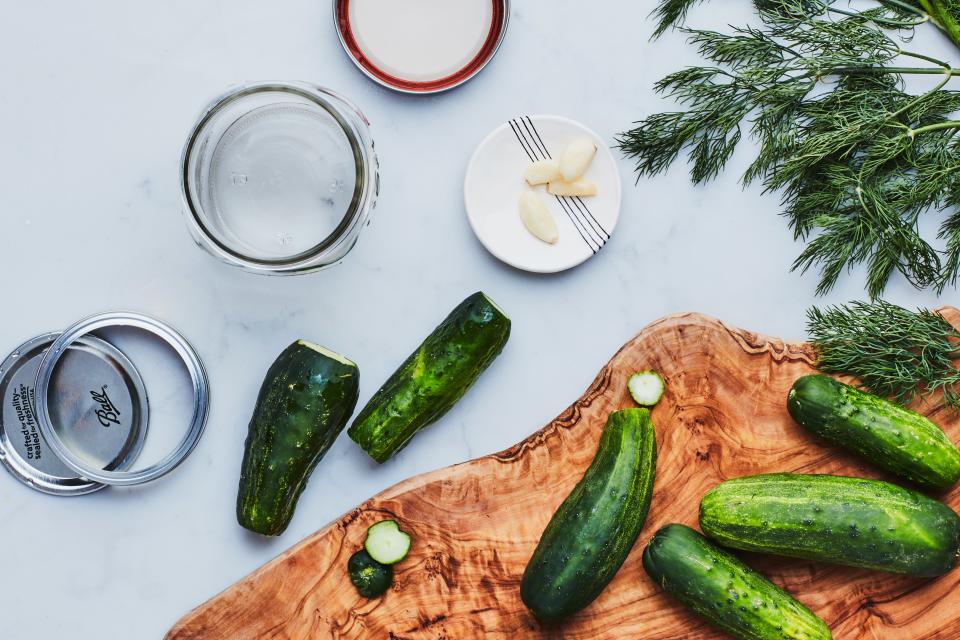
3. Gather and trim the cucumbers
Go for 3 pounds of Kirby cucumbers, which are firmer, more flavorful, and less seedy than typical full-length cucumbers. Since the ends of cucumbers can be bitter, trim both the blossom and the stem end off of each cuke. You can pickle the cucumbers whole, or cut them into your desired shape:
For spears, cut the cucumbers in half lengthwise, then place cut-side down on your cutting board and cut in half again to make spears.
For pickle chips, cut cucumbers into 1/4-inch coins. (If you want ridged pickle chips, you'll need to invest in a mandoline with a waffle slicing blade.)
4. Make the pickle brine
In a separate large saucepan, combine 2 cups white vinegar, 2 cups water, and 2 Tbsp. pickling salt and bring to a boil. It's important to use pickling salt here, which can be found in most grocery stores. Table salt often contains anti-caking agents which can turn pickle brine cloudy and produce off-flavors. Kosher salt can be used, but since it's coarser than pickling salt, you'll need to use a different amount: For every 1 tsp. pickling salt called for in your recipe, America's Test Kitchen's Foolproof Preserving recommends substituting 1 1/2 tsp. Morton's kosher salt or 2 tsp. of Diamond Crystal kosher salt.
This recipe creates a nice, sour pickle—if you prefer something a bit more mellow, you can add up to 1 Tbsp. granulated sugar to the brine.
5. Remove jars from hot water
Before lifting the hot, sanitized jars from the water, make sure you know where they're going: Never place hot glass directly on a cold stone surface, such as marble or granite. Instead, place the empty jars on a wooden cutting board, or on a work surface covered with a kitchen towel—a towel that's folded in half is even better.
Lifting the hot jars safely can be tricky. Here's another instance where a job-specific tools really really helps. A jar lifter will make your canning life exponentially easier. But, if you don't care to buy one, you can use tongs—rubberized ones would be best for better grip. (Note: If you only have tongs with uncovered metal on the gripping end, submerge them in the hot water for several seconds to warm them before using to prevent shattering a jar.) Once you've placed the jars on the counter, you can switch to oven mitts so that you can pour any hot water inside the jars back into your stock pot. There's no need to dry off the jars.
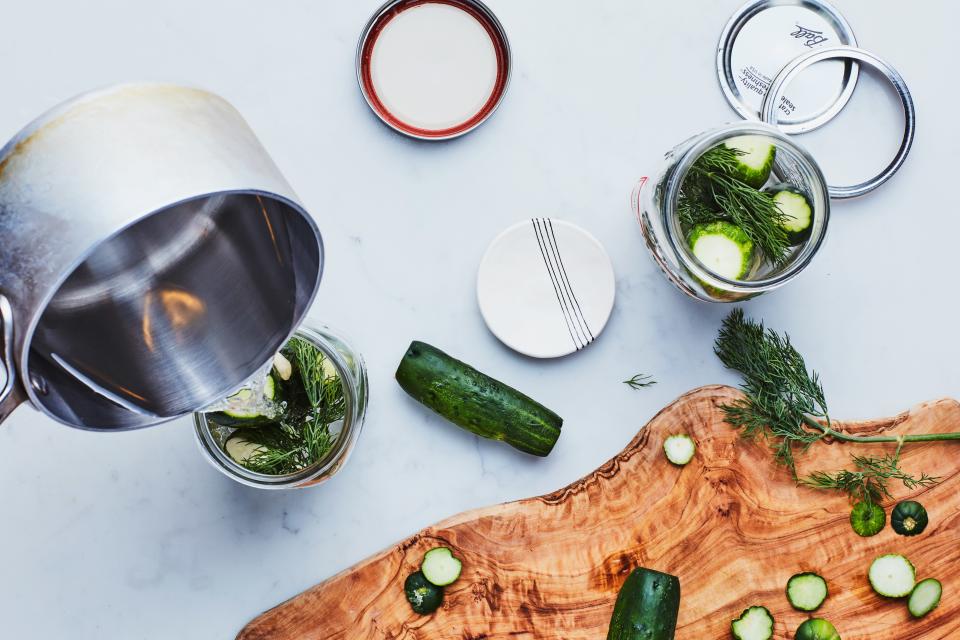
6. Fill jars with pickle ingredients
For Pint Jars: Add 1 peeled garlic clove and 3 to 4 fresh dill sprigs (or 1 tsp. dill seeds) to each jar. Tuck in a flowering dill head if you've got one, then pack as many cucumbers into the jar as will fit snugly. Pour in pickle brine to cover, leaving 1/2 inch of headspace between the rim and the liquid.
For Quart Jars: Add 2 peeled cloves of garlic and 6 to 8 fresh dill sprigs or 2 tsp. dill seeds to each jar. Tuck in a flowering dill head if you've got one, then pack as many cucumbers into the jar as will fit snugly. Pour in pickle brine to cover, leaving 1/2 inch of headspace between the rim and the liquid.
7. Add extra spices (if you'd like)
Feel free to play around with the spice mix here. While this recipe keeps it simple, you could add any combination of whole coriander, caraway, cumin, mustard seeds, cloves, black peppercorns, and/or allspice berries. Do keep the spices whole since ground spices can make the brine cloudy and the pickles gritty. Add up to 1 1/2 tsp. whole spices per pint jar or 1 Tbsp. per quart jar. A dried chile or 1/2 of a fresh jalapeño or serrano pepper per jar is another great addition, if you like a little heat.
8. Prep jars for sealing
Slide a (very clean) thin spatula, ruler, or butter knife down the side of the jar in several places to release any trapped air bubbles. If necessary, add more brine so that the liquid again comes to 1/2 inch from the rim. Then wipe the rims with a clean, dry kitchen towel. If you're using this method to make a sweet pickle, you can use a damp kitchen towel to make sure you get any sticky sweet residue off the rims.
9. Place vacuum lids on jars
For storing pickles, you must use a new lid every time. Screw rings may be reused, but the vacuum lids are a one-time-use deal. (They're sold separately, so you don't have to worry about acquiring more glass jars than you can handle.) Some recipes recommend soaking the lids in the boiled water to sanitize, but many manufacturers recommend skipping this step since it can adversely affect the lids' ability to seal. We recommend just rinsing the lids briefly in hot, running tap water.
10. Seal the jars and arrange in pot
Screw on the rings until they are just hand-tight—don't try to muscle-man tighten the rings. During the boiling process air needs to be able to escape from the jars—if the screw rings are too tight, it will prevent this from happening. Submerge sealed jars into the canner or stock pot. If necessary, add water to the pot so that it is at least 1 inch higher than the top of the jars.
11. Process the pickle jars
This doesn't have to be a vigorous boil, just steady is fine—too hard of a boil and you risk rattling glass jars (which is never a good thing). Boil for 10 to 15 minutes
That's 10 minutes for pint jars, 15 minutes for quart jars. Set your timer as soon as you see the water start boiling. Remove pot from heat and let cool for 5 minutes.
Remove the jars from the water using the lifter or tongs, transferring them back to the kitchen towel or wood cutting board.
12. Let cool, then test the seal
Let the pickle jars cool at room temperature for a full 24 hours, then check the seal on the lid. If properly processed, the lids will be indented inward, indicating that the jar is sealed. If you press the center of the lid and it "pops" up and down, the jar is not sealed and you should store the pickles in the refrigerator and eat them within a few weeks. If the lids pass the pop test, remove the rings, and just try to lift the lid gently with your fingers. If you can't easily lift it off, the jars have passed the second seal test and are ready to be stored.
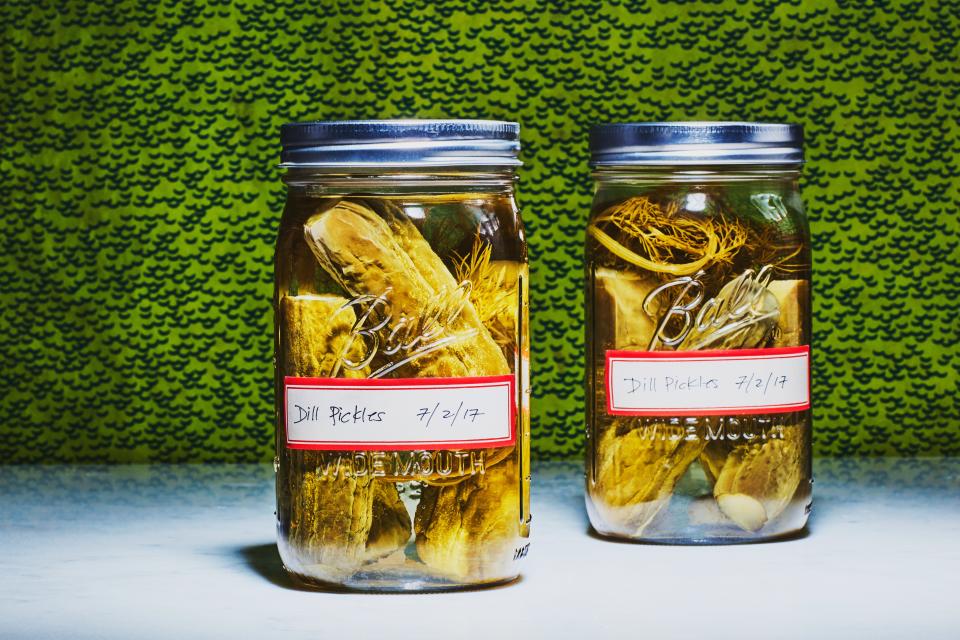
13. Label and store your jars
Mark the jars, noting what kind of pickle you've made and the date. Store them in a cool, dark place for up to 1 year. If you notice the garlic cloves turning blue or green, don't worry about it. It's a natural reaction between the acid in the brine and the enzymes in the garlic—the coloration won't affect the flavor or safety of your pickles. Now that you've learned how to can pickles, just keep on munching away until it's time for your next batch.
Get this recipe: Fast Favorite Garlic Dill Pickles
This story originally appeared on Epicurious.
More from Epicurious:
11 Ingredients You Should NEVER Refrigerate
12 Lightning-Fast Chicken Dinners to Make Now
The Epic Hack to Peeling a Dozen Eggs in 104 Seconds
