Office Q&A: An Outlook attachment solution, relieving toggle frustration, and finding previous edits in Word
This article, Office Q&A: An Outlook attachment solution, relieving toggle frustration, and finding previous edits in Word, originally appeared on TechRepublic.com.
Last month, I received a lot of complicated questions. Unfortunately, most of these readers received an offer to help them find a professional developer. That's frustrating, because I'm not answering their questions, but I simply can't supply that level of support. I can't create new templates, VBA solutions, or troubleshoot applications. There's not enough time or bourbon. However, I can provide free support in two ways: 1) I can help readers with complex needs find professionals who specialize in Office development without charging a finder's fee; 2) I can answer questions with simple how-to instructions or recommendations to use a specific feature.
On the bright side, I was able to help a few readers who had simpler requests:
How to hide Outlook's attachment icon when embedding a logo
Why Excel suddenly stops selecting the cell to the right or left
How to pick up where you left off in a Word document
Instructions are for Office 2013 on a Windows 7 system, but instructions are similar for all three ribbon versions.
Disguise Outlook attachment
Chris wants to include his company's logo in him email messages. Embedding the logo in the body of the message forces Outlook to display an attachment icon. Consequently, recipients spend time looking for an attached file that doesn't exist. He wants to send the logo, but he doesn't want Outlook to tag the file as an attachment in the recipient's incoming mail.
The easiest way to accomplish this is to include the logo in a signature. When attached to an email in this manner, Outlook doesn't tag the file as an attachment. Fortunately, adding a logo to the signature is easy. Here's how:
In Mail view, open a new mail window by clicking New Email (New) or pressing [Ctrl]+[N].
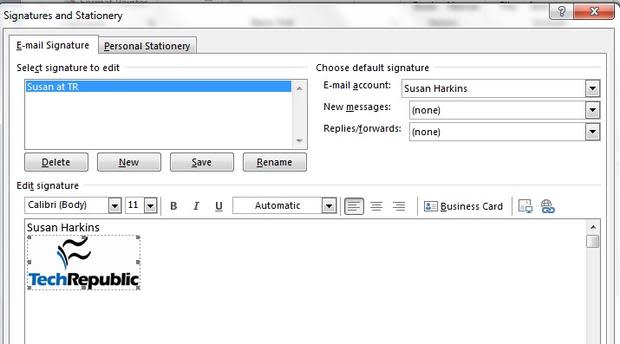
In the Include group, click the Signature drop-down and choose Signatures. When adding the logo to an existing signature, choose that signature from this drop-down list instead (Figure A).
Figure AFigure A In the resulting dialog, click New, enter a meaningful name for the signature (Figure B), and click OK. If editing an existing signature, select that signature in the Select signature to edit list.
Figure BFigure B Click inside the Edit signature control (if necessary) and enter your signature text.
To insert the logo, click the Picture icon to the right.
In the resulting dialog, locate and select the graphic file you're inserting. You can use the following formats: GIF, JPEG, or BMP.
You can make simple formatting choices, but we won't do so in this example.
Click Insert (Figure C), and then OK to create the new signature.
Figure CFigure C


You can have multiple signatures, and if you use one more than the others, consider making it the default. To make a signature the default, do the following:
Click the File tab and choose Options. Then, choose Mail in the left pane. In Outlook 2007, choose Options from the Tools menu, and then click the Mail Format tab.
Click Signatures to the right of the Create or modify signatures for messages section. In Outlook 2007, click Signatures in the Signature section.
In the resulting dialog, choose the signature from the New Messages drop-down (Figure D). You can also set this default when creating the signature.
Figure DFigure D Click OK twice.
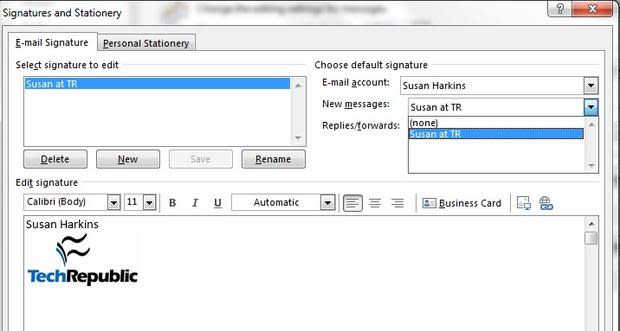
Outlook, by default, will attach Susan at TR to every outgoing message, unless you change the signature by choosing another from the Signature drop-down list.
Sound warning with toggles
Next to Caps Lock, Scroll Lock is probably the most inconvenient keystroke you can unintentionally make while working in Excel. That's what happened to Adina. She said that pressing the right and left arrow keys no longer moved the cursor to a cell. Instead, it moved the screen!
She unintentionally hit Scroll Lock on her keyboard to engage this feature. If you don't realize what you've done, it can be frustrating. The solution is simple: press Scroll Lock again to disable it. Excel will return to its normal cell-selecting behavior when you do.
Here's a non-Office solution that can help if you accidentally press one of these keys--assign a sound to the key using Windows 7 as follows:
Click the Start Menu and choose Control Panel.
Click the Ease of Access link.
Click the Change how your keyboard works link (Figure E).
Figure EFigure E Check the Turn on Toggle Keys option (Figure F) in the Make it easier to type section.
Figure FFigure F Click OK and close the Control Panel.


Anytime you press a toggle key--Scroll Lock, Caps Lock, and Num Lock--Windows will beep at you to let you know. It's a simple change that can save a bit of frustration.
Finding last edits in Word
Kenneth wants to pick up right where he left off when editing and opening a Word file. First, let's look at editing. Let's suppose you're adding content to the middle of a document and decide to make a change a few pages up. You find the spot and make the change. Now, how to get back to where you were? Pressing [Shift]+[F5] will do the trick, usually.
The problem with this feature isn't that it's buggy, but Word doesn't always interpret your previous work as an edit--and that's what Word's using to determine your last position. Pressing [Shift]+[F5] will move between the last five edits. You can't fix that or change it--it's the feature's behavior.
When opening a file, pressing [Shift]+[F5] returns you to the last saved edit, not the position of your cursor when you last saved the document. Understanding this difference can save you some frustration if you want to rely on this feature.
Even if this feature doesn't always take you where you expected, it's a great feature when it does. I don't believe this feature works in Word 2007, but it was restored with Word 2010.
Word 2013 users have a new feature--Resume Reading--that might help when opening a file, if you're willing to use Read Mode. If you're using Word to read, this is a great feature. If you're using Word to create and edit, you probably won't use it.
To explore a bit, click the View menu and choose Read Mode in the Views group. Doing so will open your document in Read Mode (Figure G). This is an application change, so every file you open will open in Read Mode until you change the View setting. Click the Welcome back bookmark to return to where you were last reading. To change views, choose a new one from the View menu.
Figure G
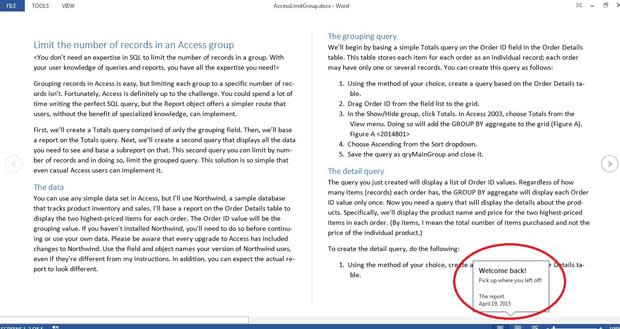
Use Read Mode to return quickly to pick up where you were when opening a document.
Send me your question about Office
I answer readers' questions when I can, but there's no guarantee. When contacting me, be as specific as possible. For example, "Please troubleshoot my workbook and fix what's wrong" probably won't get a response, but "Can you tell me why this formula isn't returning the expected results?" might. Please mention the app and version that you're using. I'm not reimbursed by TechRepublic for my time or expertise, nor do I ask for a fee from readers. You can contact me at susansalesharkins@gmail.com.

