So A Mirror Meets A Door Frame...And This DIY Is Born
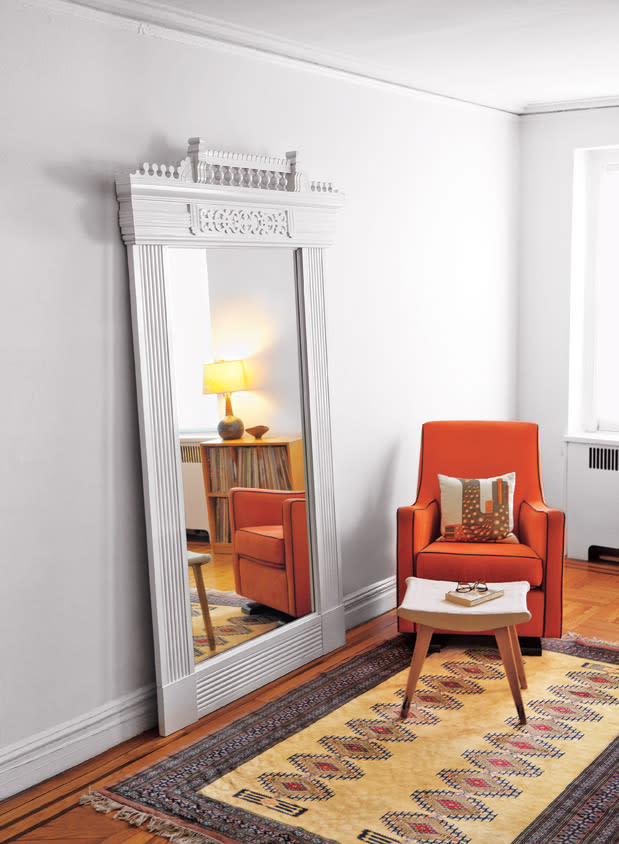
Photo by Kristine Larsen
Stylelist Home is proud to present a project-a-day from the fabulous new bookThis Old House Salvage Style Projects.
Inspired by the grand pier mirrors that graced the entertaining quarters in homes during the Victorian era, this stunning mirror is a creative DIY take on the classic piece that combines traditional ornate detailing with modern good looks. An oversize mirror propped against a wall not only makes a bold statement but it also helps reflect light in a room and gives the illusion of space. Antique mirrors come with a high price tag so this replica is a budget-friendly alternative.
TIME:6+ Hours
COST:$510
SKILL LEVEL:Difficult
SUPPLIES:
The entablature top from a door casing
Fluted pilasters
Plinth blocks
Bead molding
Mirror glass
1/2 Inch plywood
2x Board
2 5/8- Inch pocket-hole screws
Construction adhesive
1-Inch and 2-inch deck screws
Wood glue
Oil-based primer
Gloss oil-based enamel
Sandpaper
Mirror mastic
TOOLS:
Drill/driver
Pocket-hole jig
Caulk gun
Clamps
Paintbrush
Step 1: Dry-fit the parts.
Arrange the precut pilaster frame around the mirror. Lay a 2x board that's slightly thicker than the rest of the frame's parts across the top to support the entablature. My entablature had mitered corners that used to wrap the sides of the door casing, so I sized the 2x board to match the width of its back.
Step 2: Assemble the mirror frame.
Join the pilasters to the plinths by driving in pocket-hole screws on the diagonal along the backs of the wood. Use your drill/driver and a pocket-hole jig to bore the holes. Then join the 2x top to the pilaster's ends.
Step 3: Apply glue to the frame's back.
Use a caulk gun to squeeze a bead of construction adhesive along the back.
Step 4: Secure the plywood back to the frame.
Adhere the panel. Drive 1-inch deck screws into the four corners and every 8 inches along the top, sides, and bottom of the back panel.
Step 5: Adhere the entablature.
Flip the frame faceup, and use the construction adhesive to affix the decorative entablature to the 2x top. Secure with clamps.
Step 6: Complete the entablature top.
Flip the frame facedown again, and reinforce the glue by driving 2-inch deck screws through the back of the 2x board. If your entablature has mitered corners, secure them with wood glue so that they wrap the board's ends.
Step 7: Paint the frame.
Brush on an oil-based enamel to give the piece a lacquer-like finish. Be sure to first prime the entablature top if it has been stripped of its old paint or has been stained, as mine was. Sand between coats.
Step 8: Add the mirror glass and bead molding.
Adhere the mirror, using special glue called mirror mastic. Enlist a friend to help ease the glass in place. Cover its edges with bead molding affixed to the frame with wood glue. Now stand the mirror where it'll brighten both the room and your mood.
This project is from the new bookThis Old House Salvage Style Projects.

This article originally appeared on HuffPost.

