How to make the perfect pancake mix - an easy recipe for basic batter

It's Pancake Day tomorrow, but don't panic. While many often turn to ready-made pancake mix – Aunt Jemimas, invented in Missouri in 1889, has been sold for centuries – cooking the dish from scratch is actually incredibly simple.
It is a sad fact of life, but the first pancake never works. The first of any batch I make is a sad flaccid rag, too soft to even contemplate tossing: usually gobbled up by my teenage son, more from pity than hunger, I suspect. But, get the right kit, and follow these simple tips, and you'll soon have a stack of triumphant pancakes piled up.
The problem, generally, is that the pan is not hot enough. To make a successful pancake, it should be shimmeringly hot, so that a few drops of water flicked on to the surface skitter like pinballs before evaporating.
The second pancake is generally more like it, neat and firm enough to be tossed. Sure, you can turn it with a spatula or fish slice, but where's the fun in that? There is an art to the perfect pancake – just read on.
Traditionally, pancakes were eaten on this day to use up rich, indulgent foods like eggs and milk before the 40-day fasting season of Lent began. But although it is enshrined in Christian tradition, it is believed that Pancake Day might originate in a pagan holiday, when eating warm, round pancakes - symbolising the sun - was a way of celebrating the arrival of spring.
To help you celebrate the imminent arrival of the warmer months, here's our favourite pancake recipes – including our easiest and most foolproof, which take just a few minutes to rustle up.
The fat
Butter gives the best flavour, but the pan needs to be so hot that it is bound to go brown. I don't mind this but there are ways to minimise the effect:
Use only a tiny coating of butter. Rather than dolloping it into the pan, use a heat-proof silicon pastry brush to paint soft or melted butter onto the surface of the pan.
Use either unsalted butter, which has a lower whey content and burns less easily, or a mix of butter and oil, which is also less likely to burn.
Clarify the butter first, by melting it in a small pan. When it is bubbling, the yellow butter fat will rise to the surface, with a milky liquid beneath. Carefully skim off the milky part, and pour the clarified butter beneath into a pot.
The pan
Supermarkets are now selling bargain pancake pans with non-stick surfaces and a low lip. While non-stick, at first, is an easy way to make successful pancakes, the pan is of little use for anything else. And, in truth, that non-stick makes me grumpy, even (and especially) on expensive pans.

For all the lifetime guarantees, or the promises that they are impervious to metal spoons, they just don't last. Sure, when you first buy them they are gloriously slippery. But a couple of years later, when the magic has worn off, all you are left with is a not very good, not very non-stick pan. I threw one out when I realised that the black specks in my white sauce were not in fact pepper but flakes of non-stick surface.
An omelette pan - the sides curve bowl-like into the base rather than joining it at an angle - is the best shape for tossing
Contrast that with my nearly 20-year-old stainless-steel pans, which are still going strong despite more burnt-food disasters than I care to remember. Call me demanding, but I want my pans to last. I build a relationship with my pans, I know which ones work for which dishes, which ones tend to catch on the bottom but make great scrambled eggs, which ones spread the heat perfectly and which hold it beautifully.
My pancake pan is a cast iron one of indeterminate age which I inherited from my grandmother. It's heavy – tossing is a two-handed job – but it goes on and on. It is an omelette pan, by which I mean that the sides curve bowl-like into the base rather than joining it at an angle. This is the best shape for tossing, although those shallow-lipped pancake pans do work well too.
If you are investing in a new pan the best bet are steel pans. Like cast iron, they need to be kept oiled or they will rust. But, again like cast iron, season them properly (see below) and they will build a natural non-stick layer that lasts forever. Good kitchenware shops stock them, or go to the swanky davidmellordesign.com where an 18cm blue steel crêpe pan costs £14. This has a shallow lip, but unlike cheap non-stick examples, you'll be able to pass it on to your grandchildren.
Seasoning your pan
Pour a thin layer of cheap vegetable oil into a steel or cast-iron pan (not a non-stick one), and add 2 tbsp or so of table salt. Heat until smoking (the salt will start to blacken) then turn off the heat.
Put on oven gloves and arm yourself with a really large wodge of kitchen paper. With the kitchen paper, scour the inside of the pan as hard as you can. Leave the pan to cool, then wipe out with more kitchen paper.
Ideally, these pans should never be washed, just wiped out with kitchen paper after use.
If more serious cleaning is called for, use hot water and a scourer but never washing-up liquid. Wipe dry and repeat the seasoning process above. The pan's natural non-stick properties will improve with age, especially if you re-season it every now and then.
Basic pancake recipe
SERVES
Enough for 8 pancakes
TOTAL TIME
30 minutes
INGREDIENTS
1 large egg or 1 egg and one yolk
280ml milk
110g plain flour (4 heaped dessertspoons)
1 tbsp melted butter
METHOD
By hand: sift the flour into a bowl and make a well in the middle. Break in the egg (and yolk, if using) and add apinch of salt and a splash of the milk. Whisk the egg, gradually incorporating the flour, to make a smooth cream. Whisk in the rest of the milk and the melted butter.
With a blender: put all the ingredients in a blender jug with a pinch of salt. Whizz until smooth. It should be no thicker than single cream.
Brush a hot pan with vegetable oil before adding a ladleful of batter and swilling thinly around pan, tipping the pan so the mixture spreads evenly. It will begin to cook immediately: pour any excess back into the bowl.
When the pancake is browned on the bottom and the very edges are beginning to lift away, give the pan a shake to make sure the pancake is loose. If it is sticking anywhere, use a spatula to loosen it.
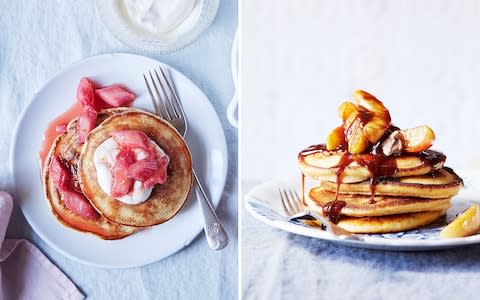
When it moves freely, then you are ready to toss it - or, if you're less confident, use a spatula to turn it over. The other side will only need a few seconds. Slide out of the pan, and try one of these delicious toppings
Fancy trying some different?
Why not give one of these delicious pancake recipes a go.
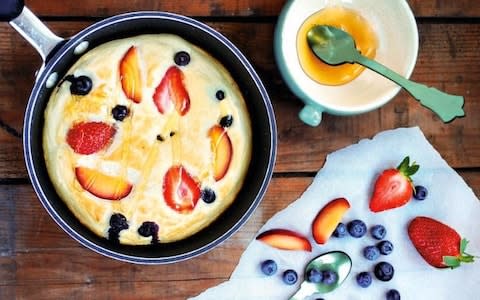
Gluten-free and healthy pancake recipes
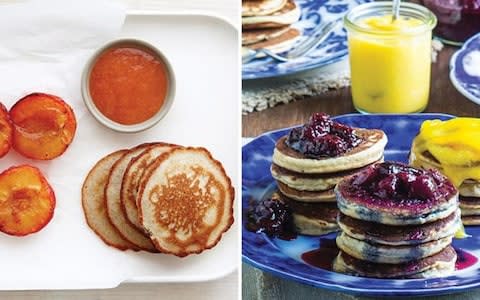
Buttermilk pancakes with balsamic-cured stone fruit

Flora Shedden's Scotch pancakes