8 Great Ways To Fix Up Your Home This Weekend (PHOTOS)
Nicole Guzzardi
Updated
If your home has you a bit frazzled because there's so much you'd like to do and so little time, you are not alone (trust us)! But, don't lose it yet because we have rounded up a few projects that will have you breathing a sigh of relief …and can be done in a weekend's time! From fixing a rip in your screen door to refacing kitchen cabinets, these ideas will have your place looking fresh in no time. To see all 8 just click through the slideshow below.
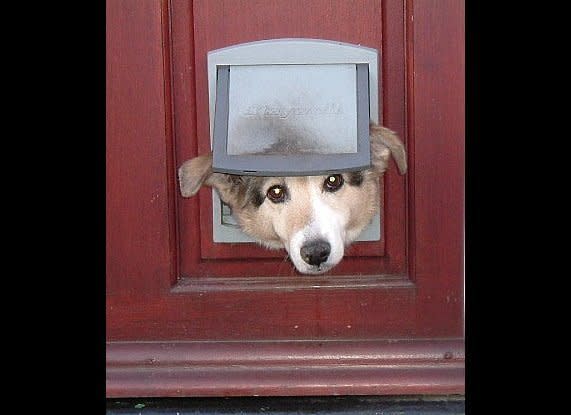
Add A Doggy Door
Installing a doggy door will give your pet a little freedom and your feet a break from taking him in and out. When buying the door, make sure to consider the height and width of your pet. To install, first remove the door from its hinges. Then, mark the square where you'd like the door to go based on the dog door's measurements. Drill holes in the four corners that match up with the holes on the dog door and use a handsaw to carefully cut the square out. Now, fit the dog door frame into the square and secure it with screws. Then, attach the doggy door with the supplies given. Next, just reattach your door to the hinges and you're pet can come and go as he pleases. For a full tutorial, visit DIY Network.
Install Window Awnings
Installing window awnings is a good way to give your home some curb appeal if it's looking a little tired and they'll also keep the summer heat from beatingbeaming in. First, using a power drill and the supplies provided in a window awning kit, center and mount your brackets above the window. Then slide the bead of the curtain in the mounting bar, allowing the curtain to hang down. Center the curtain on the mounting bar and use pliers to squeeze the ends, locking the awning into place. Next, attach the support beams to the bottom piece of the awning and twist to lock them into place. Afterward, attach the support arms and secure them into the wall brackets using screws. For a full tutorial, visit Nuimage Awnings.
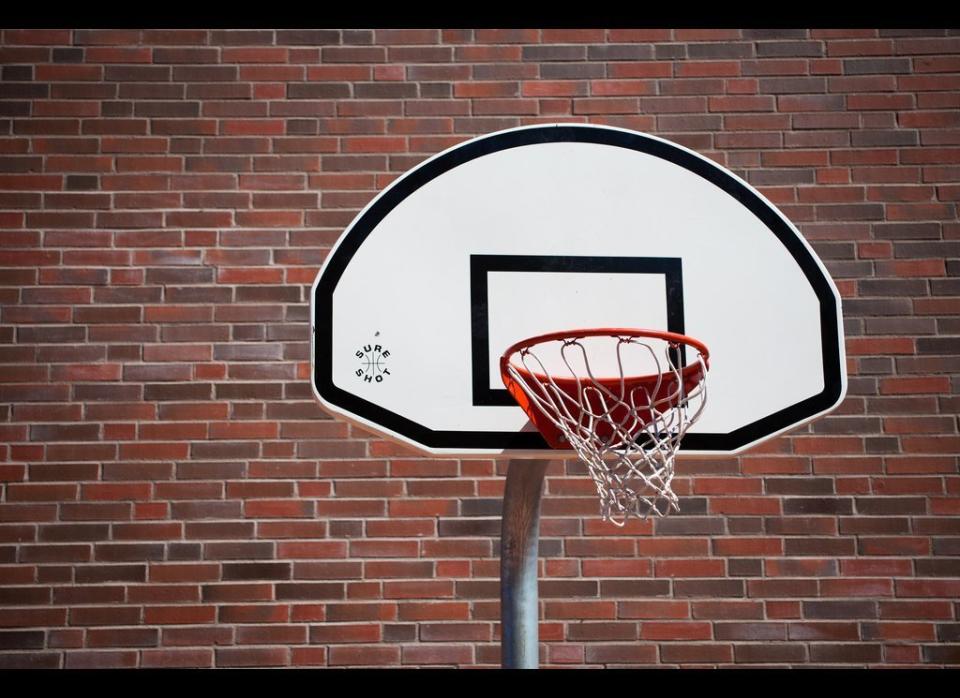
Put Up A Basketball Hoop
Installing a basketball hoop is an easy summer project and will provide hours of fun for everyone. First, make sure the ground is flat and level where you would like it to go. Then, dig a hole that's two feet deep, two feet wide and two feet long. Next, fill the hole with cement. Insert one of the basketball poles into the hole, only 18 inches deep into the cement. Let the cement rest for three to four hours. Then, attach the remaining poles. Next, install the actual basket and backboard and you are ready to shoot some hoops! For the full tutorial, visit Made Man.
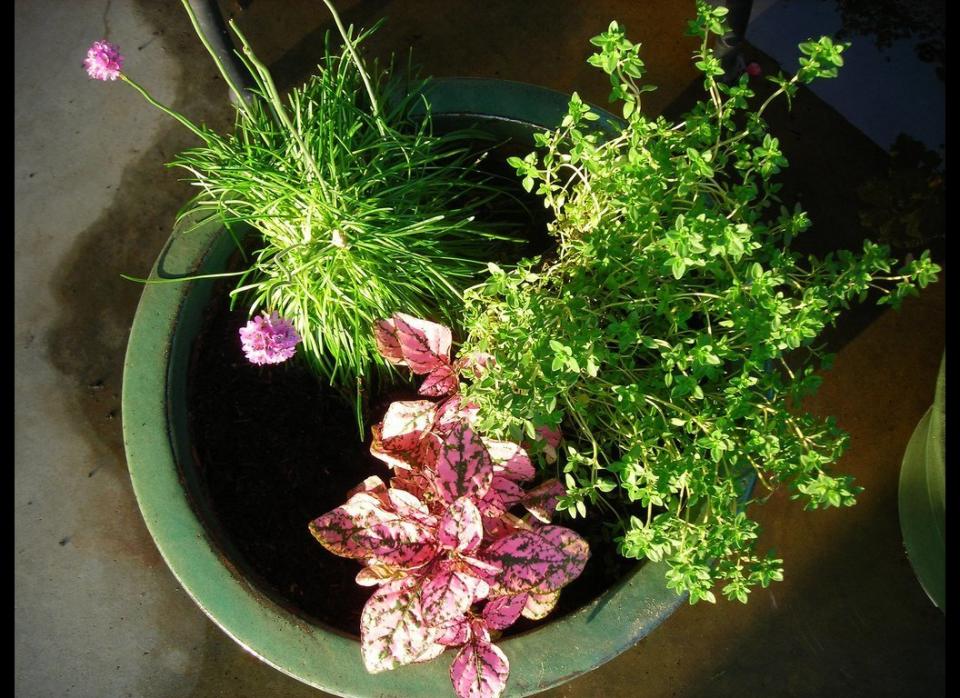
Make A Container Garden
We think these beautiful tiny gardens made up of planters are a great way to add to any outdoor (or indoor) space...and they are so easy to make! Just pick a large planter, and choose small plants that will cohabit well together in the same soil (To do so, check the plant tags to make sure they have similar care needs and can be kept with one another easilyperiod inside parentheses). Succulents in particular are great for container gardens and there are thousands of typeskinds to choose from. Just pick your favorites, put soil in the pot, bury the roots of your plants and then add more soil! For a full tutorial visit Container Gardening.
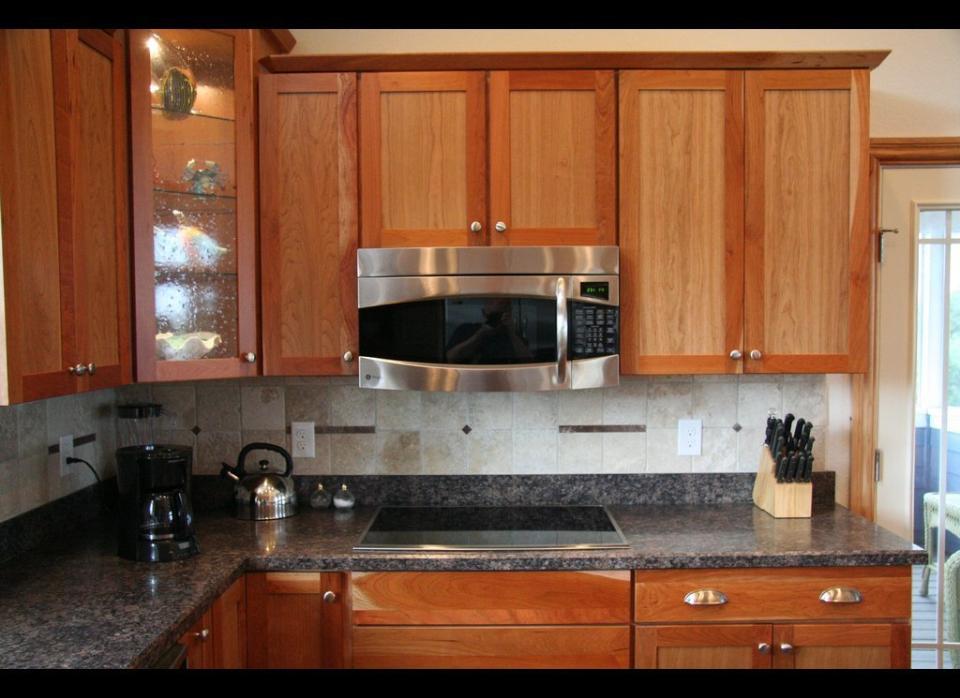
Reface Your Kitchen Cabinets
Instead of gutting and rebuilding your kitchen cabinets, why not just reface them? First, remove all the cabinet doors. Then fill any depressions with wood putty and sand it smooth. Next, clean your cabinets with mild soap and water. Pre-cut plywood panels to the size of your cabinets and then apply carpenter's glue to one side. Apply the panels to the pre-existing cabinet with nails. Then, add self-adhesive covering and trim to the cabinets. Finally, sand inside your cabinets and install your doors. For a full tutorial, watch this video from Cabinet Doors Depot.
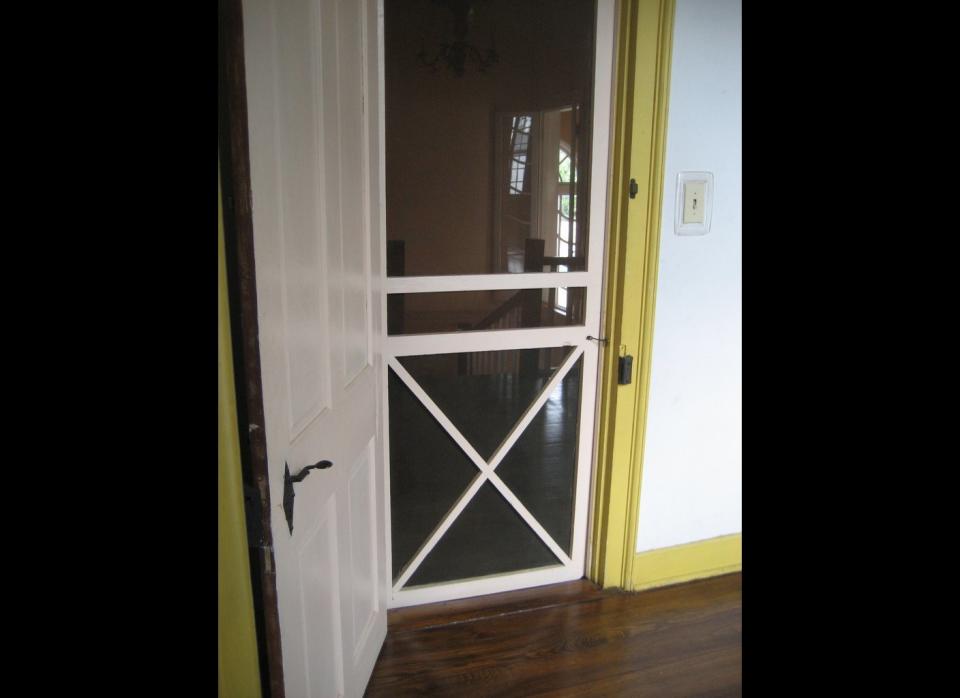
Repair A Ripped Screen
Having a tear in your screen door or window during the summer is a bummer, because it allows bugs to sneak in your home. To fix this problem, cut a square around the rip in the screen using a utility knife, making it as small as possible while getting the whole tear. Then, lay wax paper under the screen. Center the patch over the tear, leaving a 1/2 inch extra on each side. Apply a small amount of glue around the hole you've made in the screen and apply the patch, spreading the glue using a wooden stick. Let it dry and it's all set! To see a full tutorial, visit Family Handy Man.
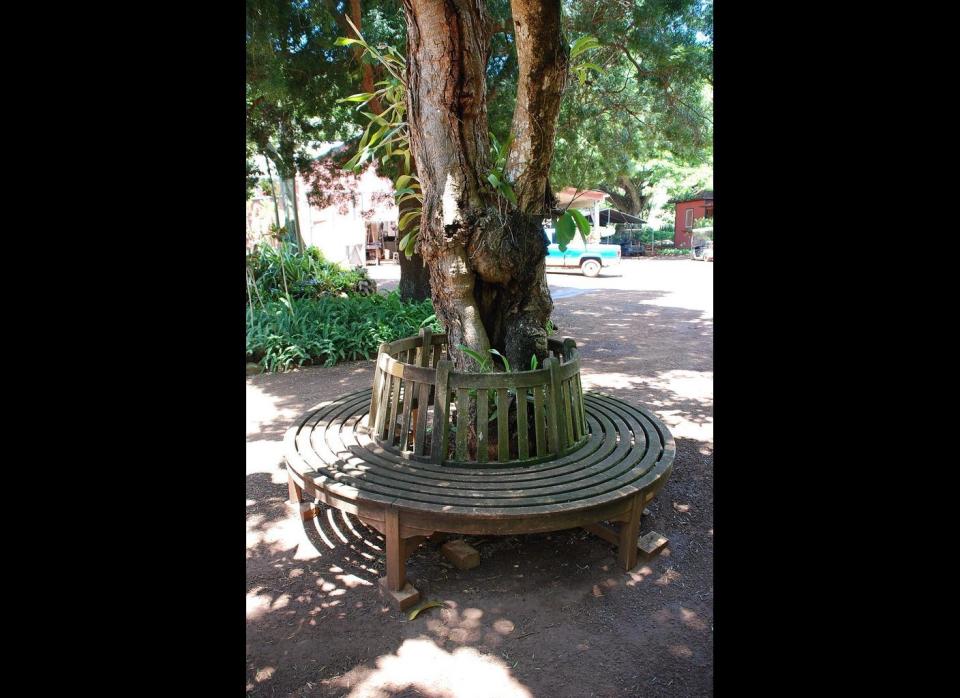
Build A Tree Bench
Building a tree bench is a great idea to stay cool and comfy this summer. First, measure the tree's width. Depending on the tree's age, you may need to add 6 or 12 inches to that size. Next, ensemble six pieces of lumbar with 30-degree meters on either end. Then, attach 18-inch scrap legs at the joints. Next, cut six inner seat boards and arrange in a hexagon. Finally, make 12 leg assemblies and backrests. For the full tutorial, visit This Old House.
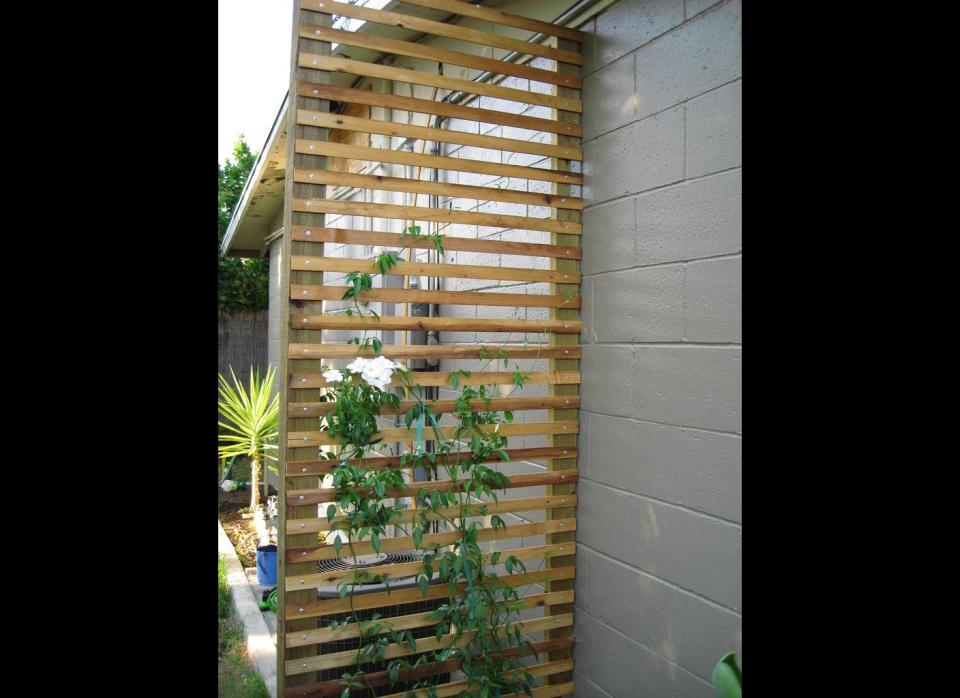
Build A Trellis
If you're looking to spruce up your garden or an outdoor wall a bit, a trellis is the perfect way. To make your own, first decide what size you'd like and purchase the amount of lattice and ply wood (this will be the frame) based on the those measurements. Next, you'll want to make notches where the frame will come together and then begin to assemble it. Then, use a power drill and screws to secure the frame together. Afterwards, lay the frame on the ground and place the lattice on it. The lattice should rest on a notch in between your frame, so it is important to get the measurements correct. Then, use the drill to secure the lattice to the frame and attach back-stops to keep it in place. Next, install the caps (the top portion of the trellis), using a drill. Then, dig holes where the lattice will be placed, install the trellis and fill the holes with gravel and soil to keep it in place. For a full tutorial, head over to This Old House.
Former NBA guard Darius Morris has died at the age of 33. He played for five teams during his four NBA seasons. Morris played college basketball at Michigan.
Affluent Americans may want to double-check how much of their bank deposits are protected by government-backed insurance. The rules governing trust accounts just changed.
With free agency and the draft behind us, what 32 teams look like today will likely be what they look like Week 1 and beyond for the 2024 season. Matt Harmon and Scott Pianowski reveal the post-draft fantasy power rankings. The duo break down the rankings in six tiers: Elite offensive ecosystems, teams on the cusp of being complete mixed bag ecosystems, offensive ecosystems with something to prove, offenses that could go either way, and offenses that are best to stay away from in fantasy.
It’s key to note that we’re not saying the “best team” or “best roster.” Instead, we’re talking about the best confluence of factors that can outline a path for survival and then success.
Jake Mintz & Jordan Shusterman discuss the Padres-Marlins trade that sent Luis Arraez to San Diego, as well as recap all the action from this weekend in baseball and send birthday wishes to hall-of-famer Willie Mays.
An annual government report offered a glimmer of good news for Social Security and a jolt of good news for Medicare even as both programs continue to be on pace to run dry next decade.
Budgeting apps can help you keep track of your finances, stick to a spending plan and reach your money goals. These are the best budget-tracking apps available right now.
Minneapolis Fed president Neel Kashkari said interest rates will likely stay at current levels for an "extended period" and didn't rule out a hike if inflation stalls near 3%.