Mix These DIY Techniques to Make the Cutest Living Valentine’s Day Gift
Valentine’s Day is right around the corner, so you’ve already made your dinner reservations, booked that horse-drawn carriage and planned that fabulous couple’s retreat, right??? Well, for those of us who aren’t the greatest at planning, or prefer at-home dates, we’re well-acquainted with the struggles of last-minute gift shopping. This year, get ahead of the game and choose to make your gifts. Here’s a super simple DIY that your sweetheart’s sure to love. Instead of flowers, we bought live plants and gave them some creative makeovers, including one technique we learned from our Wrapped Necklace Kit.

I’m a firm believer that a phenomenal house plant is a way cooler gift to receive than a bouquet of flowers, but I know how difficult it can be to find creative ways to deal with those bland plastic pots. With some hot glue, paint and rope, you can dress these puppies up without defaulting to boring old terra cotta! We’ll show you a few different techniques that you can combine to customize each plant for that special somebody.
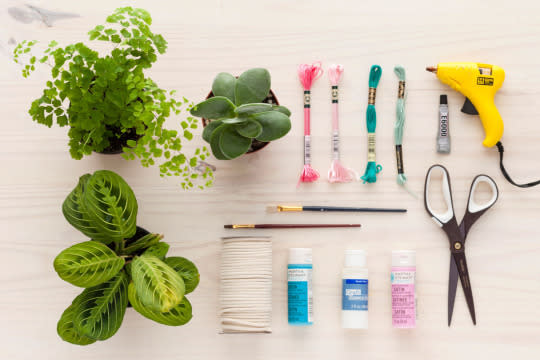
Materials:
— house plants
— embroidery floss
— E6000 glue
— hot glue gun
— paintbrushes
— rope
— acrylic paint
— scissors
Get your materials together and let’s get started!
PAINTED ROPE

Add a dab of hot glue to the bottom of the planter and position the end of your rope on top. Allow the rope to set before continuing. Wind the rope around the planter, making sure to add a dab of glue every so often to keep the rope in place.
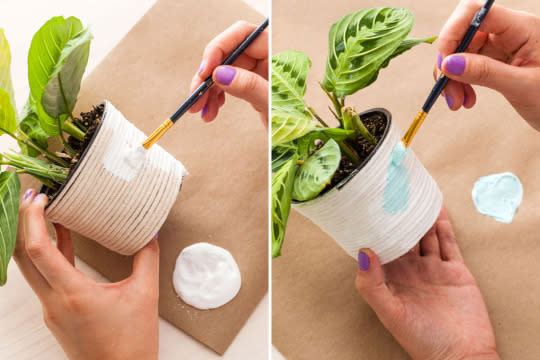
Once the glue has cooled, paint white acrylic paint all over the rope. This will give your planters a nice background to allow your colorful patterns to pop. Allow the white base coat to dry before painting on your patterns.
SPECKLED PAINT EFFECT
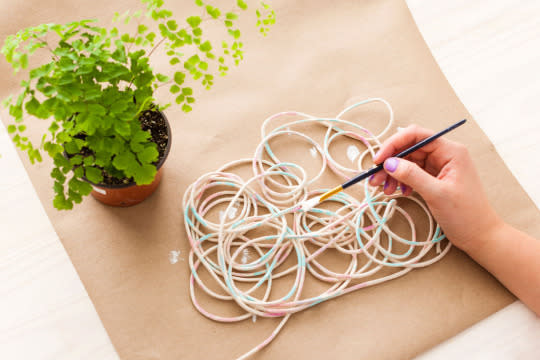
To create a random splatter effect, unwind a good amount of rope. Give yourself way more than you think you’ll need; any extra material can be used for more crafting :) Apply paint marks at random and allow the paint to completely dry before handling.

Add a dab of hot glue to the bottom of the planter and position the end of your rope on top. Allow the rope to set before continuing. Wind the rope around the planter, making sure to add a dab of glue every so often to keep the rope in place.
WRAPPED ROPE
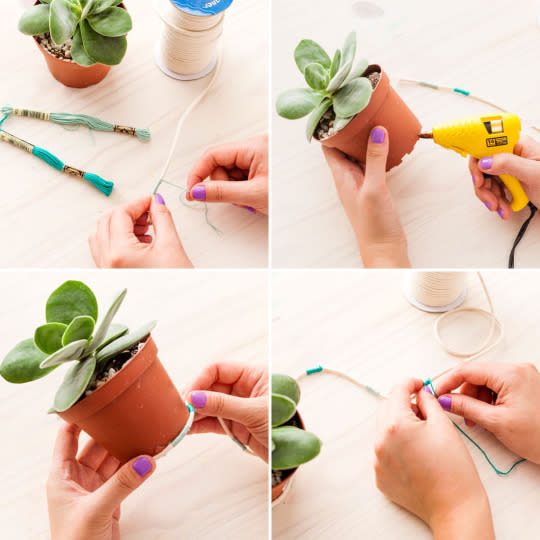
To make things easy, keep the rope intact until you’ve finished wrapping the planter. Begin by tying the embroidery floss onto the rope and carefully wrapping to create a color block about one inch long. Continue this process, being sure to leave varying lengths of blank spaces to create an overall random effect. Once you have a good start, add a dab of hot glue to the bottom of the planter, and position the end of your rope on top. Allow the rope to set before continuing. Wind the rope around the planter, making sure to add a dab of glue every so often to keep the rope in place. We left the rope intact so that we could continue adding color blocks as necessary.
TASSELS
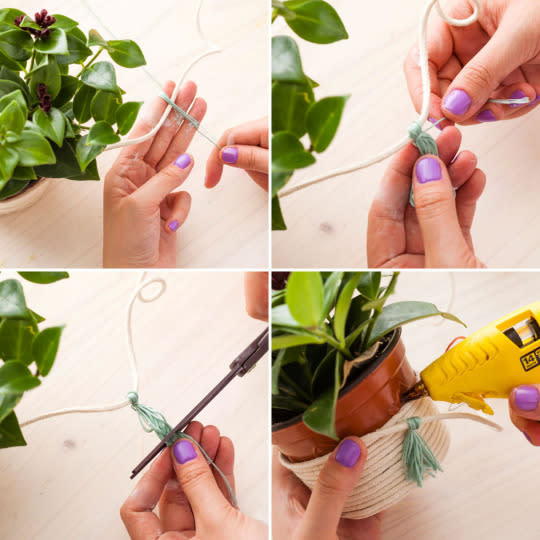
To make a tassel, wrap embroidery floss around your fingers about eight times. Trim and tie off the embroidery floss as close to the rope as possible. Cut the loop to create the tassel fringe, and continue winding the rope around the planter.
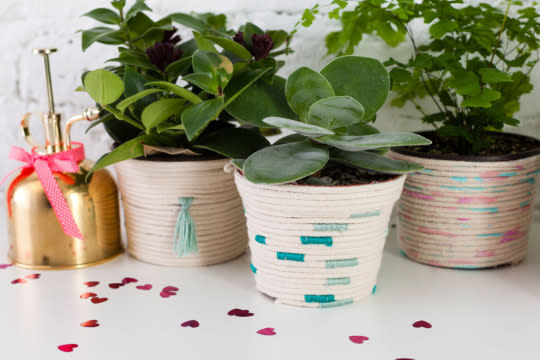
You’re all finished! Say hello to a totally fresh and unique Valentine’s (or Galentine’s!) Day gift.

And if you’re feeling extra generous, be sure to gift these dressed-up plants with our Wrapped Necklace Kit ;)
How are you adding your own DIY touch to your Valentine’s Day gifts? Show us your project by tagging us on Instagram and using the hashtag #iamcreative!
DIY Production and Styling: Marianne Koo
Photography: Brittany Griffin
