Making Your Own Soy Milk Is (Much) Easier Than You Think
Creamy, high-protein soy milk is a staple in Asia, where estimates peg 95% of the population as lactose-intolerant.
Related: Non-Dairy Milks: Which to Make, Which to Buy
Since soy milk is calcium-rich and contains the equivalent amount of protein as cow’s milk, it’s regarded as the closest match to dairy. That said, soy milk tastes different from dairy milk. While cow’s milk is very sweet, thanks to lactose (milk sugar), soy milk is more savory in flavor, with very subtle bean-y notes.
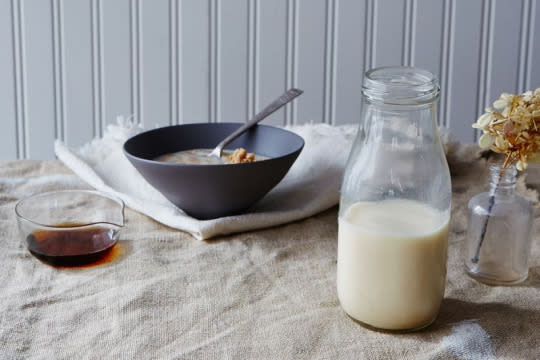
You can do it! We promise. (Photo: Bobbi Lin/Food52)
Related: Making Nut Milks at Home
Although packaged soy milk is readily available, homemade versions are ultra-fresh, plus customizable. You can control the ingredients and texture and decide whether to leave the milk plain, flavored, or fortified.
For the most versatile soy milk, leave it plain.
To flavor it, add 1/8 teaspoon of salt per 8-ounce serving and to sweeten it, also add 4 teaspoons agave nectar, honey, or maple syrup.
To fortify, add calcium tablets or protein powder to the finished soy milk, then blend. You can also accent the milk with spices (such as ground cinnamon), cocoa powder, green tea powder, and more.
Related: 10 Ways to Cook with Coconut Milk
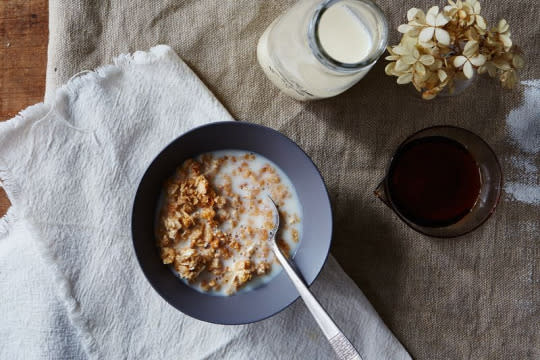
The perfect match for your morning cereal. (Photo: Bobbi Lin/Food52)
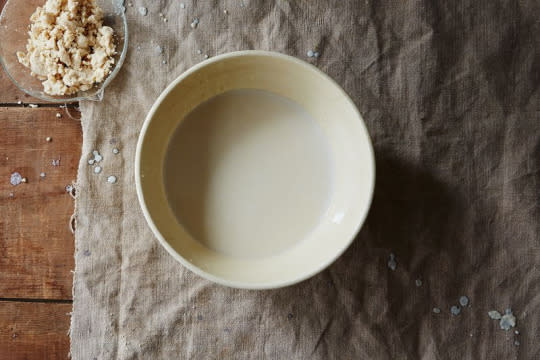
Drink your soy milk solo, add it to cereal or porridge, or incorporate it into puddings and smoothies. The soybean solids left over after straining (called okara) can be stirred into pancake or quick bread batter or smoothies, or combined with other ingredients (such as canned pumpkin) and shaped into patties.
Related: A Complete Guide to Nut, Seed & Grain Milks (& a Muesli Recipe to Get You Started)
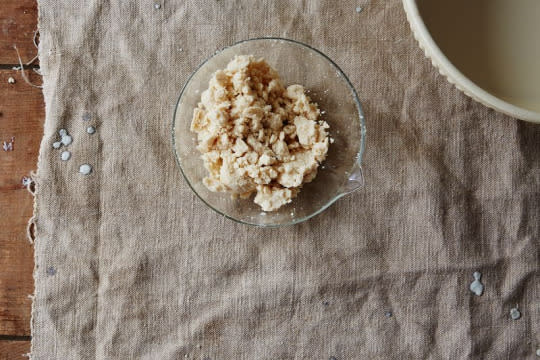
Okara a.k.a. soybean solids. (Photo: Bobbi Lin/Food52)
Here’s how to do it:
To make your own soy milk, you need just two ingredients: dried soybeans plus water. Look for dried soybeans that are organic or non-G.M.O. (since the soybean crop is particularly prone to genetic modification). You’ll also need a nut milk bag (which resembles a cross between cheesecloth and a pastry bag), a high-speed blender, and a pitcher. If you’re going to make soy milk all the time, consider springing for a soy milk machine, such as the Soyajoy G4. You can find all of these supplies at The New Milks website.
Related: 9 Unexpected Soy Pairings
[Editors’ Note: We used doubled-up cheesecloth instead of a nut milk bag and, while we endured some splatters, the process worked beautifully regardless, though we were left with perhaps more soybean solids than had we used a bag.]
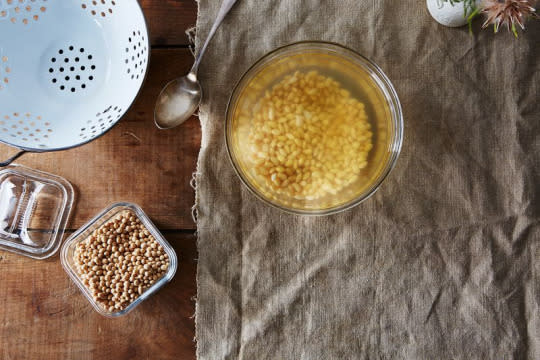
Dried soybeans (bottom left) and soybeans soaked for more than 12 hours. (Photo: Bobbi Lin/Food52)
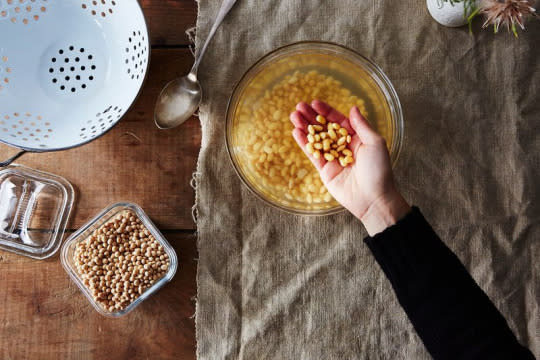
First, soak, then drain and rinse, the beans: Soaking the soybeans helps water penetrate into the legumes, resulting in a creamier, more homogenous milk. Soaking also helps remove or neutralize the phytic acid in soybeans, making the nutrients in the beans easier for the body to digest.
To soak, pour ½ cup dried soybeans into a medium bowl and cover with a few inches of water. Let sit for at least 8 hours, or overnight, at room temperature. (You will notice that the beans will almost triple in volume, to about 1 cup plus 6 tablespoons.)
Pour the beans into a colander positioned in the sink, then rinse and drain.
Compare the dried soybeans to the soaked ones—such plumpness! (Photo: Bobbi Lin/Food52)
At this point, you have 3 options for preparing the soy milk—Cook First, Cook Later, and Machine—all of which are described below.
For each method, I offer directions for how to strain it, but you have a choice: For ultra-thick, nutrient-dense milk with a porridge-like consistency, do not strain. For soy milk that is milk-like in consistency, strain.
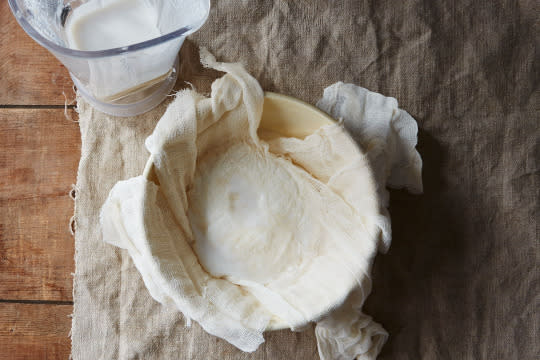

Straining and squeezing. (Photos: Bobbi Lin/Food52)
After straining, you should have between 2 and 4 cups of soy milk (you’ll get the most with the Machine technique, since it requires the most water). The Cook Later and Machine techniques should leave you with about ½ cup okara, whereas you will glean almost no soy milk solids from the Cook First method.
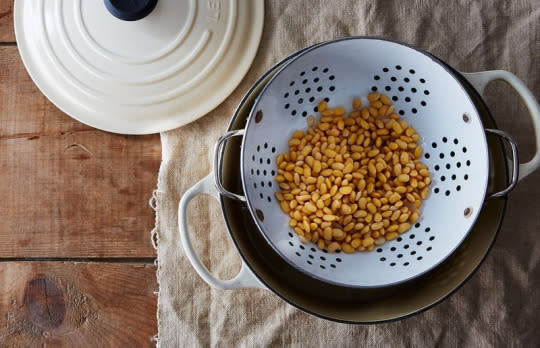
Use a steamer—or a hacked “steamer"—to cook beans ‘til tender. (Photo: Bobbi Lin/Food52)
Cook First
Although it takes the most time, this method (which is also the one pictured) is my favorite, since it yields the most velvety, complex, rounded soy milk. Although the aroma is bean-y, the soy milk itself is balanced and pleasantly nutty.
Homemade Soy Milk (Cook First Method)
Makes about 3 cups
½ cup dried soybeans (preferably organic and non-G.M.O.)
Salt, for seasoning (optional)
Maple, agave syrup, or honey, for sweetening (optional)
Bring a few inches of water to a boil in a medium saucepot.
Once the water is boiling, insert a steamer basket into the pot. [Editors’ note: We hacked our own steamer, using a colander sitting in a few inches of water in a heavy Dutch oven with a lid.]
Pour beans into the insert, cover, and steam over medium-low heat until slightly tender, about 1 hour (you might need to add more water to the pot during this process). You can also boil the beans, or cook them in a slow cooker or pressure cooker.
Add beans to a high-speed blender, with about 3 cups water. Cover and blend until smooth, 1 to 2 minutes. Position a nut milk bag over a large bowl. Pour the bean mixture into the bag and close the bag. Wait for the mixture to cool to room temperature, about 20 minutes (to avoid burning your hands). Squeeze the nut milk bag repeatedly, wringing out the soy milk. [Editors’ note: We waited for the beans to cool before blending them with the water. That worked, too!]

Before blending. (Photo: Bobbi Lin/Food52)
Cook Later
This is the fastest, most popular technique, in part since there is no lag time waiting for the mixture to cool before straining. That said, I find it yields a thinner and less flavorful, slightly more raw-tasting milk.
First, add the soaked beans to a high-speed blender, along with about 3 cups of warm water.
Purée until smooth, 1 to 2 minutes.
Position a nut milk bag over a large bowl. Pour the bean mixture into the bag, and close the bag. Squeeze the nut milk bag repeatedly, wringing out the soy milk.
Pour the soy milk into a deep, small to medium saucepot, and bring to a boil over medium-high heat (watch carefully, to avoid a boil-over). Once the milk comes to a boil, immediately reduce to medium-low heat. Simmer for about 15 to 20 minutes, stirring occasionally.

After blending! (Photo: Bobbi Lin/Food52)
Machine
This is the easiest technique, and yields a soy milk most similar to packaged varieties.
Add soaked beans to a soy milk machine.
Pour in about 6 cups of water (the machine’s specified range is about 6 to 8 cups).
Hit the “soaked beans” button, and the appliance will turn on, cooking the beans and processing them into soy milk, 25 to 33 minutes (less if you use hot water).
Position a nut milk bag over a large bowl. Pour the bean mixture into the bag, and close the bag. Wait for the mixture to cool to room temperature, about 20 minutes.
Squeeze the nut milk bag repeatedly, wringing out the soy milk.
The finished product! (Photo: Bobbi Lin/Food52)
Save and print the recipe on Food52.
By Dina Cheney.
