5 DIY Ways to Use the Trendy Metal That Has Eclipsed Stainless Steel
Forget stainless steel! Move over, gold! Copper is the metal of choice these days — and we’re all about it.
With its earthy undertones and rustic appeal, the shimmer of copper is elegant without being extravagant, and it’s finding its way into decor and design everywhere.
We’ve come up with five subtle, DIY ways to add a little copper to your home.
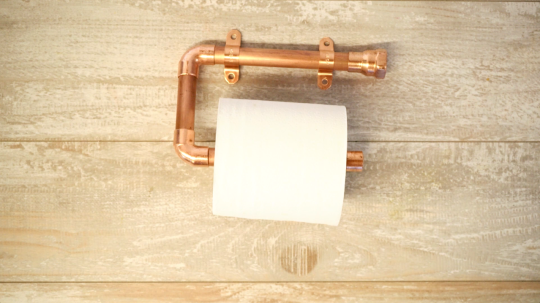
Copper pipe toilet paper holder
Have some copper pipe? Well, then you’ve got yourself a very chic toiler paper holder!
Materials:
2-foot copper pipe, ½ inch in diameter
2 copper right-angle elbow joints
Copper cap for ½-inch pipe
Copper female coupling for ½-inch pipe
2 copper U-straps
Tools:
Hacksaw
Scrub sponge
Small hammer or mallet
Instructions:
1. Scrub the copper with soap and water until it shines.
2. Saw the copper pipe into three pieces: one 6-inch piece, one 3- to 4-inch piece, and one 5-inch piece.
3. Attach the three pieces together with the right-angle copper elbow joints, using the 5-inch piece for the top and the 6-inch piece for the bottom. Tap with a hammer or mallet to make sure the pieces are well-connected.
4. Add the copper cap to the bottom pipe and the coupling to the end of the top pipe.
5. Hang the holder on the wall from the top pipe with the copper U-straps. The toilet paper roll slides over the bottom pipe.
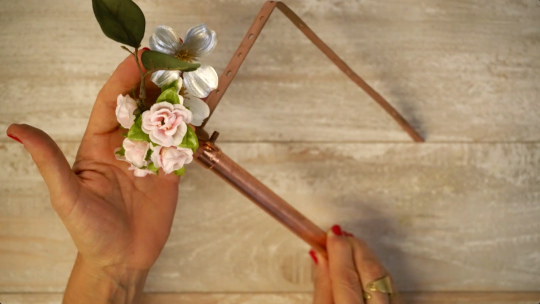
Copper bud vase
There’s something so delicate and beautifully simple about a single bud vase. When that vase is copper, the effect is even more stunning.
Materials:
Copper stub-out tube
Copper female coupling that fits stub-out tube
Copper Milford tubing hanger
Tools:
Phillips screwdriver
Rigid object with a right angle (such as a kitchen counter or block of wood)
Instructions:
1. Fit the female copper coupling onto the top opening of the stub-out tube so that the strapping for the Milford hanger will fit.
2. Using a rigid surface with a right angle, bend the long hanger part of the Milford hanger into a right angle (to fit against the wall).
3. Attach the stub-out tube to the Milford hanger strapping, securing the screws tightly with a screwdriver.
4. Attach to the wall securely; add water and flower bud.
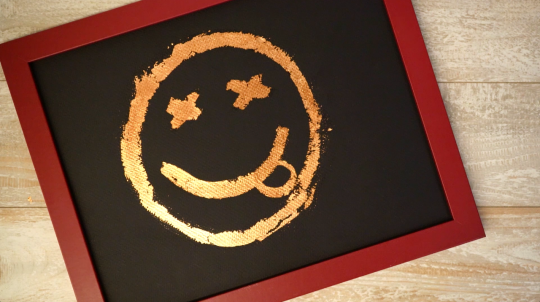
Copper foil leaf art
A framed piece of copper foil leaf art is a statement your home needs and wants!
Materials:
Copper foil leaf
Metal leaf adhesive sizing glue
2 small paintbrushes
Black card stock
Frame
Tools:
Scissors
Instructions:
1. Cut the card stock to fit your frame of choice.
2. Draw a design on the card stock with the sizing glue and let it sit for about five minutes.
3. Cut the copper foil leaves into strips.
4. When the sizing is tacky but not wet, place the copper foil strips face down over the sizing glue and rub the paper backing with your thumb to ensure the copper’s contact with the paper. Peel away the paper, leaving the copper stuck to the glue.
5. Continue this process until all of the glue is covered.
6. Gently brush away any excess copper with a very soft paintbrush until the design is the only thing left.
7. Place your new copper leaf art into the frame and display it in an area with light to bring out its reflection.
Related on Yahoo Makers: DIY Copper and Gold Foil Branches
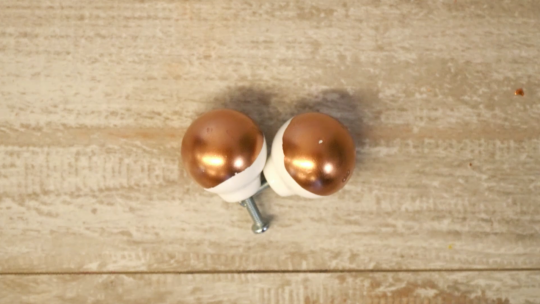
Copper-dipped drawer pulls
Turn a simple piece of furniture into something straight out of a high-end design boutique by adding a shimmer of copper to plain drawer pulls.
Materials:
Copper paint
Drawer pulls
Wire
Tools:
Paper cup cut into a shallow bowl
Wire snips
Instructions:
1. Pour some of the copper paint into the shallow paper cup.
2. Put the drawer pull’s screw into the hole in the pull and wrap a bit of wire around it so you can hang it to dry later.
3. Holding the drawer pull by the wire, dip it into the paint and roll it around, getting as much coverage as you would like. (Hint: We like to leave a bit of the original drawer pull showing; that way it has a “dipped” look.)
4. Hang it to dry so that the fresh paint isn’t touching anything.
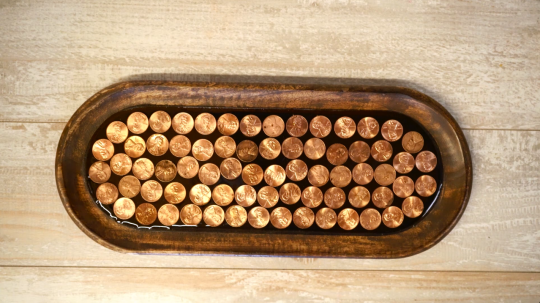
Copper penny tray
We love a good resin project! This tray is a great way to display the simple beauty of the often-overlooked copper penny.
Materials:
Pennies
Tray
Resin-based “bar coating” or lacquer
Tools:
Plastic cup with measurements on side
Stir sticks with a flat edge
Instructions:
1. Lay pennies out on the tray the way you want them to be displayed.
2. Mix resin according to the manufacturer’s directions and pour it over the pennies.
3. Let the tray dry thoroughly.
Also on Yahoo Makers:
Let Yahoo Makers inspire you every day! Join us on Facebook, Twitter, Instagram, Tumblr, and Pinterest.
