4 Place Cards That Are Sure to Point Your Guests in the Right Direction This Thanksgiving
Here are four DIY place cards that are sure to take any confusion out of the seating plan this Thanksgiving. For more information and great video content, please click the individual project links!
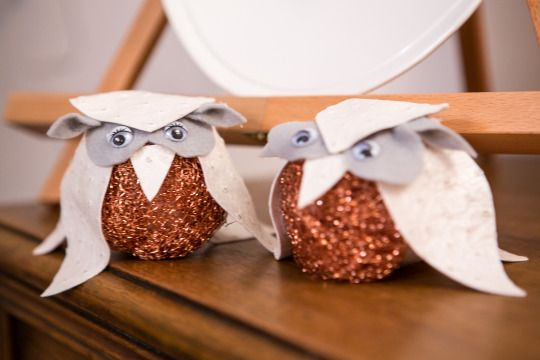
These charming, winged creatures are made from little more than vinyl, a Styrofoam ball, and a copper Brillo pad. They can be used simply as decor, or how about turning them into place cards, by writing the name of your guests on them. Now that would be a wise thing to do, indeed!
Materials:
3 in. Styrofoam Balls
White Alligator Vinyl
Copper Brillo Pad
Gray Felt
Googly Eyes
Tools:
Hot Glue Gun
Scissors
Sharpie
Related on Yahoo Makers: This Thanksgiving, Spell Out the Sentiment of the Season With DIY Letter Blocks
Instructions:
1. Flatten out your copper Brillo pad, and glue it to your Styrofoam ball.
2. Cut several teardrop shapes out of the alligator vinyl. These will serve as feathers.
3. Glue the “feathers” around the rest of the ball, leaving the Brillo pad un-feathered, so it acts as the breast of the owl.
4. Cut one larger, slightly more rounded teardrop from the vinyl, and glue it to the top of the ball, so that the point comes down onto the Brillo and the tops of the “feathers” are covered.
5. Cut a figure eight or B from the gray felt, and glue it to the top of the Brillo pad, so that the tip of the top teardrop drops down over it slightly.
6. Add a googly eye to each side of the B.
7. Cut a small triangle from the vinyl, and glue below the eyes to serve as a beak.
8. Cut two small triangles from the gray felt and pinch them in half with a dab of glue. Then glue them to the owl to serve as ears.
9. Write the name of your guest on the top of the owl.
Lots of leftover wine corks? Put them to good use this Thanksgiving by turning them into place cards. They’re rustic and playful, and with a little fall leaf and a feather or two, they’re just so pretty to look at.

Materials:
Wine corks
Feathers
Dark leaves
Gold pen
Pennies or nickels
Tools:
Awl
Hot glue
Instructions:
1. Hot glue a penny or nickel to the bottom of the cork, for weight.
2. Use an awl to poke a hole in the top of the cork and insert the quill of the feather.
Related on Yahoo Makers: How to DIY a Thanksgiving Place Card the Kids Will Love
3. Add another contrasting feather in the same hole.
4. Write the name of your guest on a leaf, in gold pen.
5. Use the awl to poke another hole for the leaf with the name, and insert the leaf.
Hint: Insert the leaf a a slightly horizontal angle, so the name can be read more easily.
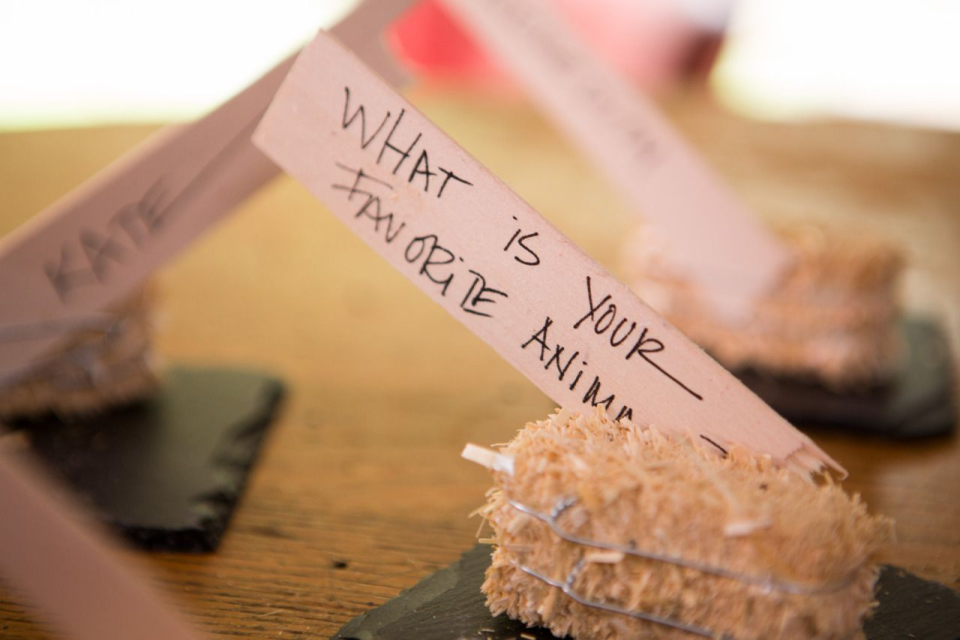
These tiny bale-of-hay-place cards have conversation-starting questions written on the back, so the kids are sure to have lots to talk about.
Materials:
Miniature Bales of Hay
Slate Coaster
Balsa Wood
Tools:
Hot Glue
Black Pen
Scissors
Related on Yahoo Makers: Skip the Store! Your Table Place Cards Are Sitting In Your Yard Right Now
Instructions:
1. Hot glue the bale of hay, on a diagonal, onto the slate coaster.
2. Break off a shard of balsa wood and write the name of your guest on one side and a conversation starter question on the other.
3. Wedge the balsa wood, with name facing forward, into the metal wire wraps around the mini bale of hay.
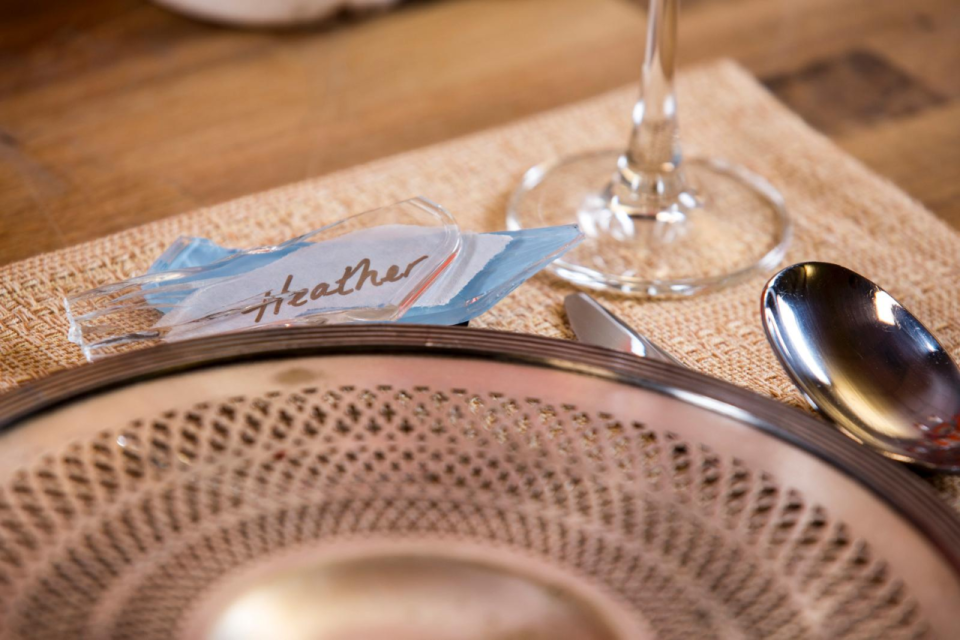
If you don’t happen to have access to sea glass, we can show you a way to cheat your own for these pretty DIY “sea glass”place card holders. It’s a great way to make use of broken glass, and if you don’t happen to have any on hand, go ahead - break a couple of inexpensive glass plates. It feels really good!
Materials:
2 glass plates
Light blue spray paint
Sanding block or sand paper
Parchment paper
Tools:
Hammer
Instructions:
1. Spray paint the back of one plate and allow it to dry.
2. Using your hammer, tap the center of the plate forcefully to break it.
3. Break your remaining, unpainted plate.
4. Sand the edges of the “sea glass” with your sanding paper or block.
5. Write names on torn parchment and lay the paper between two pieces of glass. The colored on the bottom and the plain glass on top!
Also on Yahoo Makers:
Let Yahoo Makers inspire you every day! Join us on Facebook, Twitter, Instagram, Tumblr, and Pinterest.

