Visible Mending Is a Beautiful Way to Repair Your Clothes—Here are the Basics

TABLE OF CONTENTS
On This Page
Stitches
Patching Holes
Applique
Darning
In antique shops, you'll often find vintage tablecloths that have been patched by hand, a charming sign of the item's long, happy life. These days, as we think more about sustainability, we're coming back to the idea of visible mending, and making it stand out with high-impact patches and stitches. And we're not alone—there are currently more than 128,000 Instagram posts tagged #visiblemending.
With the techniques here, you not only extend the usefulness of a piece but also give it a custom look entirely your own. Get our helpful visible mending tutorials for patching clothing, adding appliqués, and darning socks. Learning how to use visible mending requires just a few inexpensive materials and basic embroidery stitches. Inspired by the Japanese art of Sashiko mending with visible stitches, these bold ideas will help you repair your clothes and linens in a truly beautiful way.
Related: 19 More Craft Techniques to Try This Weekend

Carson Downing
Visible Mending Stitches
As you mend, don't worry about every stitch being identical. Freestyling will result in a handmade effect.
Running Stitch
This stitch is so easy that you may have learned it as a kid. Poke a needle through the fabric from back to front then down again about 1/4-inch away; repeat in a straight (or straightish) line.

Crossed Straight-Stitch
Not to be mistaken with cross-stitch, this is a series of horizontal running stitches covered by vertical running stitches.

Seed Stitch
This is a series of running stitches going in random directions rather than a straight line.

Carson Downing
How To Patch Holes in Denim Jackets or Jeans
Supplies Needed
Item to mend
Fabric
Scissors
Fabric glue stick
Straight pins
Needle
Embroidery floss
Step 1: Prepare Patch
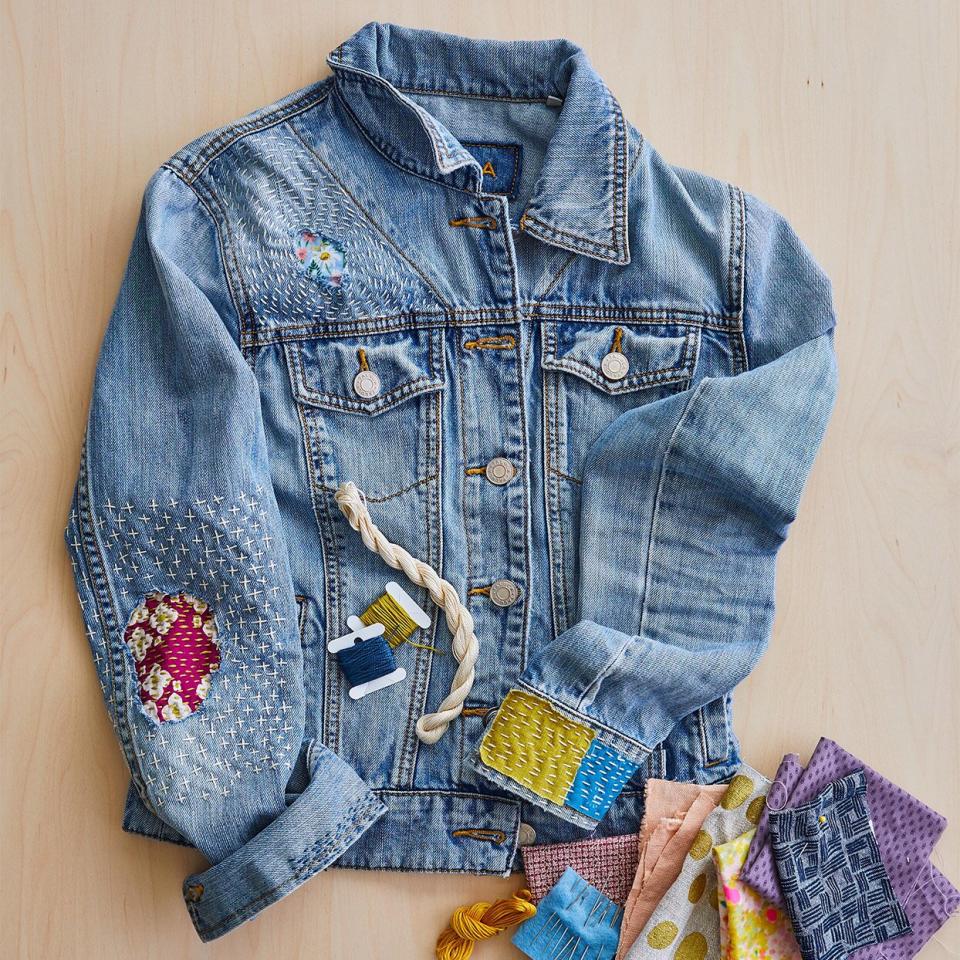
Patch holes in a denim jacket or jeans with fabrics that reflect your personal style. Extending decorative stitching beyond the patch makes it stand out. To begin, clean up any messy strings around the hole using scissors. Cut a fabric patch ½-inch larger on all sides than the hole. Turn the jacket or jeans inside out.
Step 2: Attach Patch
Attach the patch to the hole using a fabric glue stick ($3, Joann). Reinforce the patch with sewing pins ($3, Walmart) and ensure the right side of the fabric faces out through the hole. Turn the item right side out.
Step 3: Add Decorative Stitches
Thread a regular sewing needle ($3 for a five-pack, Walmart) with embroidery floss and knot at one end. Start on the backside of the fabric with a series of horizontal running stitches. Create a new stitch every ¼ inch. Overlap the hole by a few inches on each side. Repeat the process with a series of vertical running stitches so the visible threads create small plus signs. Knot thread when finished.
Related: Our Helpful Guide to Sewing Basics

Carson Downing
How to Applique Patch
Supplies Needed
Freezer Paper
Fabric
Scissors
Iron
Fabric glue stick
Needle
Thread
Tweezers
Step 1: Prepare Patch
To cover and reinforce holes try an appliqué method for a seamless appearance. Iron a circle of freezer paper ($5, Target) shiny side down to the wrong side of patch fabric; cut out fabric, leaving ¼-inch allowance around freezer paper. Dab a fabric glue stick onto freezer paper; press over the hole.
Step 2: Stitch Patch
Working around the circle, fold fabric's ¼-inch allowance under the paper and whipstitch the outer edge of the circle to what you are mending. (Try not to stitch through paper.) When there's ½-inch left unsewn, pull out the paper with tweezers. Sew up hole.
Related: 46 Easy Sewing Projects Anyone Can Make

Carson Downing
How to Darn a Sock
Supplies Needed
Wool or cotton socks
Cotton crochet thread, embroidery floss, or wool yarn
Needle
Darning egg or darning mushroom
Put a kick in old socks or sweaters by covering up holes with vibrant yarn. Visible mending darning is an easy-to-master technique; you can get through a pair of socks while watching a TV show.
Step 1: Sew Vertical Stitches
Trim the hole to remove excess threads. Place a wood darning egg ($10, Etsy), a wood darning mushroom ($13, Etsy), or even a tennis ball inside the sock behind the hole. This helps maintain the sock's shape as you mend. Thread needle with yarn, embroidery floss, or thread. For wool socks, use wool yarn. For cotton ones, cotton crochet thread or embroidery floss works. Sew rows of vertical running stitches back and forth at least ½-inch beyond hole on all sides, taking long stitches over the hole.
Step 2: Repeat Horizontally
Repeat the process horizontally, weaving the thread over and under the long stitches, until you've completely covered the hole. Weave in ends of yarn and trim.

