Tie-Dye Nails Are the Cutest Summer Trend — And They're Easier Than You Think
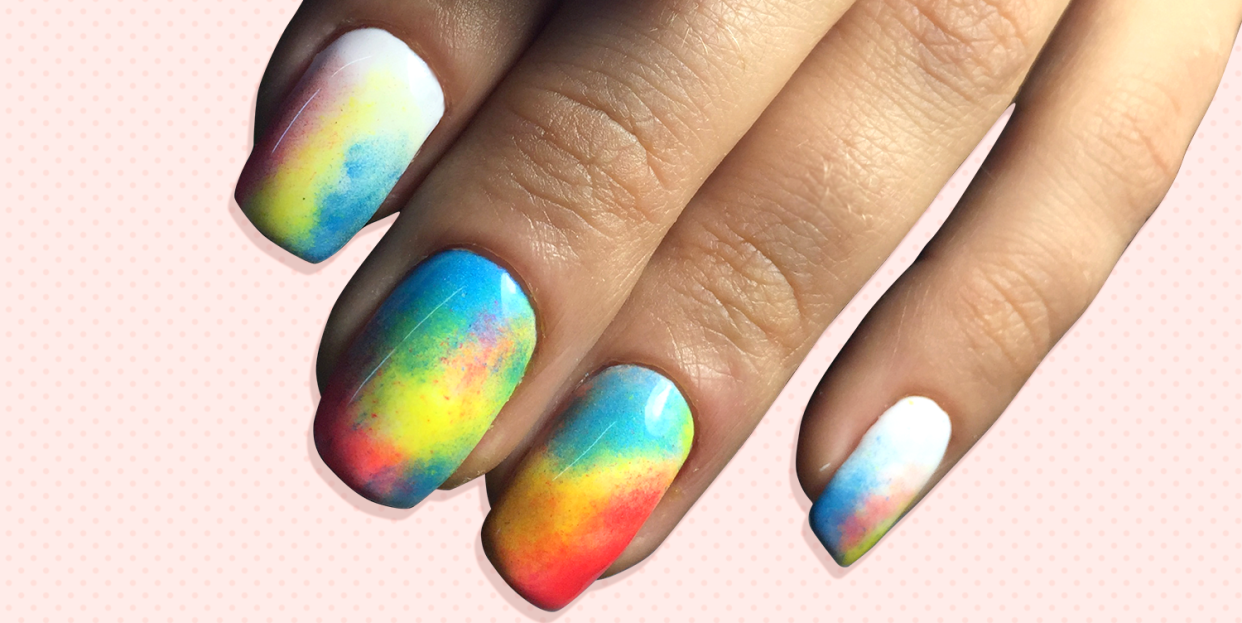
Summer is the perfect time to start experimenting with fun nail art, and one trend that's emerging this season is tie-dye! Yep, the abstract design that you've been attempting on your sweats has now made its way to becoming a beauty trend.
Tie-dye nails aren't hard to achieve. "What I love about tie-dye nails is that you don't really need any fancy tools to achieve a cool effect," nail artist Chelsea King says. "I always recommend a cleanup nail brush because it’s great for fixing any mistakes around the cuticle," she adds, "but it's also handy for achieving this watercolor tie dye effect."
As for colors, start with a nice white nail polish or neutral shade for a base. For the actual tie-dye effect, King says she prefers using contrasting pastel colors to make the design pop, while nail artist Alicia Torello says she likes using shades of the same color family — you can't go wrong either way. Here's how to do the nail trend right at home with any nail polish of your choice, even if you're a beginner.
How to do tie-dye nails with a sponge or brush
What you need:
A base coat
One neutral base color
Two or more colored nail polish
A cleanup nail brush or small makeup sponge
Start with a base coat and let dry.
Apply two coats of a neutral color for the base, let dry.
Using the brush straight from one colored bottle, apply a few dots on the nail.
Immediately take a nail brush or small makeup sponge dipped in nail polish remover and tap it onto the dots to blur out the colors.
Repeat the process with a second color. Let dry.
Apply a top coat.
How to do tie-dye nails with a toothpick
What you need:
A base coat
One neutral base color
Three or more colored nail polish
A toothpick
A post shared by HARD AS NAILS STUDIO (@hardasnails.studio) on Apr 23, 2020 at 8:59am PDT
Start with a base coat.
Apply two coats of a base color. Let dry.
Paint thick stripes on the nail with three colors or more.
Before it dries, get a toothpick and drag a line through the colors. "It should pull each color into the next and create a tie-dye effect," says King.
Let dry, then add a top coat.
How to do tie-dye nails with the water marble technique
Torello says the water marbling technique is also an easy way to create tie-dye nails. "It's a little messy, but the outcome is great and you don’t have to stress about using fancy tools or struggling when you have to work on your dominant hand," Torello says.
You need to work quickly during this process, as the polish will dry fast. "Untwist the tops so they’re ready to go," Torello recommends.
What you need:
Scotch tape
A clean up brush
A bowl of warm water
A toothpick
Your nail polish of choice
Clouds and ✨ for @rubycaster using @the_gelbottle_inc
A post shared by Alicia Torello (@aliciatnails) on Jan 6, 2020 at 8:21am PST
Paint two coats of a base color on your nails. Once dry, apply tape as close as you can to the sides of your nails and cuticles.
Take your first color and drop a bead of polish in the center. Continue with each of your other colors, dropping one color one top of the other.
Take your toothpick and gently pull from the outside of the polish circle towards the center. "You don’t need to pull it in too far," Torello says.
Dip your nail into the design. Before you pull your nail out, take your toothpick and swirl in the polish thats around your nail to remove the polish from the water. This helps to keep the polish off your finger.
Continue on all nails. When you're done, take off the tape and clean up with your brush and remover. Finally, add a top coat.
How to do tie-dye nails with gel polish
This tutorial by nail artist Galina Sadovenko might require a little more patience and skill, but the results are immaculate.
What you need:
A fine nail art brush
White nail polish
Your nail polish of choice
A post shared by Galina S. (@yagala) on May 26, 2020 at 4:28am PDT
Paint two coats of a white base color on your nails. Let dry.
Take your first color with your nail brush and draw a large "C" shape starting from the bottom of your nail, using small, vertical strokes.
Take a second color and draw around the "C" shape, using the same vertical strokes.
Continue this pattern in and around the "C" shape until you cover the entire nail area.
Let dry, then apply a top coat.
You Might Also Like

