Starlight, Starbright… Night Sky Photography in Utah’s National Parks
This article originally appeared on My Utah Parks
When the sun goes down, the crowds disappear but some of the best views to be found in our national parks are still yet to come. All five of Utah's national parks are International Dark Sky Parks, meaning they have exceptionally dark skies and are protected from light pollution. This makes them the perfect place to break out your camera and try your hand at capturing the stars above and even the Milky Way. Check out our favorite night sky photography opportunities.
Zion National Park
When the sun goes down, the crowds disappear at Utah's most-visited national park.
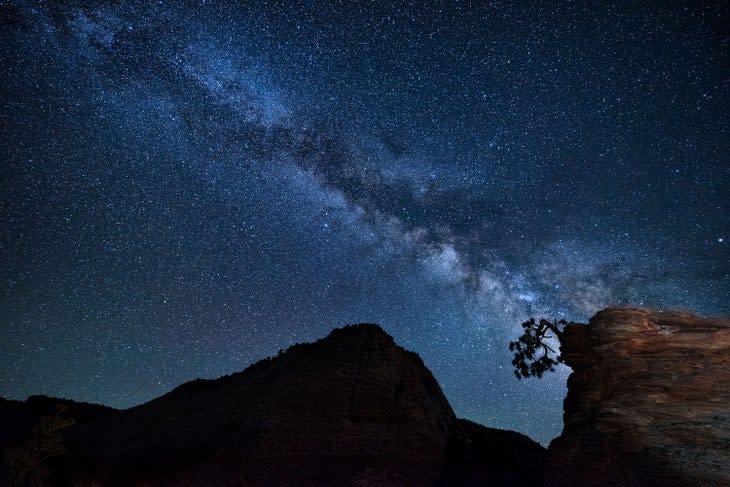
While you're waiting for the Milky Way to rise, start on the park's east side. The area surrounding Checkerboard Mesa makes for a great, semi-flat spot to set up your tripod to take photos of the stars. Make sure to bring a headlamp equipped with a red light to help preserve your night vision for the walk to wherever you choose to set up. Heading west on Hwy. 9, look for a lone pine tree growing out of a rock formation. It will be on the left-hand side of the road before you get to the Zion-Mount Carmel Tunnel. This often-photographed tree is a great subject to try light painting on.
When the Milky Way rises, head to the intersection of Zion Scenic Canyon Drive and Zion-Mount Carmel Highway to photograph the Milky Way over the peak called the Watchman, with the Virgin River in the foreground.
Bryce Canyon National Park

Seeing the Milky Way arch over Bryce Canyon's hoodoos is a truly special experience. Because Bryce Canyon sits at a higher elevation than the rest of Utah's national parks and is far away from civilization, it has incredible night sky visibility. On the flip side, the high elevation means temperatures will be cold at night, even in the summer months. Make sure to bring a jacket and a hat, as well as a thin pair of gloves that will still let you operate your camera.
It's safest not to go too far past the rim after dark since the trails into the canyon are steep and slippery in places. For unobstructed views over the canyon, head to Inspiration, Sunset or Sunrise Points. For an interesting foreground element, photograph at Natural Bridge Overlook where you'll see the stars over and under this unique formation. Bryce Canyon is a great place to try light painting on the hoodoos if you hike past the rim.
Arches National Park

Arches is an incredible place for night skies photography because the rock formations provide unique foreground elements that will give your images a sense of place. Many of these rock formations are visible from pull outs or parking lots, making it easy to set up after dark.
Because the town of Moab is nearby, for the darkest skies shoot facing north. Balanced Rock, the Windows and Garden of Eden Viewpoint--all located along the Windows Road--are great choices, and just a bit farther north Panorama Point offers great views as well.
Light painting is not allowed at Arches, so you cannot illuminate the rock formations on your own, but if you set up in a pull-off near a road, chances are a passing car's headlights might light up the rock for you. There is lots of "living soil" at Arches National Park. Learn how to identify it and make sure you don't step on it in the dark.
Canyonlands National Park
Located close to Arches National Park, a weekend spent in this part of Utah is a great way to get lots of diverse night photos. It's important to note that Canyonlands is divided into three districts. Island in the Sky is the closest to Moab and offers sweeping views of the surrounding landscape.
If you arrive early in the evening, start at Shafer Canyon Overlook where you might catch the headlights of straggling 4×4 vehicles as they make their way up Shafer Trail. If you're up for a hike, Mesa Arch is a great place to photograph the stars. It's a 0.6-mile roundtrip hike to an arch with stunning views of the surrounding formations under it. A favorite place for sunrise photography, it's also a great spot to capture the stars over and under the arch.
Light painting is not allowed at Canyonlands National Park. If you want to shoot amongst the rock formations instead of above them, head to the Needles District, 1.5 hours from Moab.
Capitol Reef National Park
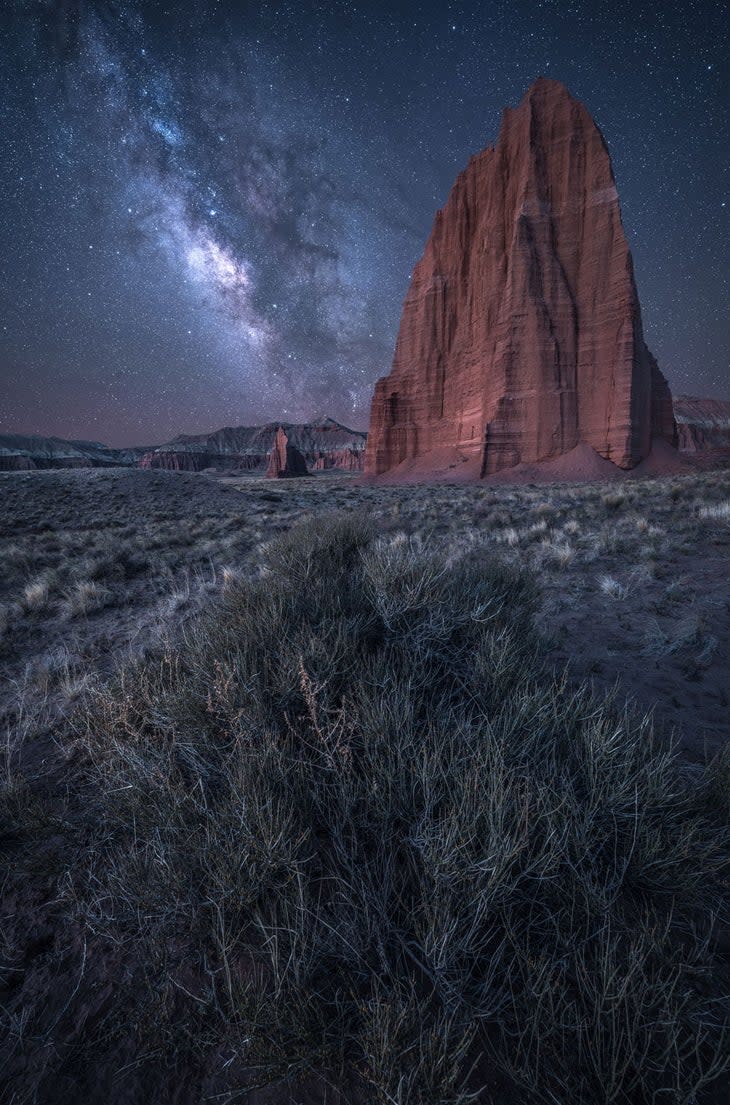
With lots of isolated peaks and rock formations, Capitol Reef is a great place for night photography. For a true adventure, many photographers plan a multi-day trip and drive the 57-mile Cathedral Valley Loop which needs a high-clearance vehicle to pass through the dirt roads. Camp at the primitive Cathedral Valley Campground to capture the Temple of the Sun and Temple of the Moon formations against the night sky.
For a less off-the-beaten path experience, drive along the Capitol Reef Scenic Drive where there are numerous pull-outs with stunning views of the park's rock formations.
These tips were sponsored by Tamron. Learn more and find your perfect camera lens at tamron-usa.com.
Tamron's Tips for Night Photography
Use an app like PhotoPills or Sky Guide to figure out where and when the Milky Way will be visible. Choose a night close to a new moon for the darkest skies.
Familiarize yourself with your camera and settings before you set off. Practice adjusting your settings at home in the dark first. Scout your location during daylight hours to fine-tune the details.
A fast aperture, wide angle lens like a Tamron 17-28mm F 2.8 for full-frame or 11-20mm F2.8 for crop-sensor is best for night photography. Settings will vary based on conditions, but you'll likely want to shoot at F2.8 at an ISO between 1600-6400 and a shutter speed between 10 and 30 seconds. Be sure to have a stable tripod and shutter release or remote timer so you don't shake your camera while taking a long exposure, and turn off your lens' image stabilization.
You'll likely need to manually focus as your auto-focus won't be effective in the dark. Use the magnifier on your camera's LCD screen to enlarge a bright star or planet, then move your focus ring back and forth until the point of light is sharp. Zoom in on your first few images to make sure the stars are sharp. You can use a piece of tape to secure the focus ring, so you don't accidentally bump it out of focus.
For exclusive access to all of our fitness, gear, adventure, and travel stories, plus discounts on trips, events, and gear, sign up for Outside+ today.

