How to Keep 3D Prints From Looking Like Spaghetti
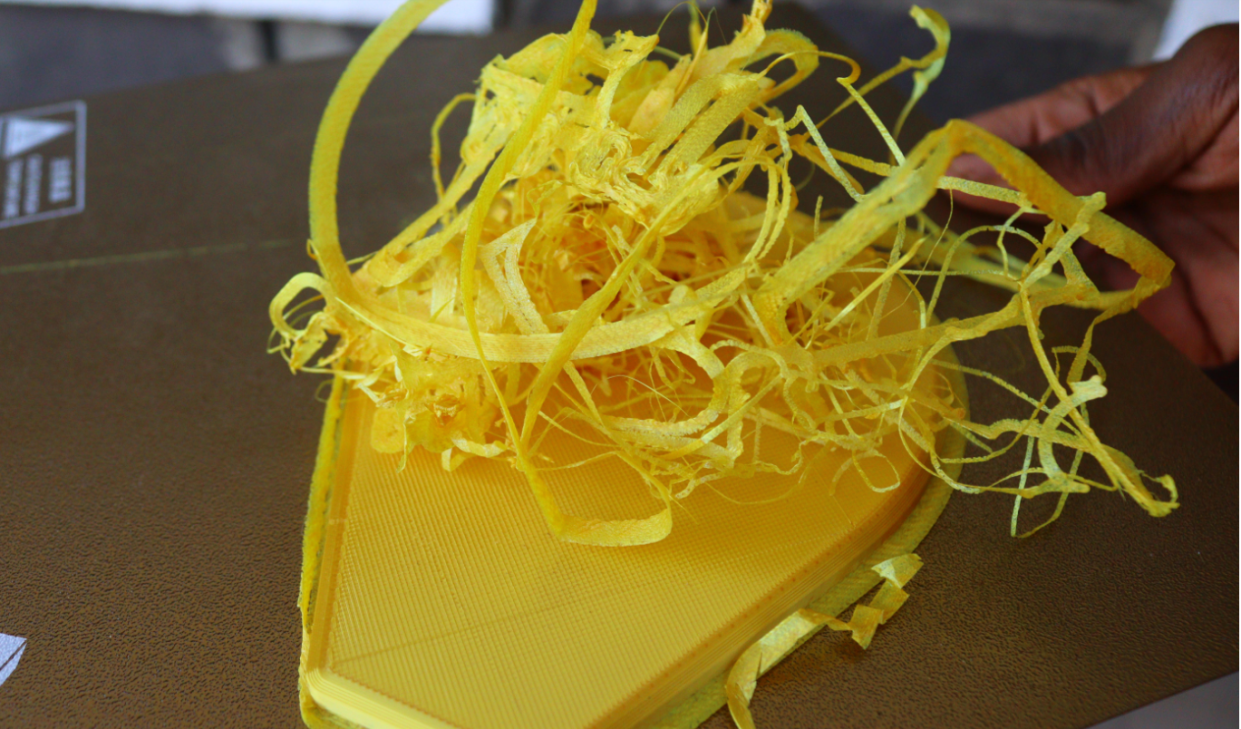
If you have ever experienced 3D prints that resemble a tangled mess of strings, the 3D printer was likely suffering from "spaghetti 3D prints" – a common issue 3D printer hobbyists face during the 3D printing process. It occurs when excess filament oozes out of the nozzle and causes a tangled mess on the build plate. This can happen even on the best 3D printers and even with the best filaments.
In most cases, these 3D prints are unusable. However, there are some cases where it is possible to salvage them by removing the excess filament, especially if it occurred just before you finish the printing process. Just like in other 3D printing issues, you need to figure out what is causing the problem so that you have a strategy for fixing it. Below are the leading causes of spaghetti 3D prints and the steps you can take to fix them.
1. High Temperatures
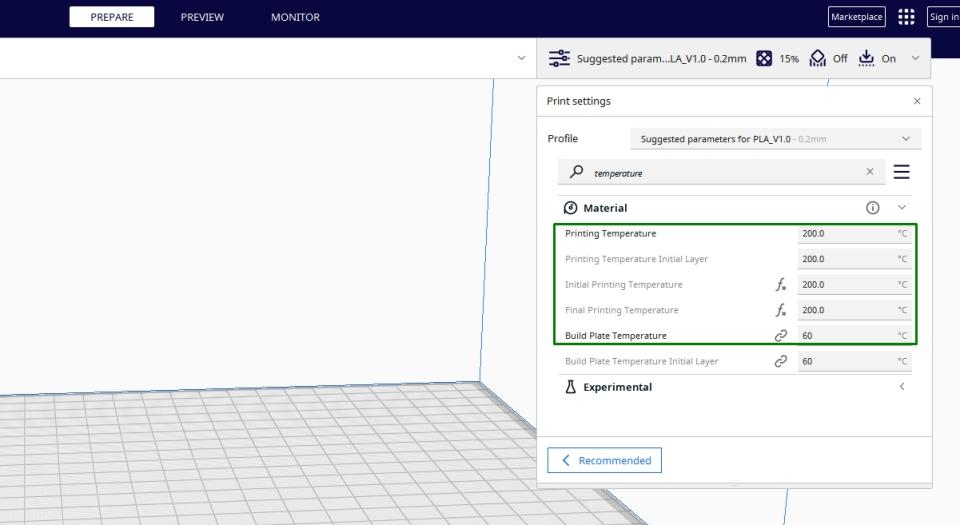
If the temperature is too high, the filament will become liquid and ooze out. So it’s essential to know the ideal temperature of the material that you are using and ensure you set it correctly. The perfect temperature for a specific material will vary depending on the filament type and brand. PLA filament, for example, generally requires a temperature of 180-220°C, while ABS filament requires a temperature of around 210-250°C. So in case you use a higher than that, you will face issues down the road.
You can adjust the temperature in your slicer. In Cura, for example, you can select Temperature from the Materials section and adjust it accordingly. In my case, it is set to 200 as I am using PLA.

You can also 3D print a test model like the smart compact temperature calibration tower and use it to see how your machine 3D prints filament in different temperatures so you can decide the best to use.
In addition to setting the temperature correctly, it is essential to calibrate the extruder properly to ensure the filament melts and extrudes correctly.
2. Poor Bed Adhesion
Bed adhesion is the design's first layer's ability to be 3D printed to adhere securely to the build plate. If the print doesn’t stick properly, the model will be shifted or detached from the bed, and as the extruder moves around, it will extrude the filament all over, resulting in a failed print.
So to solve this, you need to use an adhesive, glue, or hairspray to ensure that the first layer of the material properly adheres to the bed.
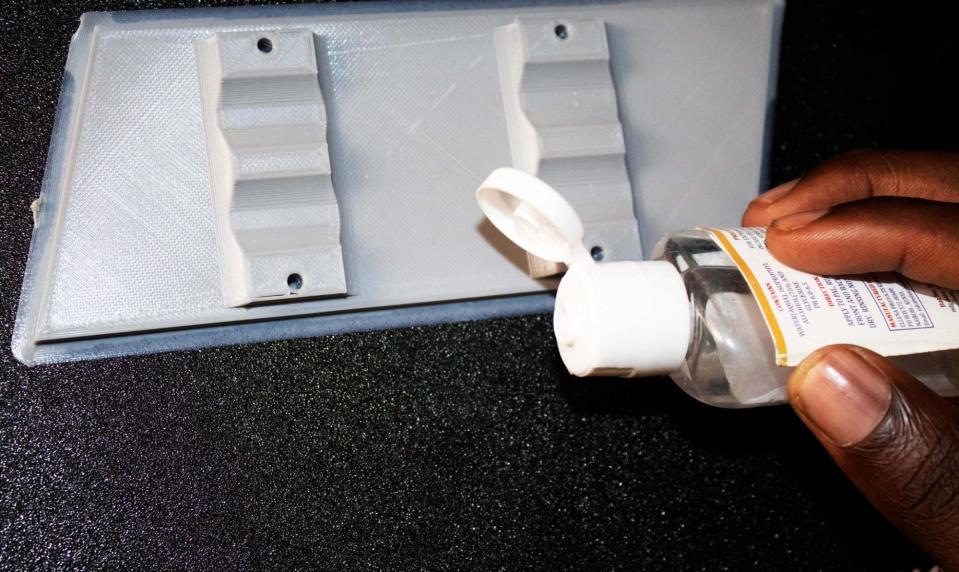
Proper bed adhesion is also essential for maintaining a consistent layer height as you will have a consistent layer heights, which leads to better print quality.
3. Filament Jam or Clog
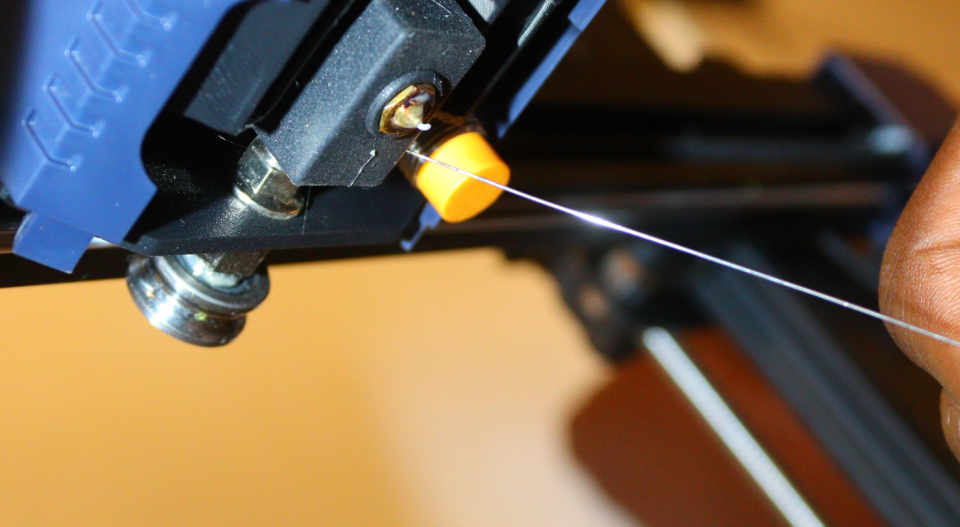
When the hotend of the extruder gets clogged, it disrupts the smooth flow of filament through the extruder and nozzle, resulting in inconsistent extrusion and improper filament deposition. Your nozzle can be jammed because of many factors. One of them is if you are using the wrong filament diameter and it doesn't match the nozzle.
The extrusion system of a 3D printer is designed to accommodate a specific filament diameter. If you use a filament with a larger or smaller diameter than what the printer is designed for, it may not properly fit or feed through the extruder assembly. This can cause the filament to get stuck, leading to a nozzle jam.
Filament containing moisture or a lot dust and foreign particles can cause clogs and even blockages in the extruder. So it’s important to always inspect and clean the nozzle regularly to remove debris and residue.
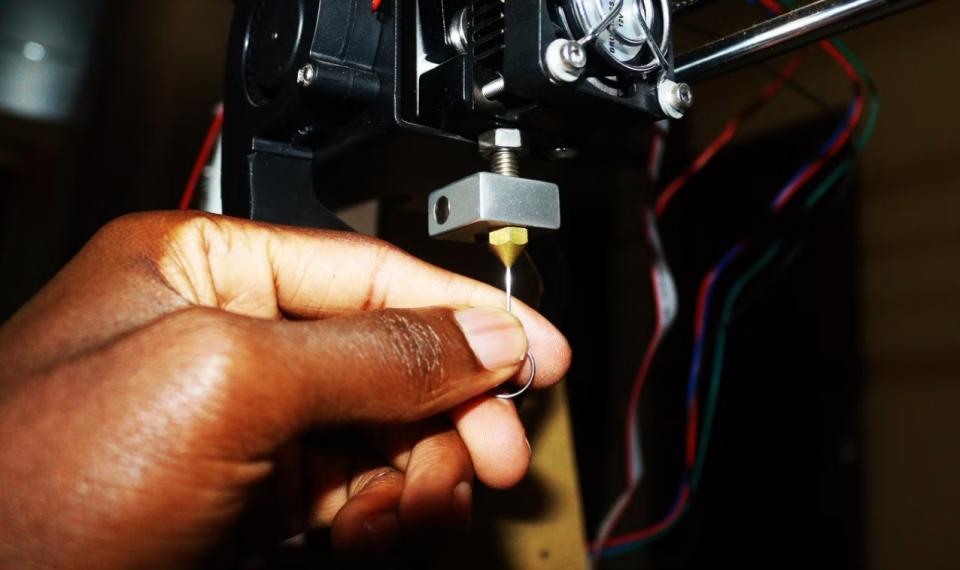
Also, it’s important to ensure that the filament you are using is the same size as your extruder.
Furthermore, when loading the filament, ensure you do it properly. You can begin by chopping the end in a slanting manner so that it will be sharper for smooth feeding.
You should also store your filament away from moisture, and in case it comes into contact, use a filament dryer to remove any moisture before you use it.
4. 3D Printing At High Speeds
There is an optimal speed for each 3D printer, and exceeding that speed can contribute to spaghetti 3D prints. The optimal speed depends on various factors like the capability of your machine, the complexity of the model you are 3D printing or even the material.
When 3D printing at a higher speed, the printer moves rapidly between different parts of the print and the sudden changes in speed and direction can cause the extruder to experience inertia and this ca can lead to filament oozing or stringing, as the extruder struggles to start and stop extruding precisely. The resulting uncontrolled extrusion can create messy and tangled filament, resembling spaghetti.
To avoid issues as a result of printing at high speeds, it's important to adjust the temperature on the slicer to the one that is optimal for your 3D printer and filament.
Additionally, it’s essential to optimize acceleration and jerk settings to reduce sudden changes in speed and direction, minimizing inertia-related issues. You also need to increase cooling time between layers by adjusting the fan speed so that each layer solidifies before the next layer is deposited.
5. Incorrect Retraction Settings
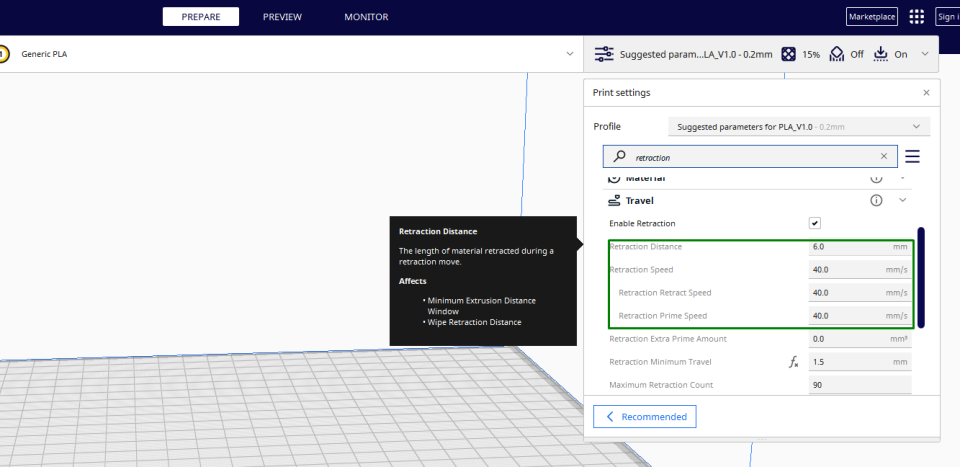
Retraction is where filament pulls back slightly within the extruder to prevent oozing. If the retraction distance is insufficient, the nozzle may still drip the filament while moving between different parts of the print or during non-printing movements. Additionally, if the retraction speed is low, the filament will drag along as the nozzle moves and this leaves behind thin strands of filament that can accumulate on your design.
To avoid this, you need to set the correct retraction distance and speed in your slicer, as shown below.
You can also download and print the retraction test model from Thingiverse and use it to find the correct retraction settings for your 3D printer.
6. Low Z-Offset
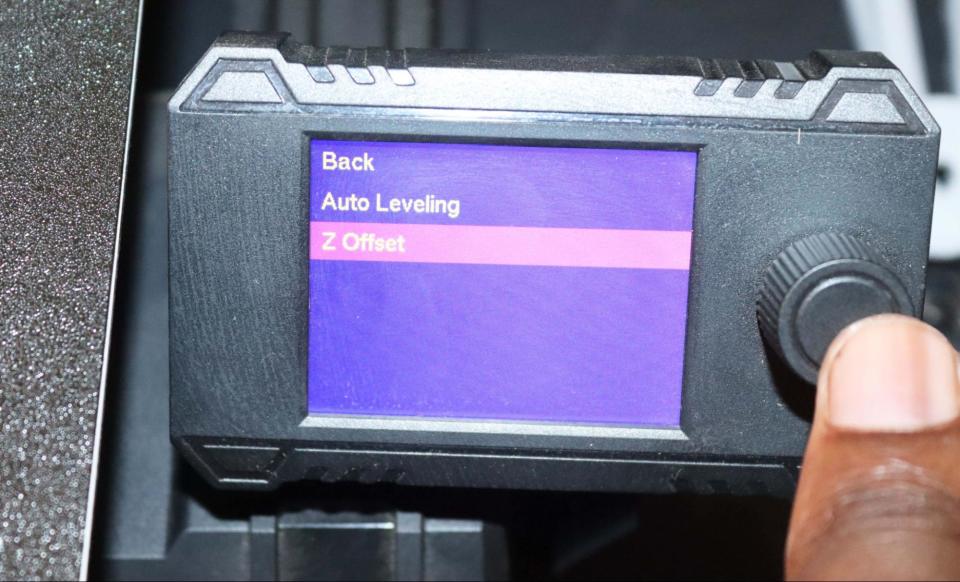
The Z-offset is the distance between the tip of the nozzle and the print bed when the nozzle is at its lowest position along the Z-axis. When the Z-offset value is too low, the nozzle may be too close to the print bed during the printing process and the filament being extruded may get compressed and squished excessively against the bed, and this causes it to spread out or overflow beyond the desired boundaries.
Moreover, with low Z-offset, the filament may not flow smoothly out of the nozzle and this can create pressure and hinder extrusion resulting in inconsistent or interrupted flow. So it’s important to properly calibrate and adjust the Z-offset to ensure the appropriate distance between the nozzle and the print bed. You can do this by manually adjusting the settings on your 3D printer screen.
As you adjust the Z-offset, be careful that you don’t raise it too high as the print may not adhere properly to the bed and it can detach easily.
If you have ever experienced spaghetti 3D prints before you know how frustrating it is as you will waste your precious time, material, and even power only to end up with a failed print. But with the solutions that we have highlighted here, you will be on the way to producing perfect prints.
MORE: Best 3D Printers
MORE: Best Budget 3D Printers
MORE: Best Resin 3D Printers

