How to Smoke Turkey in a Grill
Russ Crandall is the blogger behind paleo-centric site The Domestic Man and a former Yahoo Food Blogger of the Week. Below, he explains that you don’t need any fancy equipment to smoke a turkey.
All photos: Russ Crandall
Roast turkey is great, don’t get me wrong. But there’s one problem with having a big, delicious bird take up your whole oven on Thanksgiving Day: It takes up your whole oven on Thanksgiving Day.
This is my definitive guide to getting a great smoked turkey, using either a gas of charcoal grill. I love smoking turkeys because the flavor is awesome, but also because it frees up valuable oven space on what tends to be a hectic day.
But first, let’s go over some points that are important to keep in mind when making a perfect smoked turkey.
Related: How to Deep Fry Your Turkey

1. Turkeys should not be smoked in a roasting pan (or even on a rack in the roasting pan), and especially should not be roasted while resting in liquid. This will result in a soggy chicken. My solution is to smoke the turkey directly on the grill grates, with a roasting pan filled with one inch of water underneath the grates about 3 to 4 inches from the meat. This will keep the cooking environment moist, but let the turkey crisp evenly on the outside.
2. Turkeys should not be trussed. Dark meat tastes best at 175°F, and breast is best at 165°F; trussing means that the whole bird will reach the same temperature all around, which is not what we want. Allowing the turkey to lay naturally will let each section reach the optimal temperature at the same time.
Related: How to Cook Part of a Turkey for a Faster Thanksgiving Meal
3. Smoked turkeys should be minimally stuffed, and only with aromatics, to ensure proper airflow and even heating. The peel of citrus fruit is perfect, while the a whole lemon would just cool the turkey down too much. Many items in the cavity will result in a soggy turkey.
Related: Your Thanksgiving Turkey: To Brine or Not to Brine?
4. Mild smoking woods (alder, apple, or cherry) are best with poultry. A little goes a long way. I use a combination of chunks and chips, which I’ll explain later.
5. Turkeys should be brined overnight, coated with fat only initially, and minimally seasoned. Brining keeps the turkey from drying out during the smoking process. Basting the turkey only results in soggy skin, so it’s best to only add fat at the beginning of your cooking adventure. Lastly, overly seasoning the skin just makes inedible skin. Let the brine and aromatics add flavor.
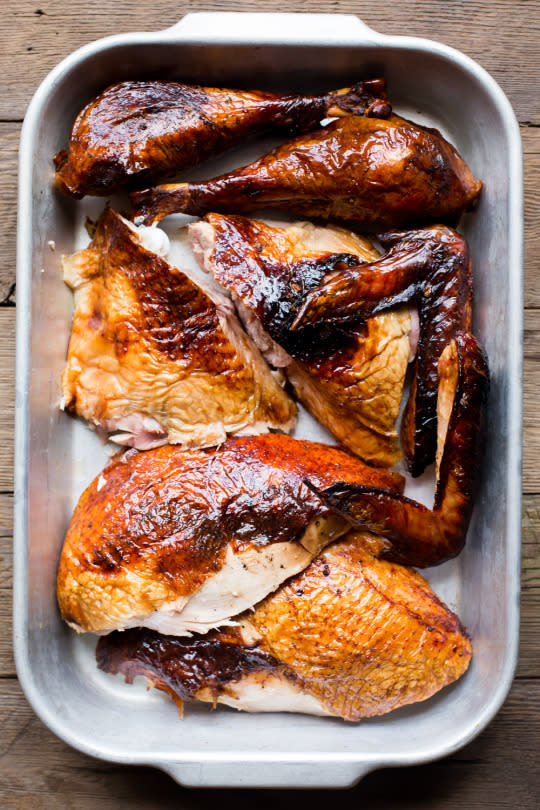
6. Turkeys should not be carved from the carcass. Instead, the bird should be deconstructed and each piece can be carved individually.
Related: How to Make Mashed Potatoes Without a Recipe
Smoked Turkey and Gravy
Serves 6-8, depending on the size of the turkey
1 quart water
1 cup kosher salt
½ cup honey
A bunch of ice cubes
1 whole thawed turkey, 10 to 15 pounds, neck and giblets removed and set aside
1 large handful wood chips (alder, apple, or cherry wood)
2 to 3 wood chunks (alder, apple, or cherry wood)
Peel of 1 lemon or orange
1 small bunch fresh sage
1 small bunch fresh thyme, plus pinch for gravy
1 small onion, quartered
4 cloves garlic
3 tablespoons melted ghee (or 1 tablespoon melted butter plus 2 tablespoons olive oil)
1 teaspoon kosher salt
1 teaspoon black pepper
10 peppercorns
2 tablespoons butter
2 ½ tablespoons of flour (or rice flour or coconut flour)
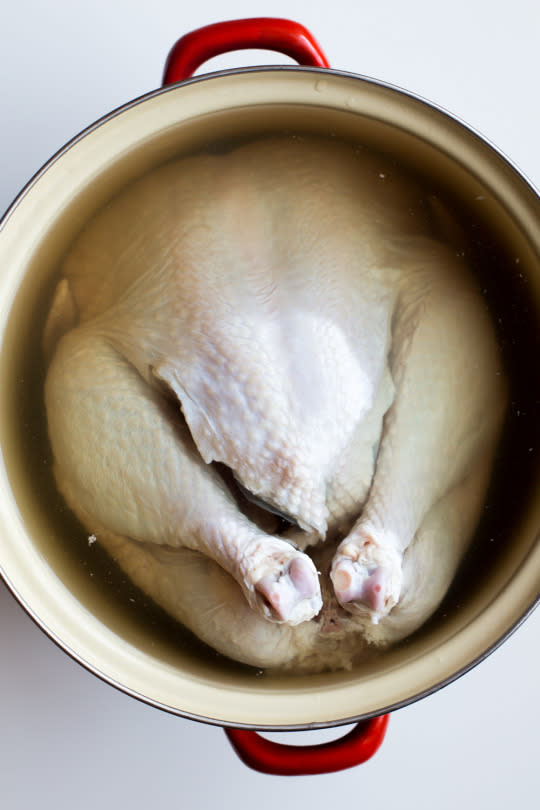
Pour 1 quart of water into your largest stockpot, then add the kosher salt and honey. Heat the stockpot on high heat and stir everything together with a wooden spoon until the salt and honey are dissolved. Remove from heat, pour in a bunch of ice and stir everything around until the ice melts and the water turns cold, or at least room temperature. Add the turkey to the stockpot and fill with cold water until the turkey is fully submerged in the brine. Cover the stockpot and put it in the fridge (or a cold basement, between 32°F to 40°F ) overnight, up to 12 hours.
The next day, remove the turkey from the brine and dry inside and out with paper towels. Place it on a wire rack on a baking sheet to air dry for 30 minutes while you prepare your woods and aromatics. If you have room in the fridge for the baking sheet and turkey, great, otherwise you can leave it out at room temperature.
Related: Chefs’ Advice to First-Time Thanksgiving Cooks
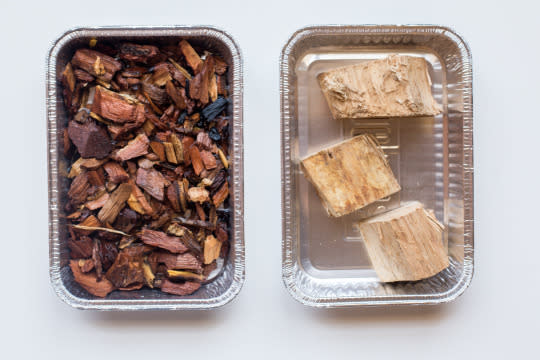
While the turkey dries, prepare your smoking woods. In two small aluminum pans, place one handful of wood chips and a few wood chunks. Fill the pan that has the chips with about ½ inch of water. This will let the chunks catch fire and smoke first, and by the time the chunks are nearly done smoking, the water will have evaporated out of the wood chips pan and the chips will start smoking. This way, you’ll get constant smoking without having to add chips. I would either use a combination of alder and a fruit wood, or stick with one fruit wood.
Place the small aluminum pans under the grill grates, on whatever side of the grill you’re going to keep hot (my burners run horizontally, some run vertically; adjust as needed). On the cool side of the grill, place a large aluminum pan under the grill grates and fill with 1 inch water. This water will keep the grill moist but also catch the turkey drippings and can be used to make gravy afterwards (more on that later).
If you’re using a charcoal grill, the setup will be similar: your charcoal on one side and the turkey and drip pan on the other. You’ll want to use only wood chunks, and add more chunks and charcoal about halfway through cooking. (I’ll let you know when.)
Related: Thanksgiving Side Dishes That Give Turkey a Run for Its Money

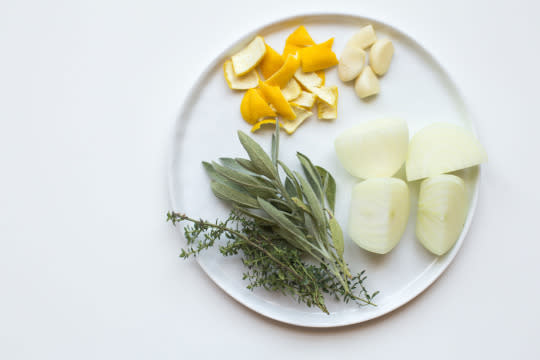
Prepare your aromatics (citrus peel, herbs, onion, and garlic) for stuffing. Lemon or orange rind is better than actual fruit pieces, because you’ll get the aroma without the added liquid inside the bird, which can mess up your cooking times.

Once the turkey has air-dried, stuff it with the aromatics, making sure there is plenty of extra room. If it’s a tight squeeze, don’t use all of the onion. Brush the turkey all over with melted ghee, starting with the underside of the turkey. It’ll start to harden as you brush it on, which is fine. Get every nook and cranny you can. Season all over with kosher salt and fresh-ground black pepper.

Heat your grill on high heat for 10 minutes, until the wood chunks start to smoke. Turn off all the burners but one, leaving it on high. Adjust the heat as needed to get to a stable 325°F.
Once the temperature is stable, put the turkey on the grill and cover each wing tip with tin foil. This helps to prevent the wing tips from overcooking too quickly. Cover and smoke for one hour.
As it smokes, take the turkey neck and gizzard (not the liver) and about 10 peppercorns and simmer them in a quart of water on low, which we’ll use to make the gravy later.
After an hour, carefully pick up and rotate the turkey 180 degrees, so that its other side is now facing the hot side of the grill. Tilt the turkey towards its backside and drain out any collected liquid into the pan underneath it. Remove the tin foil from the wing tips. Cover and smoke for another 45 minutes. If you’re using a charcoal grill, this is a good time to add more charcoal or wood chunks if needed.
Related: How to Get a Flavorful Turkey Without Cooking Stuffing Inside the Bird

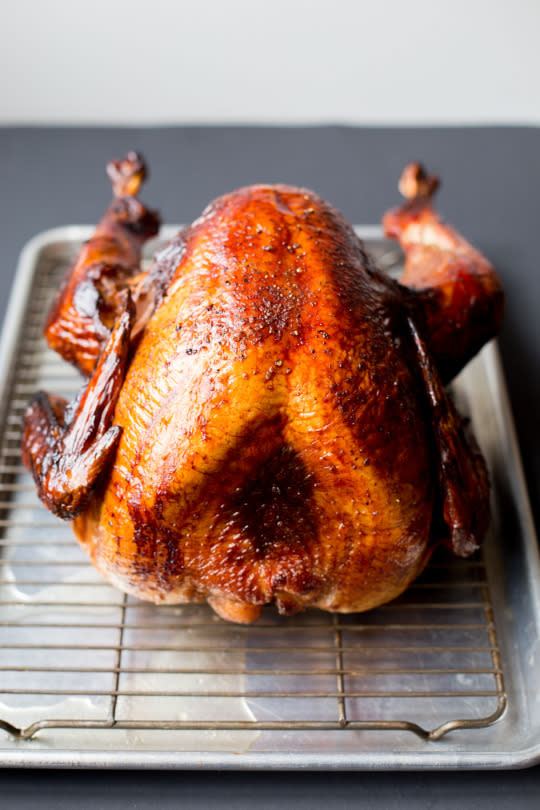
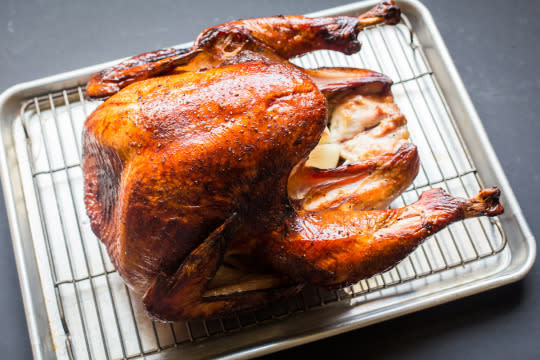
After the turkey has been smoking for 1 hour and 45 minutes, open the grill and again pour out any of the turkey’s collected liquid into the pan underneath it. Check the breast and thigh temperatures with an instant-read thermometer. You want the breasts to register 160F and the thighs to register 170°F (they’ll climb another 5 degrees as the turkey rests). If it’s ready, pull it off the grill. If it’s not there yet, cover and continue to smoke, checking every 10 to 15 minutes. For reference, the 12-pound turkey in these photos took almost exactly 2 hours.
Related: 10 Store-Bought Foods to Have on Your Thanksgiving Table
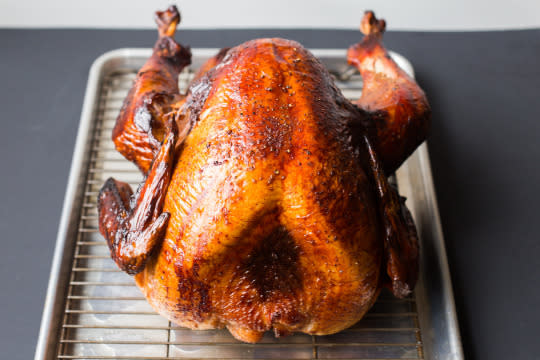
Once finished, place the turkey on a wire rack over a baking sheet to rest for at least 20 minutes before carving, but up to 45 minutes. Don’t cover it with tin foil, unless you want soggy skin (you don’t).
Once your grill has cooled a bit, carefully remove the grill grates and take out the drip pan. Pour the liquid into a fat separator, then pour the liquid (minus the fat, naturally) in with the turkey neck/gizzard broth. Fish out the neck, gizzard, and peppercorns and continue to keep warm on low heat.
Related: Pumpkin Pie with Chocolate Crust
To carve the turkey, remove each section individually — the breasts, thighs, drumsticks, wings, and drummettes. Then you can chop up the turkey as you see fit. I like to slice the breasts against the grain into ½-inch slices, and shave the thigh meat from the thigh bone. Be sure take any extra breast meat scraps you can pull off the carcass and chop it up finely to put in the gravy broth.
To make the gravy, make a roux by melting 2 tablespoons of butter in a sauce pan and stirring in 2 ½ tablespoons of flour (or rice flour for gluten-free, coconut flour for Paleo). Toast for a couple minutes until golden brown, stirring frequently. Stir the roux into the gravy broth and season with a pinch of thyme, and salt and pepper to taste. Simmer on medium to low heat until thickened, about five minutes.
More ways to prepare a turkey:
Traditional Roast Turkey with Apple-Sage Dressing
Brined and Smoked (in a Smoker) Thanksgiving Turkey from ‘Heartlandia’
Turkey Breast ‘Porchetta’ from Giada De Laurentiis
