How to hide folders on Windows 11
Learning how to hide folders on Windows 11 should be top on a Windows user's priority list. There are just some folders that you don’t want to share with everyone using your computer, so knowing how to hide them will help you maintain your privacy and keep your personal documents safe from prying eyes.
Whether you share one of the best laptops with the family or use a public computer at work, hiding important folders can have many benefits, such as reducing the risk of unintended modification, deletion, or unauthorized sharing. This is particularly important if you’re handling confidential work documents or saving sensitive personal information such as financial or medical records.
But hiding folders can also have a good effect on your workflow and productivity. Decluttering your file system can remove any unwanted visual distractions allowing you to quickly locate the files you need without having to sift through numerous and unnecessary folders. In this article, we will walk you through step by step how to hide, locate and unhide your important folders on Windows 11.
How to hide folders on Windows 11
Here's a step by step guide on how you can hide files and folders when using a Windows 11 machine.
1. Right click a folder

(Image: © Future)
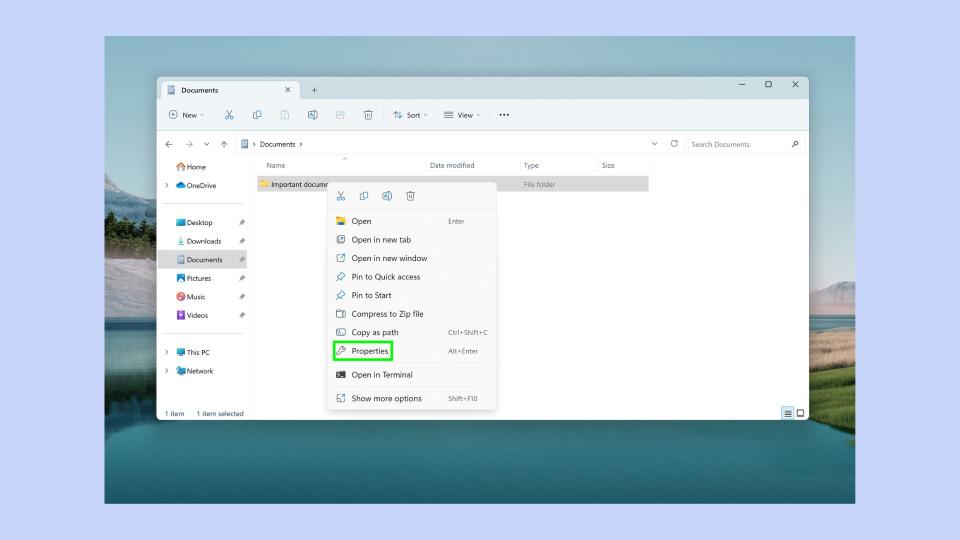
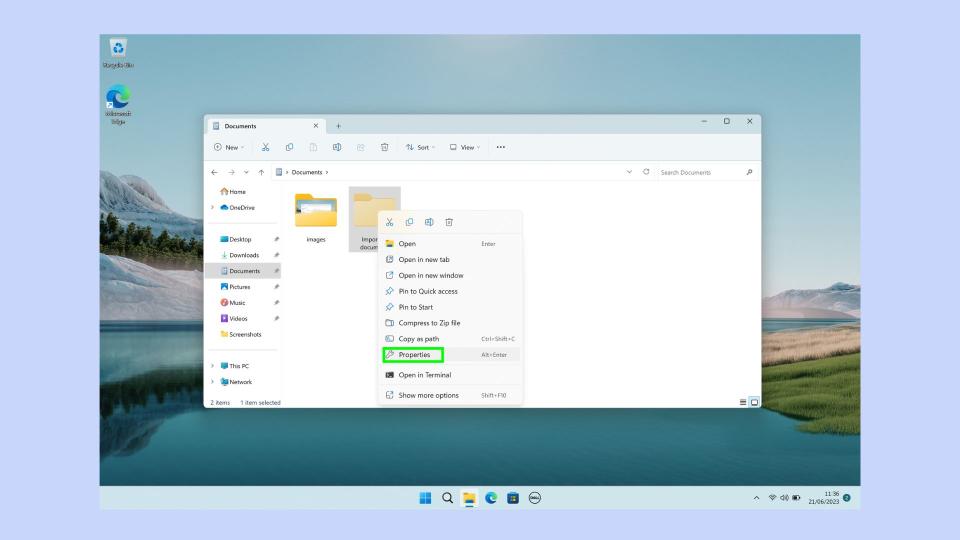
Find the folder that you wish to hide and right-click it.
2. Click Properties
(Image: © Future)
There are two ways to access your folder’s properties: Click Properties or press Alt + Enter.
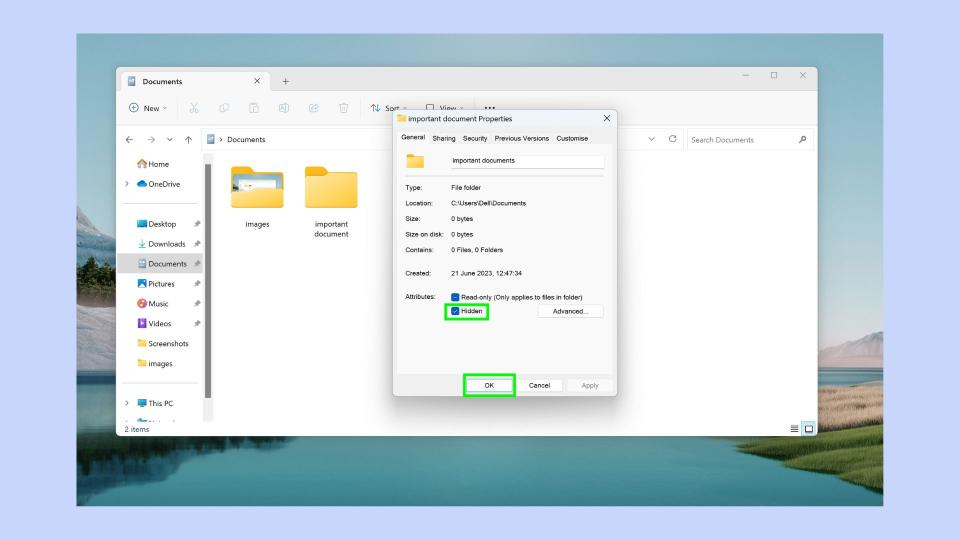
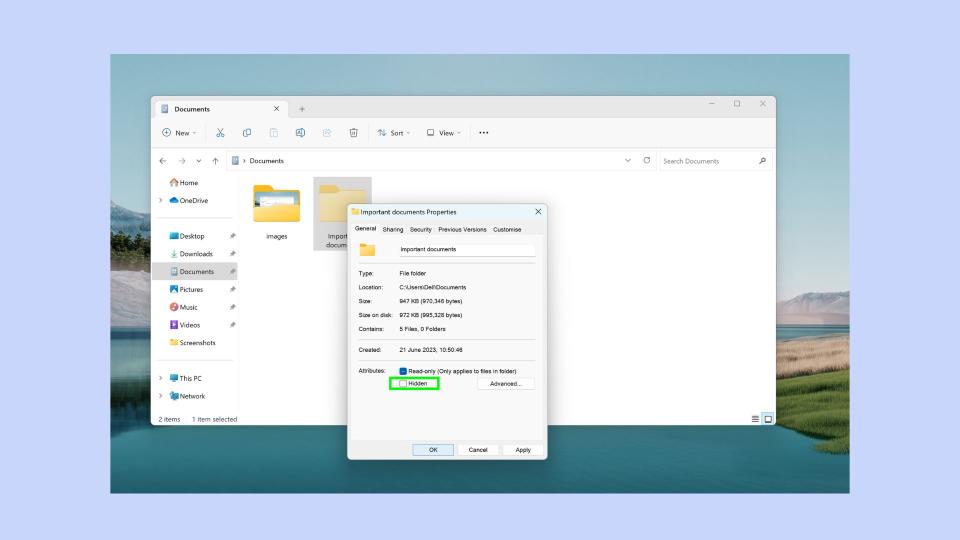
3. Select Hidden
(Image: © Future)
At the bottom of the properties box, check the Hidden box and click OK.
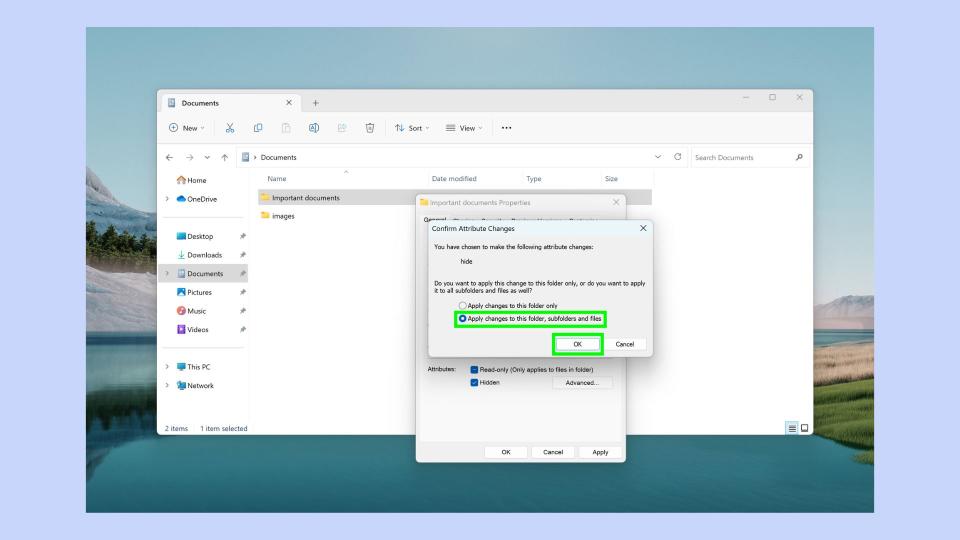
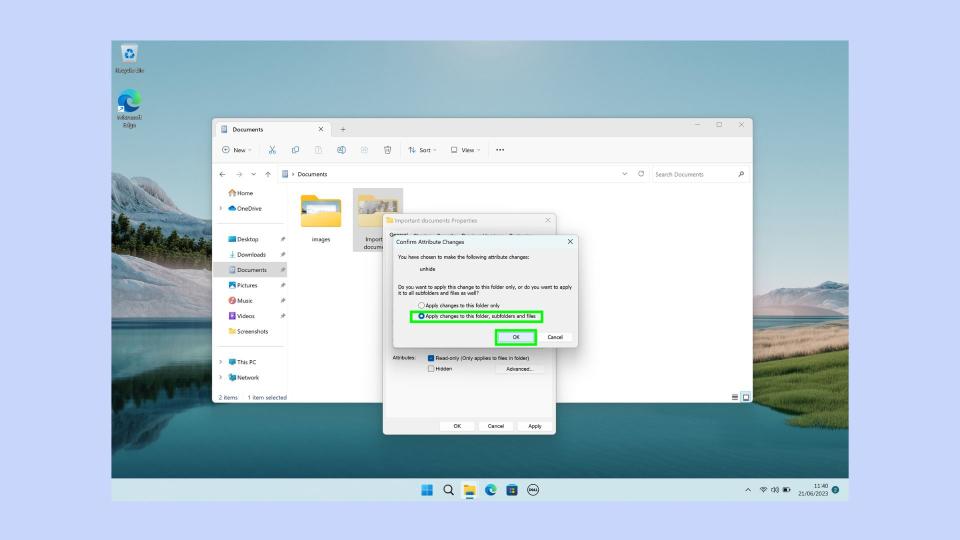
4. Decide on what changes you’d like to make
(Image: © Future)
You’ll be prompted to decide on how you'd like the changes to apple. Click Apply changes to the folder only or Apply changes to this folder, subfolders, and files based on preference. It makes sense to hide the sub folders and files, if you're trying to keep the contents of a folder hidden.
5. Click OK to save
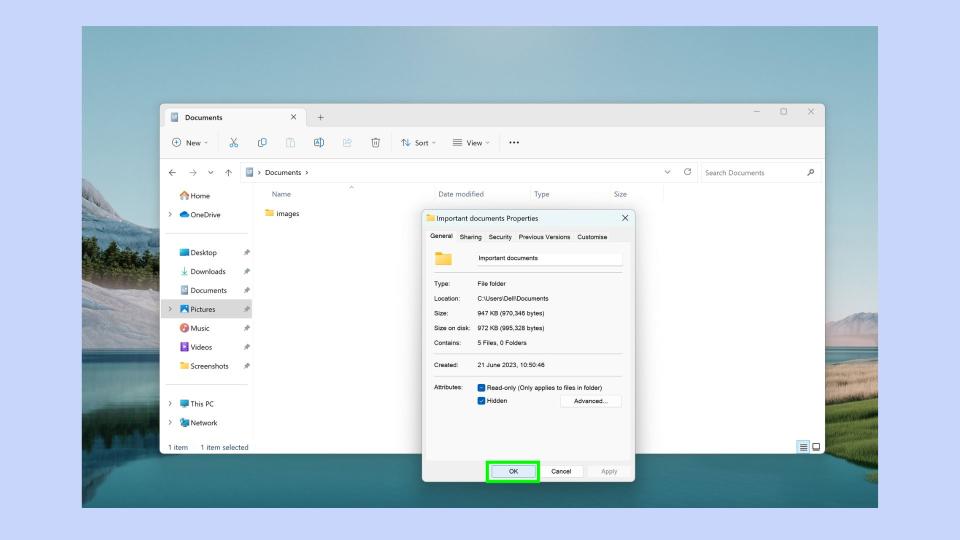
(Image: © Future)
Click OK to save your changes. Your folders will now be hidden, and access other users have to the data stored in the file will be limited.
How to find your hidden folder on Windows 11
Now you’ve hidden your folder, you’re going to need to find it again. Here’s how to find your hidden holder on Windows 11
1. Launch file explorer

(Image: © Future)
Press WIN + E to launch the File Explorer.
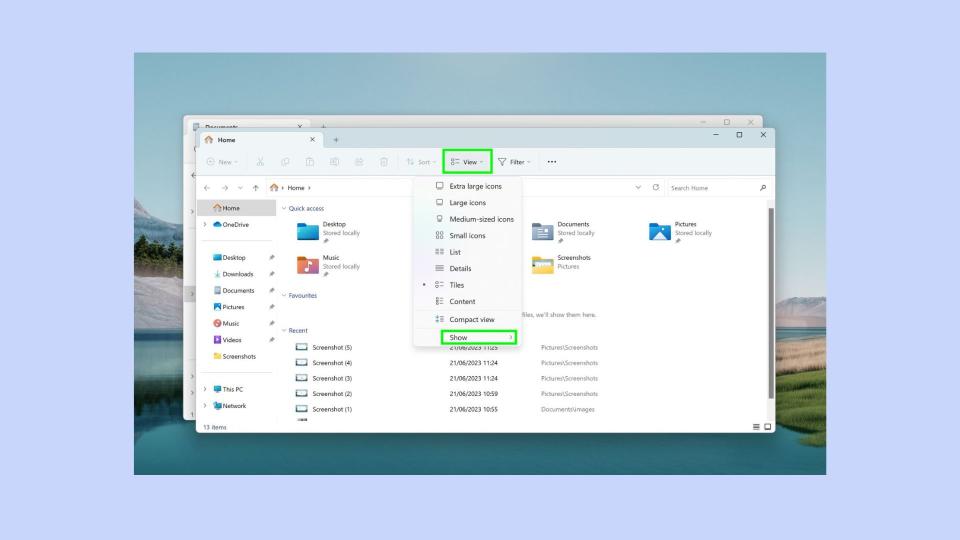
2. Click view
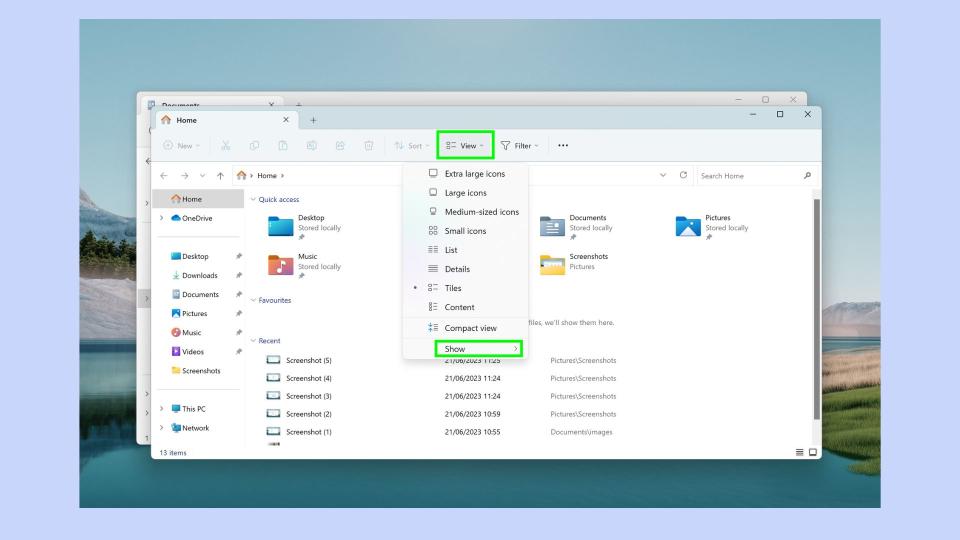
(Image: © Future)
Click View and then select Show in the drop-down menu.
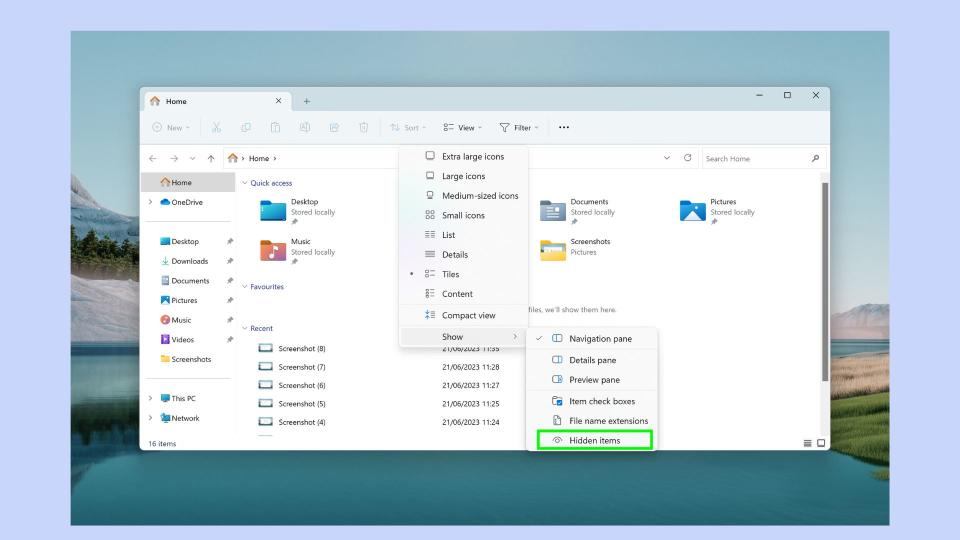
3. Click Hidden Items
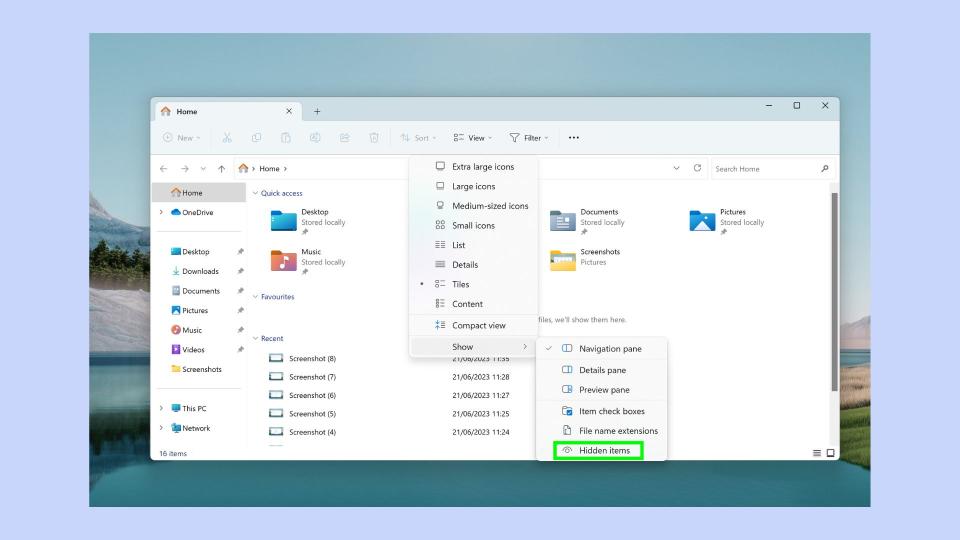
(Image: © Future)
At the bottom of the menu, click Hidden Items.
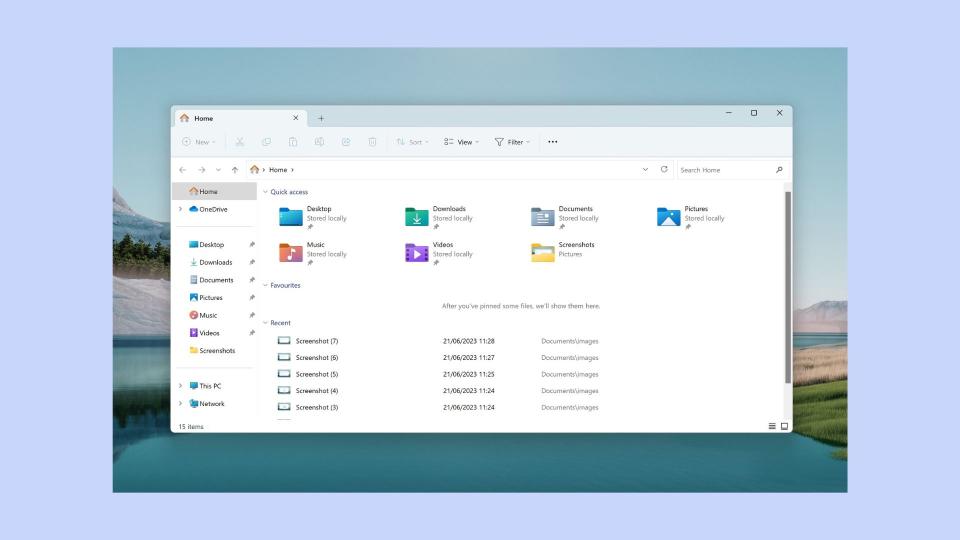
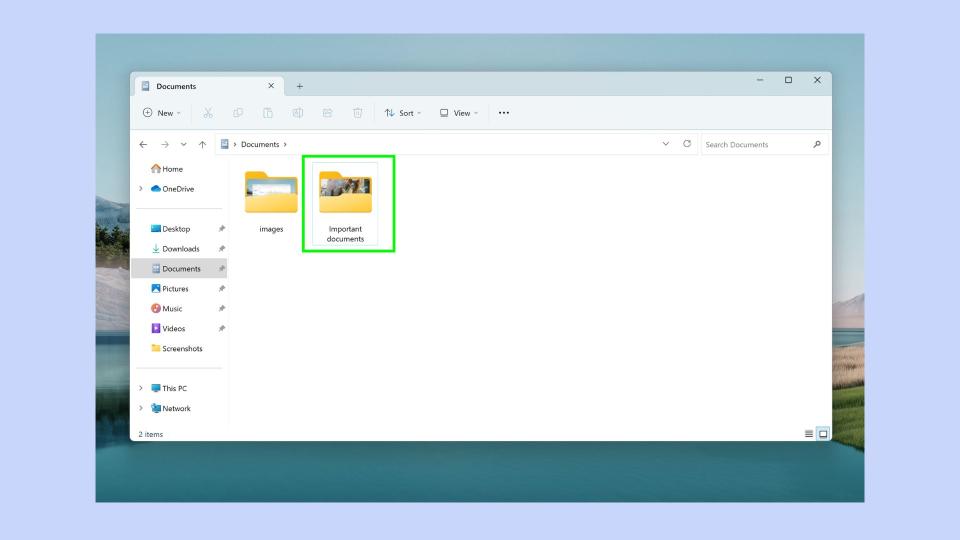
Your folders will now be accessible and in their original destination. For example, we hid a folder named important documents from the documents folder. When we click on show hidden items, this folder is then visible back in the documents folder.
How to unhide the folders on Windows 11
If you no longer want to hide a folder and want it to be accessible to all, follow these steps.
1. Launch File Explorer
(Image: © Future)
Press WIN + E to launch the File Explorer.
2. Click view
(Image: © Future)
Click View and then click Show in the drop-down menu.
3. Click Hidden Items
(Image: © Future)
Click Hidden Items to locate the files you wish to unhide.
4. Select the file
(Image: © Future)
When you’ve located the file, right-click and select Properties.
5. Uncheck hidden
(Image: © Future)
In the properties section, click Hidden to unselect the option before clicking OK.
6. Confirm your changes
(Image: © Future)
You’ll once again see the pop-up box asking you to confirm that you wish to unhide the folder. Select Apply changes to this folder, subfolders, and files.
7. Click OK
(Image: © Future)
To apply the changes, click OK, and your file will be unhidden.
If you want to use your Windows 11 machine more efficiently, we have plenty of tips and tricks up our sleeves. First of all, if you’re on Windows 10 and looking to upgrade, here’s how to download and install Windows 11 — a step-by-step guide. If you need a clean slate, then find out how to factory reset Windows 11 here. And if you’d like more screen space whilst you’re working, you may find our guide on how to hide the taskbar in Windows 11 very useful.

