Your Essential Spring-Cleaning Checklist for a Home That *Actually* Gleams
"Hearst Magazines and Yahoo may earn commission or revenue on some items through these links."
Spring has arrived. The blossoms are in bloom, the sun has returned, and you’re standing in your house looking at the fallout of six months of human hibernation: grimy baseboards, dust-lined window screens, and the neglected catch-all pantry. It’s time to restock your essential cleaning supplies and press the reset button on your house—and we’re here to help. Because nothing feels as satisfying as waking up to a house that is immaculately clean. Whether you’re going for a top-to-bottom home makeover or tackling that behind-the-stove area during your few free hours, we’ve brought in three cleaning experts—Clean My Space’s Melissa Maker, How to Clean Everything author Ann Russell, and How to Clean Your House author Lynsey Crombie—to get you started. Here is the essential guide to making your house clean enough to satisfy your most critical inner neat freak and launch you into summer with a house that actually shines. Let’s roll up our sleeves, rev that vacuum, grip that spray bottle, and let’s make your house so clean it squeaks!
Shake Out Your Doormat
First impressions matter, so let’s begin with your doormat. Sure, it looked pristine when you bought it but of course your porch accessory has kept dirt out of your home as it was intended to do—and it’s showing. This trusty workhorse is harboring everything from dirt to ice salt to allergens to fleas (thank you, Fido). However, armed with a vacuum cleaner, garden hose, baking soda, broom, and mild dish soap, your high-traffic entrance will be poised to welcome the most scrutinizing of guests (yes, even your disapproving mother-in-law).
Begin by shaking the mat over an outdoor area to remove the majority of debris. After a few good shakes, vacuum the mat with the brush attachment. Then, sprinkle baking soda over the mat and use a broom to rub the powder into the mat fibers. Once it’s embedded, use a hose to rinse it off and hang it over something to let dry. Sweep the area where the doormat should be placed before returning it for another year of gatekeeping.
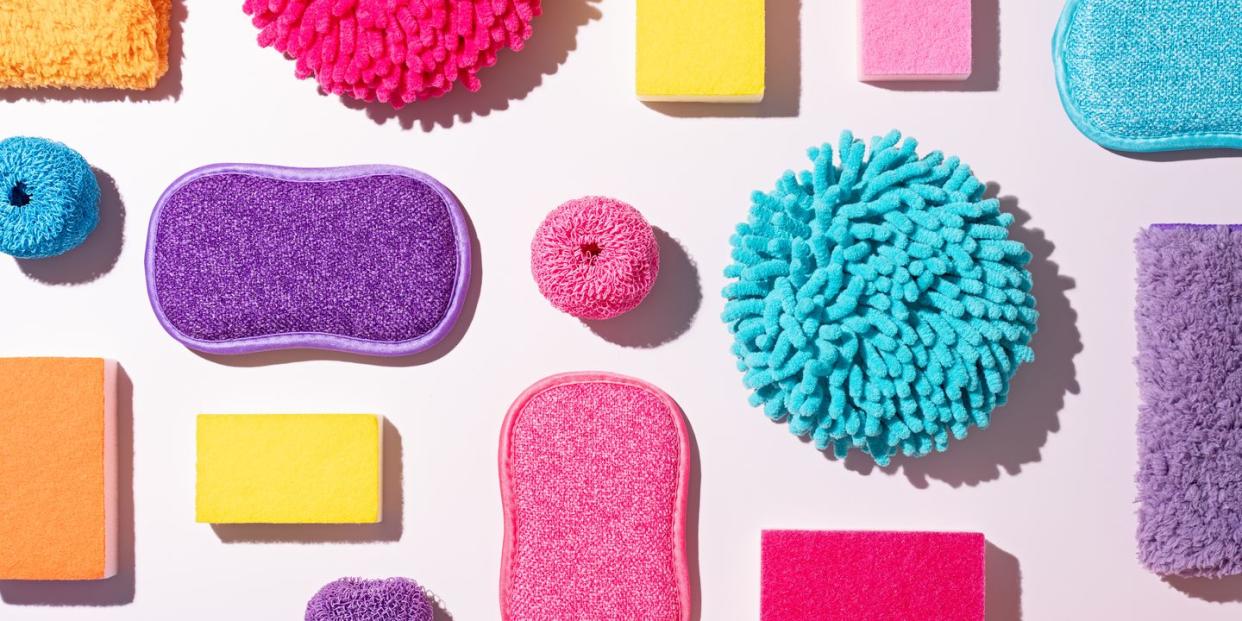
Give the House a Good Dust-Off
Dust is ever-present on every imaginable surface, no matter how diligent you are about cleaning. Those little dust bunnies can accumulate in hard-to-reach nooks at unbelievable speed—that is, they did until they met their match: the microfiber cloth. When it comes to what to use, Crombie says you needn’t pay extra for that luxe duster. “Forget fancy products,” she tells ELLE DECOR. “Damp dusting with a good quality microfiber cloth or dust daddy is just as good.” Begin by closing all the windows and turning off fans to prevent dust particles from scattering (for safety precautions, dig up a Covid-19 mask to avoid breathing in the particles). Start at the top and work your way down so the dust doesn’t resettle on the freshly cleaned area. Go from the ceiling fans to high shelves to lower surfaces. “Move all items from the surface and dust working from one side to the other,” Crombie notes. After dusting, she recommends vacuuming the dust remnants that have floated down.
A word to the truly dust-conscience: regularly clean your dusting and vacuuming tools to ensure they don’t get clogged, change your air filters, and occasionally give your local Duct Heroes a call as these devices and areas will best capture dust circulating in the air when not clogged. And you don’t want to know how bad it can get.
Wipe Down Your Walls
There’s one thing that’s worse than dust: grime. And while it would be convenient if it only reared its grungy head in the reachable areas of our homes, smudges often appear all over the walls, from baseboard to ceiling. Begin by removing artwork and anything that’s in the way of the walls. Similar to dusting, move from top to bottom, first reaching up high with a flat-headed mop and attached microfiber pad (dampened) to dislodge dust. Next, dust the baseboards with a cloth, a foam craft brush, or a vacuum cleaner with a brush attachment. Now you’ll go in for a spot-clean. You can use a Magic Eraser or create your own paint-friendly cleaning solution, Crombie says (one part rubbing alcohol, 1 part white vinegar, and a drop of dish detergent). “Pour it into a spray bottle, shake well, spray to the mop head, and work from the top to the bottom.” Don’t forget to give some TLC to the doors, door jams, ceilings, and baseboards. And voila! Like new.
Reseal Grout Lines
Good news: Your next task involves fewer aerial acrobatics. Cement-based grout is porous by nature, so it’s prone to absorbing grease, oils and water, regardless of how diligently you clean them. Even better news: Touching up those aging grout lines can transform your bathroom tile or kitchen backsplash from drab to fab in a matter of hours. Begin by removing the hardened old grout from between tiles with an oscillating tool. Move the blade along the grout joints, holding it perpendicular to the tile surface. Be careful not to nick the ceramic tile. You needn’t remove every bit of grout, just enough to dislodge the grimy surface for better adherence.
You will next choose a sealer. If the sealer is being applied in a high moisture area (like a shower), choose a penetrating sealer like Aqua-X’s Grout Sealer that can handle the humidity. For other areas like the kitchen, a membrane-forming sealer is ideal as it creates a barrier on top of the tile (if used in wet areas, it would trap moisture underneath and foster mildew growth). Be aware that these grout sealers won’t adhere to glazed tiles, including ceramic and subway tiles. There are also spray-on aerosol sealers, and tube sealers. If you want to go pro level, Crombie recommends using a steam cleaner with a grout accessory.
To apply, work in small areas at a time, moving from one end to the other to ensure consistency. Wipe off excess sealer with a dry cloth, doing so before it dries. Let the first coat dry for at least an hour before applying a second coat. Repeat about three times. If you apply a few drops of water to the surface and it beads up, the sealer is working. If not, add another layer. Allow the space to dry completely before use.
Clean Window Screens and Glass
Let those spring rays fully shine through with gleaming windows that, in their prime condition, are the last thing you notice when observing its lovely treatments and the few beyond. If you have screens, begin by removing them from the windows (don’t forget to label them to keep track of which screen goes to what window). Lay the screen flat on a towel and run a handheld vacuum over it gently. Flip the screen and repeat. Next, gently wash both sides of the screen with a soapy solution (a fourth a cup of liquid all-purpose cleaner with half a gallon of water) and a sponge or microfiber cloth. Next, hose the screen down or run it through the shower and prop it up to dry off before re-installing.
Now for your windows. Crombie warns against cleaning windows when the sun is shining directly on them. “Wash your windows on a dull day,” she says. “The sun causes the product to dry as it touches the glass, and this creates streaks.” Crombie recommends using a solution of warm soapy water, applying with a large sponge and using a window vacuum to remove excess water. “Then, buff dry using a good quality, thick microfiber cloth.” You can also top it off with Windex’s tried-and-true vinegar glass cleaner for added sparkle.
Polish Hardware
Whether you have brass cabinet pulls or copper door handles, all will inevitably tarnish. For some, that darkened patina is a desired look but for others, it’s unwanted corrosion. To bring your house bling back to its shiny glory, begin by removing the hardware, being careful not to damage the metal. If your pieces are more yellow, smooth, and shiny, they are lacquered brass and the varnish must be removed before they can be effectively polished. First submerge it in boiling water for a few minutes, then carefully remove your piece from the water. Once it has cooled, you should be able to peel the lacquer away.
Now for the cleaning. Dip the end of a clean, non-abrasive cloth into white vinegar and rub the brass until it shines. For added polishing effect, you can also add salt, lemon juice, or even flour (creating a paste that can sit on the brass for 10 minutes before being buffed away). If it’s not as shiny as desired, you can also soak the hardware in vinegar overnight. A gentle polisher like Bar Keepers Friend Soft Cleanser can also be used. Next, wash the hardware with dish soap and warm water and dry thoroughly. And finally, rub with a light coat of mineral oil to preserve the finish.
Clean Upholstered Furnishings
That well-loved couch is also showing signs of wear, but giving it a refresh isn’t as daunting as it sounds. First, refer to the manufacturer’s instructions and fabric cleaning code. “W” means you can use water (meaning you can remove the cushion covers and launder them), “S” means use a non-water-based solvent, such as alcohol or dry cleaner detergent. “WS” means you can use solvents or water, and “X” means use neither and vacuum only.
Crombie advises starting off by removing all the cushions and vacuuming as much as you can. “Wash any covers that can be washed in the machine, following the guidance on the label,” she says. “Use a steamer to refresh the surface, remove the top layer of dirt, and kill bacteria.” As for specific marks or stains, she recommends using an upholstery-specific product. “Be sure to work in a stripe motion not a circle otherwise you may get water marks.”
When finished, refresh using a homemade fabric refresher (1 oz of bicarbonate of baking soda and 20 drops of your favorite essential oil), Crombie adds. “Shake well and spray 12 inches from the upholstery to leave a fresh smell and combat any lingering odors.” Don’t forget to add a fabric protector for maximum preservation. As for upkeep, don’t forget to vacuum your upholstered furniture frequently as dirt can actually wear away fabric fibers.
Vacuum and Shampoo Carpet
Here’s a worrying statistic: according to New York University Medical Center microbiologist and immunologist Philip Tierno Jr., the average carpet contains about 200,000 bacteria per square inch, making it 4,000 times dirtier than a toilet bowl. That frequent game of Ring Around the Rosie with your toddler in the living room is now a crying-worthy proposition. As it turns out, deep cleaning a carpet or rug not only removes unwanted odors and dirt particles, but also restores fiber buoyancy and brightens the color. One caveat: Vintage rugs or those made of delicate materials require professional cleaning every three to five years.
So let’s get into it. First, test the carpet shampoo on a small, inconspicuous area to ensure it won’t damage the whole carpet or rug. After a few hours, if all looks good, proceed to clean the rest of the carpet. Begin by vacuuming a few times to remove dander. If it’s a rug, we recommend flipping it over and vacuuming the back as well. Next, sprinkle baking soda over the surface of the carpet. Mix carpet shampoo with warm water and add the mixture to a spray bottle. Spray over the carpet, brushing with a carpet brush. Blot the carpet. Repeat, spraying and blotting, until it looks and feels clean. Let dry and if it’s a rug, don’t forget to rotate to ensure even wear over time.
Feeling overwhelmed by the amount of elbow grease required? Consider renting an industrial Rug Doctor at your local hardware store for an easy and professional cleaning.
Clean Kitchen Appliances
Nothing makes a kitchen sparkle like a group of perfectly preened appliances. Begin by pulling out your appliance and vacuuming beneath and around. Next, spray your appliance (oven, microwave, refrigerator) liberally with vinegar. Use a soft cloth to wife the vinegar off in the direction of the grain (if it’s stainless steel) and remove the initial debris. Next, dip your soft cloth into a little mineral oil (like olive oil or coconut oil) and, again, wipe in the direction of the grain. The marks should start to disappear. No, really. Repeat the process until you can see your face in its reflection.
Note: You can also clean the inside of your dishwasher by filling a dishwasher-safe bowl with one cup of white vinegar and placing it on the bottom of the empty dishwasher. Set it to run on a hot water cycle.
Clean Bathroom Appliances
While the weekly shower wipe down helps to remove obstinate mildew, soap scum, and hard water spots, specimens lurk in the crevices and on build-up that are the stuff of nightmares. Showers made from fiberglass or tile can be sprayed with a commercial shower cleaner or DIY shower cleaning solution (made of equal parts vinegar and dish soap). Tile can be scrubbed with a soft-bristle brush. Stone showers, however, need a specially designed cleaning solution or a small amount of milk dish soap mixed with water. Gently buff with a microfiber cloth. To remove grime from the floor, sprinkle it with baking soda when it’s still wet and let it sit for 10 minutes. Gently scrub with a soft-bristled brush. While you’re at it, replace that mildew-y shower liner.
Do a Final Purge
You’ve done it! The house is as spick and span as the day you moved in. Now there’s one final component to the spring cleaning rite of passage: the cathartic purge of unsightly clutter. It often begins in the closet (goodbye bulky, unloved or overloved winter sweaters), and can extend to the medicine cabinet, makeup drawer, craft closet, and (deep breaths) the toy room. But that’s a post for another day, compliments of yours truly.
You Might Also Like

