Wait—This Giraffe Makeup Tutorial Is So Cute for Halloween
Soooooo, you've shown up to your annual Halloween party in basically every animal costume you could think of (and, yes, that includes the three years you went as a cat). If you're looking to mix things up this year—and, like, why wouldn't you?—it's time to meet your new go-to: this giraffe Halloween makeup tutorial.
It's definitely cooler than a pair of mousse ears, but it's honestly just as easy. All you'll need is a few makeup sponges, some face paint, and a couple makeup essentials you absolutely already own (see: foundation and mascara). Oh, and I broke down all the steps for you, ahead, so there's really no excuse not to try out this cute look.
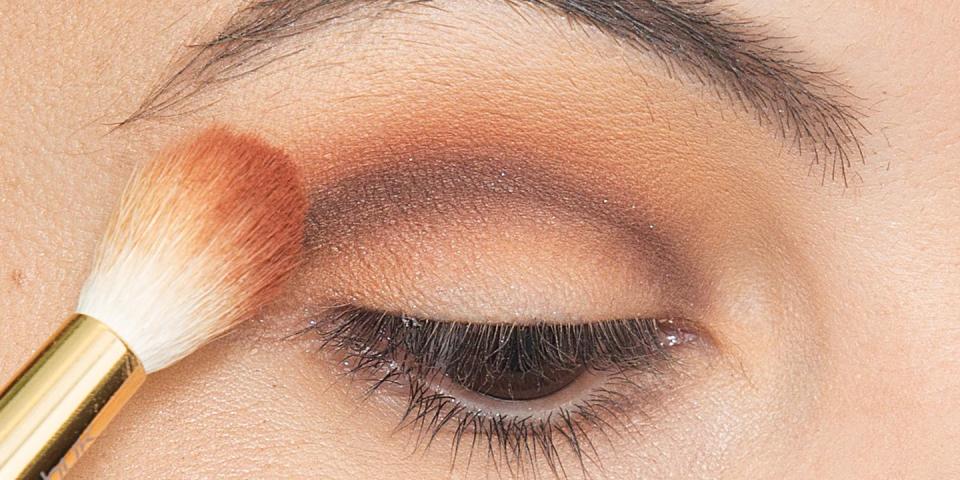
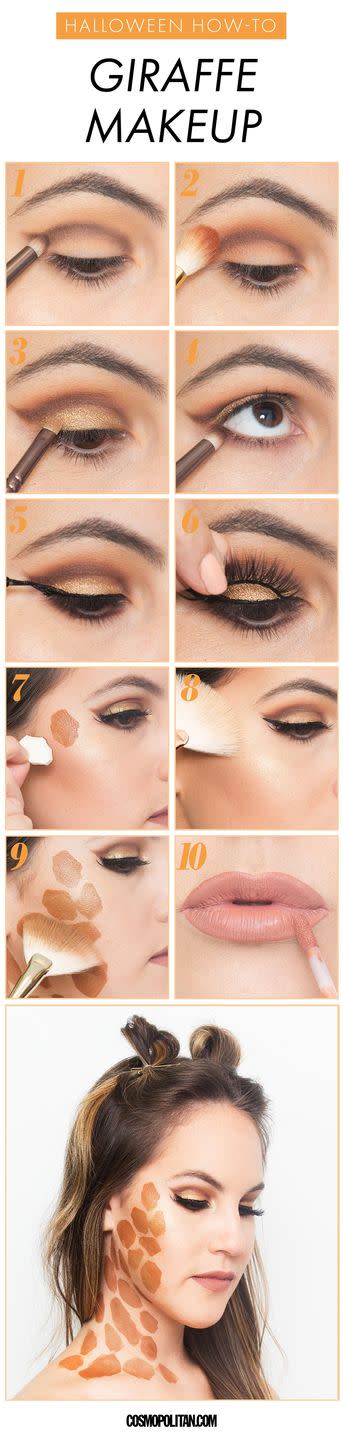
Step 1: Line Your Crease

First thing's first: Smooth an eyeshadow primer across your lids so your look stays in place allllll night. Then, starting from the inside corner, line the crease of your eye with a matte chocolate-brown shadow (a pencil brush should help you get a fairly precise line). When you reach the outside corner, draw a slight flick up toward your eyebrow.
Step 2: Blend Your Eyeshadow
Sweep a burnt-orange eyeshadow along your crease with a fluffy brush, softly blending into the brown line you just made.
Step 3: Add Gold Shimmer
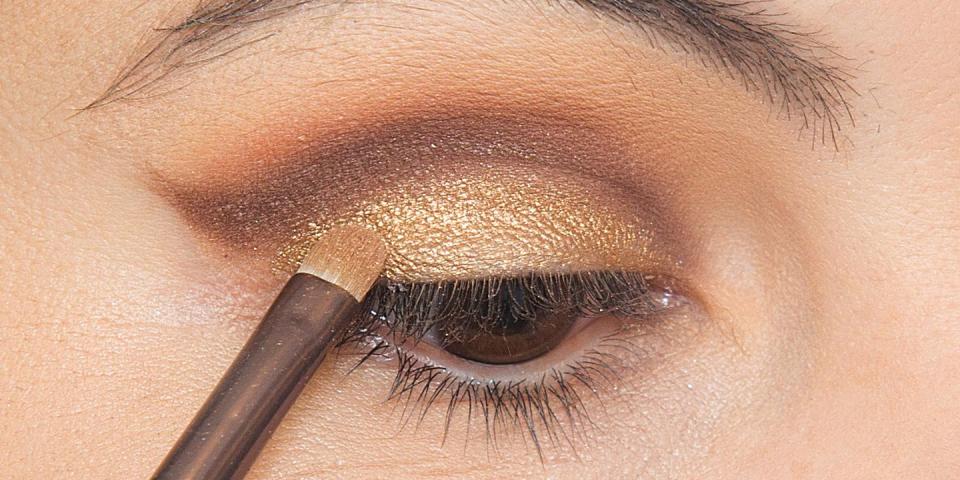
Spritz a lightweight setting spray on a small, flat brush, then press a metallic, shimmery pigment across your lid (you'll wanna sweep from your lash line right up to the brown crease).
Step 4: Line Your Bottom Lashes
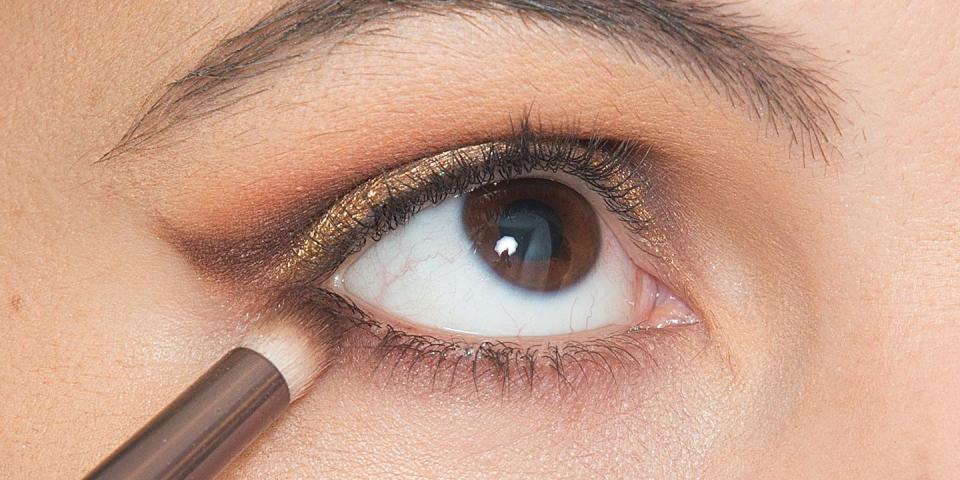
With the same brown eyeshadow and pencil brush from step one, lightly trace your bottom lashes for a soft, smokey look.
Step 5: Draw a Cat Eye
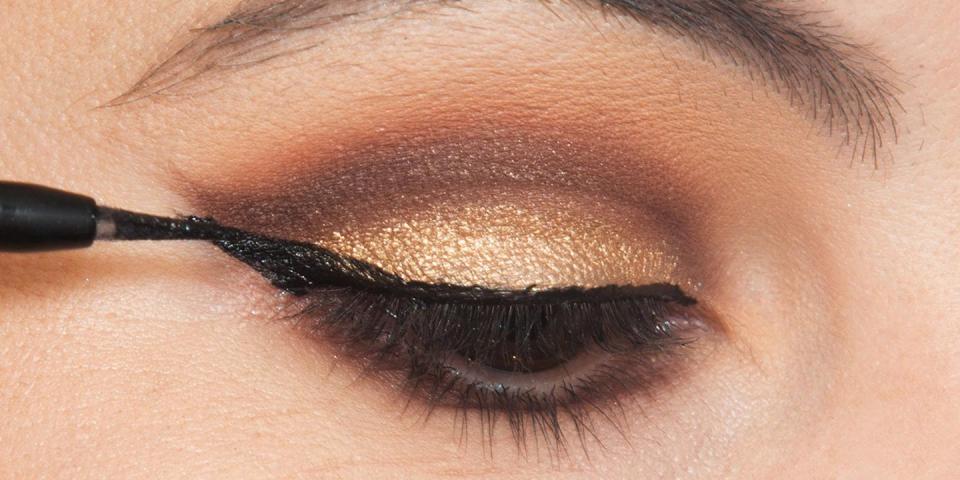
Next up, give yourself a cute cat eye with a super-pigmented liquid eyeliner (I'm obsessed with Stila Stay All Day Waterproof Liquid Liner and Nyx Epic Ink Liner).
Step 6: Add Some Falsies

After a few coats of black mascara, tack on some fluttery fake eyelashes to really make your eyes stand out.
Step 7: Apply a Neutral Lipstick
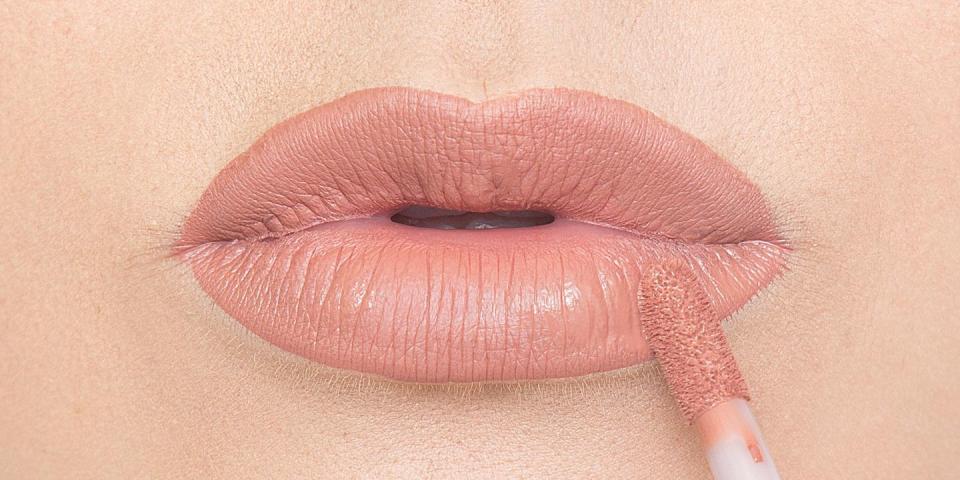
Your lips aren't really the focus of this look, so opt for a subtle shade that suits your skin tone.
Step 8: Get Crafty
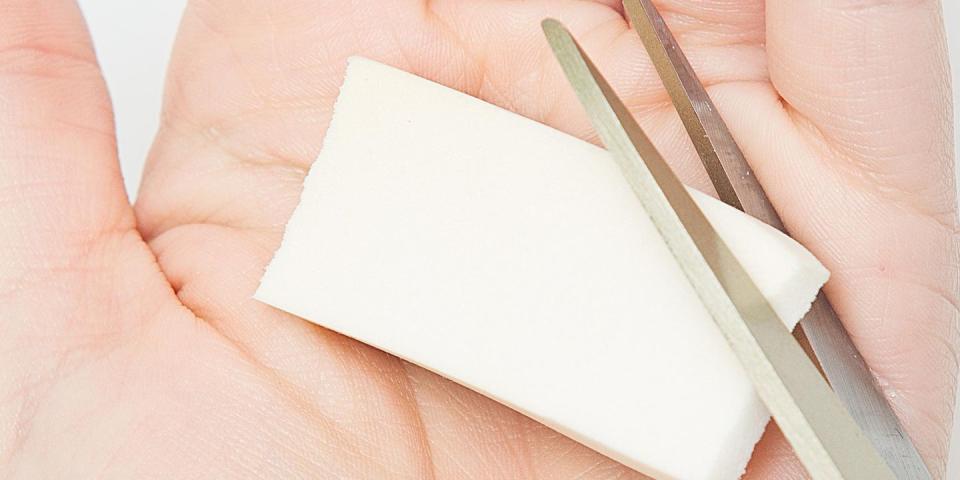
Now comes the fun part. Cut the edges of a few makeup sponges, which you'll use in step nine to stamp your giraffe spots. You'll want about three or four stamps (varying in size and shape) to get the most realistic-looking spots.
Step 9: Stamp Your Face and Neck
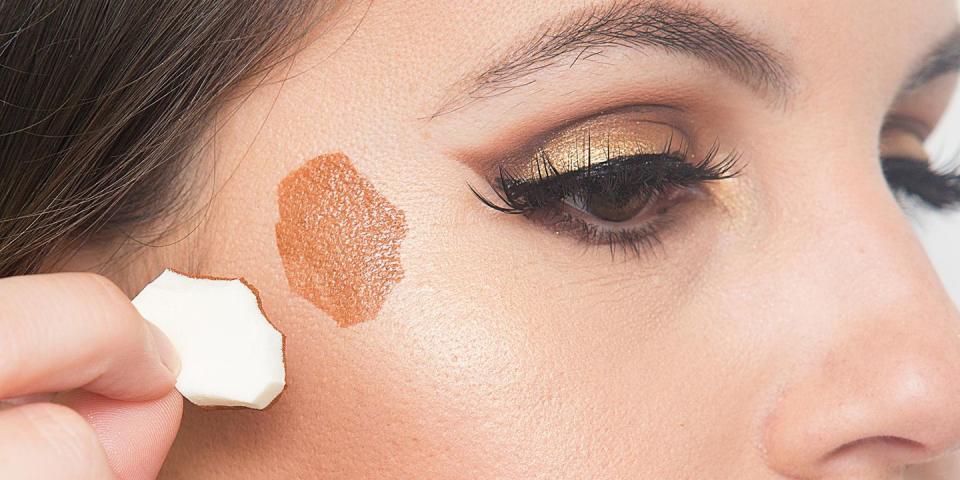
To make your spots stand out, choose a waterproof foundation with warm or yellow undertones in a shade that contrasts with your skin tone. First, dip your sponge evenly in the waterproof foundation, wiping off any excess product. Then, carefully press it onto the side of your face and down your neck. Make sure to alternate sponges to create the pattern you want.
Step 10: Set It All in Place

Even though you've used a waterproof foundation, you'll want to set it with a powder or spray to lock it down. For the final touch, sprinkle on a little gold shimmer with a fan brush (you can make things easy on yourself by using the same gold pigment from step three).
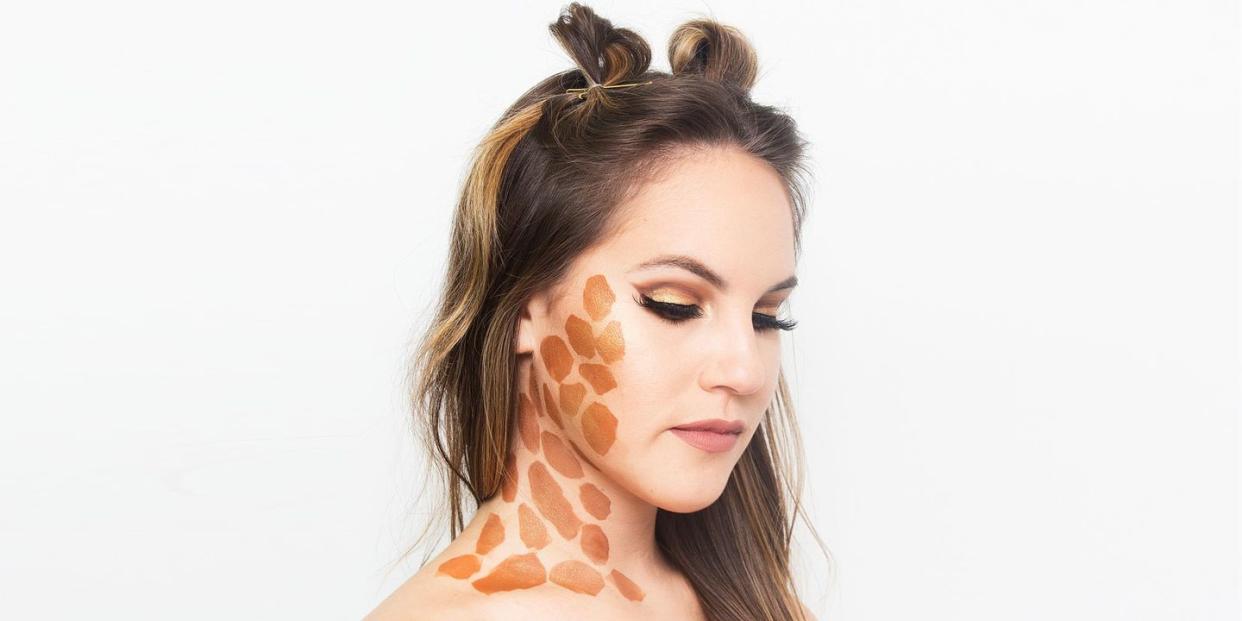
~Final Look~
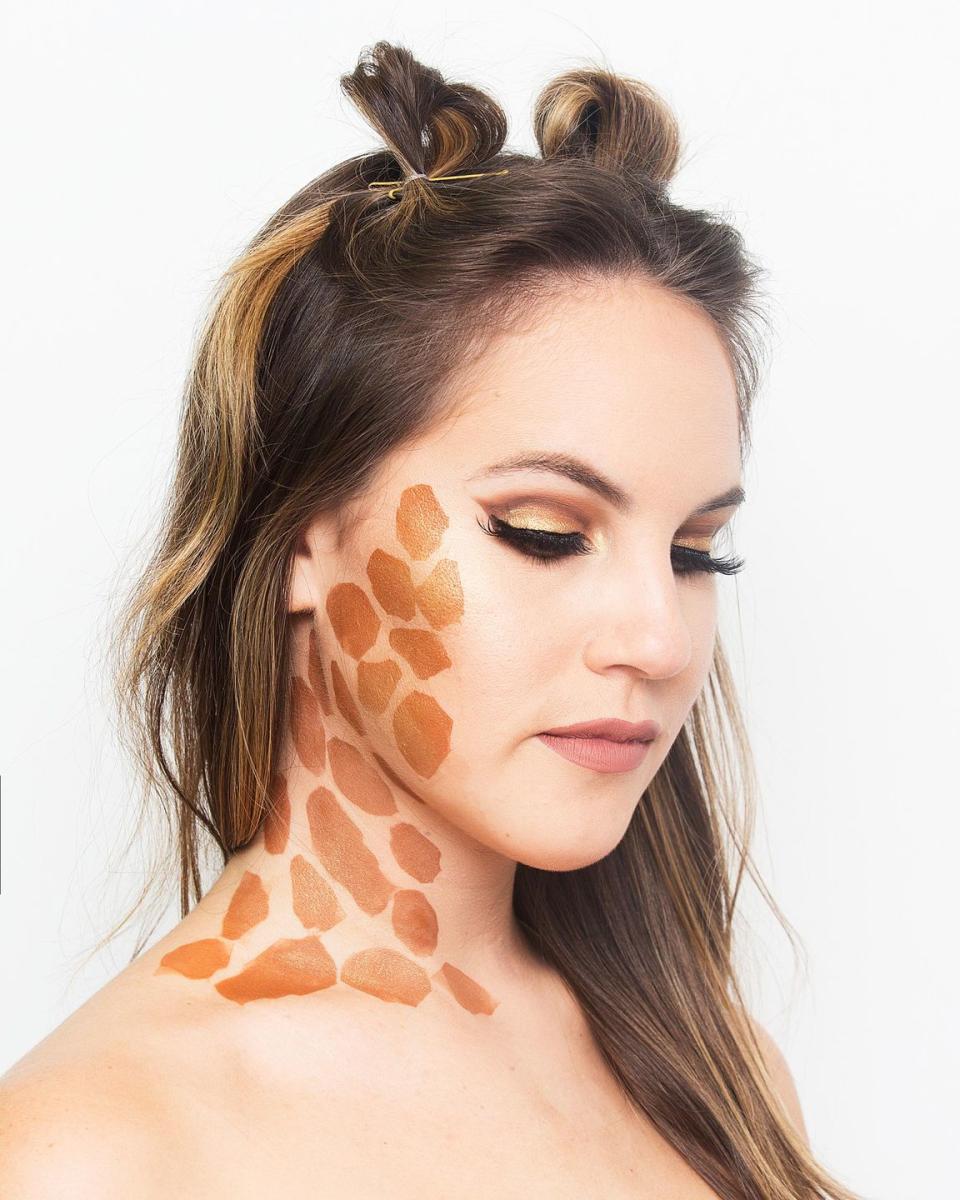
And now you're all set! Damn—you look great.
You Might Also Like

