I'm a wannabe crafter, so I tried a Cricut cutting machine — and lived to tell the tale
If you've been in a craft store in the past few years, you’ve seen a Cricut machine — it's a crafting powerhouse that cuts any design into any material you want. I'll admit, up until now the extent of my crafting has been walking through a Michaels and admiring all the really cool stuff, but ultimately buying boring basic supplies and not making anything worthwhile. My excitement for Cricut had been tempered by intimidation. But I recently came across a sale on Cricut machines and accessories at Amazon and thought: Why not make my DIY dreams come true? So I went for it! Here's my review.
Cricut Joy Machine
Cricut EasyPress 2, 9 x 9
Cricut Hat Press
Cricut Mug Press


Can an amateur craft like pro?
If your crafting skills fall short, a Cricut is a pretty great idea. These sleek, colorful, computer-controlled cutting machines look irresistible, which is quite motivating. To start, you’ll need the actual cutting machine. The one I used, the Cricut Joy, on sale at Amazon for $169, is easy-to-use, compact and cuts 50-plus different materials, from card stock and felt to vinyl — even leather, wood and metal — all at the touch of a button.
Once you have your machine, the next step is easy: Download the Cricut Design Space software to your computer and/or phone. The program allows you to create your own custom designs or choose from hundreds of existing templates and projects. You can pick or customize fonts, shapes, sizes, colors, you name it. Once you finish your design, the dimensions are sent to the Cricut Joy. And, in a few simple steps, it cuts out your design ASAP on your chosen material.
What sets Cricut apart from other crafting machines is that the cutting tool is so precise. Even if you have a complex design, the cut is perfect. Imagine detailed, intricate place cards for a summer outdoor dinner, 3D cake toppers, monogrammed wine tumblers, 4th of July decorations, custom stencils, iron-on decals, stickers, labels, signs — even make-your-own jewelry. While cutting is the Cricut’s main job, it can also draw, engrave and more. But we’re getting ahead of ourselves here…
For beginners, I would suggest investing in a few simple Cricut heat-transfer materials: Smart Iron-Ons, Smart Vinyl and preprinted Infusible Ink transfer sheets.. This means you will also need a Cricut heat press to bond your design to your project (you really can’t get away without having one if you’re looking to be a Cricut-er). There are also heat-transfer machines that work specifically with mugs and hats (if you’re into that sort of thing). Super neat.
Prepping for a family DIY experiment
To get crafting, my family needed a space our cat and dog couldn’t reach, so we turned our front porch into a temporary Cricut studio. It allowed us enough room to spread out our wares. Being new to these machines, we naturally gravitated toward relatively simple projects — a customized iron-on, a baseball cap and a mug. And, naturally, we made a few mistakes — starting with pronouncing the Cricut brand’s name wrong — it’s actually cricket, not cry-cut, as I discovered during my online demo. (Oops!)
The one thing about Cricut is that it’s not cheap. So any sale is a good thing. Because not only do you need the Cricut Joy to cut the material — if you want to use iron-on designs, like decals, vinyl or Infusible Ink — you need a heat press to bond them to your surface. So here’s where the Cricut EasyPress 2 comes in, which is a great buy — currently $40 off at Amazon — and good for beginners. The EasyPress 2 comes in two sizes: 9x9 inches ($149) and 12x10 inches ($199). (Also worth mentioning, the on-sale Cricut EasyPress Mini, $49, which works great for smaller objects like sneakers, baby clothes and stuffed animals.)
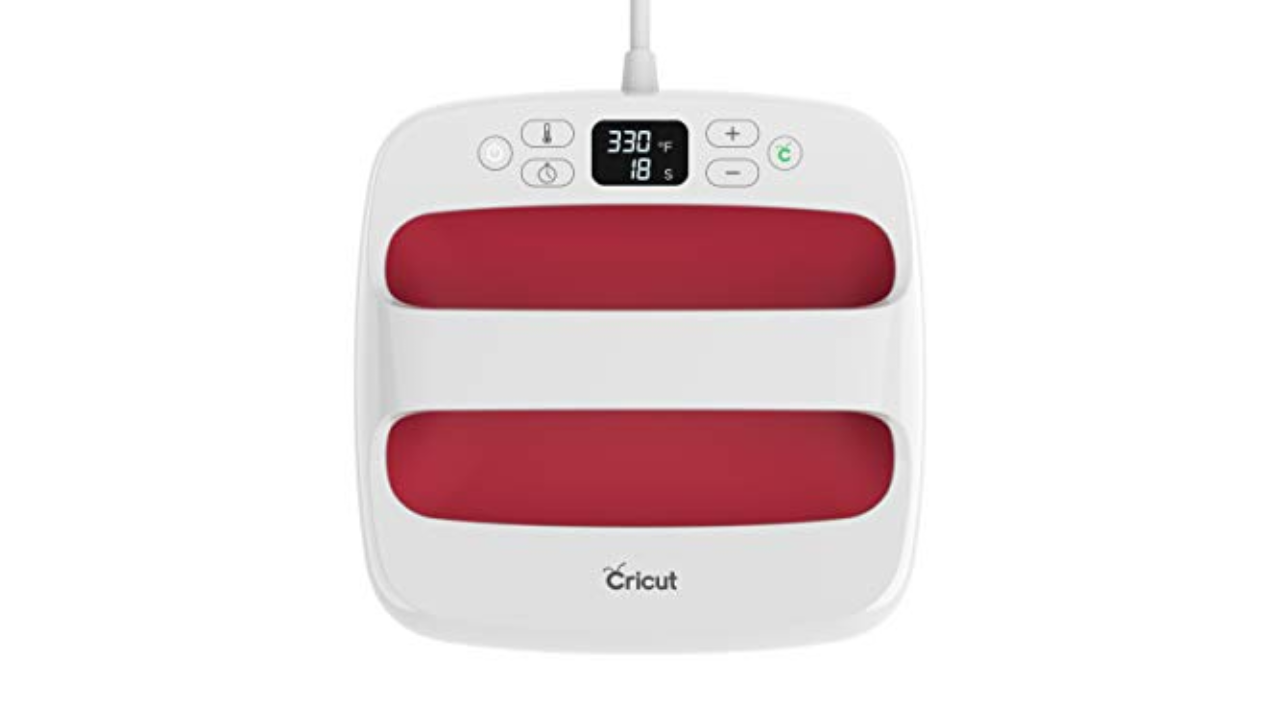
The heat press thankfully features temperature controls and an insulated safety base, but having newbies (including myself) on my porch using tools that heat up to 400 degrees in 60 seconds flat, I was still slightly concerned about the room going up in flames. To ease my anxiety, I used the 12x12 Cricut Easy Mat, currently 33% off ($17). I recommend it for protecting surfaces, your projects — and your house.
Avoiding teen jean drama
My daughter, Lexie, decided to decorate her shorts, giving them a little splash for summer. The Cricut Design software made it easy for her to access hundreds of iron-on designs. And because the app can be downloaded to her phone, also known as a 14-year-old’s natural habitat, it was easy for her to scroll through the choices and be a little more engaged with the DIY aspect. I learned during this process that sunsets are apparently in now — who knew?! — and that’s the direction she went.
She transferred her design from the Design Studio to the Cricut Joy via Bluetooth in seconds. Easy-peasy. Then the cutter did its magic, cutting the material exactly to the specs in less than a minute. The Cricut Heat Guide, which can easily be found on the app or desktop, gives the correct setting for almost any material and was a life saver. On the app, Lexie easily used the dropdowns to determine the exact temperature and time required to make her project. It also guided her with prompts on how long to preheat the material (a very necessary step) and how long to press evenly over the design to distribute the heat.
On the first try Lexie forgot to “weed” the design after it was made, meaning pull away any excess material. Eek! Instead of a sunset, it turned out to be a big blob. So we had a little peeling to do to remove that mistake from the shorts. On the second try, she got it right. Once you know what you’re doing, you can get near professional results in 60 seconds — which I found good for a 14-year-old's attention span. But it can take some time to get there.
Hats off to my husband
My husband, Cliff, was excited to make a customized baseball cap with vinyl lettering for his softball team. This project utilized yet another pricey ($149) accessory called a Cricut Hat Press, which is a nifty little kit that lets you make pro hats at home. You just need the “blanks” — crafters’ parlance for undecorated items. The heat plate is curved, so it presses perfectly on universal-size hats. Just follow the instructions and place the cap on the “hat pressing form” (aka fake head), tape your design on the front with heat-resistant tape (included) and press firmly to bond your design.
The app for this accessory uses the same Bluetooth capability, sending your design specs to the Hat Press, and then walks you through the specific instructions for your project step by step. The catch here is that my husband is a carpenter by trade and an “anxious doer,” as I like to call him, determined to jump in and figure things out as he goes along. Word to the wise: Don’t skip steps because it’ll only throw a wrench in your plans.
Despite the know-it-all approach, Cliff only forgot two details. One, to turn on a little button called “mirroring” — a finer detail in the design program that turns out to be incredibly important). Because without it, the vinyl lettering gets applied backwards. Oops! And, oh, yeah, that “weeding” thing again — removing the extra material in the design that’s not needed. The more intricate lettering, which he had, the longer the weeding takes. But success was quickly achieved in take two (luckily, because my husband has an even shorter attention span than my daughter).
Preparing for my mug shot
When my guinea pigs finished their projects, I was ready to get my hands on my final heat-press accessory: the Cricut Mug Press ($199). Now I see some immediate utility — gifts, personalization, bragging rights at coffee klatches. It’s another sleek, compact machine (yes, I’m obsessed with the design) that lets you customize mugs in minutes.
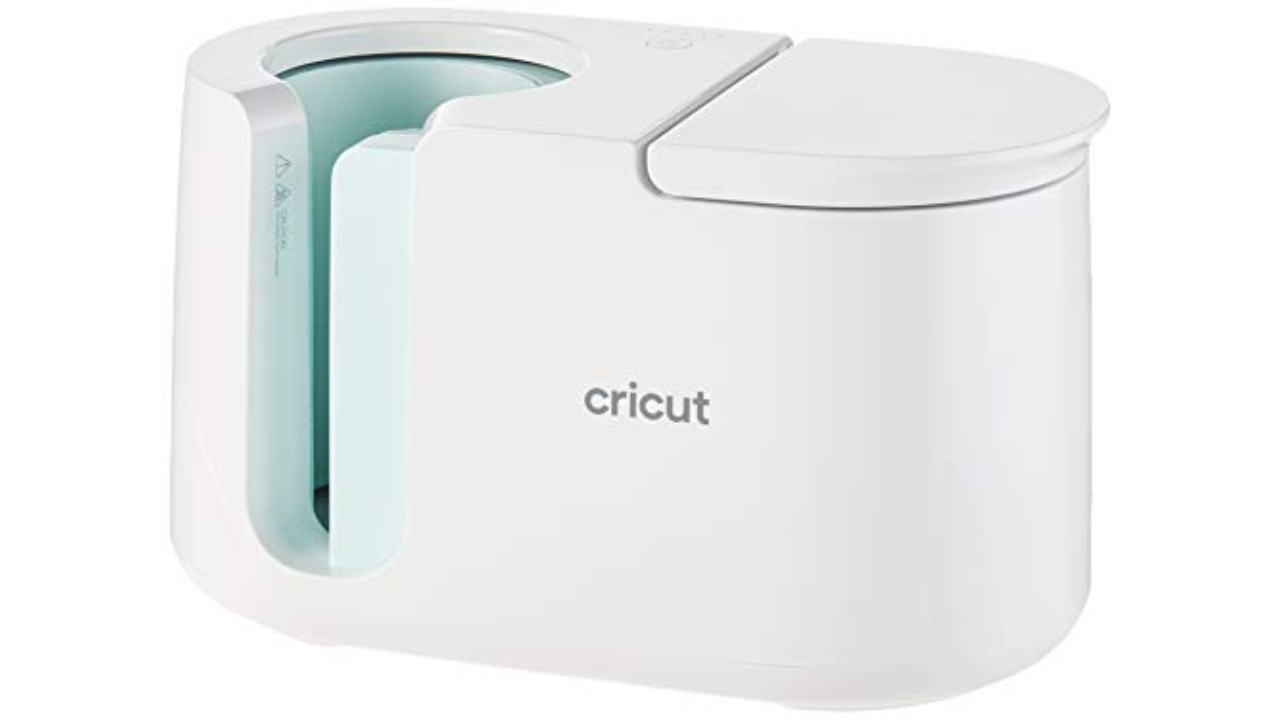
With my blank in hand, I was ready to crank out my mug masterpiece. This accessory uses Infusible Ink material, since it adheres most strongly to the surface — these babies need to be peel-proof and dishwasher-safe.
Since we’d already worked through the trial-and-error process of letters printing backwards and finely detailed weeding, I just needed to concentrate on the capabilities of this machine. There are two ways to make mugs with the Mug Press: 1) the “draw” option, where the Cricut Joy uses an Infusible Ink pen to draw a design of your choice onto the paper. The design then gets pressed on to the mug; 2) the “cut” option, where the Cricut cuts an existing design onto the Infusible Ink paper. I did the latter (basically because I’m chicken).
Once my design was cut, I wrapped the sheet around my mug, placed it in the Mug Press, and pushed down the handle. In just a few minutes, a beep told me it was done. Once it cooled, I removed the wrapper. Since I used a cutout design, there was some weeding. But I’m a pro at that now. Once dry, my mug was smooth, colorful, glossy — and I was proud!
Sharing my “wannabe” honesty
So back to the original question. Is Cricut right for wannabe crafters? I look at it in two ways: Yes, in that it levels the playing field and gives you superhuman skills to craft items even experienced crafters probably can’t do. But you need to be invested and want to spend time doing this hobby. Not that you have to start an Etsy business, but you should have the desire to create some cool stuff for events and celebrations — because the machines aren’t cheap. (I did a back-of-the-envelope estimate on the machines and accessories needed and it was reaching upwards of $400.)
So if you’re serious about embarking on the Cricut path, I’d say go for it — especially during the Amazon sale. It could open up a whole new world for those who never thought they were good enough for DIY.
If you have Amazon Prime, you’ll get free shipping, of course. Not yet a member? No problem. You can sign up for your free 30-day trial here. (And by the way, those without Prime still get free shipping on orders of $25 or more.)

