How to Color Correct
Sometimes, foundation and concealer alone don't cut it. No matter how much coverage you layer on, stubborn dark undereye circles, redness, and acne scars can still show through. When your go-to complexion products fail, it's time to call in some trusty reinforcements: color correctors. The general gist is that the unusual pigments like lavender, sea foam, and muted yellow can work to counterbalance pesky undertones in your skin.
Previously a technique only makeup artists knew, color correcting has reached the masses thanks to YouTube and Instagram tutorials. Nearly every makeup brand now has color correcting products: liquids, creams, powders, and tubes of primer in greens, purples, and yellows. Since color correctors come in such a wide spectrum of rainbow shades, it can be intimidating for the average makeup wearer to figure out application. That's why we tapped Estée Lauder makeup artist Jocelyn Biga to help us master the basics. Ahead, four ELLE.com staffers demonstrate the transformative powers of color correcting.
Figure out your problem areas.
"First, identify what you want to correct. Ask yourself: Are you getting what you want with your concealer and foundation? If the answer is no, then that means a corrector could help," Biga said.
Have you noticed that hyper pigmentation on your cheeks is the most difficult to cover up? Do you feel like there's dullness beneath your eyes? Do you have a large surface area of discoloration or just tiny target spots? There's a color corrector to neutralize each of these individual concerns. "The best example is dark circles," Biga continued, "Sometimes when you put concealer over dark circles, it looks ashy. You need to cut that blue first."

Apply color correctors before foundation-and blend, blend, blend.
The whole point is to have your foundation do less. "The moment you strike a color corrector on the skin you have to immediately blend it," Biga added, "They dry so fast. Blend one color at a time, definitely." The makeup artist also said that your application technique for foundation is crucial.
"You can't put on your foundation the way you normally would because then you disturb the correcting underneath," she said. "Do a stippling effect and pack it on there versus spreading. Do it little by little. You don't want to disturb the corrector underneath and you don't want it to become part of the foundation so it changes the color."
Use heavier color correcting coverage on targeted spots.
Biga said that on places where you have individual marks or spots and where your pores are larger-like the nose and center of the face-you'll want to use heavier coverage. "Thin [coverage] is not going to last. Go thicker around these areas where foundation goes away," she said.
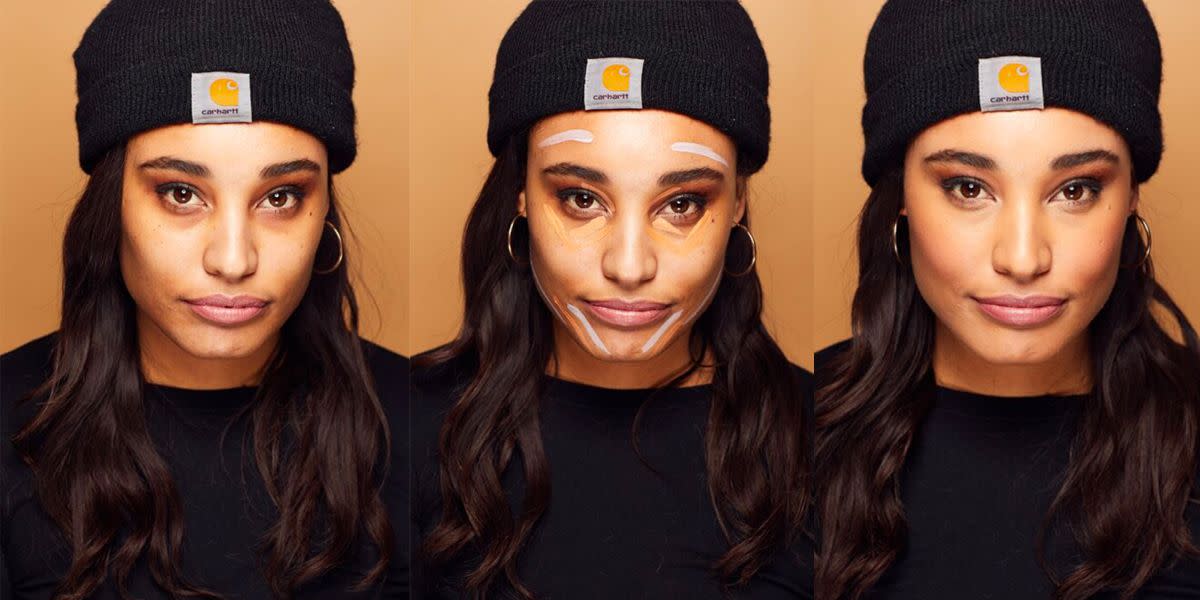
Chloe: Dark Circles, Hyperpigmentation

Lavender applied around the jawline and forehead neutralizes yellowness and cancels out dullness and hyperpigmentation.
Tangerine, applied under the eyes cuts the blue from dark circles.
Kristina: Acne Scars, Redness

Emily: Redness

Green, applied in the center of the face neutralizes redness.
Pink, applied underneath the orbital bone and along the T-zone works to brighten blueness of dark dark areas for fair skin.
Madi: Dark Spots, Dark Circles
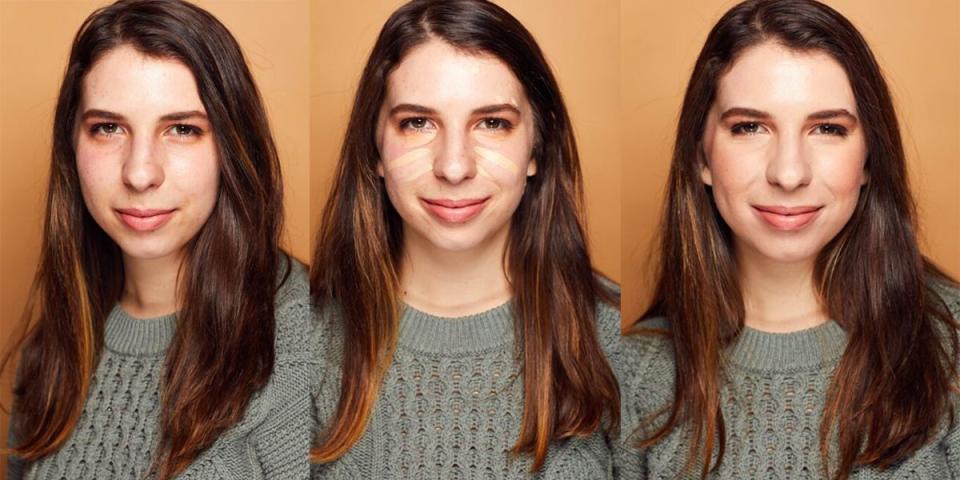
Yellow, applied on the apples of the cheeks brightens dullness and neutralizes mild redness.
Peach, applied under the eyes and around mouth evens discoloration and darkness.
You Might Also Like

