You don't hear much about Home Ec courses in schools these days. Even though many voices, from Anthony Bourdain to Slate, have called for its return, there's still the critique that teaching high-schoolers cooking, budgeting and basic household skills is like saying they should walk around in poodle skirts -- a "regressive" idea that doesn't have a place in the modern curriculum.
Yet the history of home economics isn't necessarily in line with the idea of miniature "Stepford Wives" who sew aprons in a daze. You know, a bit like this:
Quite the opposite. To home ec curriculum pioneers, the topic was considered a science. -------------------------------- The creation of home ec is often attributed to Ellen Swallow Richards, a chemist and instructor at MIT, who paved the way for MIT's Women's Laboratory, which existed from 1876 to 1883 with a goal of advancing the scientific education of women at the Institution.
At the Women's Laboratory, Richards turned her scientific attention to the study of how to make home life more efficient. According to the Chemical Heritage Foundation, "Richards was very concerned to apply scientific principles to domestic topics -- good nutrition, pure foods, proper clothing, physical fitness, sanitation, and efficient practices that would allow women more time for pursuits other than cooking and cleaning."
Richards' philosophy -- that running one's home as efficiently as possible in order to make more time for things like, say, education -- might be surprising to those who still see home ec as being anti-intellectual. To Richards, home ec wasn't contrary to feminist principles. After all, she gathered other progressive women in 1899 to come up with academic guidelines for a fuller home ec curriculum that would "liberate" women from house work. The meetings, which occurred yearly in Lake Placid, New York until 1909, led to the formation of the American Home Economics Association. The group lobbied for increased funding for home economics programs. Richards was the president of the group until her death in 1911. (The American Home Economics Association was later renamed the American Association of Family & Consumer Sciences and still exists today.)
But let's back up a second. Another guiding force behind the formal teaching of home economics was The Morrill Act of 1862, which led to the establishment of land-grant colleges in each state. These colleges, which offered both classical academic and practical courses, were open to women. "Domestic Science" courses were often on the agenda, specifically geared towards the wives of farmers, who were expected to run the household in addition to assisting in farm work.
At Cornell, the curriculum had a more experimental direction. Famously, the school had "practice homes" and "practice babies." Each is exactly what you'd think they'd be. Students were tasked with taking care of an actual baby, sourced through an orphanage, in accordance to the latest in scientific theories of child rearing. After the school year was over, the babies would be put up for adoption. The first child arrived on campus in 1919.
Author Lisa Grunwald describes the environment in which practice babies were kept:
Bobby was only the second infant to come to the Cornell practice house. Like others who would follow him, he lived in a strange, artificial world: a nondescript apartment in which there were no favorite books on the bookshelves and no favorite clothes in the closet, and a baby in the nursery who could not have a favorite grown-up.
Cornell wasn't the only college to use orphaned infants as living, breathing lesson plans. By the 1950s, up to 50 institutions of higher learning incorporated "practice babies" into the home ec curriculum.
home economics
A glimpse into a midcentury home economics class.
-------------------------------- The post-World War II landscape presented a challenge for college-level home ec studies. During the Cold War, universities started to defund programs in favor of increasing budgets for science departments. The explosion of convenience foods made from-scratch cooking seem irrelevant. As college-level courses disappeared, those at the high school level lost their cache, as well. As Megan J. Elias writes in "Stir It Up: Home Economics in American Culture," home ec "became associated with dead-end high school classes for girls."
-------------------------------- Today, while home economics courses occasionally pop up in high schools, the language has changed. Instead of home ec, it's usually called something like "Family And Consumer Sciences." Even Richards' American Home Economics Association has been renamed the American Association of Family & Consumer Sciences. While home ec's founders would love the "science" part of that title, they might wonder where the "home" went.
So, what now? We have a few ideas.
- Language matters. "Consumer Science" on its own has broader appeal than throwing "Family" into the mix. "Family" sounds like we're back in the "practice baby" days. - Timing matters, too. A high school kid can handle learning how to make grilled cheese. But the student likely won't remember the in-depth lecture about interest rates, mainly because that's probably not part of his or her world yet. But in college, with student loan debts averaging in the high $20,000s, it's a great time to learn things like budgeting and basic business etiquette. Work in the "core" home ec classes from there: Managing laundry, meal planning and cooking. - Don't make it part of the formal curriculum. Instead, treat it as informally as freshmen orientation. - Change your attitude. The sooner we can accept that Home Ec isn't just for women, the sooner we can have students who have attain stronger life skills.
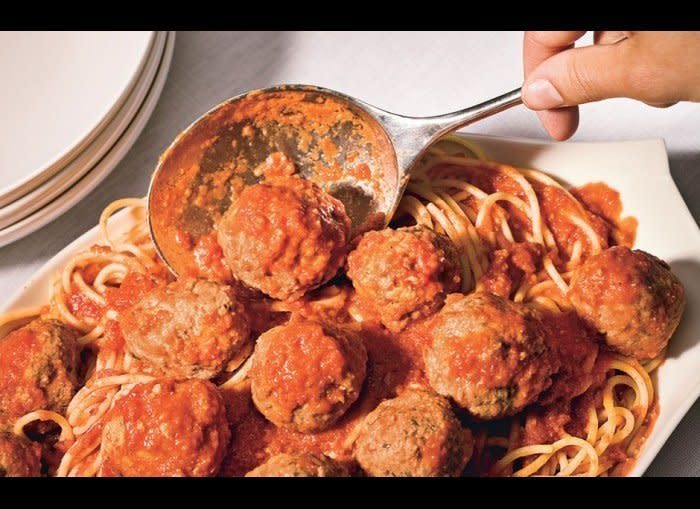
Spaghetti and Meatballs
SERVINGS: 6 MAIN-COURSE PREP: 1 MINUTES TOTAL: 2 HOURS INGREDIENTS SAUCE 2 28-ounce cans whole peeled tomatoes in juice, drained, juice reserved, tomatoes finely chopped 1/2 cup (1 stick) unsalted butter 2 medium onions, peeled, halved through root end 1/2 teaspoon (or more) salt MEATBALLS 1 cup fresh breadcrumbs made from crustless French or country-style bread 1/3 cup whole milk 8 ounces ground beef (15% fat) 8 ounces ground pork 1 cup finely ground (not grated) Parmesan cheese 1/3 cup finely chopped Italian parsley 1 teaspoon saltt 1/4 teaspoon freshly ground black pepper 2 large eggs 2 large garlic cloves, pressed 1 pound spaghetti Freshly grated Parmesan cheese (for serving) PREPARATION SAUCE Combine tomatoes with juice, butter, onions, and salt in large wide pot. Bring to simmer over medium heat. Reduce heat; simmer uncovered 45 minutes, stirring occasionally. Discard onions. Using immersion blender, process sauce briefly to break up any large pieces of tomato (texture should be even but not completely smooth). Season sauce with more salt and freshly ground black pepper. Remove from heat. MEATBALLS Combine breadcrumbs and milk in small bowl; stir until breadcrumbs are evenly moistened. Let stand 10 minutes. Place beef and pork in large bowl and break up into small chunks. Add 1 cup ground Parmesan, parsley, salt, and pepper. Whisk eggs to blend in small bowl; whisk in garlic. Add to meat mixture. Using hands, squeeze milk from breadcrumbs, reserving milk. Add breadcrumbs to meat mixture. Using hands, quickly and gently mix meat mixture just until all ingredients are evenly combined (do not overmix). Chill mixture at least 15 minutes and up to 1 hour. Moisten hands with some of reserved milk from breadcrumbs, then roll meat mixture between palms into golf-ball-size balls, occasionally moistening hands with milk as needed and arranging meatballs in single layer in sauce in pot. Bring to simmer. Reduce heat to medium-low, cover, and simmer until meatballs are cooked through, 15 to 20 minutes. DO AHEAD Can be made 2 days ahead. Cool slightly. Chill uncovered until cold, then cover and keep chilled. Rewarm before continuing. Cook spaghetti in large pot of boiling salted water until just tender but still firm to bite, stirring occasionally. Drain. Using slotted spoon, transfer meatballs to platter. Add pasta to sauce in pot and toss to coat. Divide pasta among 6 plates. Top each serving with meatballs. Sprinkle meatballs with freshly grated Parmesan cheese and serve. PHOTOGRAPH BY ELINOR CARUCCI
Chicken Pot Pie
SERVINGS: 6 PREP: 30 MINUTES INGREDIENTS 1/4 cup olive oil 1 cup frozen white pearl onions, thawed 4 garlic cloves, finely chopped 1 tablespoon chopped fresh sage 1 small bunch kale, center ribs and stems removed, leaves chopped tt Kosher salt, freshly ground pepper 1/4 cup all-purpose flour 3 cups low-sodium chicken broth 1/2 small butternut squash, peeled, cut into 1/2-inch pieces (about 1 1/2 cups) 1/2 rotisserie chicken, meat torn into bite-size pieces (about 1 1/2 cups) 1 sheet frozen puff pastry (such as Dufour or Pepperidge Farm), thawed 1 large egg PREPARATION Place a rack in upper third of oven; preheat to 425°. Heat oil in an 8-inch cast-iron or other heavy ovenproof skillet over medium-high heat. Add onions; cook, stirring occasionally, until beginning to brown, about 4 minutes. Reduce heat to medium-low. Add garlic and sage to skillet and cook, stirring occasionally, until garlic begins to brown, about 2 minutes. Add kale and season with salt and pepper. Cook, tossing often, until wilted, about 4 minutes. Sprinkle flour over. Cook, stirring constantly, for 4 minutes. Stir in broth, 1/2-cupful at a time, then add squash. Bring to a boil, reduce heat, and simmer until squash is just softened and broth is thickened, 8-10 minutes. Add chicken to skillet, stir, and season with salt and pepper. Unfold pastry and smooth any creases; place over skillet, allowing corners to hang over sides. Whisk egg and 1 teaspoon water in a small bowl. Brush pastry with egg wash; cut four 1-inch slits in top to vent. Bake pot pie until pastry is beginning to brown, 15-20 minutes. Reduce oven temperature to 375° and bake until pastry is deep golden brown and crisp, 15-20 minutes longer. Let cool for 10 minutes before serving. Photo by Brian W Ferry
Garlic Bread
SERVINGS: 4 PREPARATION Mix 1/2 cup (1 stick) room-temperature unsalted butter, 2 tablespoons finely chopped flat-leaf parsley, 2 finely chopped garlic cloves, and 1 teaspoon kosher salt in a small bowl. Cut 1 baguette into 1-inch slices, without cutting all the way through; spread both sides of each slice with butter mixture. Cut baguette into 4 equal pieces. Wrap each piece in foil. DO AHEAD: Bread can be prepared 2 hours ahead. Let stand at room temperature. Preheat oven to 375°. Bake bread on a baking sheet until butter is melted and bread is warm, 5–8 minutes. Photo by Matt Duckor
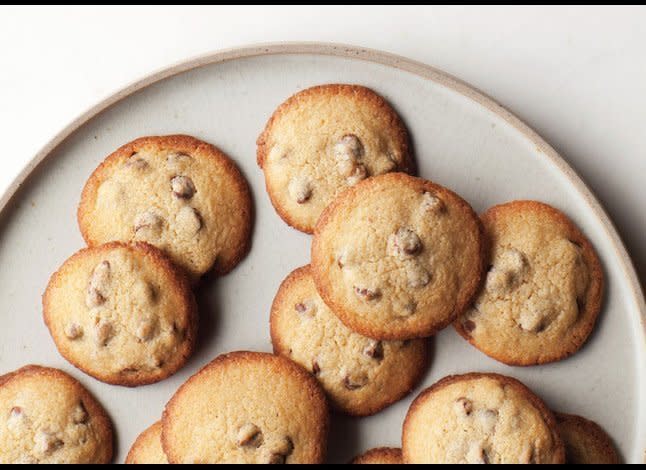
Chocolate Chip Cookies
SERVINGS: MAKES 20 COOK: 20 MINUTES INGREDIENTS 1 cup plus 2 tablespoons all-purpose flour 3/4 teaspoon kosher salt 1/2 teaspoon baking powder 3/4 cup (1 1/2 sticks) unsalted butter, room temperature 3/4 cup (packed) light brown sugar 1/4 cup sugar 1 large egg, room temperature 1/2 teaspoon vanilla extract 1 cup semisweet or bittersweet chocolate chips PREPARATION Arrange racks in upper and lower thirds of oven; preheat to 425°. Line 2 baking sheets with parchment paper. Whisk flour, salt, and baking powder in a small bowl. Using an electric mixer on medium-high speed, beat butter and both sugars in a large bowl until well combined, 2–3 minutes. Add egg and vanilla; beat on medium-high speed until mixture is light and fluffy, 2–3 minutes. Add dry ingredients, reduce speed to low, and mix just to blend. Fold in chocolate chips. Spoon heaping tablespoonfuls of dough onto prepared baking sheets, spacing 1 1/2" apart. Bake, rotating pans halfway through, until edges are golden brown, 6–8 minutes. Transfer to wire racks and let cool. DO AHEAD: Can be made 1 day ahead. Store airtight at room temperature, or freeze cookies for up to 2 months. Photo by Tarra Donne
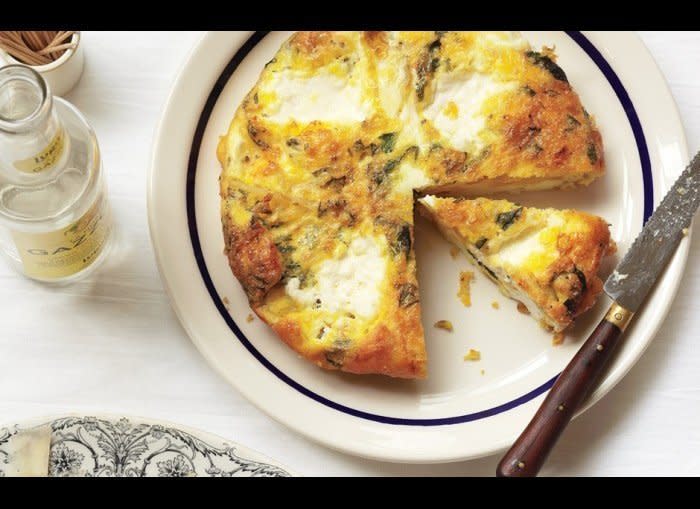
Frittata
INGREDIENTS 8 large eggs 1/2 cup finely grated Parmesan 3 large fresh basil leaves, torn into pieces 3 large fresh sage leaves, minced 1 tsp. minced fresh rosemary 1/4 tsp. kosher salt 1/8 tsp. freshly ground black pepper 3 Tbsp. extra-virgin olive oil 1 cup thinly sliced onion 1/3 cup whole-milk ricotta PREPARATION Preheat oven to 400°. Whisk first 7 ingredients in a medium bowl; set aside. Heat oil in a medium ovenproof nonstick skillet over medium-high heat. Add onion; sauté until soft, about 6 minutes. Reduce heat to low. Stir in egg mixture. Spoon dollops of ricotta evenly over. Cook until frittata begins to set, about 2 minutes. Place in oven; bake until just set, 7-9 minutes. Slide the frittata onto a platter. Cut into wedges; serve hot or at room temperature. Photo by Marcus Nilsson
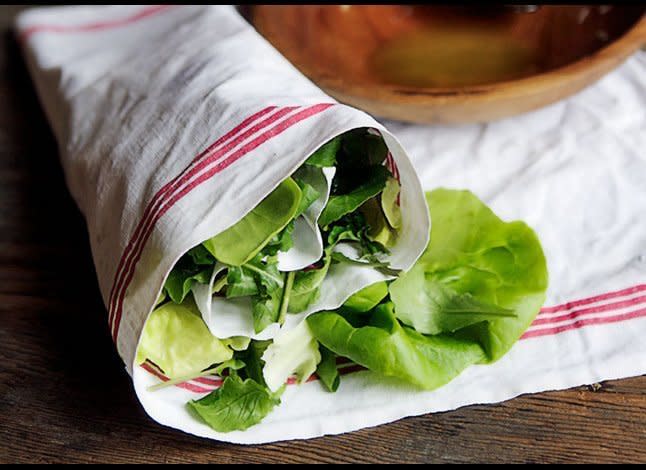
Classic Salad
INGREDIENTS 1 small garlic clove, chopped 1 anchovy fillet packed in oil, drained, chopped Kosher salt and freshly ground black pepper 1 1/2 tablespoons white wine vinegar 1/4 cup (or more) extra-virgin olive oil 1 9-ounce head of freshest-possible lettuce, leaves separated, torn if large (about 6 cups) 1/2 cup minced chives PREPARATION Using a wooden spoon, mash garlic, anchovy, and a pinch each of salt and pepper in a large bowl. Stir in vinegar, then 1/4 cup oil. Season to taste with salt, pepper, and more oil, if desired. Add lettuce leaves and chives just before serving and toss to coat. Photo by Hirsheimer Hamilton
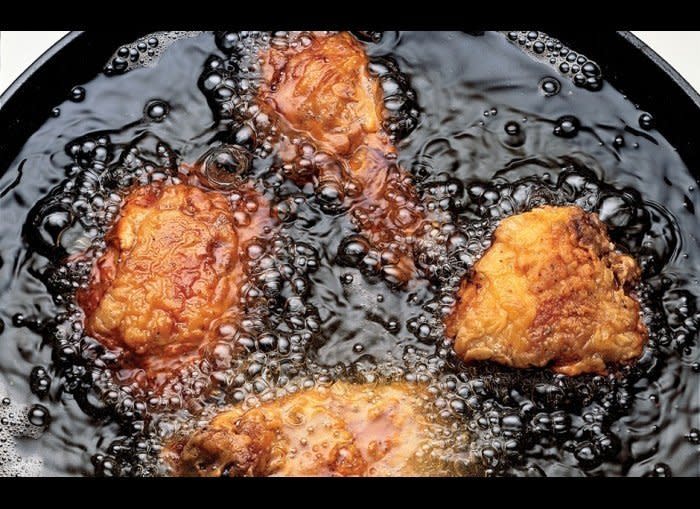
Fried Chicken
INGREDIENTS 2 tablespoons kosher salt, divided 2 teaspoons plus 1 tablespoon freshly ground black pepper 1 1/2 teaspoons paprika 3/4 teaspoon cayenne pepper 1/2 teaspoon garlic powder 1/2 teaspoon onion powder 1 3–4-lb. chicken (not kosher), cut into 10 pieces, backbone and wing tips removed 1 cup buttermilk 1 large egg 3 cups all-purpose flour 1 tablespoon cornstarch Peanut oil (for frying) PREPARATION Whisk 1 Tbsp. salt, 2 tsp. black pepper, paprika, cayenne, garlic powder, and onion powder in a small bowl. Season chicken with spices. Place chicken in a medium bowl, cover, and chill overnight. Let chicken stand covered at room temperature for 1 hour. Whisk buttermilk, egg, and 1/2 cup water in a medium bowl. Whisk flour, cornstarch, remaining 1 Tbsp. salt, and remaining 1 Tbsp. pepper in a 9x13x2" baking dish. Pour oil into a 10"–12" cast-iron skillet or other heavy straight-sided skillet (not nonstick) to a depth of 3/4". Prop deep-fry thermometer in oil so bulb is submerged. Heat over medium-high heat until thermometer registers 350°. Meanwhile, set a wire rack inside a large rimmed baking sheet. Photo by Mitchell Feinberg
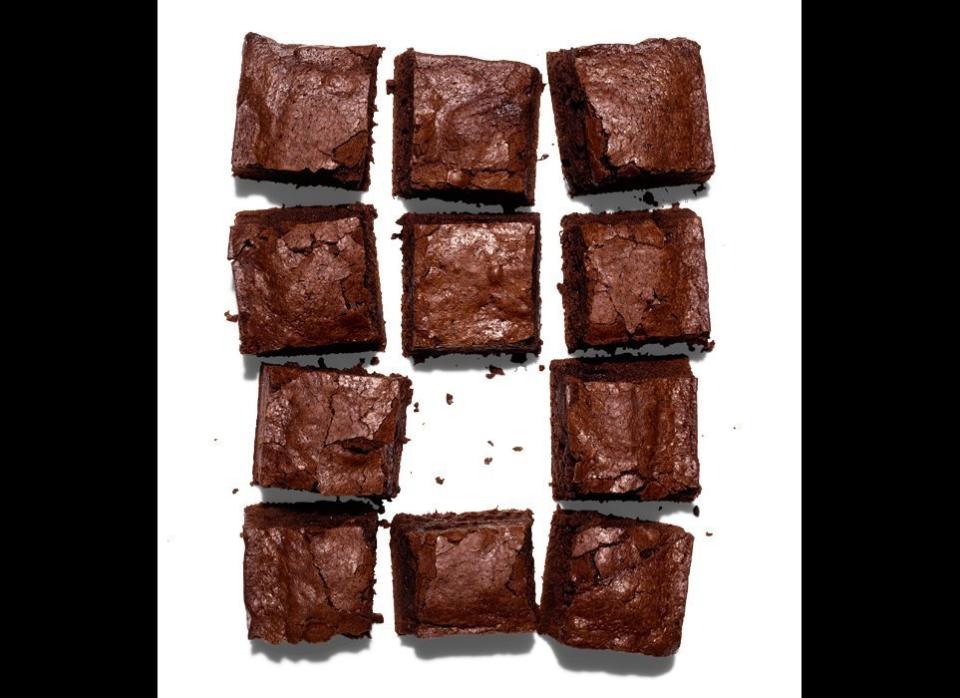
INGREDIENTS Nonstick vegetable oil spray 1/2 cup (1 stick) unsalted butter, cut into 1 inch pieces 1 1/4 cups sugar 3/4 cup Scharffen Berger natural unsweetened cocoa powder 1/2 teaspoon kosher salt 1 teaspoon vanilla extract 2 large eggs 1/3 cup all-purpose flour PREPARATION Preheat oven to 325°. Line an 8x8x2 inches glass baking dish with foil, pressing firmly into pan and leaving a 2 inches overhang. Coat foil with nonstick spray; set baking dish aside. Melt butter in a small sauce-pan over medium heat. Let cool slightly. Whisk sugar, cocoa, and salt in a medium bowl to combine. Pour butter in a steady stream into dry ingredients, whisking constantly to blend. Whisk in vanilla. Add eggs one at a time, beating vigorously to blend after each addition. Add flour and stir until just combined (do not overmix). Scrape batter into prepared pan; smooth top. Bake until top begins to crack and a toothpick inserted into the center comes out with a few moist crumbs attached, 25-30 minutes. Transfer pan to a wire rack; let cool completely in pan. Using foil overhang, lift brownie out of pan; transfer to a cutting board. Cut into 16 squares. Photo by Tom Schierlitz
Pancakes
SERVINGS: MAKES ABOUT 28 INGREDIENTS 2 1/4 cups all purpose flour 2 teaspoons baking powder 1 teaspoon salt 2 cups whole milk 4 large eggs, separated 2 tablespoons (1/4 stick) or more unsalted butter, melted 2 tablespoons sugar Additional melted butter Pure maple syrup PREPARATION Whisk flour, baking powder, and salt in large bowl to blend. Whisk milk and egg yolks in medium bowl to blend. Whisk milk mixture into dry ingredients. Add 2 tablespoons melted butter and whisk until batter is smooth. Beat egg whites in another medium bowl until soft peaks form. Gradually add sugar, beating until stiff but not dry. Fold whites into batter in 2 additions. Heat nonstick griddle or large nonstick skillet over medium heat. Brush generously with additional melted butter. For each pancake, fill 1/4 cup measuring cup half full and drop batter onto griddle. Cook pancakes until bottoms are brown, about 3 minutes. Using spatula, turn pancakes over and cook until bottoms are brown and pancakes are cooked through, about 2 minutes. Transfer to plates. Serve warm with syrup. Photo by Tina Rupp
Burger
SERVINGS: MAKES 4 INGREDIENTS 1 1/2 pounds ground beef chuck (20% fat) 1 1/4 teaspoons kosher salt 1/2 teaspoon freshly ground black pepper 4 slices American cheese 4 potato rolls (such as Martin's or Oroweat) PREPARATION Divide meat into 4 equal portions (about 6 oz. each). Place 1 portion on a work surface. Cup your hands around the meat and begin to gently shape it into a rounded mound. (Use light pressure as you shape so you don't pack the meat too tightly.) Lightly press down on the top of the meat with your palm to gently flatten it. Continue rotating and cupping the meat, patting the top of it occasionally, until you've formed a 4"-diameter, 3/4"-thick patty. Using your thumb, make a small indentation in the center to help keep the burger flat as it cooks. Transfer to a plate. Repeat with remaining portions. Build a medium-hot fire in a charcoal grill, or heat a gas grill to high. Season one side of patties with salt and pepper; place on grill, seasoned side down. Grill until lightly charred on bottom, about 4 minutes. Season other side, turn, and top with cheese. Grill to desired doneness, about 4 minutes longer for medium. Transfer burgers to buns and let stand for 3 minutes before serving. Photo by Romulo Yanes
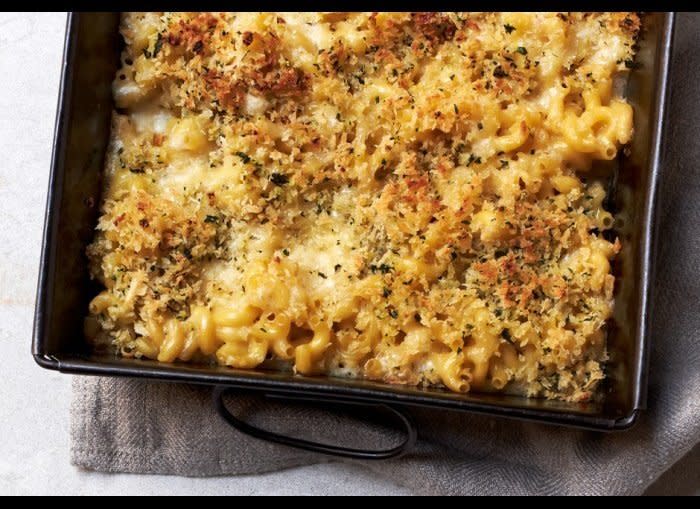
Mac and Cheese
SERVINGS: 8 ACTIVE: 30 MINUTES TOTAL: 1 HOURS INGREDIENTS 1/2 cup (1 stick) unsalted butter, divided 1/4 cup all-purpose flour 3 cups whole milk 1 tablespoon kosher salt plus more 1/2 teaspoon freshly ground black pepper plus more 1 pound elbow macaroni 2 cups shredded cheddar, divided 2 garlic cloves, chopped 1 cup panko (Japanese breadcrumbs) 2 tablespoons chopped flat-leaf parsley PREPARATION Preheat oven to 400°. Melt 1/4 cup butter in a large saucepan over medium-high heat. Add flour; cook, whisking constantly, for 1 minute. Whisk in milk and 3 cups water. Bring to a boil, reduce heat to a simmer, and cook, whisking often, until a very thin, glossy sauce forms, about 10 minutes. Stir in 1 tablespoon salt and 1/2 teaspoon pepper. Remove sauce from heat. Toss pasta and 1 1/2 cups cheese in a 13x9x2-inch or other shallow 3-quart baking dish. Pour sauce over (pasta should be submerged; do not stir) and cover with foil. Bake until pasta is almost tender, about 20 minutes. Meanwhile, melt remaining 1/4 cup butter in a large skillet over medium heat. Add garlic, panko, and parsley and toss to combine. Season with salt and pepper. Remove foil from dish. Sprinkle with remaining 1/2 cup cheese, then panko mixture. Bake until pasta is tender, edges are bubbling, and top is golden brown, about 10 minutes longer. Let sit 10 minutes before serving. FOR THE REST OF THE RECIPES YOU SHOULD KNOW HOW TO MAKE, VISIT BON APPETIT.COM Photo by Christina Holmes
Marvin Harrison Jr., Fanatics said, “rejected or ignored every request” from the company while refusing to fulfill obligations of their contract that was signed last May.
According to Bloomberg’s Mark Gurman, Apple will be offering a little more than usual for some trade-ins starting next week in the US and Canada. That's as long as you're getting one of the iPhone 15 models.
Yahoo Sports NBA draft expert Krysten Peek is back for another season of On the Clock with Krysten Peek. Krysten just spent the week in Chicago at the NBA Draft Combine and kicks off draft season joined by CBS Sports' Kyle Boone.
The atmosphere was electric for Clark's home debut and there were brief flashes from the Fever, but it's clear they've got plenty to work on before they can compete with the WNBA's elite teams.
All five of these hitters were drafted highly in fantasy baseball leagues. So far, they have not lived up to their ADPs — and that's an understatement. Scott Pianowski analyzes.