Without a truss rod, your guitar would be a lot harder to play – here's everything you need to know, from the history of the truss rod to how to adjust it safely
Before steel strings became commonplace, most guitar necks were able to remain fairly straight under the low tension of gut strings without any reinforcement. But steel strings have much higher tension, and in order to counteract the pull, guitar manufacturers carved very chunky necks.
We’re not talking cool late-1950s profiles here – because necks from the early steel-string era can be an uncomfortable handful. Clearly, Gibson recognised this and company employee Thaddeus McHugh came up with a design for an adjustable truss rod.
Trussed up
Born in 1859, Thaddeus (Ted) lived in Kalamazoo all his life and spent 30 years at Gibson. His patent application was filed in 1921 and US Patent #1446758 was granted on 27 February 1923 with an anticipated expiration date of 27 February 1940.
The patent diagram shows a flat-top acoustic with an adjustment nut at the headstock with a rod curving upwards towards the fretboard and an anchor point about halfway down the heel.
In the application document he also states: “By this arrangement of parts, I am also enabled to use wood which has not been heretofore considered satisfactory for the manufacture of necks.”
This reveals that Thaddeus’ truss rod design served two functions. First, it could stiffen and reinforce a neck. But second, and more significantly, it could be used to make minor adjustments if a neck bowed upwards.
Over at Martin Guitars, the neck-bending issue had clearly been identified, and starting in 1920, ebony strips were used to add stiffness. Martin transitioned to a steel T-bar in 1934, which lasted until 1967 when a square steel tube was introduced.
Due to steel shortages during World War II and the Korean war, Martin briefly reverted to ebony strips, and adjustable truss rods have only been standard on Martins since 1985. Martin recently revisited the concept of rod-less necks, using extremely stiff and light carbon fibre in place of ebony.
Leo Fender was initially unenthused about truss rods, and the very earliest Fender necks were made without them. Leo would place necks between a couple of chairs and bounce up and down on them to demonstrate their strength.
However, he hadn’t accounted for timber’s tendency to move about in response to temperature and humidity changes. When the earliest Fender owners returned from icy Canada to sunny California, they reported that their guitars were buzzing and the action was changing. Leo reconsidered and quickly began installing adjustable truss rods.
This change meant routing a truss rod channel into the back of Fender’s one-piece necks, anchoring it through the front of the headstock at one end and creating an access hole for adjustment at the other. Hence, the famous walnut skunk stripe filling the channel and the walnut/maple headstock plugs.
When Fender changed to rosewood ’boards, the truss-rod channel could be cut on the upper side, then filled and concealed under the fretboard. That’s why vintage rosewood-’board and maple-cap necks never have plugs or stripes.
Rickenbacker is unusual in installing two truss rods, rather than a single rod running along the middle. The idea is that a rod each side of the centre line can be used to counteract twisting as well as control up-bow. Rickenbacker truss rods also slide in and out of the necks and can be replaced quite easily if one breaks.
The symptoms are easy to spot. A guitar that was previously playing cleanly might start buzzing and rattling because the string height has decreased. Or a low-playing action may start to feel higher and stiffer.
The intonation might begin to sound a little off and you’ll struggle to make your guitar play in tune with itself. In our experience, this tends to happen biannually during spring and autumn. Under normal circumstances, and all things being equal, bridges and saddles don’t tend to move around on their own and you should investigate the neck relief before booking your guitar in for a setup.
Behind the curve
To check the straightness of your neck, fret a string at the 1st fret. At the same time, fret the same string using the thumb of your picking hand where the neck joins the body. This effectively creates a straight line between these two points. Use the middle finger of the picking hand to press the string down at the 7th fret. If this feels awkward, use a capo or two, or search online for a ‘notched fretboard ruler’.
Ideally, you should notice a slight gap between the string and the top of the 7th fret. If the string is resting on the fret, the neck is set too flat or may even be back-bowed. This results in fretbuzz, choking out and poor tone.
On the other hand, a large gap indicates the neck has settled into an up-bow, which results in higher string action. Intonation drift provides a subtle clue. When a neck is up-bowed, the distance between the nut and bridge shortens, and when it’s back-bowed the distance increases.
Another issue is often encountered on single-cutaway guitars because the truss rod has no effect on the neck beyond the body join. If the action feels fine up to the 15th or 16th frets, but things get buzzy and choke out above that point, you can be pretty certain there’s an up-bow and the bridge has been lowered to compensate for the raised action without any truss-rod adjustment.
Time to tweak
Before we discuss truss-rod adjustments, it’s worth making clear what truss rods can and cannot do. Single-action truss rods are designed to make relatively minor corrections to necks with slight up-bows. A dual-action truss rod should also be able to dial out a back-bow.
But if a neck is severely bowed in either direction or twisted, then cranking a truss rod beyond its limits isn’t the way to force it back into shape. And if you snap the truss rod, your neck could be toast. There are methods to straighten badly bowed necks, but they’re best entrusted to professionals.
If possible, make truss-rod adjustments with the strings tuned to pitch and retune after each turn
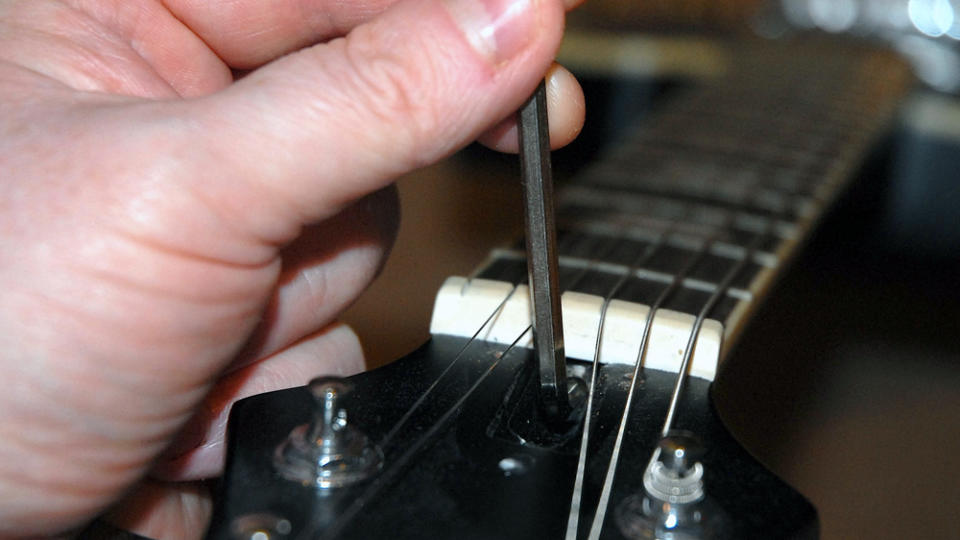
If you’re dealing with slightly too much relief, the truss rod needs to be tightened clockwise to counteract the string pull. If there’s insufficient relief or a slight back-bow, turning anti-clockwise will release some rod tension and hopefully allow the strings to pull the neck back into shape.
If possible, make truss-rod adjustments with the strings tuned to pitch and retune after each turn. If you’re new to this, work slowly, restrict yourself to 1/8th increments and allow the neck to settle between each turn. Healthy truss rods adjust quite easily, so if you’re applying moderate force and nothing’s moving, the rod may already be over-tightened or seized.
When dealing with older guitars, try unscrewing the nut completely to remove it, and apply a bit of grease to the threads. If the threads look damaged, or the wood is cracked or compressed around the truss rod, you should consult a tech rather than continue. Similarly, if there’s still insufficient relief or even a back-bow after a single-action truss rod is slackened off completely, it’s tech time.
You can search online for recommended relief gaps and go to car accessories shops and buy feeler gauges for measurement, but it’s equally valid to use your ears and go by the feel of the guitar.
Some relief is needed at the point of maximum displacement to allow strings to vibrate freely. However, most electric players are prepared to tolerate some buzzing in return for lower action and easy string bends. If it can’t be heard through an amp and sustain isn’t compromised, then don’t get too neurotic about it.
Tooling up
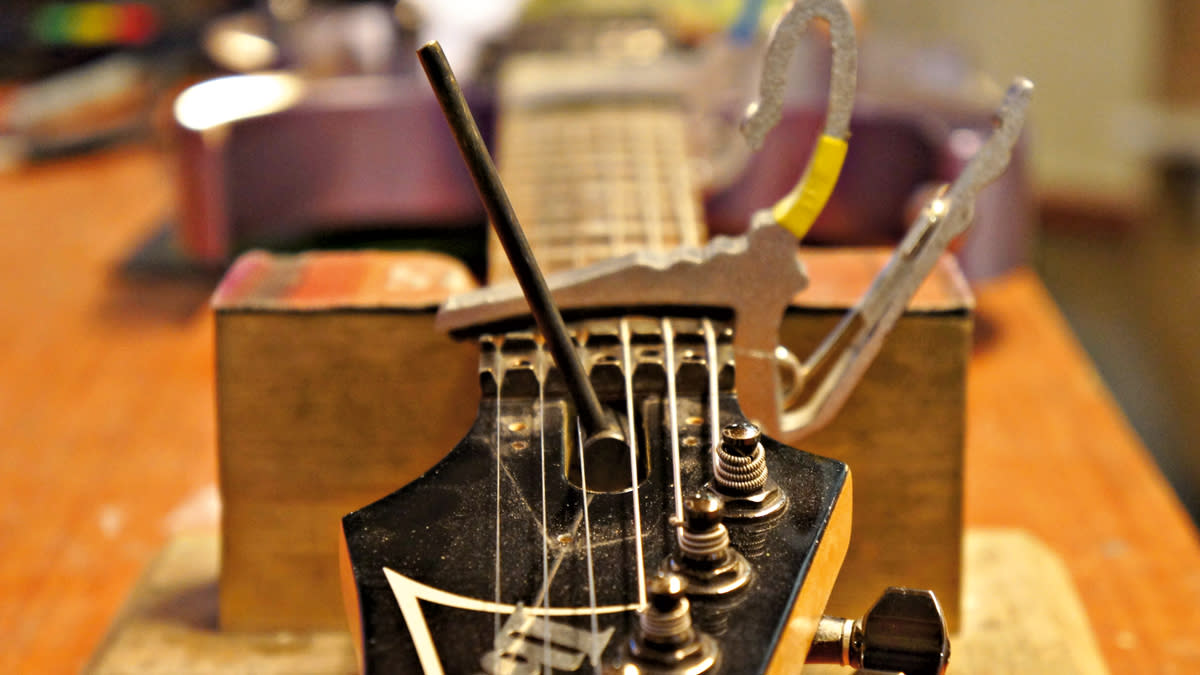
Depending on the truss rod in question, you’ll need a screwdriver, an Allen wrench or a hex wrench. Vintage Fender-style guitars will usually have a crosshead adjustment nut recessed into the body end of the neck. A crosshead screwdriver can be used, but we have found that a wide flat-head screwdriver can usually get deeper into the slots and is less likely to damage the nut.
An adjustment nut can usually be found under a truss-rod cover on the headstock with vintage Gibson-style guitars. You can use a socket wrench, but the clearance around the nut can be a bit tight. We’d suggest buying the correct tool because they’re inexpensive. Just make sure you get the right size for your guitar’s nut. PRS and Gibson guitars should require 5/16-inch, and PRS SE models require 7mm. If in doubt, do some research or try to measure using a micrometer or digital callipers.
Epiphone, Mexican and many modern USA-made Fenders have Allen-wrench adjustable truss-rods. The Fender ones can be quite recessed and you may damage the finish if you use a normal Allen wrench. Official Fender tools cost between $/£15 and $/£20, but they’re the best thing for the job. Generally speaking, you’ll need 3/16-inch for Mexican models and 1/8-inch for American Standards, but there are exceptions.
Some luthiers issue dire warnings about snapping rods and ruining necks, but they are fairly easy and safe to adjust
With many acoustic guitars, you have to go through the soundhole to adjust the truss rod; sometimes there will be an access hole through the transverse brace under the fretboard. The truss rod itself is often set quite far back and you will have to remove the strings, roll up your sleeves and reach inside with your Allen wrench.
What follows can be a bit hit and miss, and you may need a few attempts to optimise the neck relief. As always, the proper tool is the best option because it will allow you to access the rod without removing or even detuning the strings.
Some luthiers issue dire warnings about snapping rods and ruining necks, but they are fairly easy and safe to adjust. Work slowly, never force anything, use the right tools and you can keep your instruments in fine playing condition without regular and expensive visits to your tech.

