What is spectral processing? Get to know the technology behind the next generation of effects plugins

Spectral effects are a relatively new area of technology, and in recent years their popularity has really taken off. Developers from all over the world have been releasing plugins using a new buzzword: spectral processing. iZotope, Sonible, Mastering The Mix and plenty more have all gotten in on the action – but what exactly can they do?
First of all, note that spectral processing is a technology that’s only possible in the digital domain. Spectral effects use fast Fourier transform (FFT) calculations in order to break down audio into a representation of the frequency spectrum. Next, the spectrum is broken down into many different bands, and it’s these that are processed individually.
Spectral processing is a technology that’s only possible in the digital domain
In many ways, spectral processing can be thought of as “hyper-multiband”, using many more bands to do the job. But while the user can program three or four bands’ worth of settings in a multiband effects processor, the many bands in spectral processing have to rely on rules that govern how any given band processes audio. These rules may be programmed in by the developer, or could be governed by parameters set by the user.
Spectral processing tech can be applied in many ways. Perhaps the most obvious is iZotope’s RX which can perform a huge range of functions using spectral processing technology. For example, RX can separate mixdowns into individual instrument stems, remove background noise and even perform spectral recovery on thin-sounding audio.
Elsewhere, plugins like oeksound Soothe2 have taken producers’ plugin folders by storm, offering taming of harshness and resonances wherever they appear along the frequency spectrum. This sort of ‘moving-target’ processing is perfect for a spectral application, working sort of like a dynamic EQ with many bands active and waiting to go into action.

6 cutting-edge plugins that blew our minds this in 2022
It can also be used to advance more traditional audio effects such as compressors. Sonible’s smart:comp2, for example, employs spectral compression to achieve clearer compression results. smart:comp2 is effectively a multiband compressor with hundreds of bands across the entire frequency range. This means that loud bass in an audio signal won’t compress the highs which can help achieve full-sounding mixes and is great for transparency.
It’s not just third-party plugin developers who have started creating spectral tools, DAW developers have entered the fray too. Ableton introduced some new spectral effects processors to Live with Live 11: Spectral Resonator and Spectral Time both add extra depth to traditional resonators and delay units. They’re pretty fantastic for weird, otherworldly sound design – particularly if you’re a big fan of that slightly unnatural, warped digital kind of sound.
In this feature, we’ll look at some examples of spectral processing in the plugin world. We’ve seen a lot of powerful, groundbreaking applications in the past few years, but the possible applications for spectral processing technology in audio effects are very exciting. This is where we are right now – the rest is yet to come.
Three of the best spectral processors
1. Eventide SplitEQ
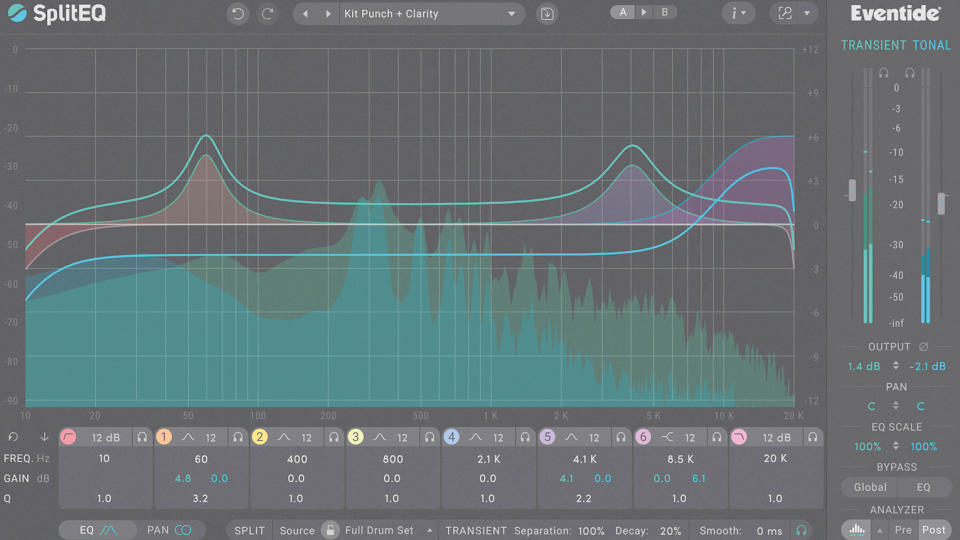
Split your EQ processing into two types, one affecting just transient material within your audio signal, the other working on only the tonal audio that’s present. With SplitEQ, there are a lot of new ideas to try, both for seasoned mix engineers and for creative and sound design applications.
2. Newfangled Audio Saturate
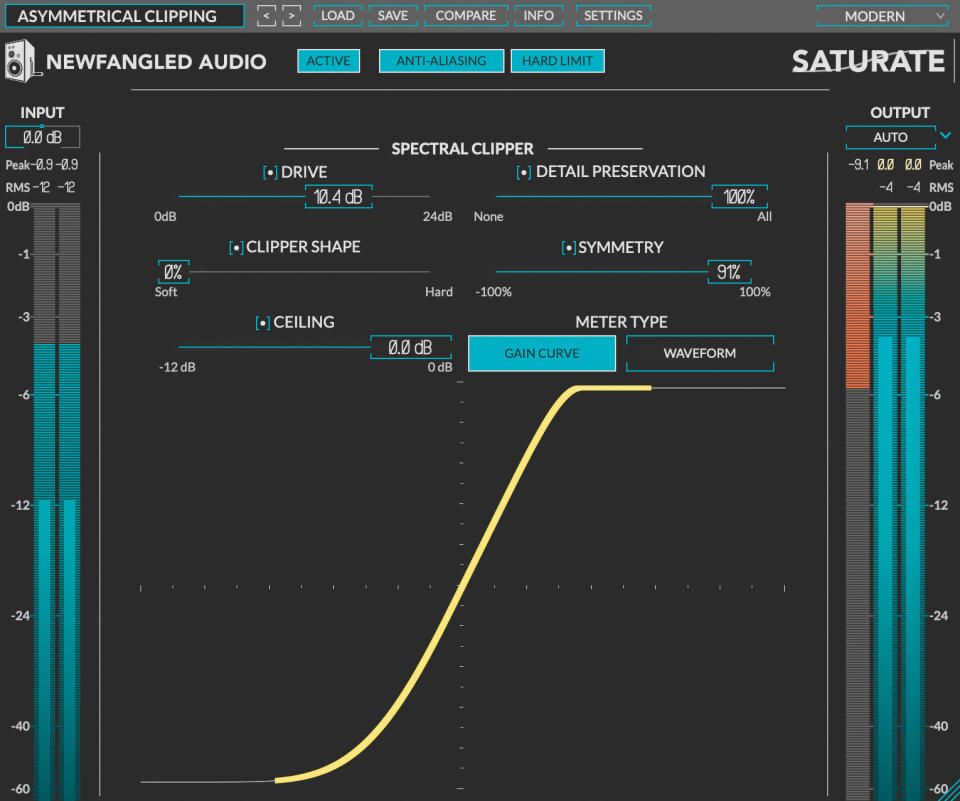
In this plugin, clipping is given the spectral treatment. By clipping different bands separately, Saturate can ease up or push harder when it’s still got headroom. The result is a transparent clipper that can be pushed past the point where others would melt.
3. GS DSP MagicPitch
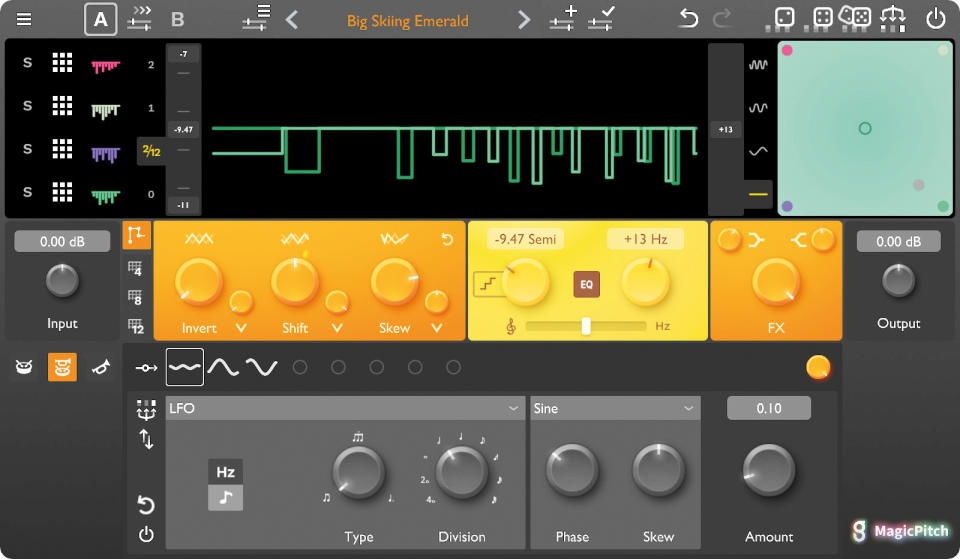
Want to shift both pitch and frequency with properties that scale along the frequency spectrum? MagicPitch is built to do it, letting you in on all sorts of boundary-pushing, creative effects.
Resonance suppression with Mastering The Mix RESO
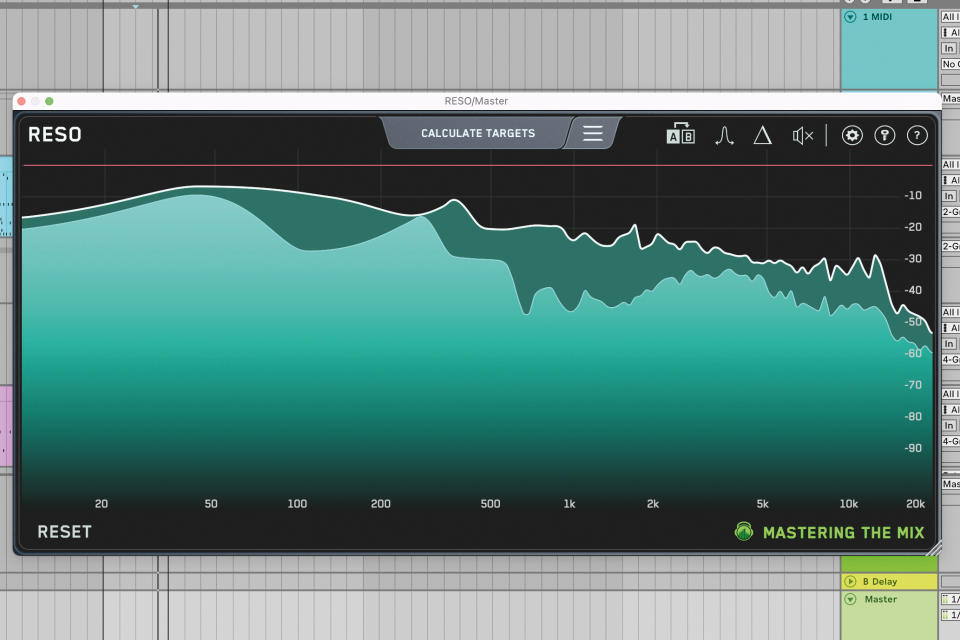
Like Serum, Little AlterBoy and VintageVerb before it, Oeksound’s Soothe is one of those plugins that really captured the mood of music producers. Other developers focused on resonance suppression, and one standout is Mastering The Mix’s Reso.
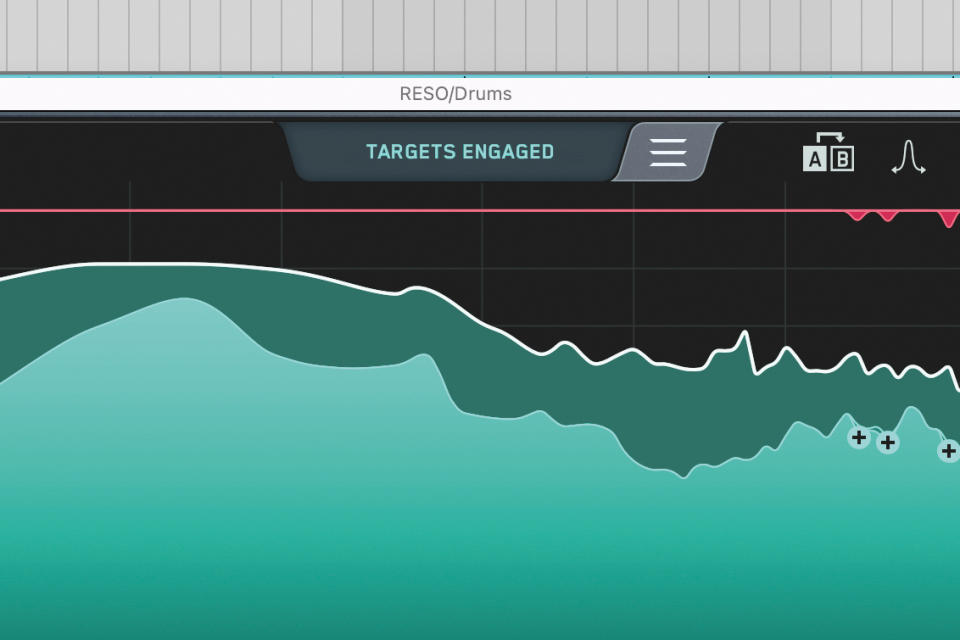
Reso intelligently analyses your audio, identifies resonant frequencies, creates a bell EQ band at each, and lets you adjust the suppression of each resonant frequency to your taste. Or it can automatically suppress each resonant frequency.
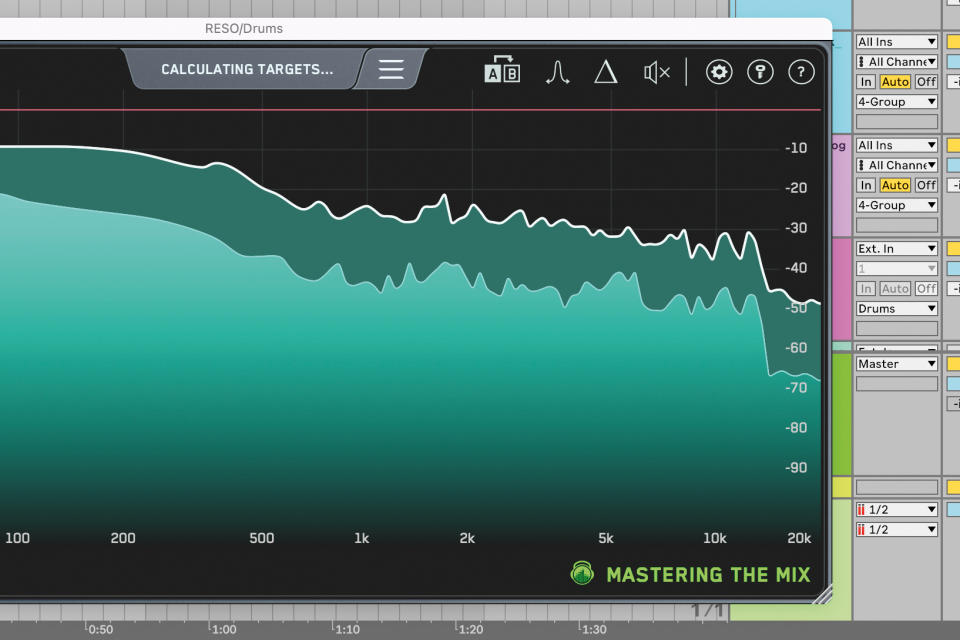
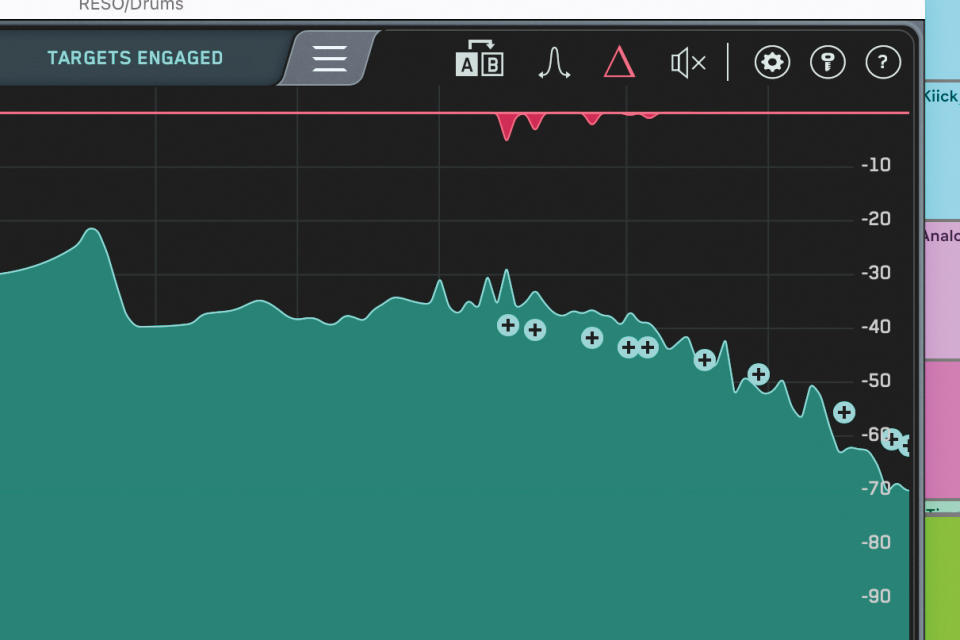
On our practice track, which is garage-style, note that the drums are quite harsh in the upper mids when the snare hits. This is exactly where Reso is handy. Load Reso on the drum bus, play the track and click the Calculate Targets button.
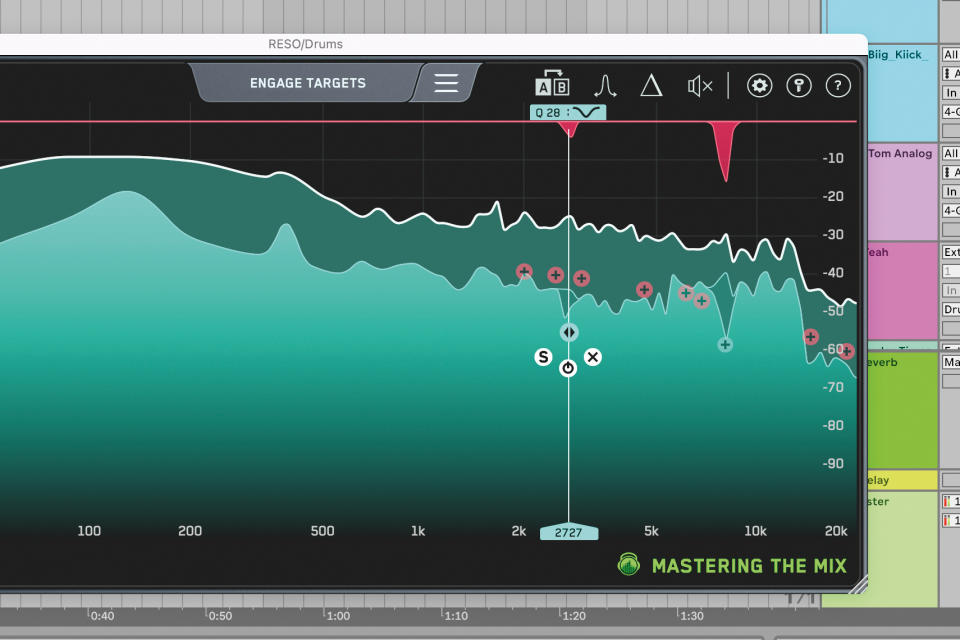
A series of red + icons will appear, representing a resonant frequency. Clicking a + lets you move it up/down to change the threshold where the node triggers, and left/right to change its frequency. Scrolling your mouse wheel adjusts the Q.
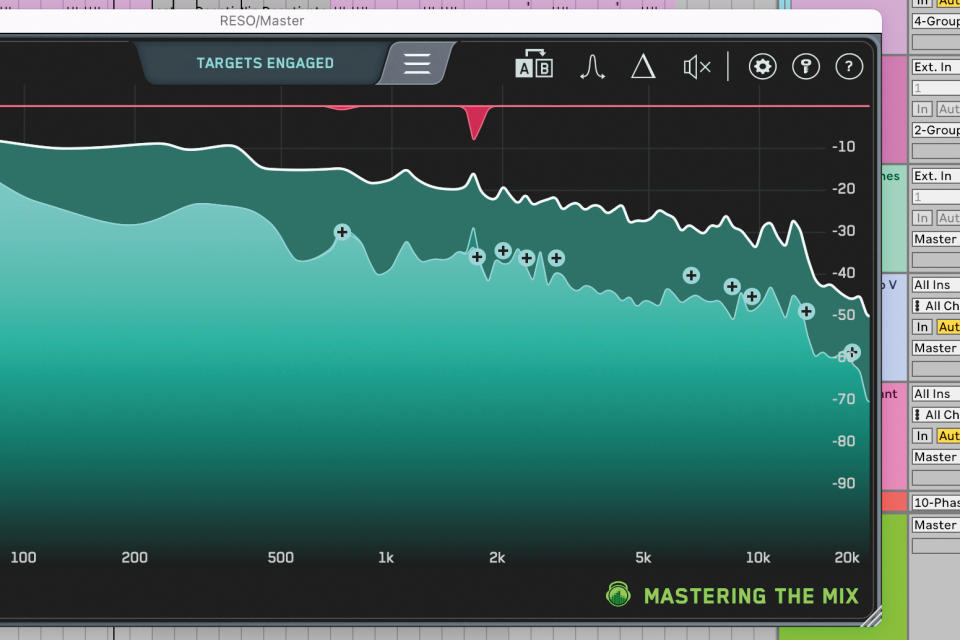
Clicking Engage Targets automatically suppresses each identified resonant frequency with the EQ band settings that Reso deems best. The resonance suppression is visualised by the red graphics at the top of the spectrum analyser.
Resonant frequencies are often hard to hear and you may struggle to hear the difference between the processed and unprocessed drums. Clicking the ‘delta’ icon lets us hear just the resonant frequencies which were removed.
Bitwig's Spectral Suite
After some internet controversy, Bitwig’s new Spectral Suite is now included as part of the main DAW package for Bitwig Studio 4.4. These spectral processors are very clever signal splitters which let you pull apart signals and process their different qualities in different ways.
The simplest tool might be Transient Split. With this, you can separate your signal into transient and non-transient material, rebalancing the two and processing each one with a different subsequent chain of effects.
The most ‘spectral’ of the effects might be Harmonics Split, which detects and isolates the fundamental frequency, odd harmonics and even harmonics, allowing you to solo, mute and rebalance any of those three, as well as processing each separately. Loud Split is one to watch, splitting signals into their extremes on a spectral level.
Splitting sounds by harmonics and transients in Bitwig Studio 4.4
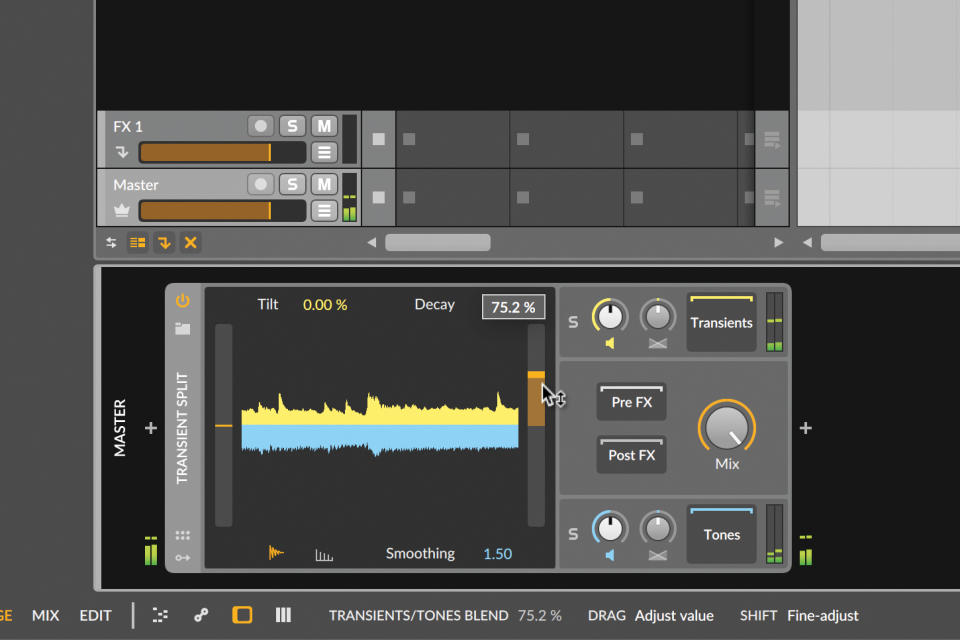
Let’s start with Transient Split. We can balance the device’s transient/non-transient sections, or isolate one. Or tweak the analysis that leads to the separation of the two elements. Here the slider to the right of the waveform gives a transient-heavy outcome.
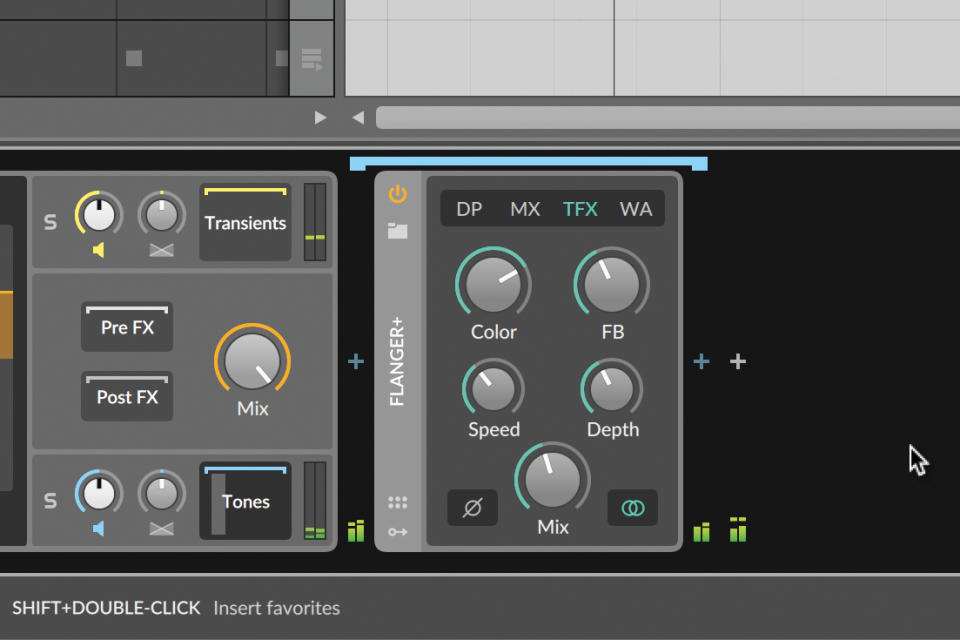
We put a flanger on the tonal, sustained elements only, keeping the transients free of smudging. We could add, say, a distortion processor to just the transients, getting them to bite harder without affecting the rest of the signal.
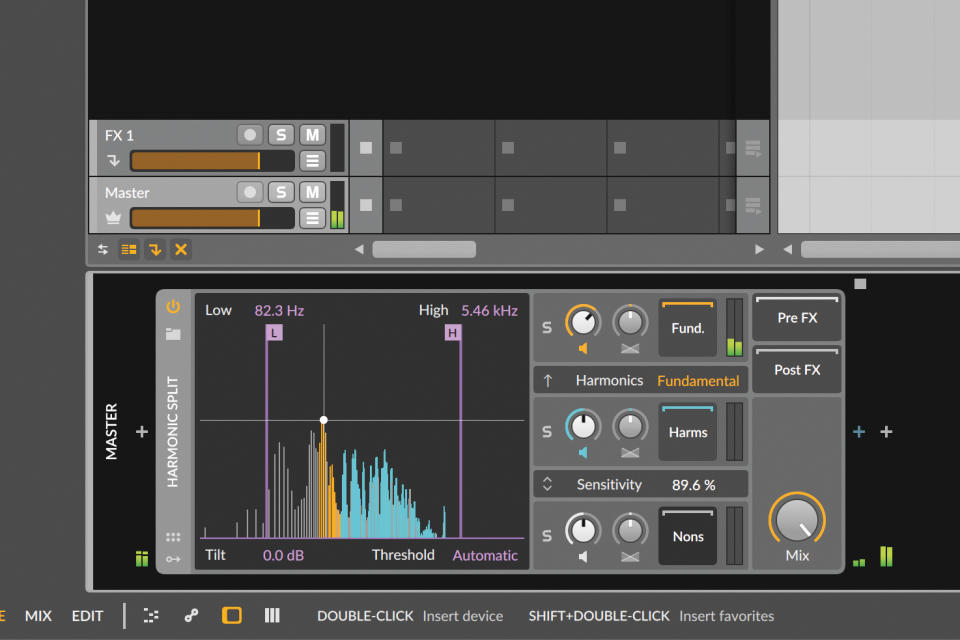
Over to the Harmonic Split, which can split signals by groups of harmonics, or by Fundamental and not. This Fundamental split lets us increase the lowest partial of our signal, or to put effects on just that part, or just the harmonics.
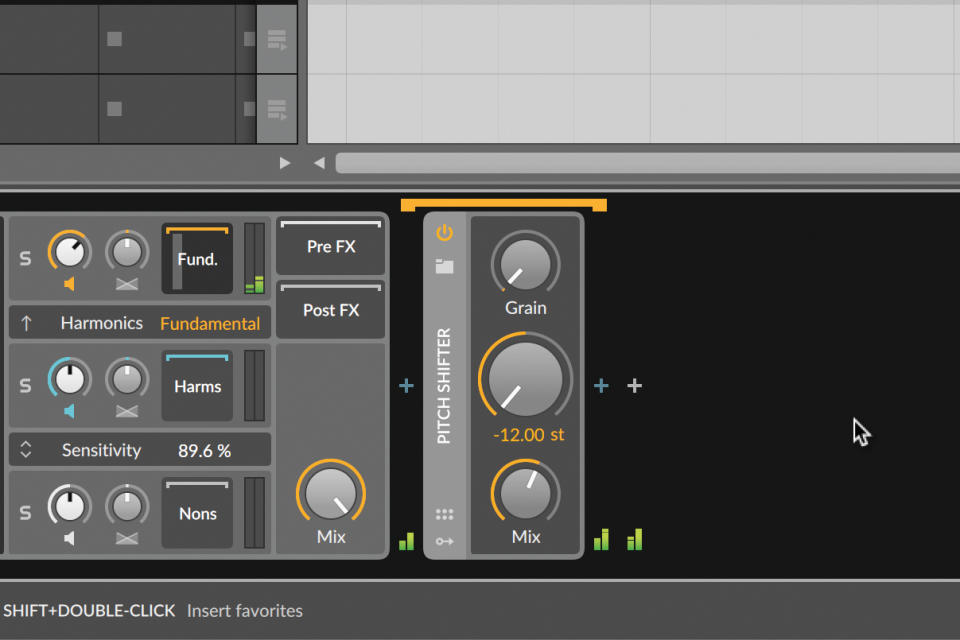
Here’s an interesting application: we add a Pitch Shifter to just the fundamental, pitch it down 12 semitones and set the Mix to about 60%, and we’ve just layered in a sub layer (or a brand new, lower fundamental pitch) for our instrument.
New sonic possibilities with Bitwig's Loud Split processor
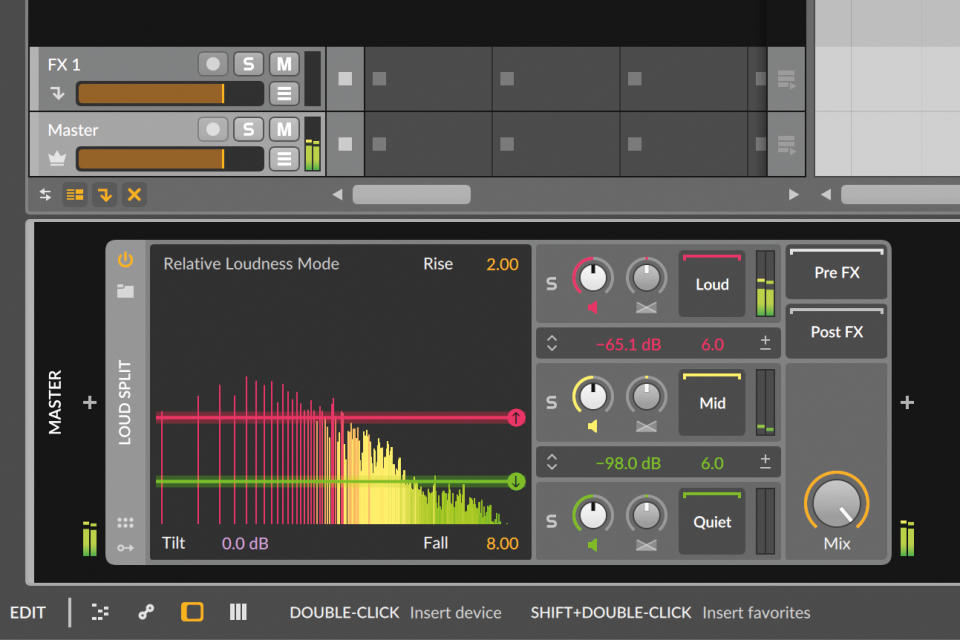
Loud Split is a revelation. Thanks to spectral processing, you’re not just ‘gating’ your signal by loudness; you’re isolating the different loudnesses at every point on the frequency spectrum. Let’s play with the horizontal lines to figure out our detection…
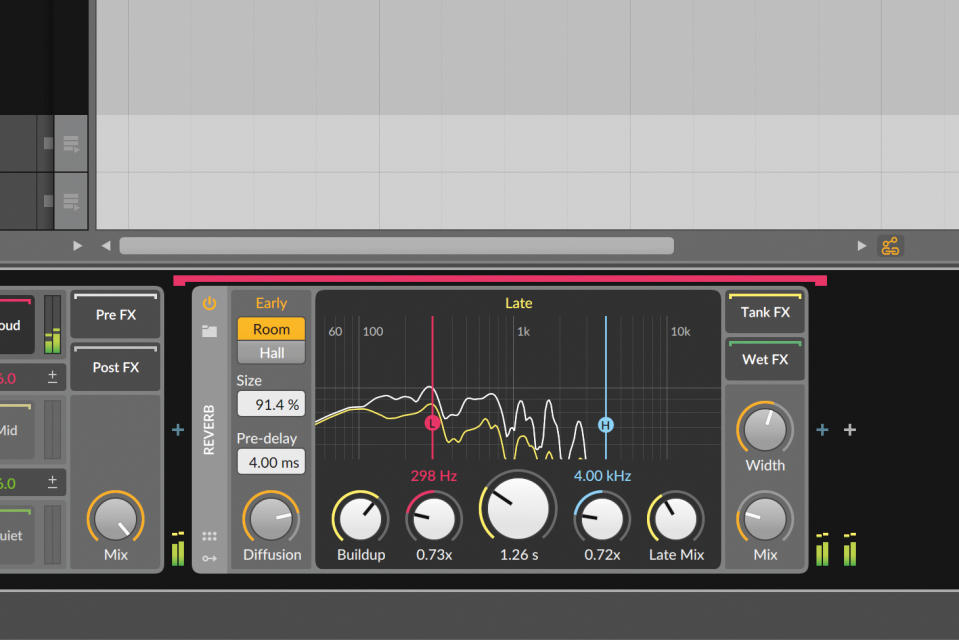
…and then let’s add reverb to only the loudest parts, making them hit harder, but not turning the project into a huge wash. Since this only affects frequencies that pass our threshold, while above that threshold, the effect is fun to play with.
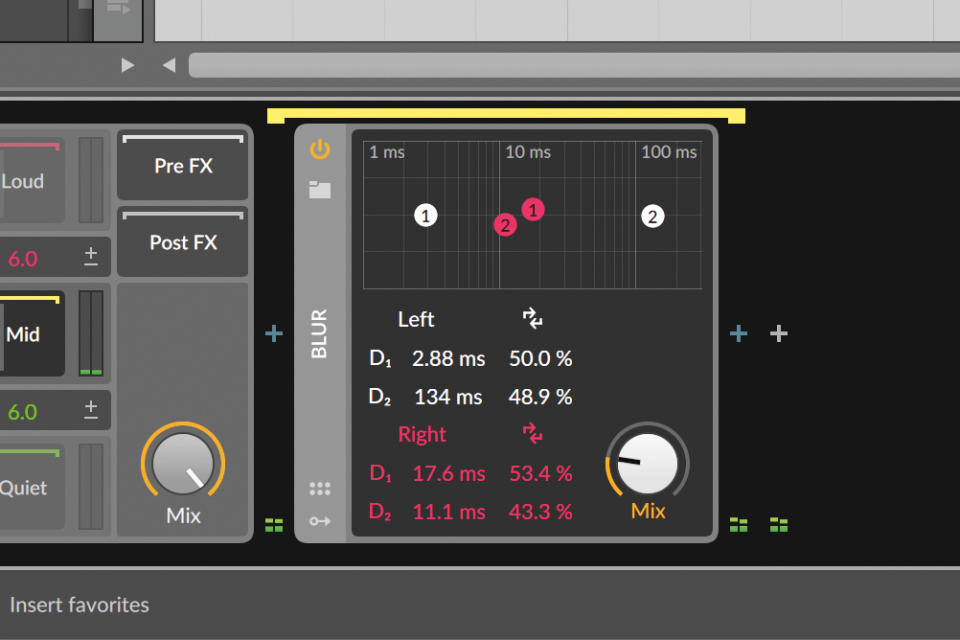
How about some Blur effect on the in-between bits of the signal? Or taking quieter bits and adding modulation to smooth them? We could even apply saturation and amplification to get upward compression, or process recorded vinyl artefacts.
Spectral compression with Sonible smart:comp 2
Spectral compression is a term that’s used by Sonible for the launch of the second iteration of smart:comp. Building on the recent rise in popularity of spectral effects, smart:comp 2 takes this spectral processing technology and applies it to the compression realm.
So what does this look like in the case of spectral compression? Well you can effectively think of smart:comp 2 as a multiband compressor with up to 2,000 bands across the frequency spectrum. This means that smart:comp 2 can compress individual areas of the frequency spectrum with great precision, giving a very tonally balanced yet transparent compression sound.
You can effectively think of smart:comp 2 as a multiband compressor with up to 2,000 bands across the frequency spectrum
This is extremely advantageous on elements such as drums, or submixes and master channels where there is frequency information across the spectrum happening at different points in a track. With a traditional single band compressor, you may struggle to compress as effectively throughout the duration of a song, since at different points there will be focus on different areas of the frequency spectrum.
This spectral compression is on by default when working with smart:comp2, but it can be turned off for a more traditional compression approach. Sonible also allow you to use the spectral algorithm to control the tonality of the sound, making it either darker or brighter.
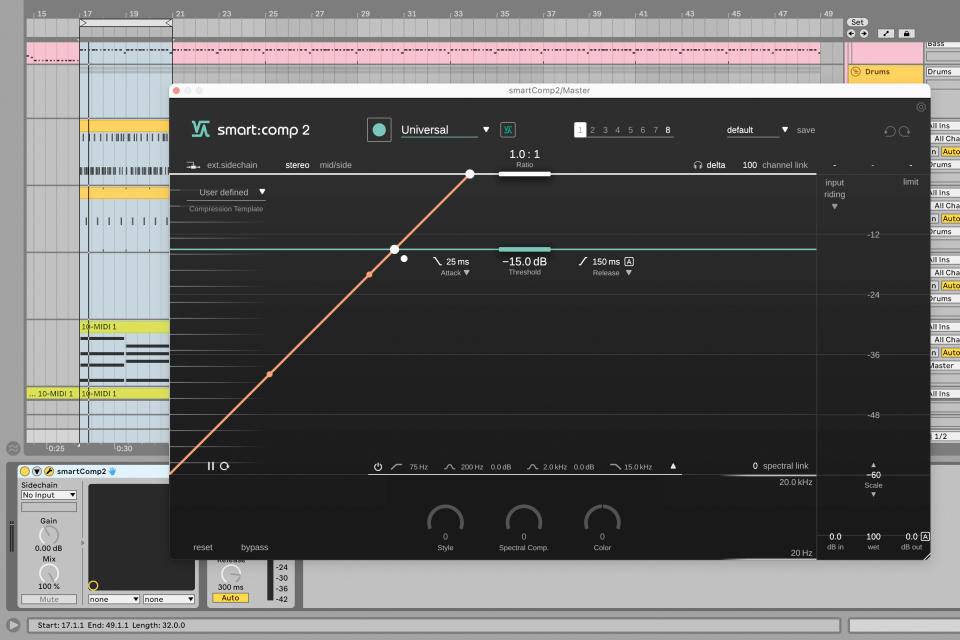
To explore smart:comp 2’s spectral compression capabilities, we’ll use it on the master bus of this dance track. Spectral compression is well suited for use on master busses, as full tracks have information across the full frequency spectrum.
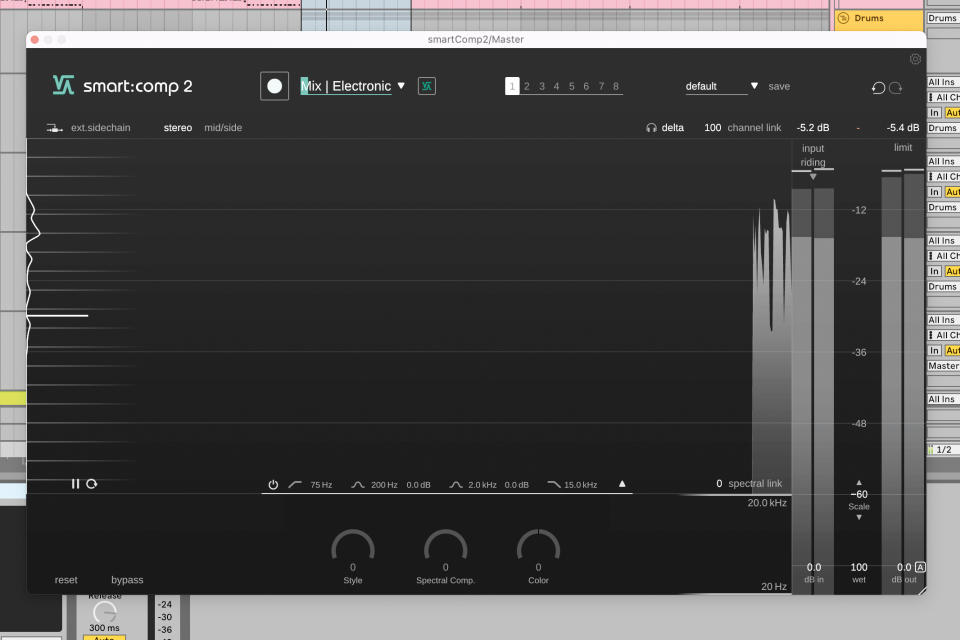
We’ll let Sonible’s famous AI start us off. Select the Mix | Electronic profile from the dropdown menu in the top of the UI, press record and hit play. smart:comp 2 listens to the track and applies what it deems the best compression settings.

The Spectral Comp(ression) dial can be set from 0 to 150 where 0 is single band compression and 150 uses all possible bands. By default, smart:comp 2 is set to 100. Crank it up to 150 to hear how maximum spectral compression sounds.
smart:comp 2 gives a very clean compression sound thanks to its spectral compression. It’s hard to hear without a comparison point, so here’s what the compression sounds like with the Spectral Compression dial set to 0.
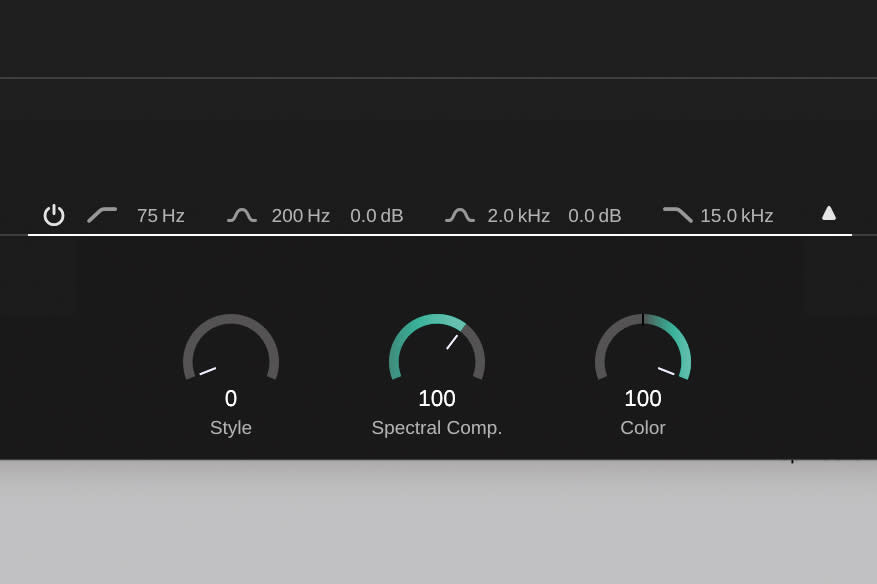
The difference is subtle, but the single-band compressed audio is more tonally restrained. The spectral compression technology can also colour the sound with the Color dial. We’ve set ours to full brightness to bring out those keys and strings.
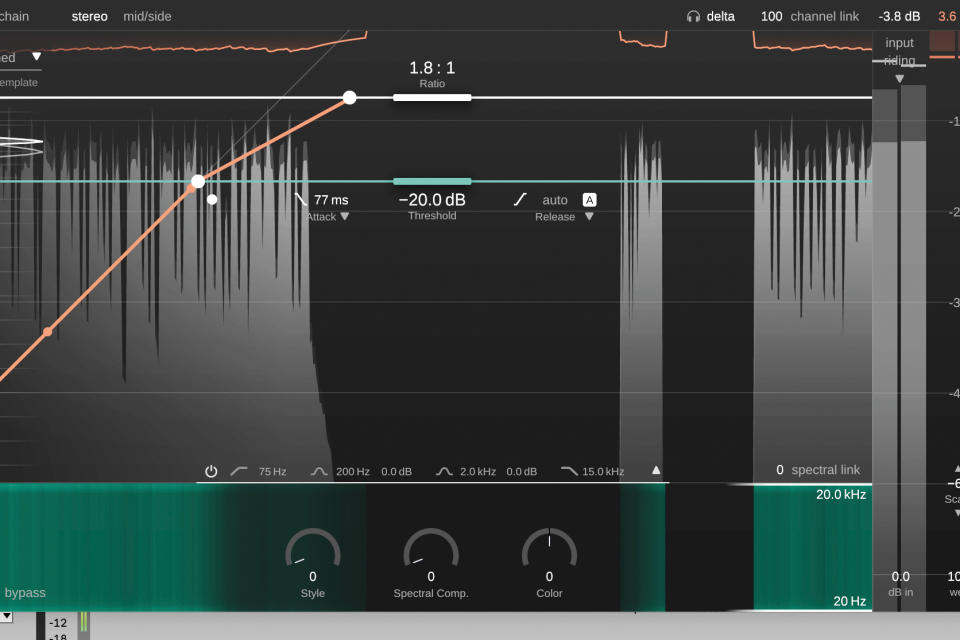
A powerful feature is that you can set the frequency range to which spectral compression is applied using the two handles. By default they’re set to 20Hz and 20kHz, but by dragging them you can alter the spectral compression range.
Delay times across the spectrum with MeldaProduction MSpectralDelay
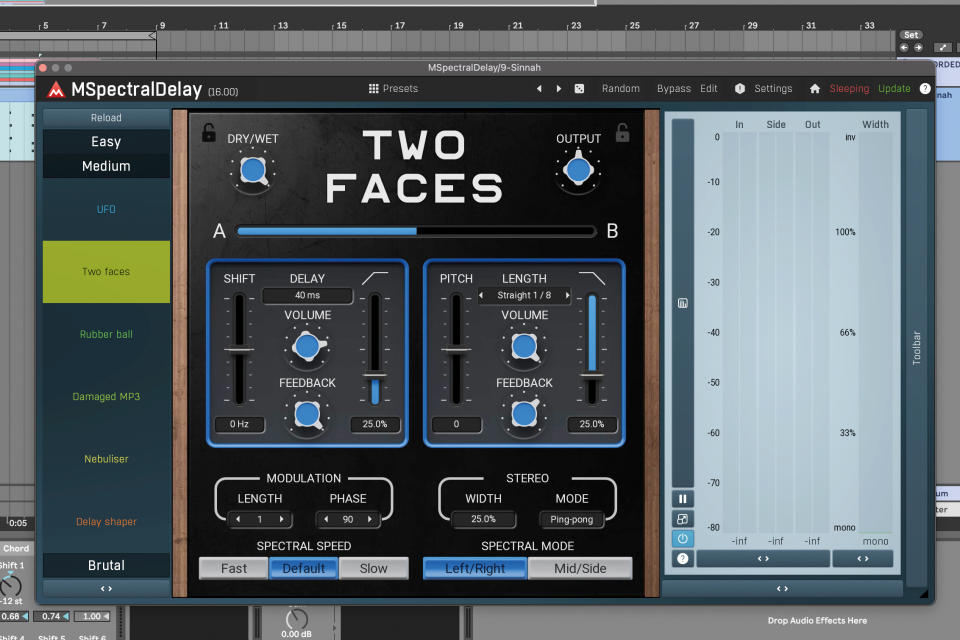
MSpectralDelay’s Easy Mode contains 20 powerful spectral delay algorithms. Choose from Easy, Medium or Brutal algorithm categories and experiment with the pre-assigned multi parameters to apply all manner of delay effects, from subtle repeats to complete sonic transformations.

Enter the Edit page to access MSpectralDelay’s advanced controls. From here, you can adjust the usual delay parameters, including Dry/Wet amount, Feedback level, Delay Mode and Delay time. Let’s set up a synced straight 8th-note ping pong delay, with a medium mix and high feedback value.
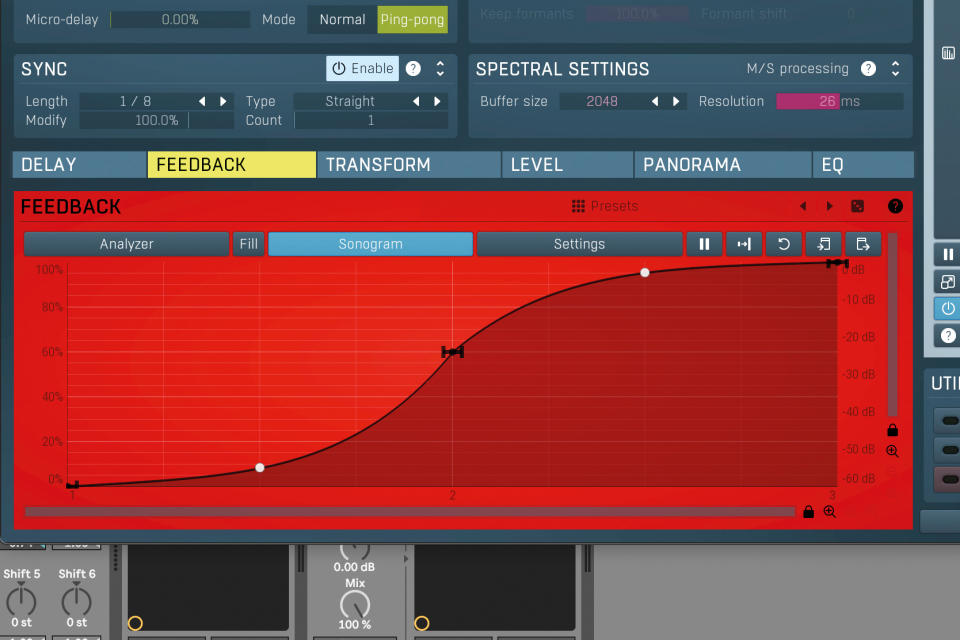
Below the delay controls is the spectral graph, which allows you to scale parameters depending on the source audio’s frequency content. In this case, let’s reduce the feedback of the lower frequencies to clear up some of the muddiness. Double-click in the graph to create a new node.
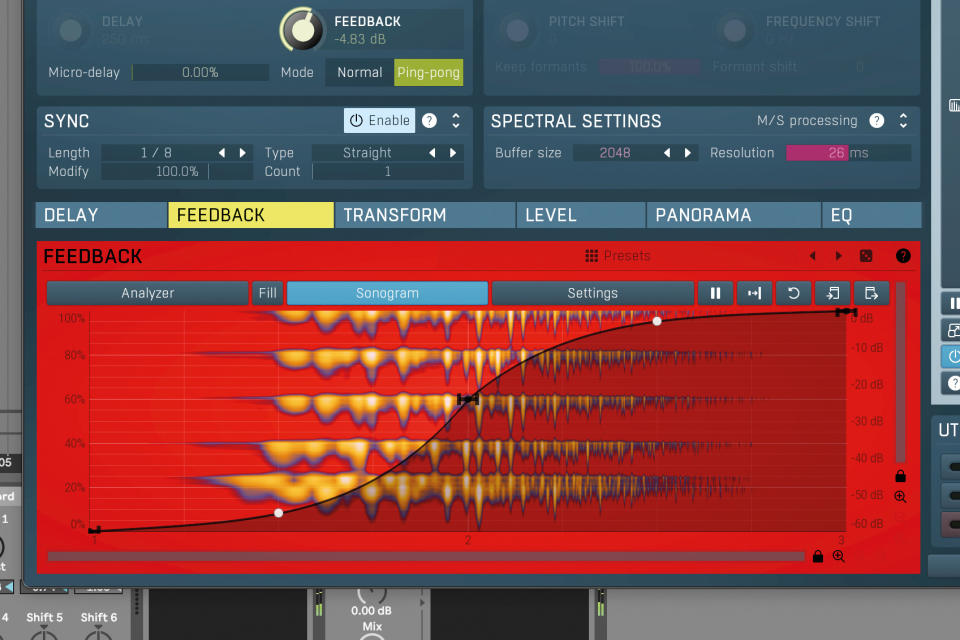
MSpectralDelay’s analysis and metering features let you clearly see the audio content of your sound source, giving you a visual representation of where there is a lot of frequency content. You can toggle the Analyzer and Sonogram on and off by clicking on them.
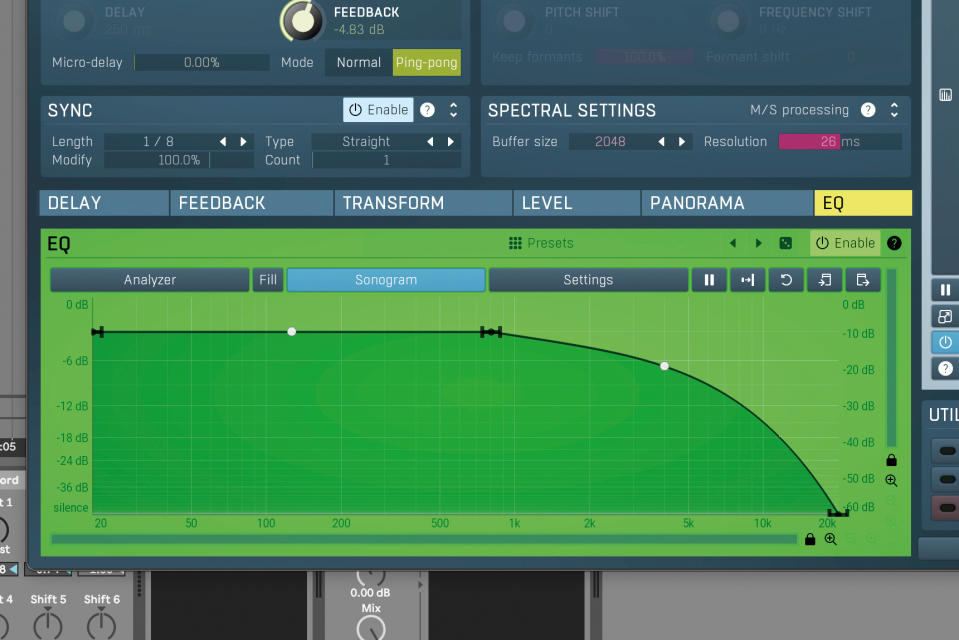
You can shape your delayed signal’s overall frequency content using the EQ tab, useful for tidying up the low end of your delayed signal, or for taming high frequencies when applying delays to the high end with high feedback values. Here, the high end is rolled off.
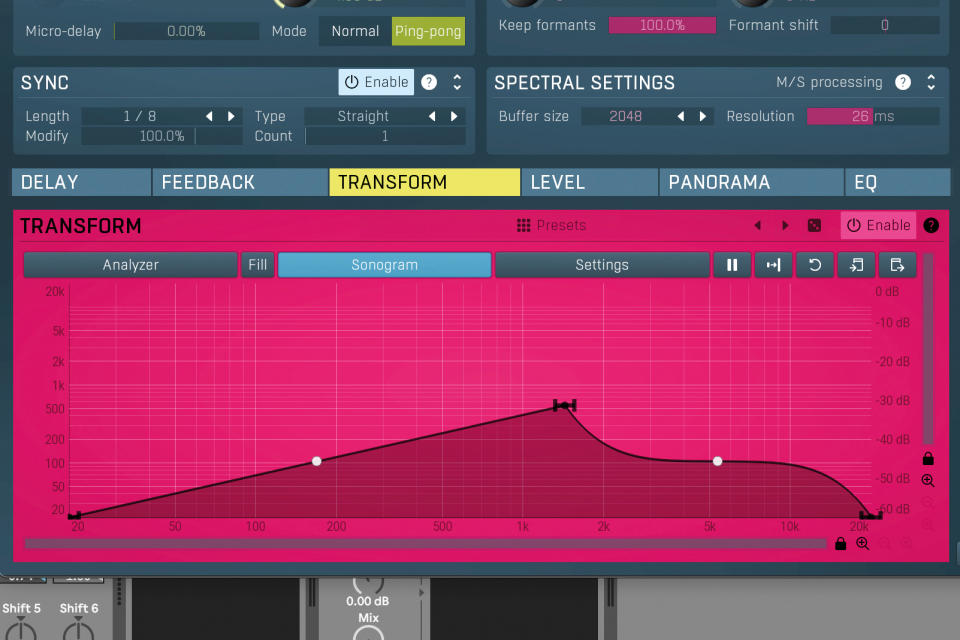
The Spectral Transform tab lets you transform your feedback’s frequency to any other frequency. Enable the Transformation function above the spectral window, then increase the Transform value. Frequencies can build quickly, but this can be controlled by reducing the transform amount.
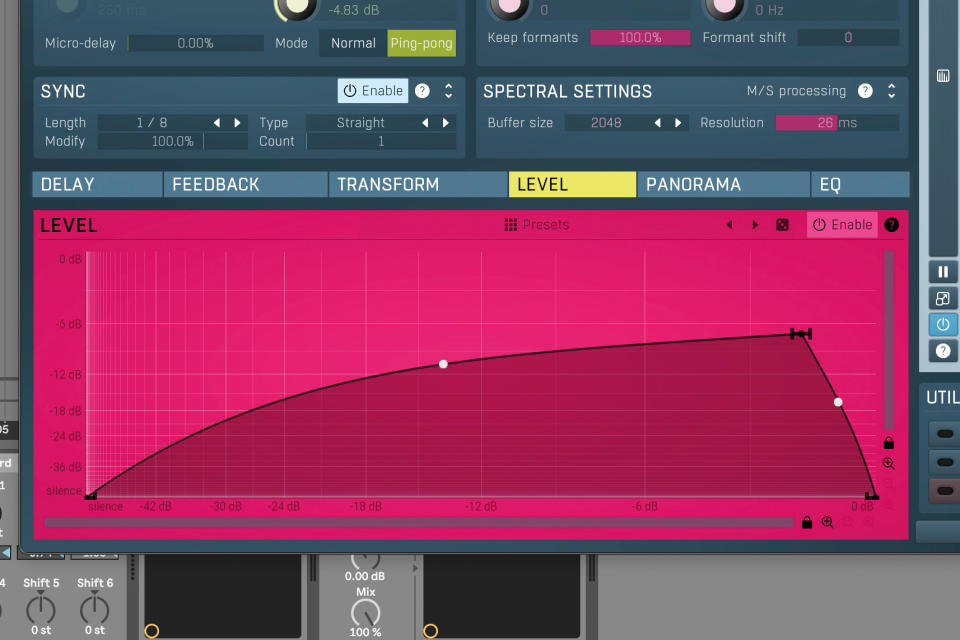
Further tame the delay feedback using the transformation level graph. The X axis represents input levels, while the Y axis represents output levels. Experiment with this graph to create a spectral compression or gating effect to control the frequency transformation of your delay feedback.
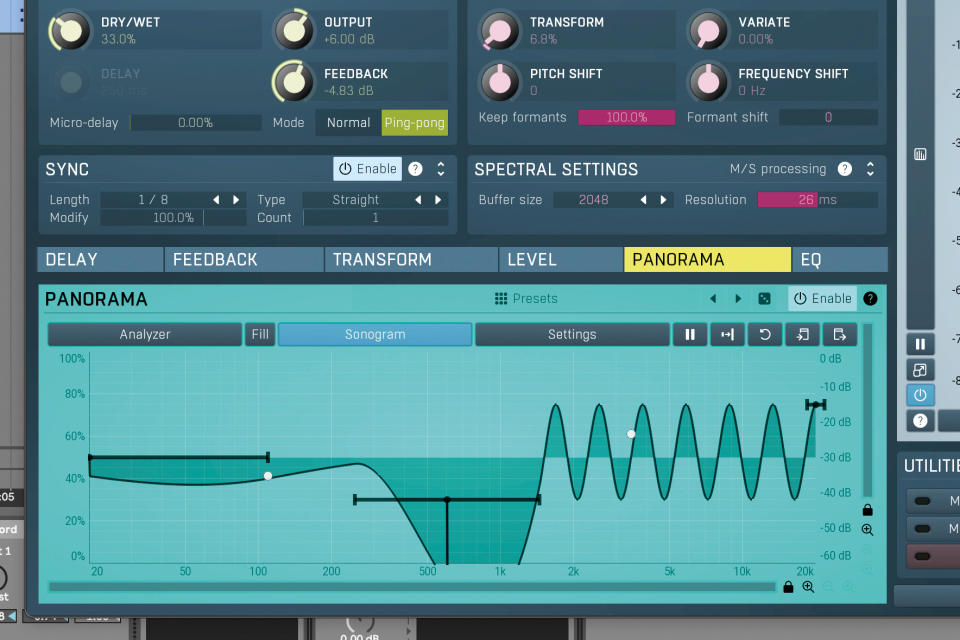
You can also pan your delay according to its frequency content. Open the Panorama tab then click enable. Dragging the black nodes vertically controls the panning depth, and dragging the white node alters wavelength. Drag the edge of the black nodes horizontally to smooth the effect.
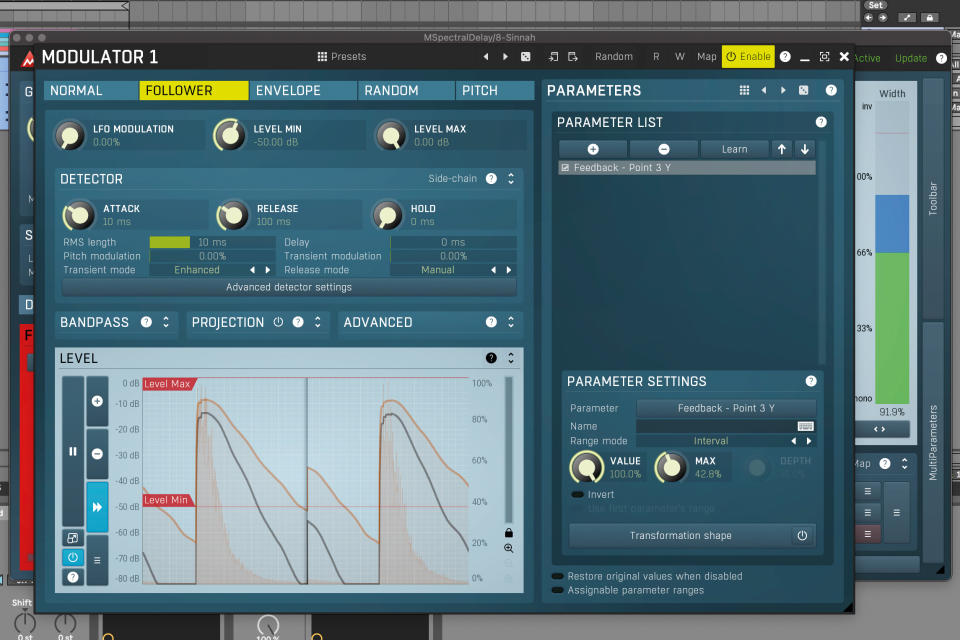
The comprehensive suite of modulation options includes a selection of unique mod sources. In the utilities window, click a modulation slot. Then select a modulation destination from the list, or using the learn function. There’s an envelope follower that reduces the feedback amount.
Spectral smoothing with Baby Audio Smooth Operator
Spectral soothing plugins, including Smooth Operator and Reso (mentioned earlier), can make the difference when you’re looking for a professional and polished mix. By smoothing out the frequency spectrum and taming resonance, you get a balanced track, group or entire mix, that feels like it’s had the eyes of seasoned recording and mix engineers on it.
But then again, there’s such a thing as driving these processors too hard, giving you a dull, lifeless piece of audio that sounds and feels like it’s never been anywhere near a room full of air. Of course, it’s the ‘imperfections’ that tend to make music sound real.
So if you’re reaching for a resonance suppressor, track smoother-outer, tonal-balancer, or any other newfangled processor like the ones we’ve discussed in this article, remember to use them with care and light hands.
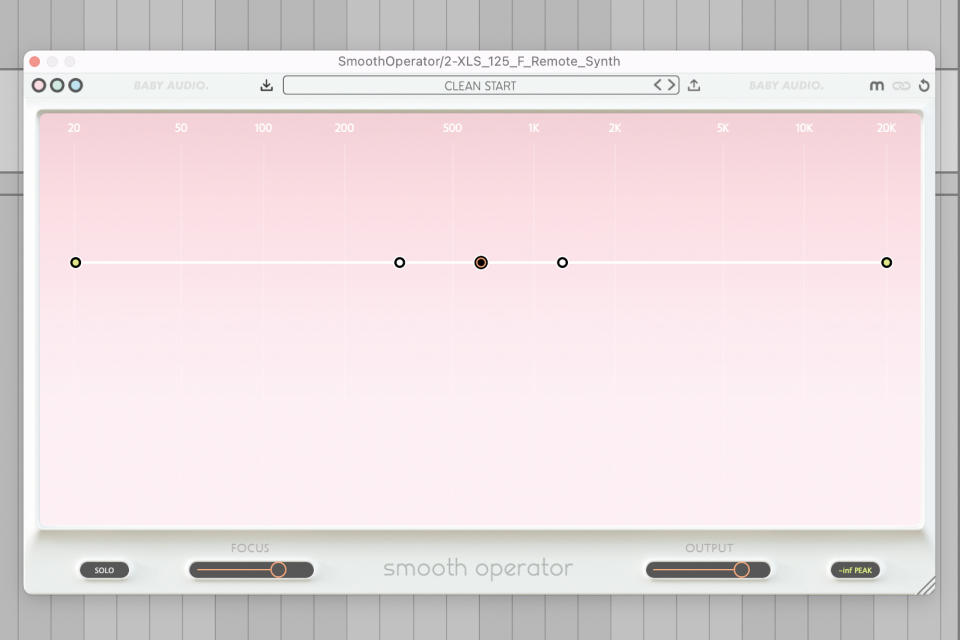
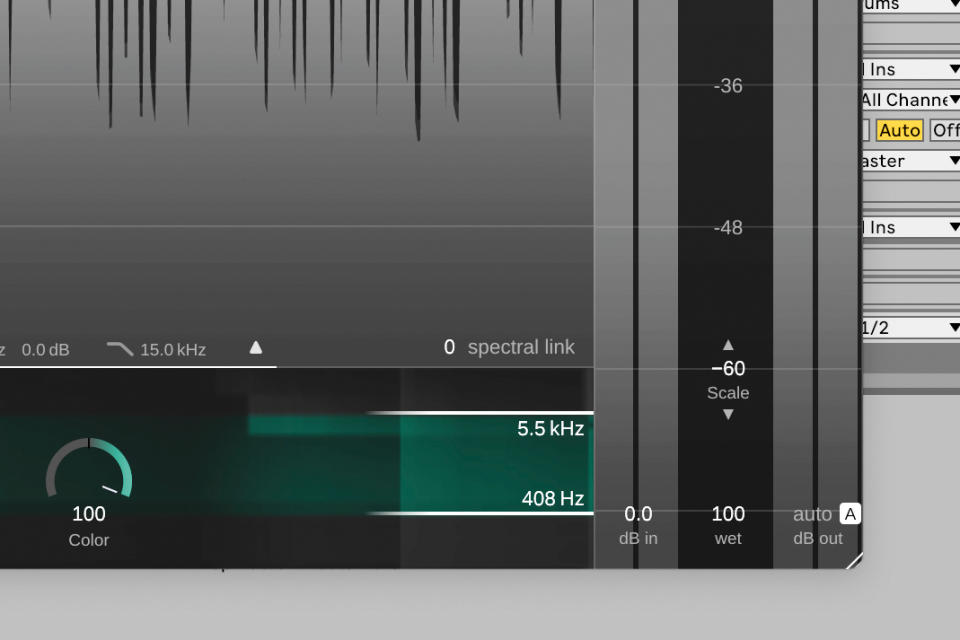
Smooth Operator is one of the best known of the recent wave of AI resonance removal tools. Coming in at $100 less than Soothe 2, Smooth Operator is much more affordable, but how does it perform? Let’s take a look at it in action on this track.
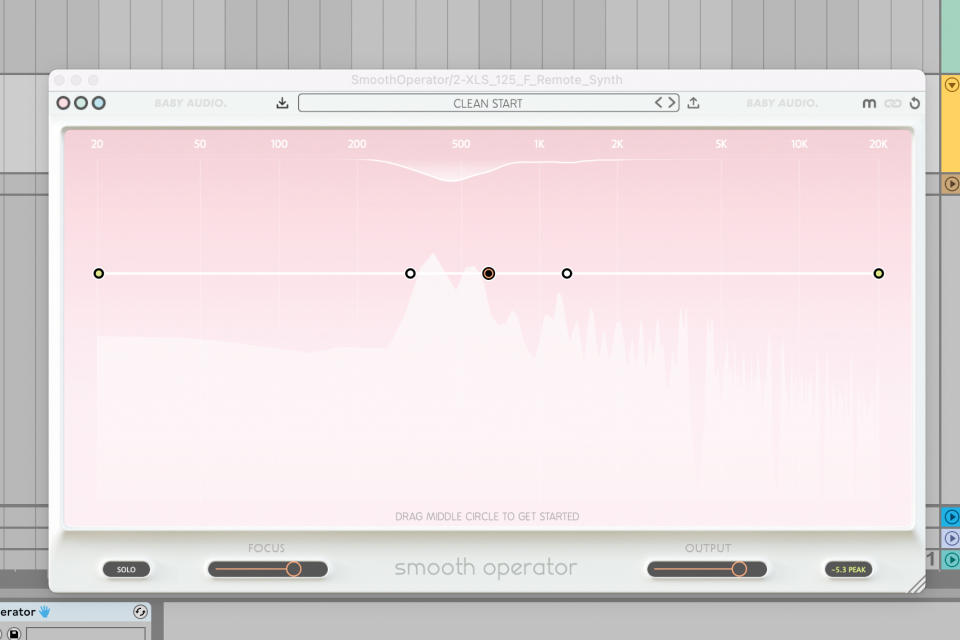
The main synth arp is slightly harsh in the upper frequencies, due to having a bitcrusher applied. Smooth it out by loading Smooth Operator on the channel. You’ll notice that Smooth Operator is suppressing the loudest frequencies in the sound.
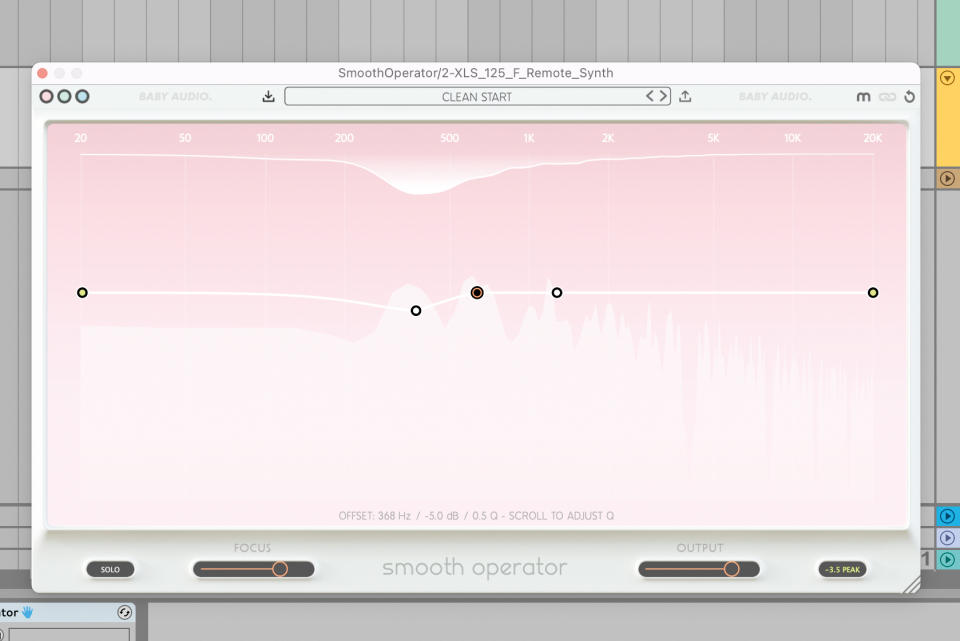
However, at present, Smooth Operator is focusing on the mid and low mid frequencies. For the higher frequencies, we can control the threshold and tonal balance of the suppression using the handles on the line in the centre of the UI.
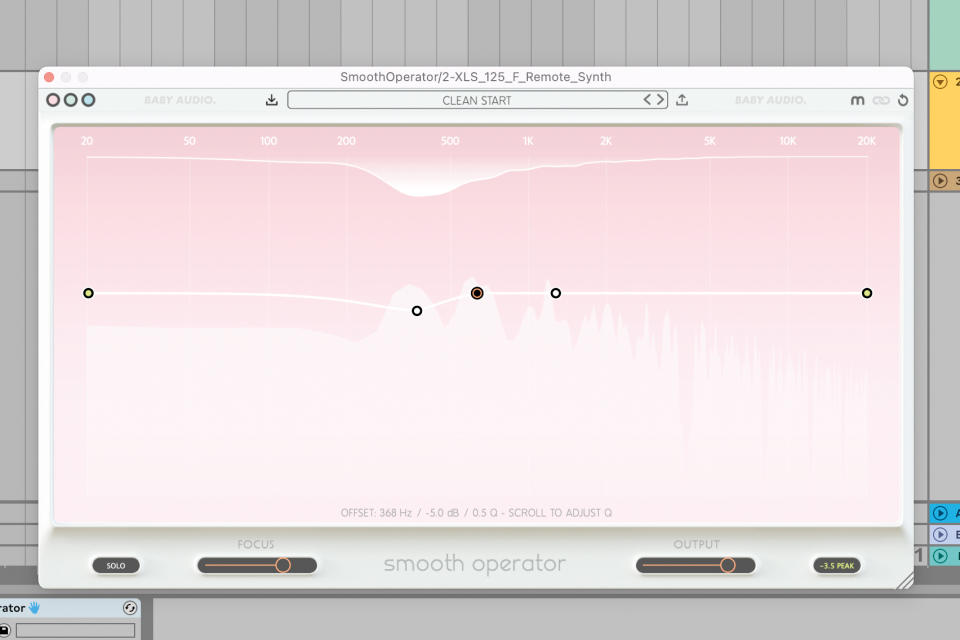
We’ve now increased the overall threshold of Smooth Operator to suppress the low mid frequencies less. We’ve simultaneously used the handles in the upper frequencies to increase the suppression here. This gives us a less brittle arp sound.

