Master Gardener: Getting started with straw bale gardening

Upon retiring in June of last year, one goal was to plant a big, beautiful vegetable garden. With great enthusiasm, I set to work diligently rototilling, planting and fertilizing. Unfortunately, rather than the enviable garden I envisioned, my garden was a pitiful disaster.
Determined to try again, I enrolled in the Master Gardener Volunteer Program (MGV) offered through the Sandusky County Extension Office. What I learned led me to rethink my entire approach to my garden plot.
Why straw bale gardening?
Three factors, learned from the gardening course, led me to decide straw bale gardening would be the best option for at least this year.
First, the soil in my area near the Ottawa County/Wood County line, is very heavy clay with poor drainage. Second, the area chosen for the garden had neither been tilled nor composted in the years prior to my first trying to plant it. Third, the location, like much of the land in Ottawa County, is as flat as a sheet of paper so excess water tends to simply stay atop the soil.
As one MGV instructor advised, I used detective-like observation and analysis of my garden plot throughout the early spring:
Watching where puddles accumulated after rain,
Walking the area to determine if the soil had any signs of drying out,
Observing what, if anything, voluntarily grew in the unplanted plot.
I concluded a couple of years of carefully planned soil amendments, such as planting and plowing in a crop of red clover for soil aeration and enrichment, would be necessary before trying to again plant a vegetable garden in it.
I needed an alternative if I wanted a vegetable garden this year. I happened upon the book "Straw Bale Gardens Complete" by Joel Karsten. After reading the book and using websites for further study, I decided this approach was a way for me to plant a garden while I amended the soil.
Preparing the bale
A straw bale to be used as the “soil” for plants must be “conditioned.” Conditioning involves the process of getting the straw bales to compost internally so that they will support root growth. Following the process described by Karsten, 12 days before the date of planting, I saturated the bales with water.
Depending on the number of bales used for the garden, watering can be a long process as straw is like a disposable diaper in terms of the amount of water it can hold. On alternate days, prior to watering, I sprinkled a high nitrogen fertilizer (at least 20% nitrogen is necessary) evenly across the top of the bale. I used 32-4-4 (Nitrogen-Phosphorous-Potassium) lawn fertilizer.
Days 1, 3, and 5, I applied a half cup of fertilizer; days 7, 8, and 9, a quarter cup. Day 10, I applied one cup of 10-10-10 fertilizer. Day 12 is a free day – no water or fertilizer. (For those who want to garden organically, Karsten’s book outlines a conditioning process using organic materials.)
Creating the garden space
Since wet straw bales are heavy, the bales for the garden need to be arranged before conditioning. A straw bale garden can be as small as one bale or as extensive as the person watering wants to water intensely for 12 days.
I created four rows of five bales setting the bales with the strings on the side, the “cut” side of the straw stems facing up. (The straw stems on the opposite side of the bale look as if they are folded over.) Leave a space of about 4 inches between each bale and 4 to 6 feet between rows to allows air circulation around the bales and easy access to each row.
While the bales will prevent weeds, I added extra protection by putting six sheets of newspaper under each bale and between the rows. I then spread fresh, loose straw over the newspaper between the rows. Weed guard is another option for diminishing weed growth.
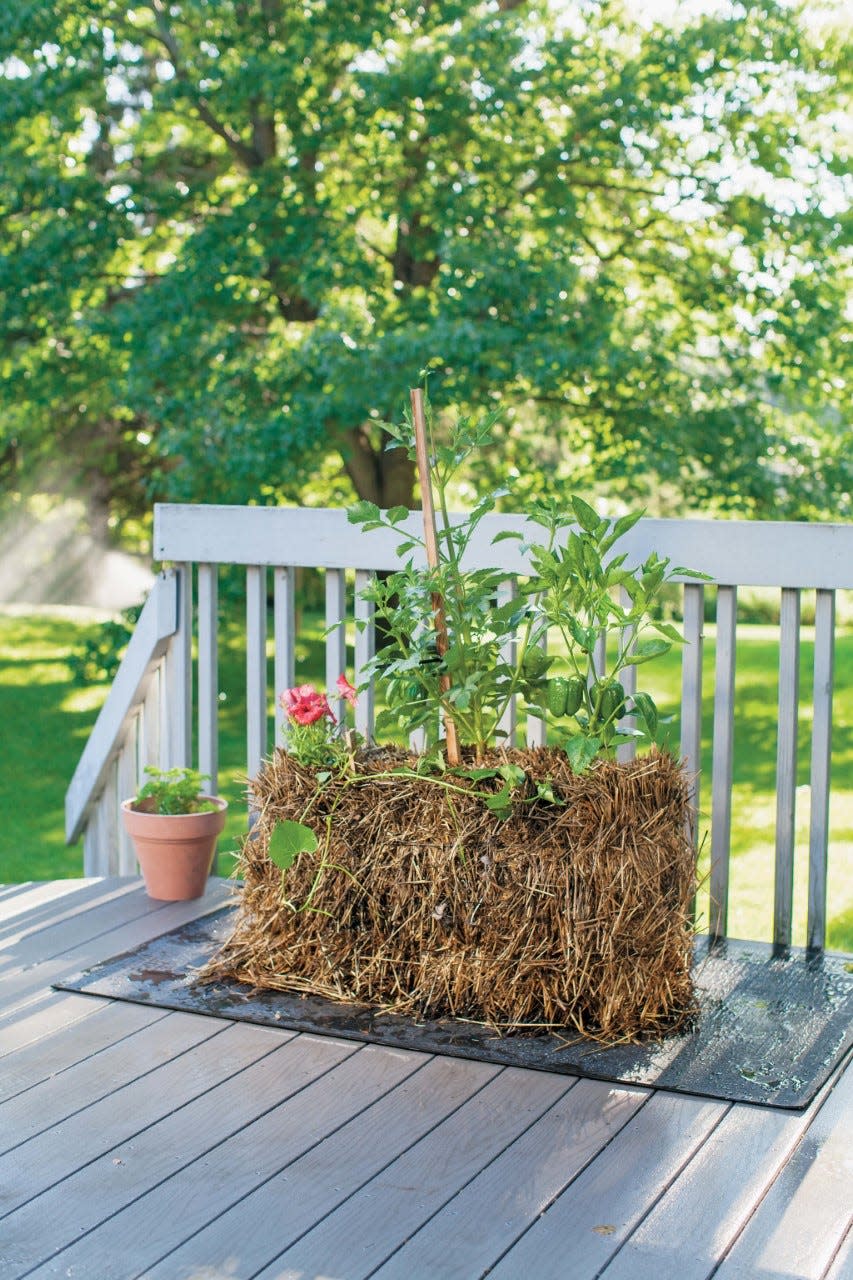
For climbing plants. I pounded a fence post at each end of a row of bales. A heavy wire can then be strung between the posts beginning about 10” from the top of the bale and every 10-inches up the post.
Planting the straw bale
To plant starter plants, I made a hole in the straw bale for the plant. (I used a short 4x4 block of wood with an angled face, pounding it into the bale to create a hole.) The hole is then filled with a garden planting soil. Finally, the starter plant can be planted in the hole.
To plant seeds, I spread 3 to 4 inches of garden soil mix evenly across the top of the bale, leveled it out, then make holes of appropriate depth for the seed being planted.
To add color, interest, and fun to the garden, flowers can be planted in the sides of the bales. As they grow, the stems will orient upward toward the sun. Some varieties of flowers, such as the marigold, help naturally defend the bale from pests.
Continue to water the bale as needed throughout the growing season and fertilize the plants in the same way as for plants grown in soil.
With these steps, the straw bale garden is set to flourish. I am excited to say that my straw bale garden is thriving. It remains to be seen whether it is worthy of highest ratings, but I am hoping that at least a few persons will consider it “enviable.”
In the next article, Straw Bale Gardening, Part II, I will share some things I learned about caring for the straw bale garden and addressing some of the unique issues of the method.
Joyce Konieczny is a Master Gardener with the Sandusky-Ottawa County Extension Offices.
This article originally appeared on Fremont News-Messenger: Master Gardener: Getting started with straw bale gardening

