Making homemade apple pie is easy. All you need are 10 ingredients and this simple recipe
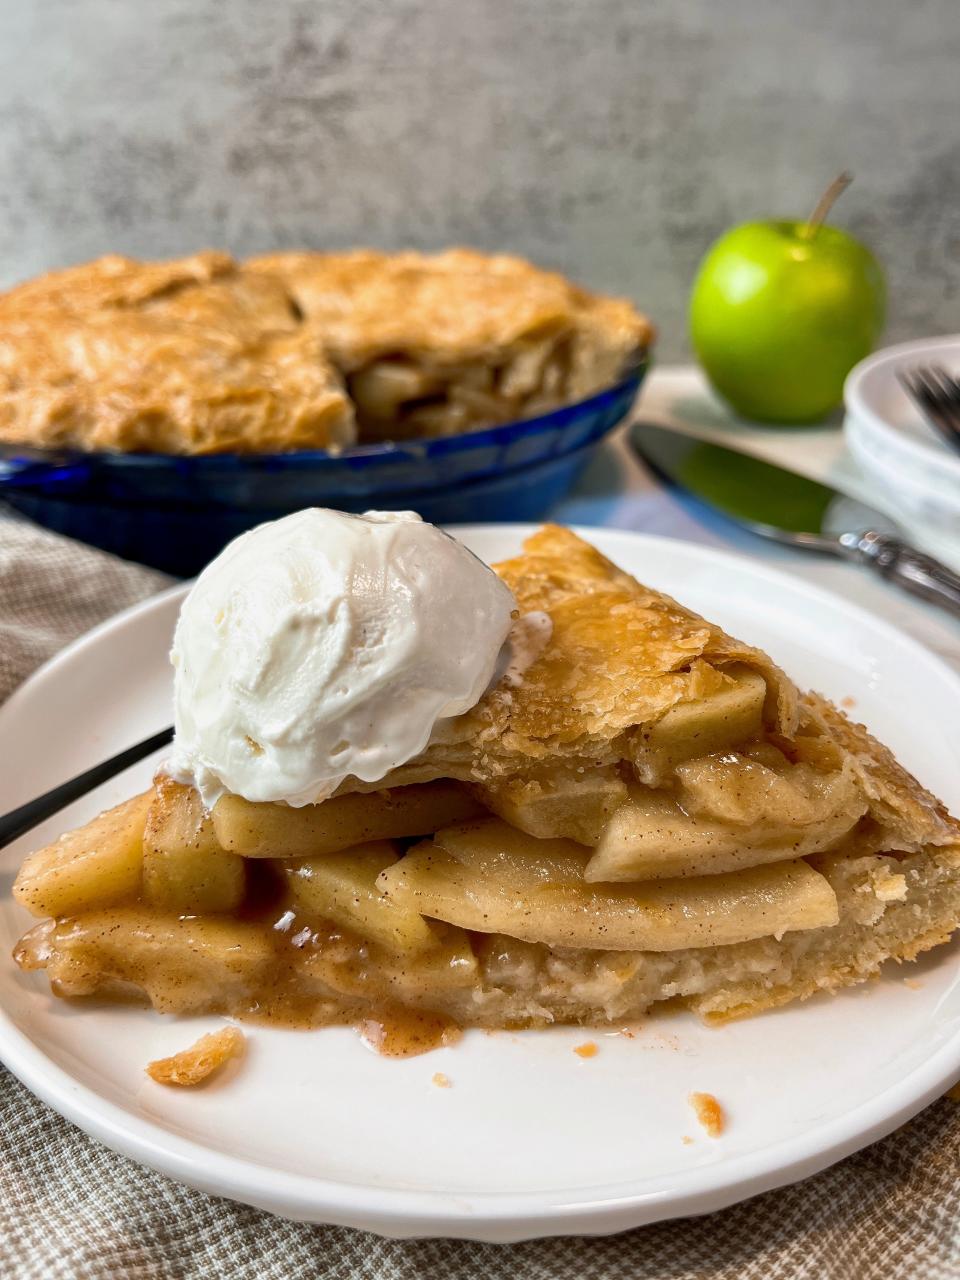
Saucy, sugary, cinnamon-laced apples, bubbling through buttery, flaky pastry— a single slice of apple pie can elicit memories of autumn festivals, the county fair, hometown parades and cozy holidays.
While apple pie isn’t uniquely American, it’s still our national dessert harkening back to the culinary repertoires of Dutch, Swedish and German immigrants who brought their flaky, buttery pastry with them, and the apples used were not Johnny Appleseed’s ridiculously sour crabapples, but apples from trees that were likewise introduced to America via overseas trade routes.
So, where did the phrase, "As American as apple pie" come from?
During World War II, soldiers commonly proclaimed that they enlisted for "for mom and apple pie". Since then, the phrase has referred to anything deemed patriotic and commemorative. The staying power of apple pie likely has more to do with it's delicious simplicity, than with any kind of symbolism.
While it’s not a complicated dessert, there are a few ingredient and technique tips you should follow to ensure your pie is flawless. What follows is your guide to the easiest, most foolproof way to make classic apple pie.
How to make classic beef chili: The only recipe you need (with or without beans)
Best apples for apple pie
Granny Smith is the gold standard for apple pie. Granny Smiths are tart and firm, which means they hold their shape during baking. Plus, the tartness marries well with the sugar and spices.
Second choices include Honeycrisp, Jazz, Jonagold, Braeburn and Pink Lady. Crisp, tart and sweet, these varieties remain firm during baking. Take note, they’re sweeter than Granny Smiths and that sweetness will be amplified during baking.
In a pinch you can use Golden Delicious. Sweeter and softer, this variety doesn’t hold up as well during baking. But if they're all you have, don't worry, the pie will still be tasty.
Pie crust
Use cold ingredients. Use cold butter and ice-cold water to ensure your butter doesn’t soften during handling. Visible bits of butter in the pastry is the objective. As the butter melts during baking, it creates steam and air pockets. When the dough cools, these air pockets become light, flaky layers.
Refrigerate your dough before rolling out. Chilled dough yields the flakiest crust. Refrigerate the dough, tightly wrapped in plastic, for at least 1 hour and up to 2 days before rolling out.
Freeze your dough, if you want. Wrap the disks in a few layers of plastic wrap and freeze for up to 3 months. Thaw overnight in the refrigerator before rolling out.
Flour your work surface. There’s nothing worse than a perfectly rolled-out pie crust that’s perfectly stuck to the counter. Generously flour your work surface before rolling out the dough, add more flour as needed and rotate your dough frequently to ensure it’s not sticking.
Use a ruler. Seriously. Roll the dough out to ⅛-inch thickness. This is the ideal thickness for pie crust, so use a ruler.
Use a deep-dish pie plate. This recipe calls for a lot of apples. Seven to be exact. Apple pie should be brimming with apples so grab your deep-dish pie plate and pile those apples in.
Bake in the center of your oven. The middle of your oven is where heat and air circulate evenly, so place your pie on the middle oven rack to promote even baking and prevent over-browning of the crust.
Make it ala mode: Make vanilla ice cream with 3 ingredients and a blender
Create a pie shield. In some cases (not all) the edges of apple pie over-brown before the pie is finished baking. Create a shield to rim the edges of the pie by folding a 38-inch piece of aluminum foil in half lengthwise two times. Use this 38x3-inch strip of foil to cover the edges for the first 20 minutes of baking when the pie is still cold (this prevents burning your hands) and when the oven temperature is the highest.
Start with a hot oven, then reduce the temperature. Start baking your pie at 400 degrees, then reduce the oven temperature to 375 degrees after 20 minutes. Why? A hot start ensures golden, flaky — not soggy — pastry.
Bake the pie ahead if needed. This apple pie can be prepared and baked in advance, which makes it great for the holidays. Store the pie, loosely covered, at room temperature for up to 2 days. You can also cover the pie and refrigerate for up to 3 days.
Let your pie cool before slicing. As tempting as that apple pie is, let it cool for at least 2 hours before cutting into it. The starches in the filling will thicken and gel as the pie cools, making it easier to slice. Don’t worry, the pie will still be delightfully warm.
How to make pie crust without a food processor
While the food processor makes quick work of pastry-making, you can make the dough by hand. To do so, freeze your cut-up butter for 10 minutes before using.
In a large bowl, combine the flour, sugar and salt. Add the cold butter and toss to combine. Working quickly, use your fingers to break the butter into pea-size pieces. Add a few tablespoons of the ice-cold water and toss to moisten. Continue adding the water, a few tablespoons at a time, and toss until the dough sticks together. It will look crumbly, but will stick together when pressed between two fingers.
Transfer the dough to a clean work surface and press together until you have a cohesive mound. Halve the dough with a bench scraper or sharp knife. Wrap each piece in plastic wrap and shape into a 4-inch disk.
Refrigerate the disks for at least 1 hour before rolling out.
Keep baking: This buttery, vanilla dough does it all
Recipe: How to make apple pie
Makes: a single 8-slice pie
Ingredients:
For the pie crusts:
2 sticks cold unsalted butter (1 cup), cut into small cubes
3 cups all-purpose flour
2 tablespoon granulated sugar
1 teaspoon salt
½ to ¾ cup ice-cold water (add ice cubes to make sure the water’s cold)
For the pie filling:
7 Granny Smith apples, peeled, cored, and sliced into ¼-inch-thick slices (about 16 slices per apple)
1 tablespoon fresh lemon juice
⅓ cup granulated sugar
¼ cup loosely packed light brown sugar
3 tablespoons all-purpose flour
1 teaspoon ground cinnamon
⅛ teaspoon ground nutmeg
1 large egg, lightly beaten with 1 tablespoon of water
1-2 teaspoons sugar for sprinkling over top, optional (if desired, use coarse sugar, turbinado sugar or sanding sugar)
Preparation:
Make the pastry
To prepare the pastry, place your cubed butter in the freezer for 10 minutes.
In the bowl of a food processor, combine flour, granulated sugar and salt. Pulse a few times to combine. Add the cold butter and pulse on and off until the butter pieces are uniform in size, about pea-size.
Add a few tablespoons of the ice-cold water pulse a few times (briefly) to moisten. Continue adding the water, a few tablespoons at a time, and pulse until the dough sticks together. It will look crumbly, but will stick together when pressed between two fingers. Please note: You may not need all the water.
Transfer the dough to a clean work surface and press together until you have a cohesive mound. Halve the dough with a bench scraper or sharp knife. Wrap each piece in plastic wrap and shape into 4-inch disks.
Refrigerate the disks for at least 1 hour before rolling out.
Make the filling
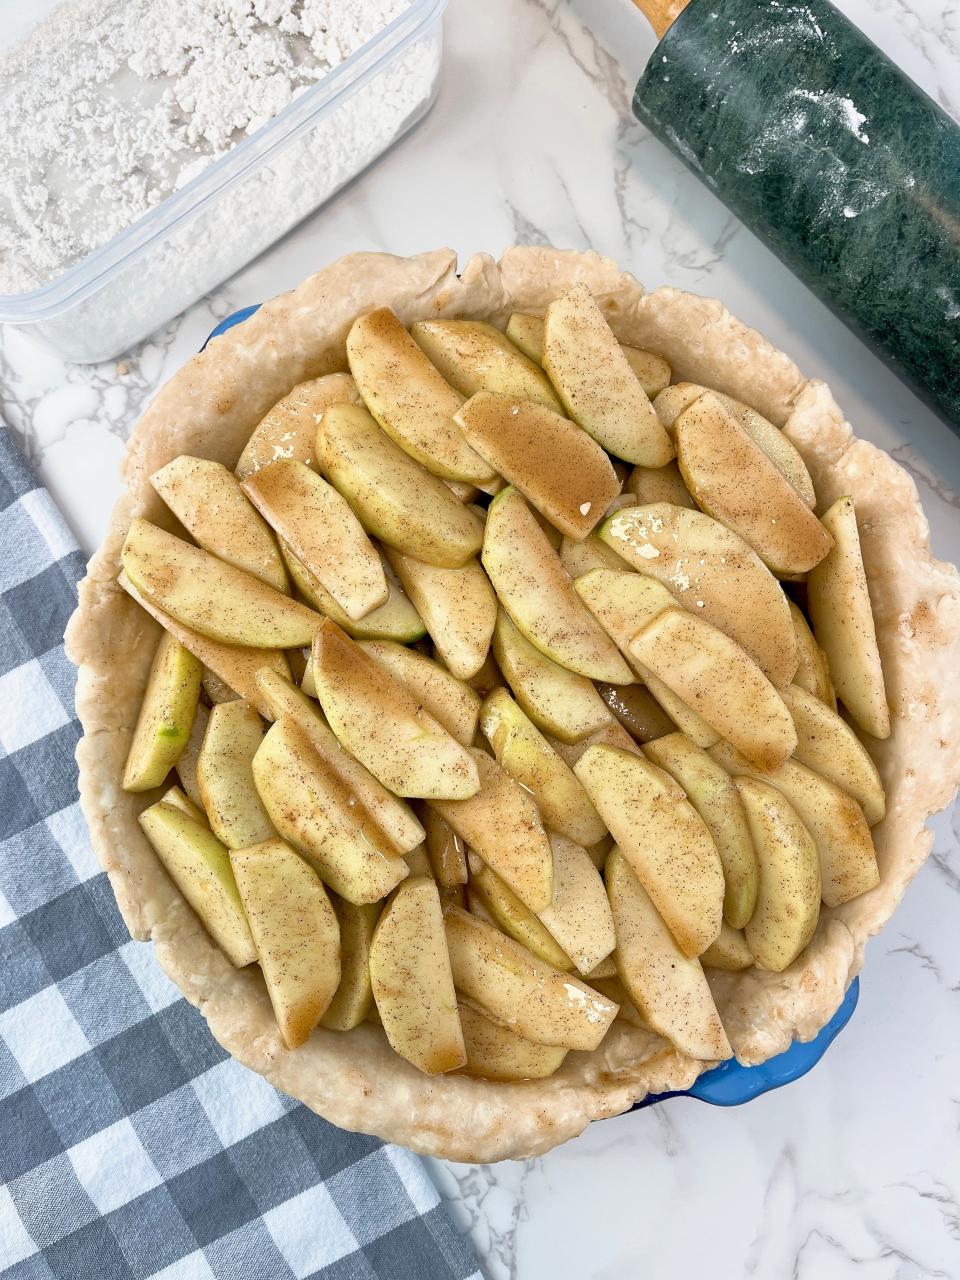
In a large bowl, combine the sliced apples, lemon juice, granulated sugar, brown sugar, flour, cinnamon and nutmeg. Toss to coat the apples evenly.
Assemble and bake
Preheat the oven to 400 degrees.
Remove the dough from the refrigerator and let stand at room temperature for 5 minutes, or until soft enough to roll out.
Roll one disk of dough out on a floured work surface until about 12-inches in diameter and ⅛-inch thick. (Measure to be sure!) Rotate the dough often to ensure it’s not sticking and is of even thickness. Add more flour to your work surface and rolling pin as needed.
Carefully transfer your dough to a deep-dish pie plate, allowing the excess dough to hang over the sides.
Roll out the second disk of dough the same way and leave it on your work surface.
Spoon the apple mixture over the bottom crust. If there are any juices at the bottom of the bowl, drizzle about 3 tablespoons over the apples and discard the rest.
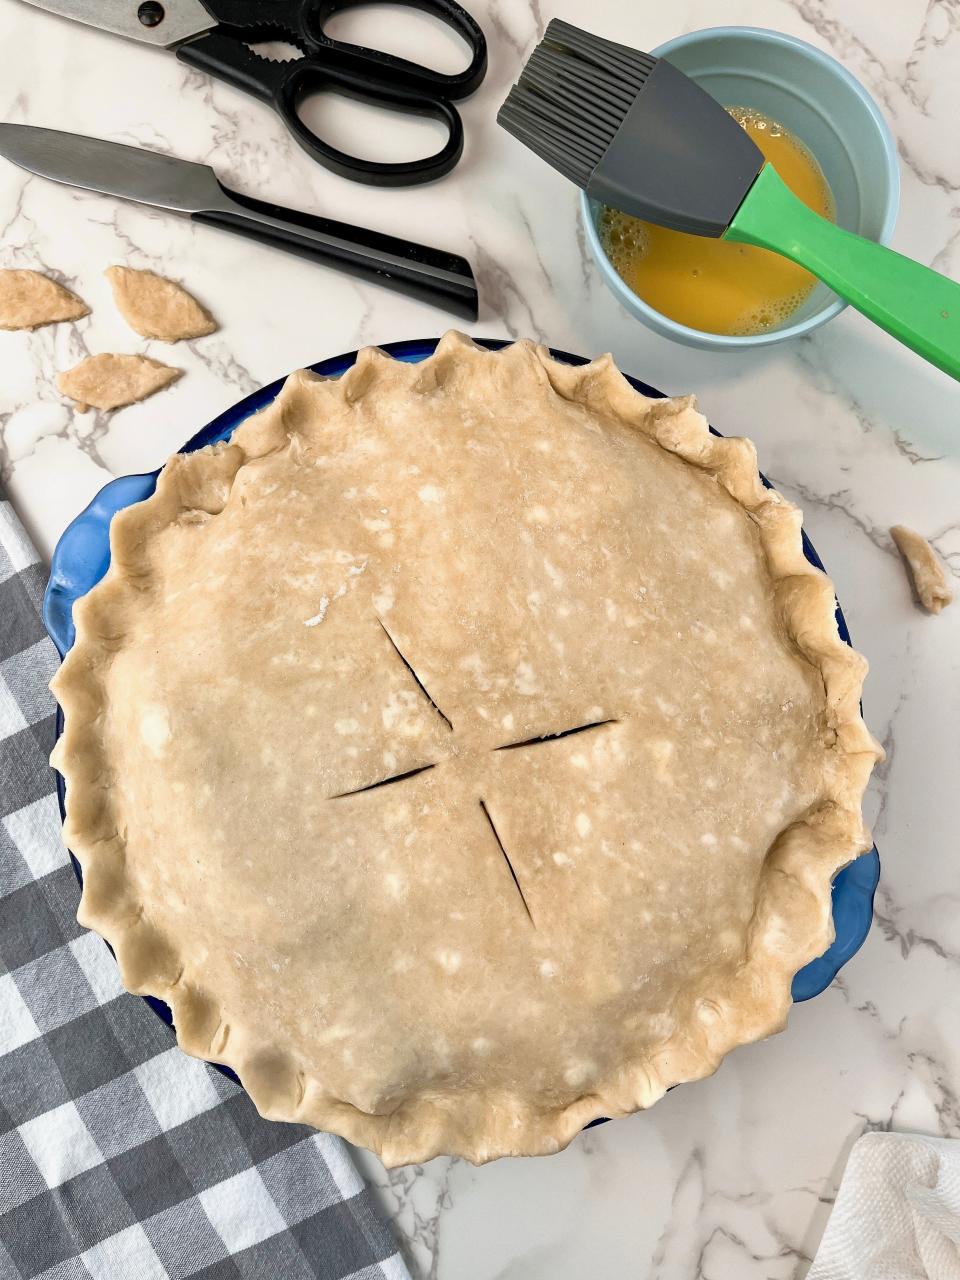
Arrange the second pie crust over top. If necessary, trim any excess dough so the top and bottom crusts are equal. Pinch the two crusts together to seal, then fold them under all the way around the edge of the pie. If desired, use your fingers or a fork to create a decorative edge. Cut 4 slits in the top of the pie to allow steam to vent during baking.
Place the pie on a baking sheet and brush the egg wash all over the pie — top and edges. You can also use the scraps to create decorations (such as leaves). If you’re adding decorations, add them after the egg wash and brush them with egg wash. Sprinkle the top with coarse sugar, if using.
Fold a 38-inch piece of aluminum foil in half lengthwise two times. Use this 38x3-inch strip of foil to cover the edge of the pie.
Bake at 400 F for 20 minutes.
Carefully remove the pie shield, reduce the oven temperature to 375 F and bake for 30 to 40 more minutes, until the top is golden brown and the juices are bubbling through the steam vents.
Cool at room temperature for at least 2 hours before cutting into eight slices and serving.
Questions or comments? Email the culinary team at cooking@azcentral.com.
This article originally appeared on Arizona Republic: Last minute apple pie: An easy recipe for homemade pie from scratch

