Hailey Bieber’s nail artist shares how you can recreate ‘glazed donut’ nails in 5 steps
- Oops!Something went wrong.Please try again later.
— Recommendations are independently chosen by Reviewed's editors. Purchases made through the links below may earn us and our publishing partners a commission.
You’d think model Hailey Bieber invented the actual glazed donut with how often the phrase is seen beside her name. It began with “glazed donut skin”—i.e., a dewy complexion—featuring products from her skincare line Rhode. Then it evolved into the trending “glazed donut nails,” consisting of a white polish embellished with shimmering chrome. Who knew a confectionary could inspire an aesthetic movement?
For more beauty, makeup and hair reviews and tips, follow us on TikTok @beautorial.
What are glazed donut nails?
The nail style began with Hailey Bieber’s request for sheer white nails at her pre-Met Gala appointment with Los Angeles-based nail artist Zola Ganzorigt. “After we put [on] the color, I asked her to try chrome powder on it,” Ganzorigt says, adding that she thought it may match the YSL white satin dress Bieber planned to wear to the event. “We fell in love with the result.”
Bieber’s original nail treatment consisted of a gel manicure featuring O.P.I. polishes and a chrome powder—a loose powder manicurists apply post-polish for a shimmery effect—that’s only sold to professional nail technicians. But as with anything worn by Justin’s better half, the internet was rabid to copy the look at home. Luckily, Ganzorigt obliged the many fans requesting tips to mimic the manicure, even posting a tutorial to TikTok. But no need to click away: The steps—and products—below will lead you to the Bieber-inspired nails of your sweetest dreams.
1. Prepare your nails to receive polish
Like any good paint job, you’ll need to prep your canvas first. “Prepping your nails before polish is really important and it helps your manicure last longer,” Ganzorigt says.
Wash your hands and remove any old polish first with nail polish remover. Soak your fingertips in a bowl of warm, sudsy water for a few minutes. Next, gently push back your cuticles—the translucent, thin layer of skin around the perimeter of your nail—using a wooden orange stick or metal cuticle pusher.
Then, use cuticle nippers to carefully trip the excess skin, taking your time to avoid an accidental snip. From there, wipe the nail with a cotton ball or round dipped in rubbing alcohol or acetone-based nail polish remover to remove any oil that may cause nail polish not to adhere well.
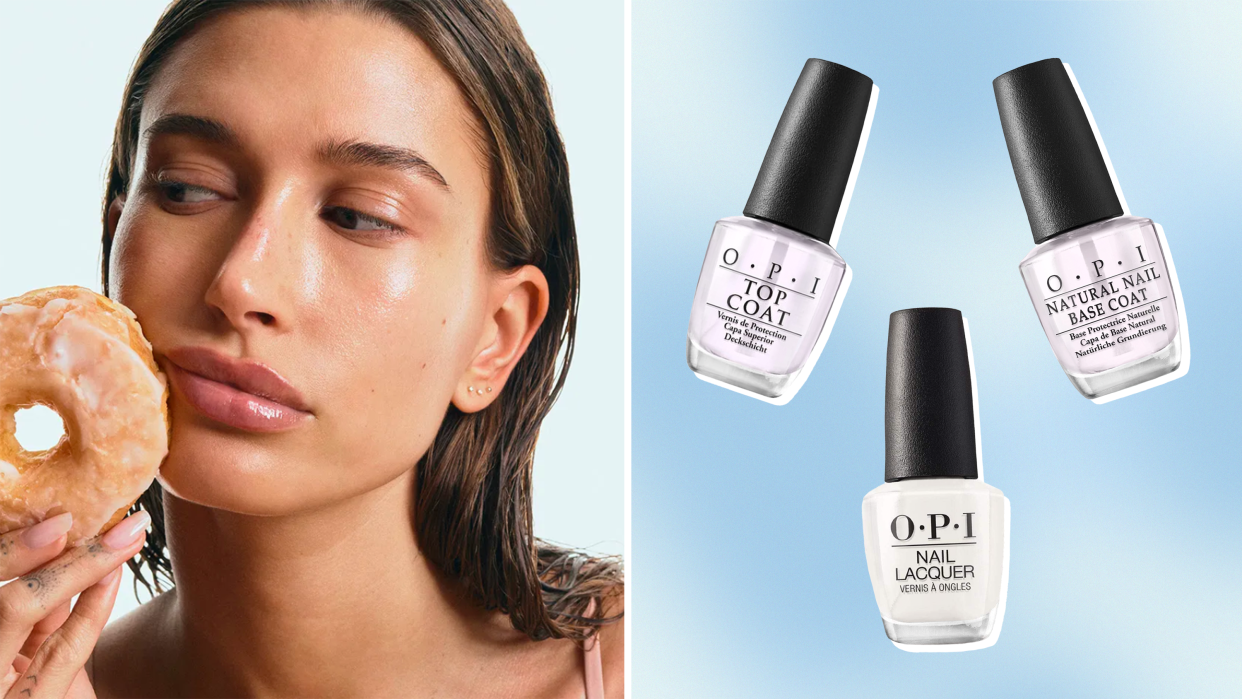
2. Begin your manicure with a base coat
Another part of the prep process is applying a base coat, which protects the nails and helps the manicure last longer, Ganzorigt says. Bieber’s signature manicure uses gel polishes, but if you’re opting for regular polish at home, Ganzorigt recommends applying a layer of the O.P.I. Natural Nail Base Coat, which claims to keep nails looking shiny and chip-free for up to seven days.
3. Layer on your white polish
For the next step, you’ll want to snag O.P.I.’s Nail Lacquer in the shade “Funny Bunny,” or any polish with a milky-white, shimmer-free hue. Apply this in a thin layer, “which gives a sheer tone of white to your nails,” Ganzorigt says. Allow this layer to dry for about three minutes to prevent the subsequent layer of polish from diluting the white.
For the tidiest paint job, swipe the brush on the jar rim to remove the excess polish—too much and you risk a blotchy result. Swipe the brush down the center of your nail first, then each side, taking long strokes from just above the cuticles out toward the tips. Wipe any polish from skin using your orange stick or a cotton swab dipped in nail polish remover.
4. Add sugary shimmer with this hack
The nail powder that provides Bieber’s nails with its glistening finish—O.P.I.’s Chrome Effects “Tin Man Can”—isn’t available to the everyday nail enthusiast, and powder is fussier to apply anyway. Luckily, Ganzorigt suggests a regular-polish alternative to create the look at home: Mix O.P.I.'s “Kyoto Pearl,” a shimmery white shade, with the O.P.I. Top Coat to thin it out before applying a single coat of the mixture to your nails. “It gives that glazed donut effect.”
Stir the polishes together on a clean surface, such as on a metal palette or a disposable plate, using the wooden or metal cuticle pusher (you can wipe either clean later with nail polish remover). Work with several drops of each at a time to avoid the polish drying up and turning gloppy. Use the shimmery shade’s brush to pick up the combined polish and brush it onto the nails in three strokes (down the middle, side, side). Repeat the mixing and painting process for each nail, or every few nails if you have enough blended polish leftover and it hasn’t dried up.
5. Seal it in and smooth your skin
Once the polish phase is complete and you’ve given your nails at least 15 minutes to set—or however long it takes for them to feel dry to the touch—finish your manicure with cuticle oil and a hand lotion to add an extra layer of protection to your nail polish and make your skin silky feel soft.
The Cuccio Naturale Revitalizing Cuticle Oil is a highly rated option on Amazon and comes in a variety of fragrances like “milk and honey” and “lavender and chamomile,” as well as a fragrance-free option for anyone with sensitive skin or noses. You can snag it in a 0.5- or 2.5-ounce bottle with a dropper for easy application. Apply a drop of the oil to the base of each nail and gently massage it into the surrounding skin.
For a hand cream to leave skin supple and smooth, we at Reviewed recommend the Kiehl’s Ultimate Strength Hand Salve, as it leaves the skin feeling moisturized and absorbs quickly without leaving behind a greasy residue. It’s available in 2.5- and 5-ounce squeeze bottles.
The product experts at Reviewed have all your shopping needs covered. Follow Reviewed on Facebook, Twitter, Instagram, TikTok or Flipboard for the latest deals, product reviews and more.
Prices were accurate at the time this article was published but may change over time.
This article originally appeared on Reviewed: Hailey Bieber glazed donut nails: 5 steps to recreate them at home

