How to use Google My Maps to plan your trip
Whether you’re planning a holiday or a day trip, having the ability to plan your trip with more granularity is a real boon, so it’s worth learning how to use Google My Maps to help you get organized.
Google Maps is undoubtedly one of the best wayfinding software available, but there are some features Google likes to split off into separate services.
One such example is the ability to customize your maps, which is currently housed under Google My Maps, allowing you to plan custom routes, set multiple markers, and add details like notes, colored labels, and more.
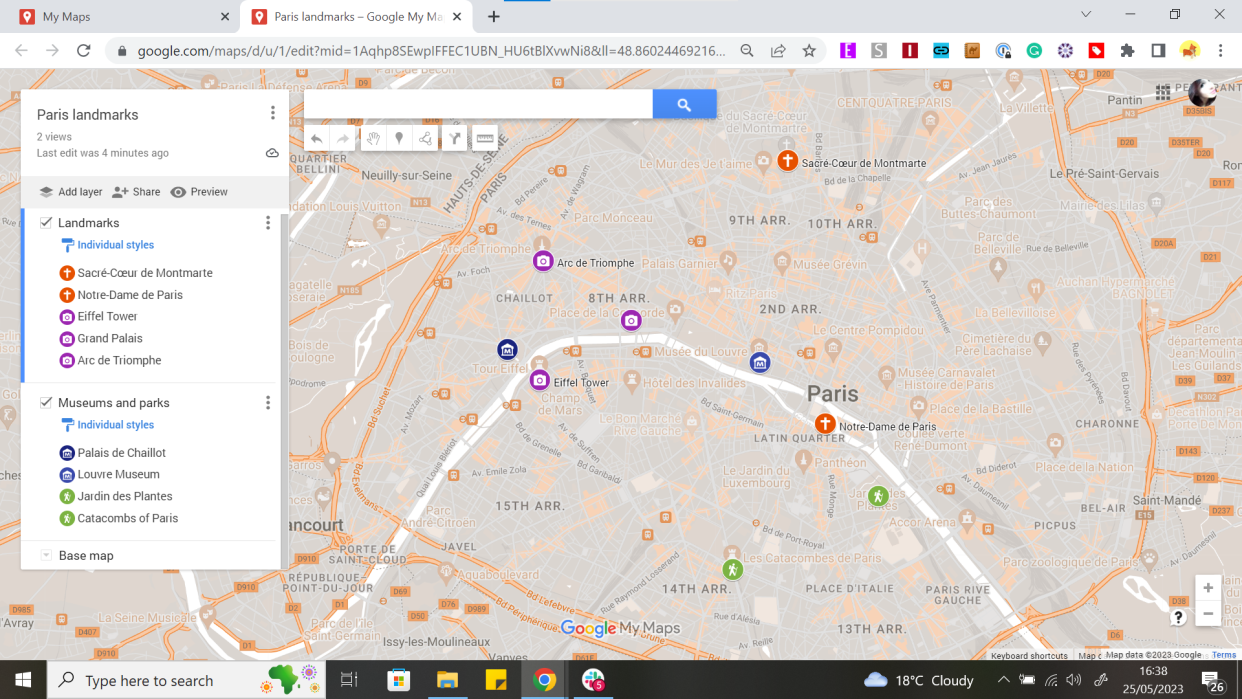
For example, the map above shows a map of some of the most popular destinations in Paris, with added detail in the form of summaries and different layers for different types of locations.
Below, we’ve included instructions on how to do a basic set-up, as well as some optional steps to really make your map sing.
Steps for how to use Google My Maps
Head to Google My Maps and log in to your Google account
Create and name a new map
Input or import your destinations
Customize tags, labels, and imagery
Tools and requirements
Google account
Desktop browser
Step by step guide for how to use Google My Maps
1. Head to Google My Maps and create a map
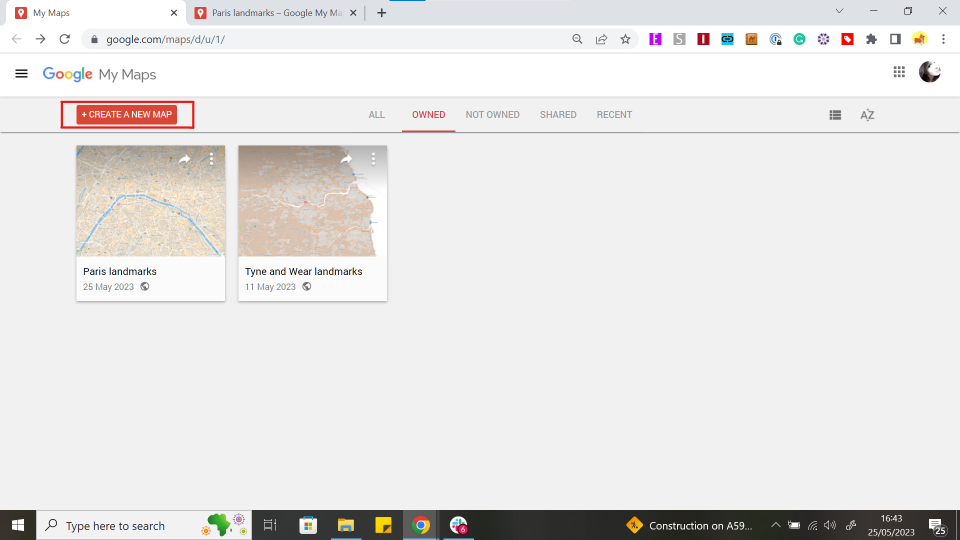
(Image: © Future / Google My Maps)
First, open Google My Maps and sign in to your Google account. In the top left hand corner of the screen, you’ll see a button titled “Create a new pin". Click this, then name your map by clicking the map title field in the index on the left side of the screen.
2. Add pins for your destinations
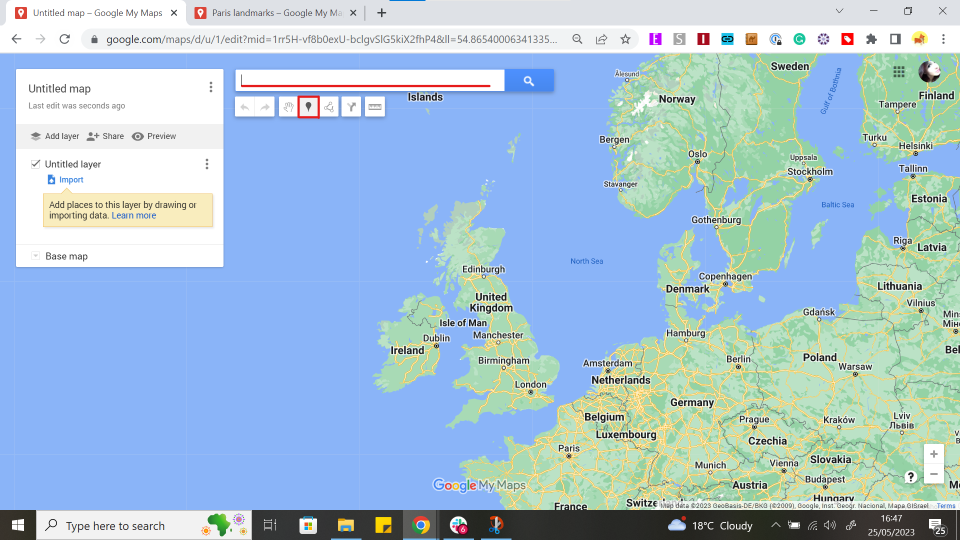
(Image: © Future)
Next, you'll want to add pins for the destinations on your map. You can do this either by using the search bar as you would on the standard Google Maps, or by pressing the pin logo, which will change your mouse into a crosshair and allow you to manually place your destination.
3. Label and describe the destinations
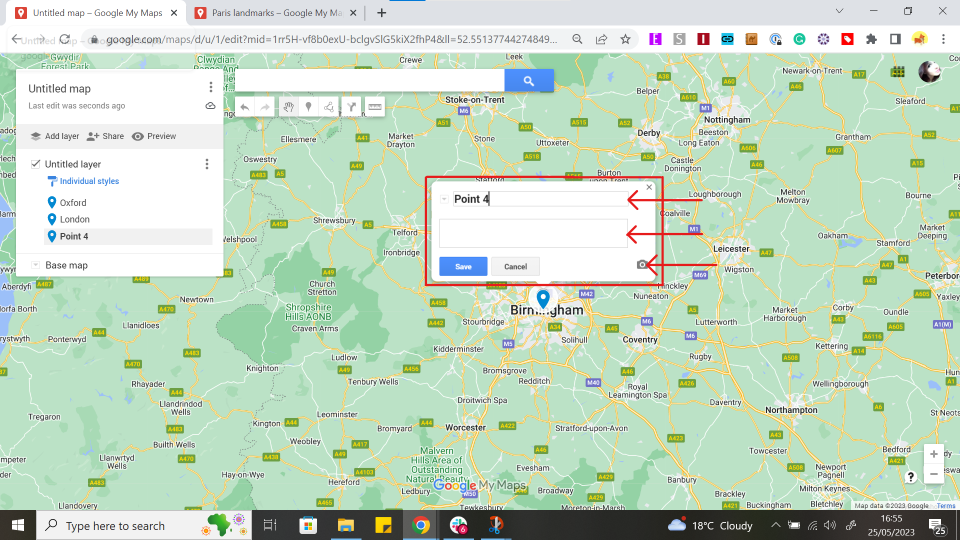
(Image: © Future / Google My Maps)
A box will appear, in which you can type your own label for the location (or use whatever comes up in the text box search, if you used that method), add a short description or any notes, and even add media to the location.
This media can either be uploaded from your device, from a URL, from your Google Drive, from Google Image search results, or from YouTube.
4. (Optional) Add lines or directions
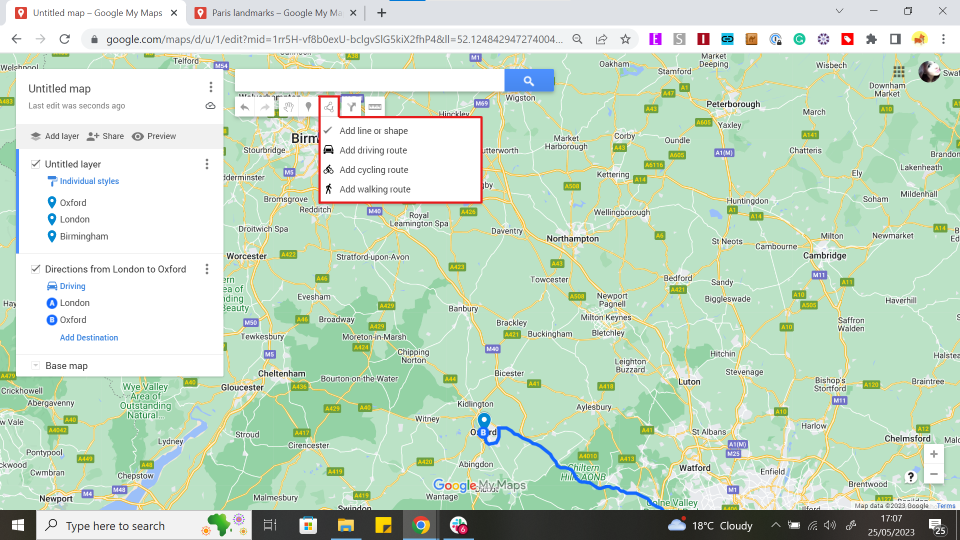
(Image: © Future / Google My Maps)
If you're traveling by foot, car or by bike, you can press the three circles connected by dots below the search bar (pictured above) to draw lines or directions between your destinations. You can choose to type the destinations directly into the index on the left side of the page or simply click on existing pins to connect them.
5. (Optional) Customize your map
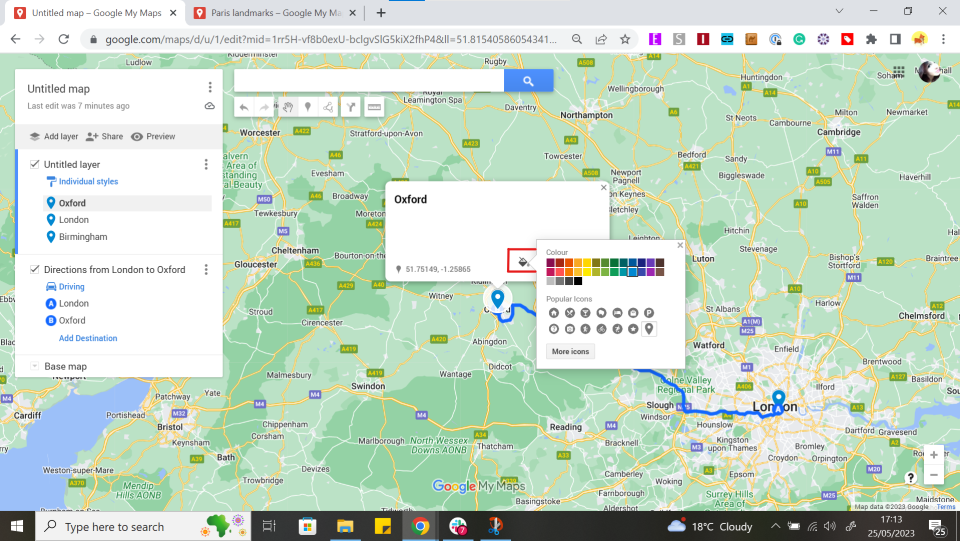
(Image: © Future / Google My Maps)
There are lots of ways to make your map bright, colorful, and detailed.
By clicking the paint can icon on a pin or in the index bar next to the pin's name in the index, you can change the pin color or icon.
By clicking the dropdown menu titled 'Base map' at the bottom of the index, you can change the topography of your map.
You can also separate your pins out into layers by clicking 'add layer', allowing you to check or uncheck the visibility of given layers and separate destinations by any filter you might need; what day of the trip you'll be visiting, what kind of location they are, etc.
6. (Optional) Share and/or publish your map
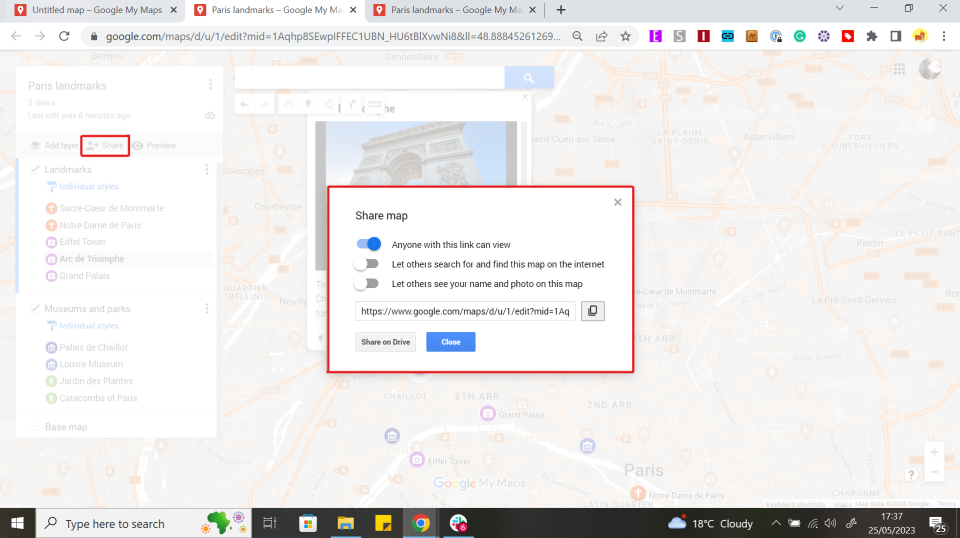
(Image: © Future / Google My Maps)
When your map is ready, you can either share it with your families or travel buddies, or you can publish it online for your blog, social media, or project.
Clicking share will bring up a window with the sharing options, allowing you to toggle your map's visibility, searchability, and if your details are attached to the map, as well as its share link and an option to share on drive.
To see what it will look like to non-collaborators, click the preview button.

