How to design a funky synth patch that sounds like the Clavinet
- Oops!Something went wrong.Please try again later.
There was a time when we had to place great reliance on acoustic and simplistic synthetic instruments, to create the sounds we wanted to hear in the production realm. One instrument which was always difficult to replicate synthetically is the piano.
It’s easy to forget this, given the vastness of many of the excellent sample libraries that we have today, hence history is littered with a number of instruments that tried to emulate a piano’s credentials, but with electronics.
Many artists, looking to replicate the jazz and funk sound of yesteryear, continue to explore some of this vintage equipment, however our ZebraCM, a synth that's bundled with every issue of Computer Music Magazine, is a versatile beast, and more than capable of managing a passing facsimile to some of these instruments.
READ MORE
Early electric pianos, from companies like Roland, relied on synthetically-recreated piano sounds. More successful were keyboards that were electromechanical in operation. The Fender Rhodes is a classic example, but it doesn’t really sound like an acoustic piano.
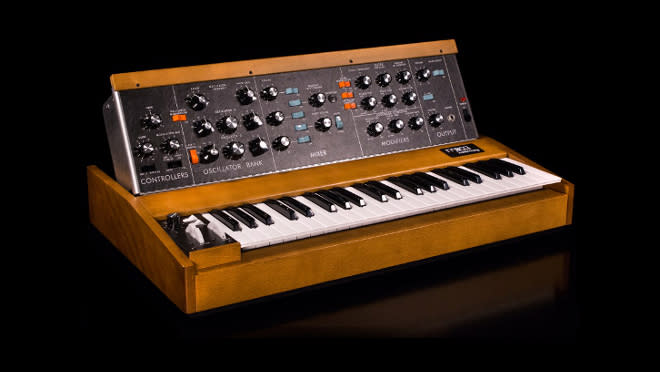
Enter Hohner, who produced a couple of interesting and lesser known instruments. The Pianet and Clavinet were both electromechanical instruments which had a unique sound all of their own. They could certainly be described as pianistic, but with a tone which could be amplified, inviting performers to add different effects, such as wah pedals and phasers.
Let’s make a patch that deconstructs this sound. If you have ZebraCM, follow along with the steps below, but if not, you should be able to replicate the process with any well-equipped synth plugin.
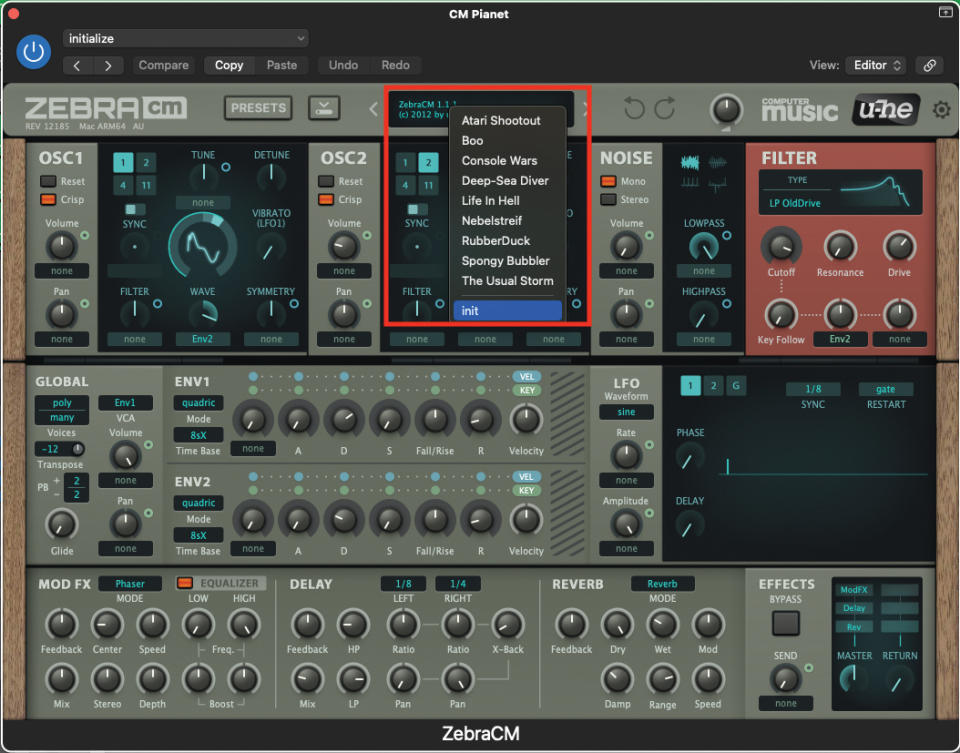
Let’s begin by initialising a patch on the ZebraCM. Open up your DAW and load up the plugin. Once the plugin window is open, move to the central display at the top of the window, click to reveal the drop-down menu, and select ‘init’ from the bottom. This will initialise the patch.
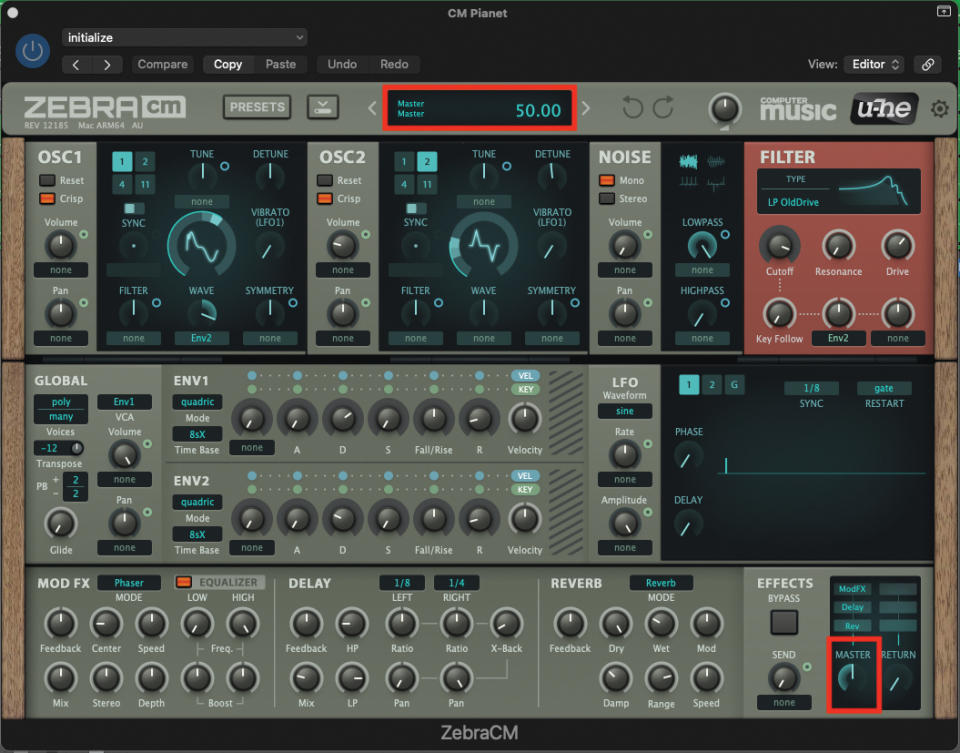
This patch is going to be a relatively loud one, so now would be a great time to reduce your master volume to a level of 50. Just as a reminder, every time you tweak a pot or setting on the plugin, you will see an accurate value/numeric in the upper display.
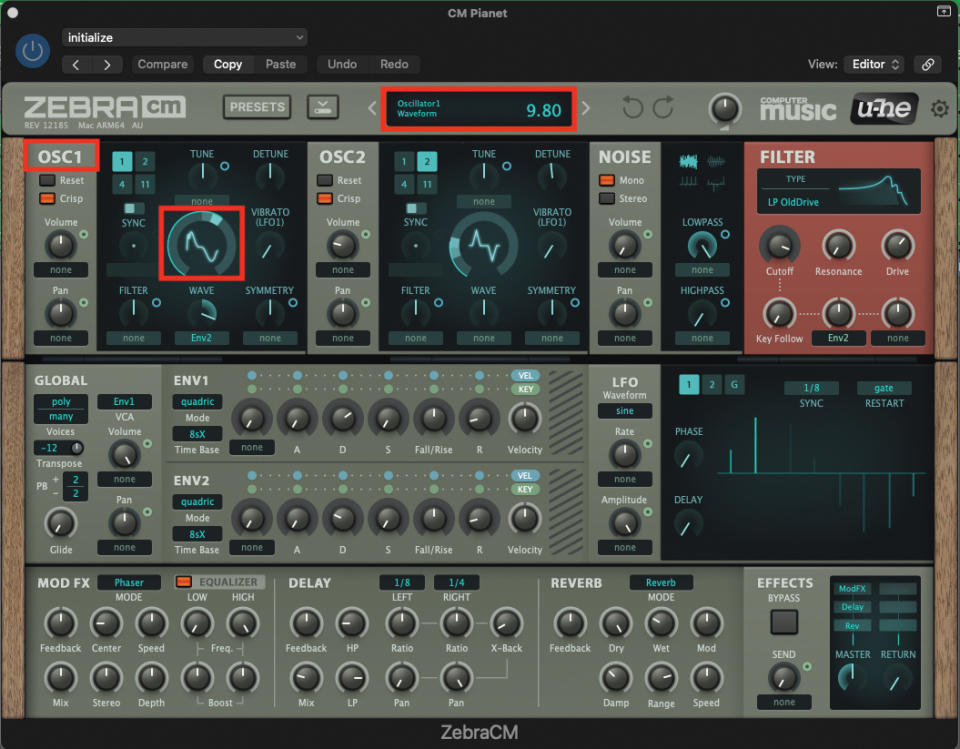
We’ll start creating our sound by visiting Osc1; we want to use a reedy-sounding waveform, so change the Osc1 waveform to a value of 9.80. This will also be the dominant sound source in our patch, so leave the oscillator volume set to the default of 100.
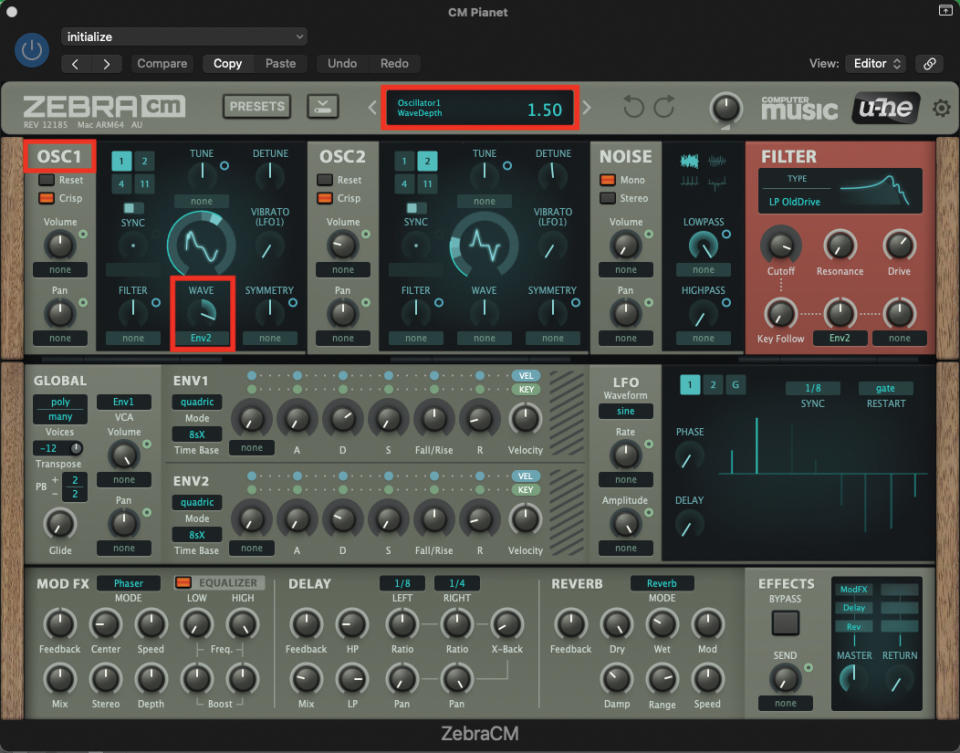
To create a degree of movement, to mimic a pianet or Clavinet, we want to modulate the waveform. Set the user-assigned Wave pot, to respond to Env2. Then set a pot value of 1.5. This now means that Env2 will directly modulate the waveform.
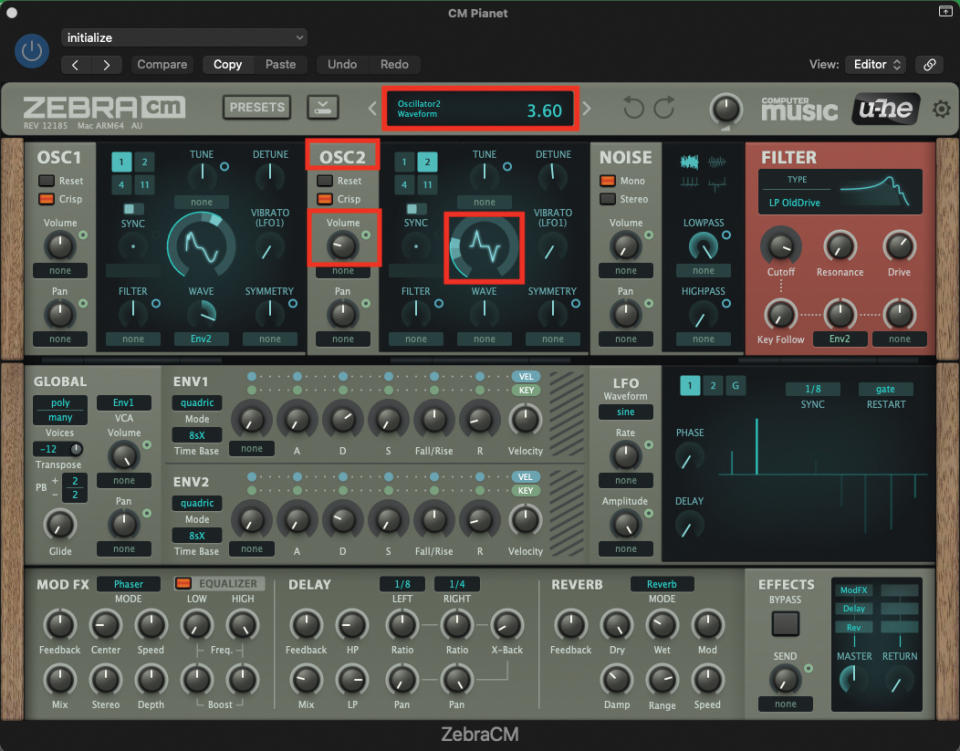
Next, we can move along to Osc2. By default, the volume is decreased to 0, so turn the volume pot up to a value of 50. Now we can select an appropriate waveform; select a value of 3.6, by clicking and dragging on the wave icon while checking the upper display.
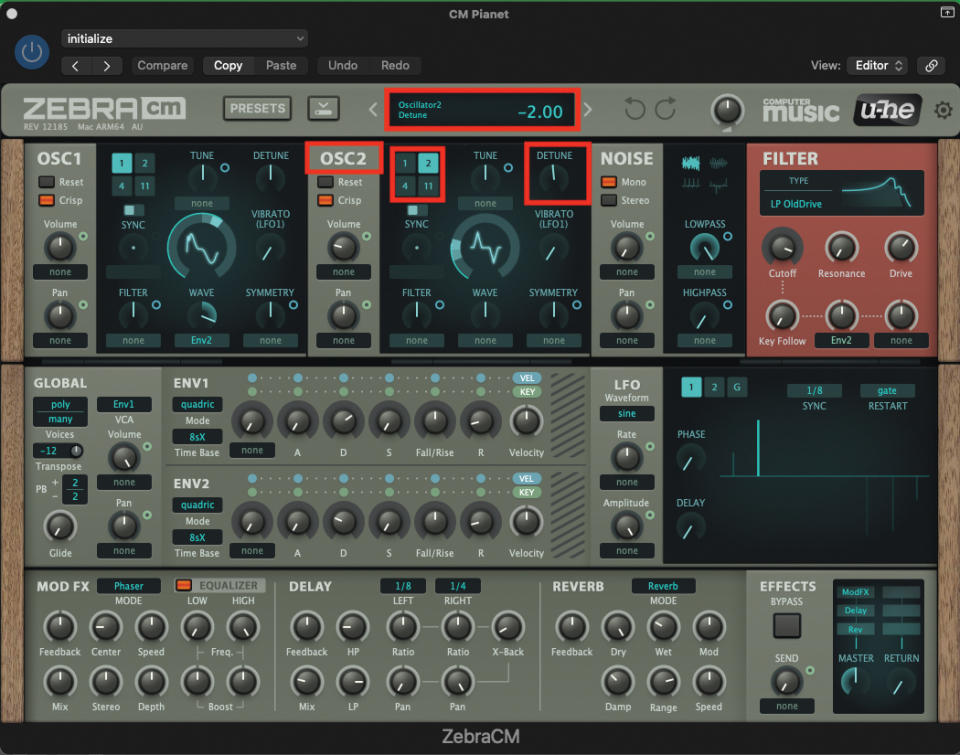
Staying within the Osc2 section, we can thicken the texture by selecting a value of 2, in the Wave aliasing section. To prevent any phasing issues, detune the oscillator to a value of -2. This will also provide the additional effect of thickening the wave’s texture.
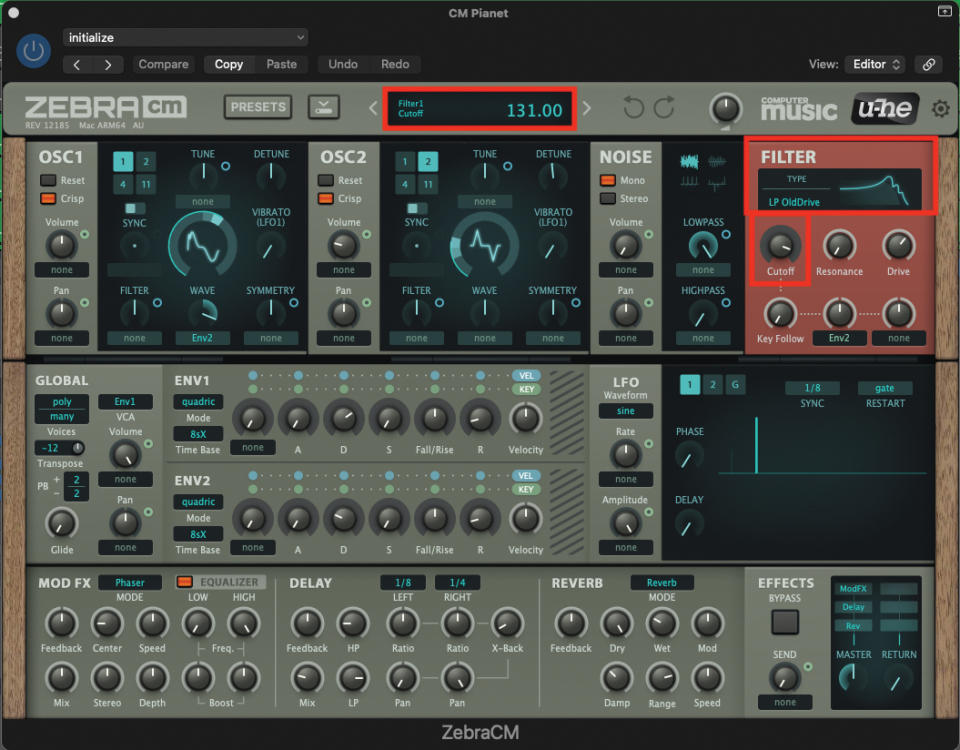
Now we can move to the filter section, where we’re going to employ a vintage-style filter. From the drop-down menu, select LP OldDrive. We’ll be wanting to leave the cutoff fairly open, but we can filter out a little bit of top end, by setting the Cutoff pot to a value of 131.
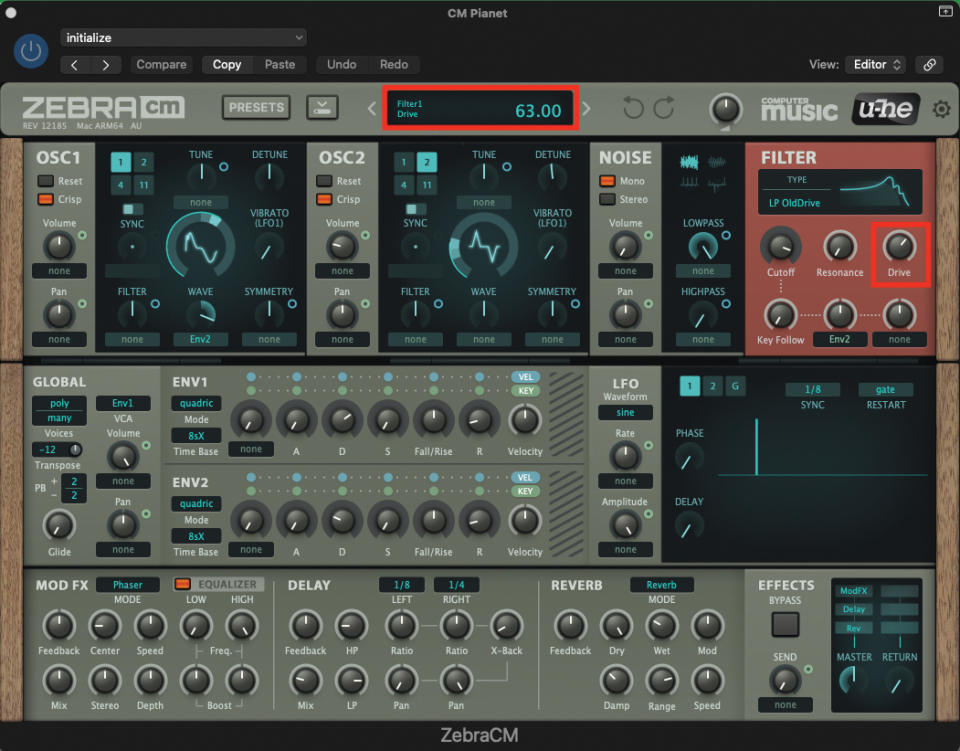
Staying within our vintage remit, we can add some very classy overdrive colour, right within the filter section. Set the Drive pot to a value of 63 and you should hear a multitude of vintage frequencies immediately infiltrate our patch.
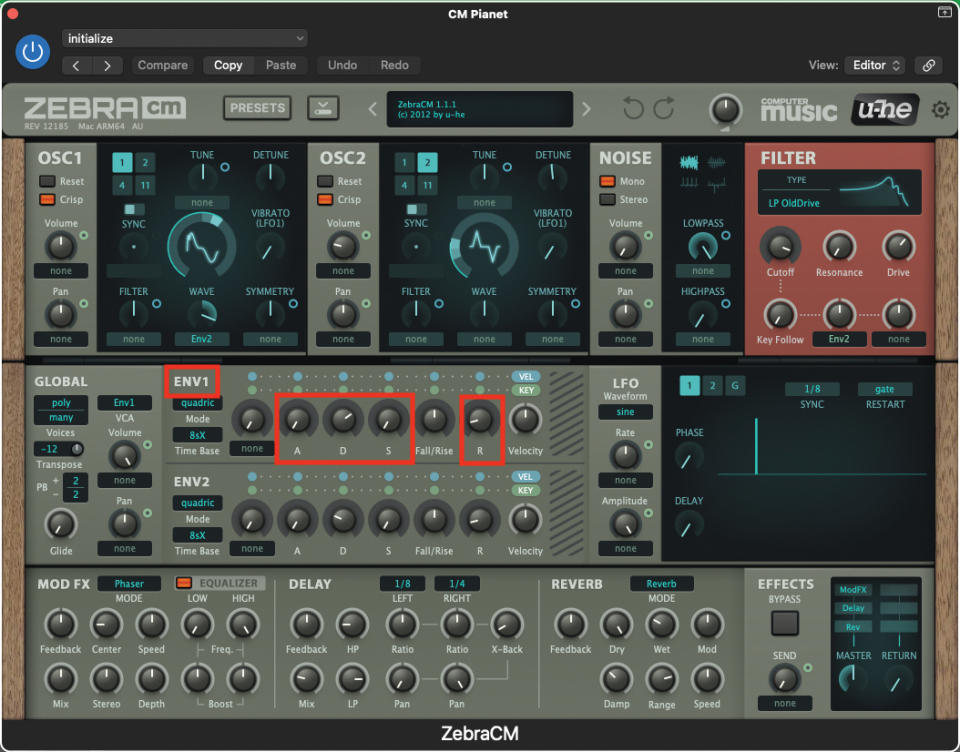
Env1 is going to be used to control the amplitude, or volume of our patch. Set the Attack pot to a value of 0, Decay to a value of 68, the Sustain to 0, and finally the Release to 15. The overall plan here is to try and mimic the sound of a decaying piano string, hence the relatively long decay phase.
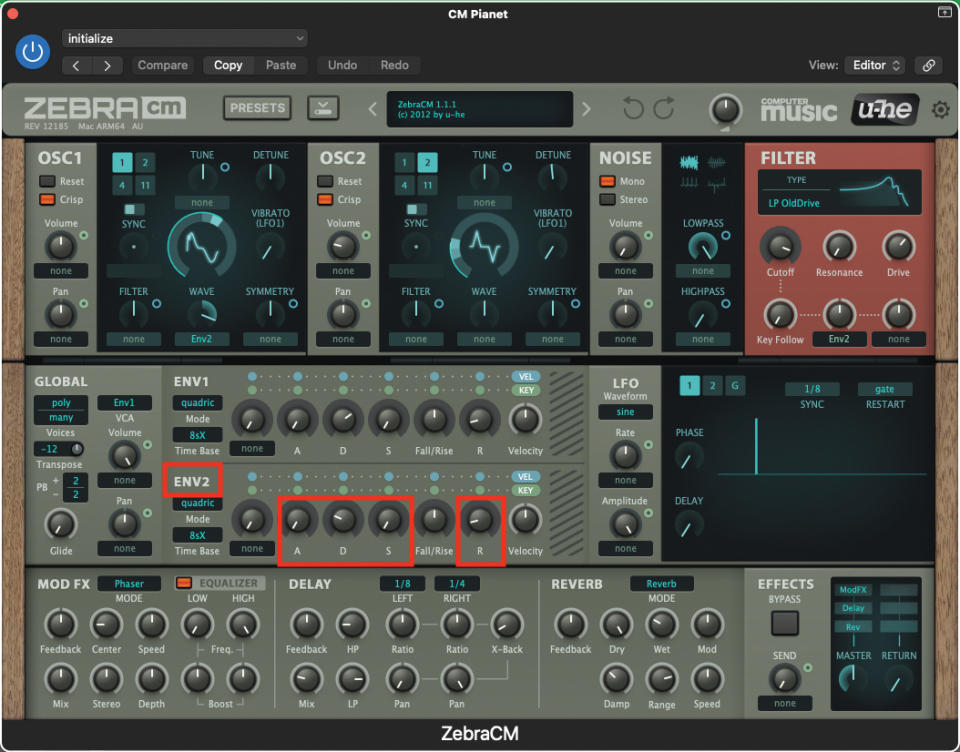
Env2 is going to adopt some similar traits, but will be modulating the waveform of Osc1. Set the Attack pot to a value of 0, Decay to a value of 28, the Sustain to 0, and finally the Release to 15. You can also experiment with the decay phase of Env2, which will have the effect of varying the tone of the patch in realtime.
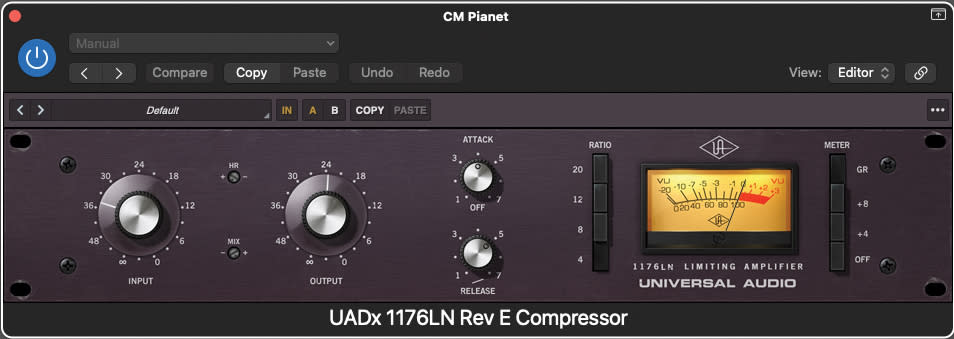
Depending on how you play this patch, chances are that the percussive nature of the sound could end up being difficult to mix. An easy option to rectify this is simply to add some juicy compression – the phatter the better! Try using a compressor plugin with some vintage character, such as a fast-responding 1176-style compressor.
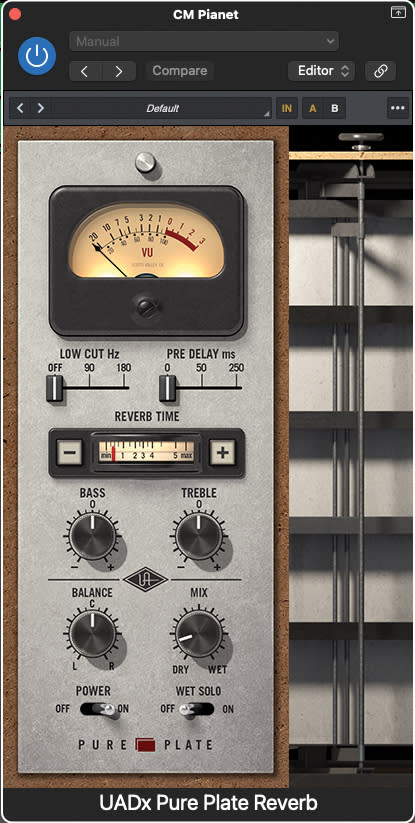
The last part of the equation is to add some back-end reverb. Staying with our vintage roots, we like the idea of some form of plate reverb, which you should be able to find within your DAW’s in-built stable. Universal Audio offer the perfect solution, in the shape of Pure Plate.
Pro tip
Hohner’s electromechanical instruments will be forever associated with certain styles of music. The Clavinet, and the D6 Clavinet in particular, was made exceptionally popular by artists like Stevie Wonder. He liked the sound so much, many of his well-known tracks, such as Higher Ground, use several Clavinets all at once, but all playing slightly different lines in the track.
The Pianet, with its less abrasive tone, was by no means as popular, but still had its fans, The Beatles being one of them. Then there’s the main riff from the track Louie Louie, centred entirely around the Pianet. Arguably, both instruments adopted a single sound, though you could subtly alter the sound on both machines, with basic settings.

This might explain why it became common to use effects pedals alongside both. One of the mainstays was the wah pedal, in keeping with the jazz-funk of the late ’70s. This tradition is continued today, with many players applying both distortion and an auto-wah to the instrument signal.
Of course, this is very easy to do within our DAW, but it might be a little more than you require, given the hefty date stamp that accompanies this effect.
Recommended listening
1. Stevie Wonder - Superstition
Apart from being one of the most well-known tracks in existence, Superstition, like so many other tracks of Stevie’s from the same era, includes the use of several Clavinets.
2. Snarky Puppy - Chonks
This extraordinarily funky track from the jazz fusion band places a Hohner Clavinet, right at the heart of the track’s main riff.

