What to bring off-roading: Packing a non-winch basic recovery kit

No matter where you go off the pavement, having proper vehicle recovery gear with you is as important as having a suitable set of tires. In many cases, you can’t go very far in your vehicle if you don’t have either.
Owning a basic recovery kit is essential for off-roading or remote travel. What if you don’t have a fully kitted out adventure rig outfitted with a winch, winch bumper, and tons of recovery points?
It doesn’t matter if you’re pounding pavement or slaying sand in your stock all-wheel- or four-wheel-drive vehicle – arming yourself with a basic non-winch recovery kit can help others or yourself when a vehicle recovery is needed.

There are several things to consider when compiling a non-winch recovery kit. Here are five important basics that should be in every non-winch kit.

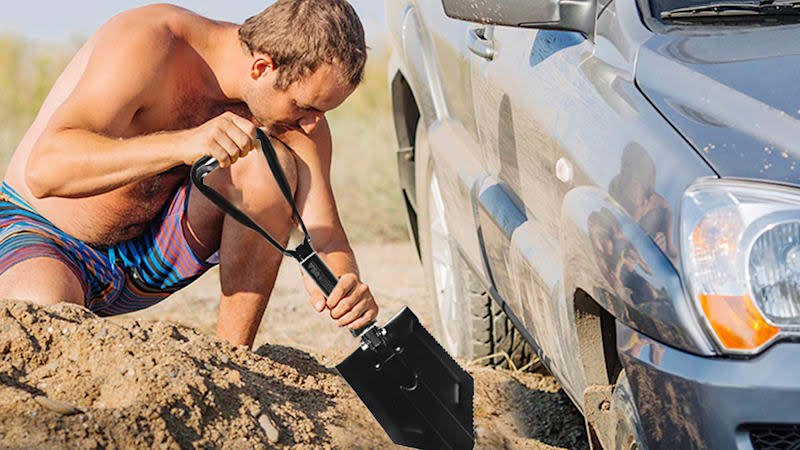
1) An Off-Road Shovel
Along with a good set of heavy-duty gloves, having a solid shovel on board is important. We’ve seen it happen before. A vehicle gets stuck and no one has a shovel handy. Using hands, credit cards or whatever else you can get your hands on doesn’t work very well when frame deep in soft sand or slushy snow.
There are a few things to consider when shopping for a high-quality off-road shovel:
Choose the correct material to suit your needs: fiberglass, steel, wood, or aluminum
Determine your optimal handle height: full-length, folding or short handles
Stowing opportunities: a roof rack or spare tire carrier, under a seat, loose in the trunk, packed in a storage tote
No matter what type you buy, a basic shovel can help vehicles get unstuck, clean up camp, and help put campfires out.

2) Recovery or Traction Boards
In addition to a good shovel, traction or recovery boards can be beneficial to get out of stuck situations. If your adventure vehicle doesn’t have a winch, traction boards are an essential bit of kit.
There are a variety of recovery board styles on the market. Some are small in size and fold up into a storage bag. Others are full-size and can reach up to 45 inches or so in height and approximately 13 inches in width.
Tip: Buy the best recovery boards you can afford. Cheaper units can crack more easily or pose other issues. Premium brands like MAXTRAX or ARB’s TRED lineup offer superior materials, proven designs and easily nest for compact storage.

Traction or recovery boards are easy to use. However, these instructions will help keep them in tip-top shape (without melting their nubs).
Plan your escape route (you can either drive forward or backward from your stuck position).
Dig yourself out as best as you can, especially under the affected tires (either in front or behind them to aid the planned route).
Place each recovery board as flat as possible on the ground, teeth side up (either directly in front or behind your tires).
Kick them into place until the protruding nubs make contact with the tire tread (this allows the boards to partially sit under your tires, giving them the grip they need to drive into recovery).
Slowly accelerate onto the boards and out of the way (do not spin your tires as this will melt the teeth).
If still stuck, repeat steps two through five until free.
No matter if deep snow, thick mud or soft sand has you stuck, recovery boards can help free your rig. They’re an important piece of recovery equipment that all adventure seekers should pack – winch or no winch.

3) Proper Recovery Points
Most vehicles have factory recovery points. If unsure where yours are, check your owner’s manual for their location.
It’s critical to understand which points on your vehicle are used merely as tie-down points versus bona fide recovery points. Using the wrong one could lead to vehicle damage or worse.
Recovery points are oftentimes concealed in a vehicle’s bumpers behind a small, circular cover. Pop the cover off and screw in the factory-supplied metal recovery point loop (usually located adjacent to the vehicle’s jack and spare tire), and you have a legitimate recovery point.


4) Metal or Soft Shackles
Having at least two shackles in your basic non-winch recovery kit is paramount. Used for anchoring recovery straps to vehicles, shackles play an important role in rigging and successful recoveries.
Made from either metal or synthetic rope, shackles come in a variety of types and sizes. Metal shackles are often called screw-pin, bow, or D-shackles, depending on their shape. Soft shackles are synthetic rope, with a knot on one end and a loop on the other to create a secure loop.
When using metal shackles, simply remove the pin, connect it to the recovery point, add the recovery strap loop end into it, and then screw the pin back in. You now have connected the recovery point and strap together.
Tip: Do not overtighten metal shackles. Hand-tighten the pin and back it off a quarter of a turn. This will help ensure the pin will release after recovery. It’s no fun using pliers to remove a stuck shackle pin.
Soft shackles are fed through the recovery point, add the recovery strap loop end into it, and then close by pushing the shackle knot through its looped end to create a secure shackle.
Both shackle types offer pros and cons. Soft shackles can wear over time but are lighter in weight and don’t store as much potential energy. Metal shackles are heavier but typically last much longer, especially if they’re forged and not cast material, and are not prone to abrasion. They do store more energy under tension, however.

5) Kinetic Recovery Straps
Kinetic recovery straps, otherwise known as snatch straps, are used to help “yank” someone out of a stuck predicament. Kinetic straps are designed to stretch. They use said energy build-up to recover stuck rigs.
Kinetic straps can smoothly transfer energy through the strap of a vehicle that’s facilitating the recovery to the vehicle that is stuck. Kinetic ropes allow more pulling force with less stress on the recovery point, providing a powerful pull.
Kinetic straps are used only for vehicle-to-vehicle recoveries.
Hook one end of the recovery strap to a recovery point of the stuck vehicle, using one shackle.
Affix the strap’s other end to a vehicle’s recovery point that’s going to do the pulling, using the second shackle. Make sure there is slack on the strap.
Once the vehicle drives forward, slack on the strap is taken up and energy is released to the stuck vehicle. That translates into kinetic energy, helping to recover the rig.
Kinetic recovery straps are effective if used correctly. Note: Never use the ball on a hitch as a recovery point. This can be extremely dangerous and the ball can turn into a deadly projectile!
Once you assembled a basic non-winch recovery kit, know how each unfamiliar item works before traversing through challenging terrain. How do you properly use each product? What are their limitations?
Understanding how to use recovery equipment correctly and practicing how to use the equipment safely will give you confidence to self-recover successfully or help others in need of vehicle recovery.
Related Video: