Blues playing giving you the blues? Welcome to the ultimate blues guitar workshop: an in-depth lesson that will make you a better blues guitarist
- Oops!Something went wrong.Please try again later.
Blues is one of those styles that most guitarists love to play. There’s just something about the sound of those pentatonic-based licks and riffs, and the immediately identifiable musical structures and rhythms that make it so satisfying.
As a player with relatively little experience you can soon learn to play some simple but authentic-sounding blues guitar because, at its essence, the style is mainly based around the minor pentatonic scale (R- b3-4-5-b7) with additional notes borrowed from the major pentatonic too (R-2-3-5-6) which can be used to construct some basic but authentic sounding licks.
However, it would be a glaring misconception to assume that because of this, it should be dismissed as an easy style to play, because it isn’t. As with any genre, there are harder things to play and easier things to play; things that need a high level of technical skill and musical ability, and others that are simpler.
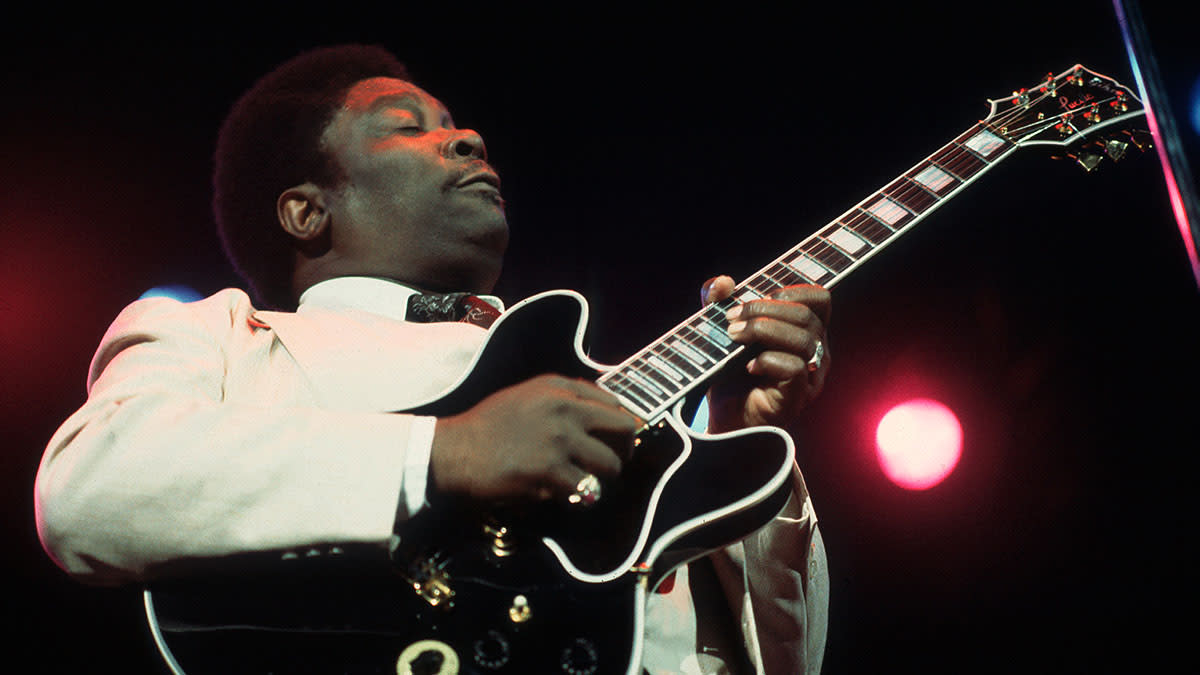
Listening to blues players like B.B. King, who characteristically played quite conservatively but highly emotively, and later players like Joe Bonamassa whose blistering blues-rock licks are jaw-dropping, will give you an idea of how varied blues can be, and how technically and musically demanding it can be, too.
In the 1960s, British guitar players and blues devotees like Eric Clapton, Peter Green, Jimmy Page and Keith Richards took the sound of American blues and, using their own prodigious talent (and some cranked Marshall amps), gave the music a harder edge and the recipe for blues-rock was born. Add some amazing Jimi Hendrix to the mix and there was enough there to captivate and influence legions of guitarists ever since.
Later players like Stevie Ray Vaughan, Gary Moore and Joe Bonamassa (to name but a few) have added their own sound and vocabulary to the genre, combining the influences of traditional American electric blues guitarists like B.B. King, Albert King, and Freddie King, with blues-rock players such as SRV, Clapton and Hendrix and have come up with their own mix of soulful and technically astounding blues-rock guitar that has itself influenced generations.
As a blues guitarist, there is an intensity that has to be put over to the listener that is utterly authentic, and firmly based on feel. Yet in order to achieve this, you need to develop a high enough level of technical and above all, musical skill to be able to convey it.
You don’t necessarily need to be able to play super-fast, for example (unless you want to be able to pull off those super-flash lines), but a good command of different techniques combined with good fretboard knowledge and musical understanding is essential to help you to get there.
This lesson has been put together to boost your blues-rock lead and rhythm playing by giving you a series of exercises and licks which focus on seven different areas of the style. These will help you to improve both technically and musically, and include: picking, legato, string bending, chords, ‘wailing’ (high fretboard licks and searing string bends), turnarounds and intros.
Each of these areas is vital if you want to come across as a confident and authentic blues guitarist. They transfer to other styles like rock and country too, so should prove very useful to your skills overall.
We have come up with five distinct exercises in each area, with some being pretty demanding. In particular, go easy with the string bends as these can require a lot of fretting-hand strength and stamina, especially with the larger interval bends. The same with some of the legato and picking exercises; take these slowly to begin with. But most of all, have fun!
Get the tone
Amp Settings: Gain 7, Bass 5, Middle 5, Treble 6, Reverb 4
Either a single-coil or humbucker equipped guitar will be fine. Use an amp which has an overdrive channel or is low enough in power so it can be naturally overdriven without being too loud; this can be tempered by turning down your guitar volume for cleaner sounds.
Use an additional overdrive pedal to boost the amp to get a thicker, more saturated sound for solos, but don’t make it too distorted. Reverb and maybe some delay will add ambience.
Part 1. Picking
Example 1. Alternate picking
This ascending alternate picking line uses shapes 3, 4, 5 and 1 of the E minor pentatonic scale (E-G-A-B-D). Visualise the patterns across the different fretboard positions and take it slowly to begin with, ensuring correct co-ordination between your picking and fretting hands.
Example 2. Hybrid picking #1
This example is based around an open E7 chord (E-G#-B-D). Use palm-muted pick downstrokes on the sixth string, making sure you create a strong pedal tone on each beat of the bar.
The melody notes are played with either second (m) or third (a) fingers of the picking hand, either between the pedal sixth-string pedal tone notes. This a complex style if you’re unfamiliar with it, so take it slowly in small sections to try to nail the technique, as it’s a useful one to know.
Example 3. Alternate picking across string pairs
The repeating triplet phrases in bars 1 and 3 are tricky because there are three notes being played across two strings, so each new group of three notes starts with a different picking direction. Approach the exercise slowly, paying attention to picking accuracy and, again, hand-to-hand coordination.
Example 4. Hybrid picking #2
This exercise incorporates hybrid picking in a melodic, lead line context. Based around an open E minor pentatonic scale, note how in bar 1 this classic three-string lick is played with a pick downstroke on the third string, but second (m) and third (a) fingers of the picking hand on second and first strings respectively.
In bar 2, the second finger (m) of the picking hand plucks the string beneath the one that’s just been played with a pick downstroke. Take care with timing.
Example 5. Hybrid and economy picking
Another E minor pentatonic lick in shape 1, this exercise features two picking approaches. In bar 1, use a pick downstroke on the third string, and your picking-hand second finger (m) on the first string, then another pick downstroke on the second string followed by a pull-off.
Bar 2 requires some particularly fast economy picking, as the first string is played with a downstroke and the second string uses an upstroke. This ‘inside picking’ approach can be a more economical way of picking between strings, and it’s employed by many great players in all styles of guitar music.
Part 2. Legato
Example 1. Speedy lick with ‘blue’ note
This exercise is a straightforward ascending and descending scale based on Bbm pentatonic (Bb-Db-Eb-F-Ab) with the b5th ‘blue’ note (Fb) at the top of the phrase. It utilises a classic linear pattern with a sixth-string root which goes over shapes 5, 1 and 2. Pay attention to the articulation between the notes, as the placement of the hammer-ons, slides and pull-offs ultimately facilitate the fast-paced execution of the phrase.
Example 2. Repeating phrase
This example uses a repeating legato phrase using the higher strings of shape 5 of Bbm blues scale (Bb-Db-Eb-Fb-F-Ab). Although played in a specific rhythmic pattern, the way the note groupings fall against the beats of the bar creates a displaced feel that adds an interesting lack of symmetry to the phrase.
Example 3. Shape 3 legato phrase
This shape 3 Bbm pentatonic legato phrase uses a three-string grouping to create one of those flashy blues-rock licks that you might find in the middle or end of a solo. You might want to experiment with different fingering approaches here, as shape 3 has a tricky transition between the second and third strings.
Example 4. Repeating sextuplet phrase
This is a shape 2 Bbm pentatonic repeating sextuplet phrase. The lick in bar 1 is rhythmically symmetrical (it does the same thing each time), but the speed of the lick is what makes this challenging. Take it slowly, making sure your hammer-ons and pull-offs are accurate and not messy.
Example 5. Stretchy three-string sequence
This is an interesting Bbm pentatonic shape 1 phrase that uses a three-string forwards and backwards sequence that sounds great when played at a lively tempo. Take it slowly in order to get to grips with the groupings. The initial part of the phrase on the first string has quite a wide stretch, so you might find that the whole phrase is easier to play in another key further up the neck, where the frets are closer together.
Part 3. String bending
With all of these examples, go easy and take numerous breaks as string bending requires considerable effort and stamina and can be fatiguing, so don’t overdo it!
Avoid bending with only one finger (unless it’s a first finger bend); always use any spare fingers for support. Usually, a ‘thumb over the neck’ with a wrist motion is used to facilitate the bending technique.
Example 1. Cut-off bends
Bars 1 and 2 use ascending tone-wide bends with a cut-off, where the sound is cut off at the apex of the bend so you can take your fretting hand off the string with no descending bend.
For the cut off, place the pick on the string either on top or underneath (depending on what you’re playing next). Bar 3 uses ascending and descending bends. Ensure accurate pitching, as the different string tensions will affect the effort needed.
Example 2. Cut-off bend with blues curl
This exercise uses the cut-off bend approach but also employs a ‘blues curl’ on the b3rd (C note) of the A minor pentatonic scale (A-C-D-E-G) upon which it’s based. This ‘micro bend’ is pretty much a quarter of a tone (in practise, not quite a semitone) and is imperative to playing blues.
Technically, you achieve it in the same way as the cut-off bend. You often hear the curl on the b3rd, so it’s important to get the feel of it and learn to hear it automatically on that note.
Example 3. Three-fret bend (minor 3rd)
This exercise features wider bend intervals of a minor 3rd, or tone-and-a-half. Go easy, but aim to pitch the bends accurately. The bend in bar 1 is a classic ‘over bend’. It’s not quite a b3rd interval as it’s a tone plus a curl! This is often played in shape 1. The b3rd bend on beat 1 of bar 3 is another classic one in shape 3.
Example 4. Double-string bend
There are two classic blues-rock bending approaches in this exercise. Bars 1 and 2 feature second-string bends with static notes on the first string. The usual fingering for this is with the third finger fretting the bent string and the fourth finger fretting the first string. Keep the fourth finger firmly down as you don’t want this note going out of pitch.
Ensure the second-string bends are accurately pitched though. The bend in bar 3 is a double-string bend where the third string bends a tone and the second string bends a semitone. I usually use the third and fourth fingers for this. It’s a tricky one, this, so again be aware of pitching.
Example 5. Albert King-style bend
This is a very tricky but classic blues bending approach; the Albert King-style first finger bend. The idea is to bend the string up with the third finger, and with the string still bent to pitch, re-fret a tone lower with your first finger, then let the bend down. This is particularly difficult, but sounds great when done properly.
Part 4. Chords
Example 1. G7 chord voicings
This exercise gives various voicings of a G dominant 7 chord (G-B-D-F). The dominant 7th consists of root, 3rd, 5th and b7th and is one of the bedrocks of blues. It’s vital to try these chords in different keys so you can recognise them all over the neck. Learn each shape properly before you try to put them all together.
Example 2. G9th voicings
This exercise gives various voicings of a G dominant 9th chord, or G9 (G-B-D-F-A). These chords are again used extensively in blues and, although they have the same basis, the 9th interval gives a slightly more interesting and jazzy tonal colour to the regular dominant 7th. In particular, the voicings on beat 2& of bars 1 and 3 and on beat 1 of bar 4 are probably the most common, so make sure you know these inside-out.
Example 3. Diminished and augmented chords
Diminished 7th and augmented chords are more unusual and can sound weird when isolated, but in context, they really can lift a blues chord progression. The diminished 7th (dim7) consists of root, b3, b5 and bb7, and the augmented (triad) consists of root, 3rd and #5th.
Both of these chord types exist to provide tension between chords, and make your ear ‘crave’ the next ‘resolving’ chord that they pull your ear towards (eg C#dim7 - G/D - D7 - G, or G - Daug - G).
Example 4 & 5. Altered chords
These exercises are slow bluesy progressions incorporating the previous chords which help you to hear how they work musically together. In addition, these examples use altered dominant chords which are regular dominant 7ths but have ‘alteration’ notes such as b5, #5, b9, #9.
Again, these chords can sound a little strange in isolation (although Hendrix’s E7#9 is an acceptable standalone these days), but in a progression give extra tension to ‘pull’ the ear to another chord.
Part 5. Wailing
These exercises are licks that incorporate some of the techniques already seen, but use them at 12th fret and beyond higher pitches in licks that could be of the sort that you could hear at the culmination of a blues-rock solo.
Example 1. Exciting E minor lick
This lick uses the type of bend with static note as seen in Ex4 of the string bending exercises. In the key of E minor, this lick can sound really exciting, but depending on the type of guitar you have, the 22nd-fret bend can be awkward to reach comfortably so practise this in isolation first.
Example 2. Clashing catch bend
Again in the key of E Minor, and using shape 2 of the E minor pentatonic scale (E-G-A-B-D), this lick has a b3rd interval bend on the 17the fret of the second string (E note) in bar 2, but also has a great ‘wailing’ blues-rock approach on beat 3 of bar 3, which is where you deliberately catch the second string under your fretting finger when you bend up the first string, so you get a kind of ‘nasty’ dissonant sounding wail when the bend descends. Sounds great!
Example 3. Re-picked bends
Another E minor pentatonic shape 2 lick, this one not only incorporates blues curls on the b7th (D note) as well as the b3rd (G note), but also a bending approach where you bend up a tone but re-pick the bend a semitone lower in pitch, before raising it again.
This is another tricky technique, as you need to be confident in releasing and re raising the pitch of the bend mechanically, as you don’t hear the sound of the re-picked descending or re-ascending note.
Example 4. Lick with big bends
This lick starts with a repeating E note on the 17th fret of the second string. Make sure you dig in here and give it plenty of rapid blues style vibrato. The rest of the lick uses a b3rd interval wide bend in shape 3 E minor pentatonic and a major 3rd bend on the second string in that position. Proper wailing!
Example 5. Lick with 22nd-fret bend
This E minor pentatonic lick incorporates bends and short passages in shapes 1, 2 and 3, but the fast legato section at the end involves fretting at the 22nd fret (D note) and bending it a tone to E, which is pretty much as high as most guitars get. It can be super tricky but if it’s possible on your guitar, go for it!
Part 6. Turnarounds
Turnarounds are usually the last two bars of a 12-bar blues progression where it cycles round and starts again (this is normally over the V chord). The turnaround provides an opportunity for a catchy phrase which, with the chords that it’s played over, has the effect of creating an obvious ‘turning round’ point.
Example 1. Open-string turnaround
All the exercises incorporate the last four bars of the 12-bar blues progression in order for you to hear the turnaround in context. In the key of E, this turnaround features a classic open-string blues lick which uses E minor pentatonic but borrows the major 3rd (G#) and major 6th (C#) from the E major pentatonic scale (E-F#-G#-B-C#). This is followed by a the B9 (V chord - the turnaround chord) which is approached from a semitone above with a C9 chord.
Example 2. Descending triplets turnaround
This is another classic turnaround in the key of E which uses a descending chromatic triplet line on the third string from the 4th fret (B note) with an open first-string E note pedal.
The characteristic hammer-on and pull-off figure from the b3rd G note (open third string) to the major 3rd (1st fret, third string) gives a classic blues flavour. Note that the final note of the lick is B, which is the root note of the B7 chord over which it’s played.
Example 3. Ascending chromatic turnaround
This turnaround is similar to the last one, but an octave higher and the chromatic line is ascending chromatically from the major 3rd of the E chord (G# note) to the 5th of the E chord (B note).
Example 4. Blues scale and major pentatonic turnaround
In the key of A, this turnaround uses a classic combination of A minor blues scale (A-C-D-Eb-E-G) and A major pentatonic (A-B-C#-E-F#) to create a catchy blues phrase. Again, note the use of the root note of the V chord (E7) at the end of the lick; in this case the E note played over the E7 chord.
Example 5. Ringing three-string turnaround
For this turnaround in A you need to fret little chord shapes, and let the notes ring. The first shape on beat 1 of bar 3 is a little A7 chord, the next shape is a Gb diminished triad followed by an F diminished triad and lastly, what could be seen as a kind of E diminished triad, but is really an A7 chord.
Part 7. Intros
A blues intro is a memorable start to a piece, drawing the audience’s attention. Often the guitar plays an important part in doing this!
Example 1. Intro to a quick change blues
This intro, in the key of Bb, starts as the first four bars of a ‘quick change’ blues. This means that the first bar is the I chord (Bb7), the second bar is the IV chord (Eb7) and the third and fourth bars are the I chord again (Bb7). This pulls the ear into the next part of the 12-bar progression which is the IV chord (Eb7) which is where the vocal line might well start or an improvised guitar solo might take over. (Many blues songs start with guitar solos).
Example 2. Intro with arpeggios and lead licks
This intro is in the key of D and harmonically involves the same principal as Ex1, but has a #4 diminished 7th chord (G#dim7) after the IV chord (G7). Its important to get a relatively warm, clean tone on the arpeggiated chords section in bars 1 and 2, and then a nice biting, bluesy overdrive tone when the lead line comes in on beat 2 of bar 3. You can do this by pressing an overdrive pedal and flicking to the bridge pickup from the neck.
Example 3. Intro with 3rds
This intro is in C and again, harmonically similar to the previous two exercises. In this example, the point is to create a catchy, simple motif which repeats itself with subtle differences, before launching into an ascending 3rds line which creates an exciting lead into the upcoming section.
Example 4. Intro with pentatonics and descending 3rds
In the key of G, this intro is very much like a turnaround, as it starts on the V chord (D7), before going to the IV chord (C7) and then the I chord (G7) and back to the V chord (D7). In effect this is just like the last four bars of the progression. The phrases here use Pentatonic lines and chromatic descending 3rds.
Example 5. Slow minor blues intro
Our final intro is similar harmonically to the last exercise since it’s also like the last four bars of a 12-bar progression, but in this case it’s a slow minor blues in the key of Bbm. The intro phrase is really just some sparse and simple Bb minor pentatonic (Bb-Db-Eb-F-Ab) lines. Playing with feel is the point here.

