3 Mind-Blowing Ways to Use Paint for an Instant Decor Transformation

Lone Fox’s Drew Scott, the West Elm stylist turned DIY’er with a sharp eye for interiors, believes in the power of a coat of paint. “You can change up so much with paint, and really alter anything,” he says. It’s this can-do attitude that’s attracted a design-minded following to his YouTube, TikTok, and blog, where he shares everything from IKEA hacks and interior makeovers to tutorials on how to breathe new life into thrifted or upcycled decor.
Though Scott is no stranger to power tools, some of his most captivating projects simply rely on a handful of household goods (baking soda or fabric softener, for example), crafting staples (such as paintbrushes and painter’s tape, and maybe Mod Podge), and a coat or two of paint. Itching for something new to admire in your home, and willing to spend an afternoon getting crafty? These simple projects are easy to do yourself.
Keep reading for Scott’s step-by-step instructions and words of wisdom on how to complete three fun upgrades: a ceramic paint finish, a “terrazzo” technique, and a faux-leather chair project.
Ceramic Paint Finish
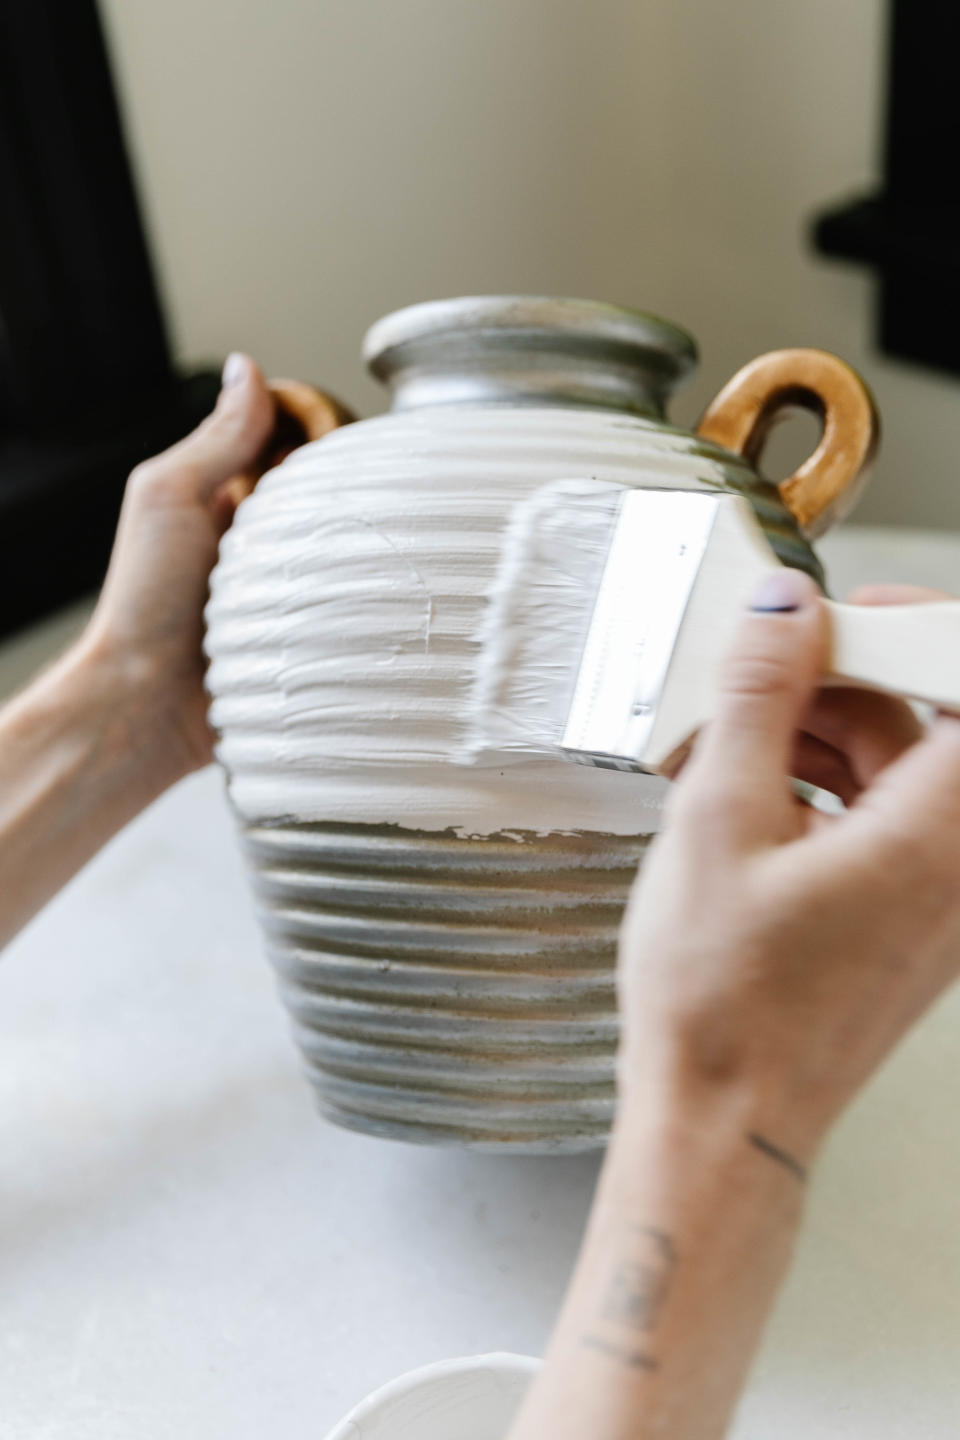
A 1:1 ratio of baking soda to paint gave this oddball vase a finish that now channels unglazed Mediterranean pottery. “Before I repainted it, it was almost medieval! So I feel like I was able to turn it into something that goes better with my current sense of design and style,” Scott says. The project is ideal for anyone looking for a quick project with low effort and high payoff: “The time commitment is maybe 30 to 45 minutes,” he adds.
Finding that your baking soda–and–paint mixture is clumpy and impossible to apply? Scott suggests just adding a bit more paint to thin it out and ease application. But no worries: “Any imperfections you might add to this piece add character,” he says.

Drew Scott’s step-by-step instructions:
1. Combine equal parts baking soda and household paint (Scott has used acrylic paint with success). Mix well. Keep in mind that the more baking soda you use, the chunkier and grainier the finish will be.
2. Using a brush, apply the mixture to any vase or decor object you want to paint.
3. Let dry and apply another coat if desired.
4. Once dry, style your updated decor with eucalyptus leaves, artificial flowers, or whatever else your heart desires.
5. Also consider: Once the vase is dried, apply a thin layer of mud (yes, dirt and water) and allow the mud to fully dry. Wipe off excess dried dirt with a dry cloth for an aged look.

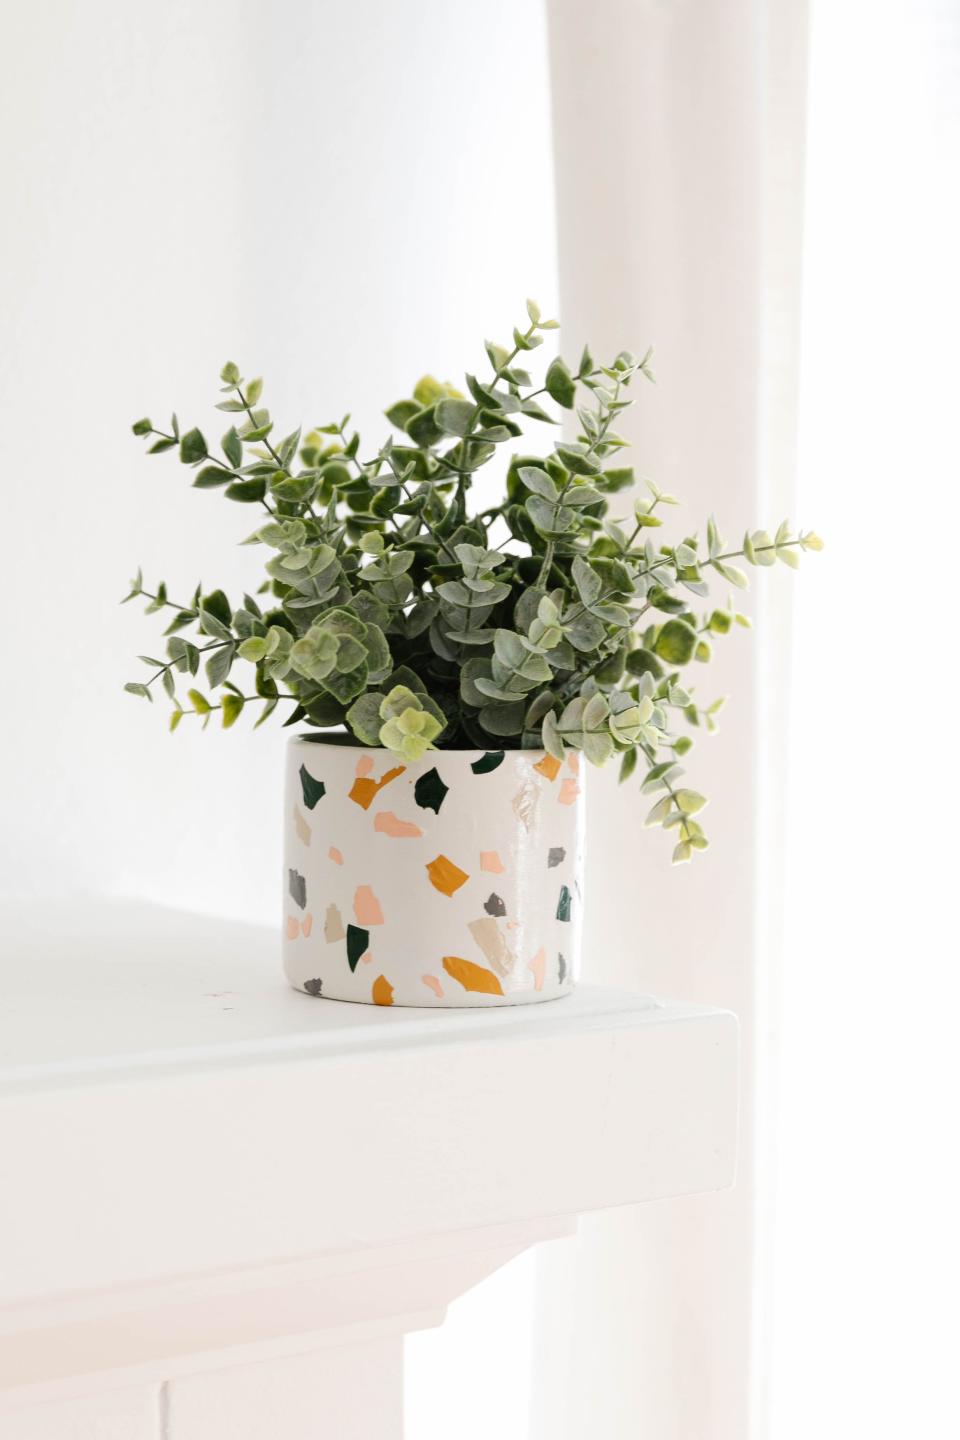
“Terrazzo” Technique
Can’t quite commit to a Sottsass mirror? In the meantime, add elements of retro design to your space with this terrazzo-inspired painting technique. Keep in mind that you’ll need to paint your vase or decorative object with two coats of base color (letting them dry in between) and allow your “terrazzo” swatches to dry overnight so they lift easily from the wax paper and snap apart into crisp organic shapes.
Scott first tried to peel his paint swatches an hour after applying them and found that although they were dry to the touch, they weren’t dry enough to keep going with the project. “I decided to wait a full 24 hours, and in the morning they cracked apart really easily,” he says.


Drew Scott’s step-by-step instructions:
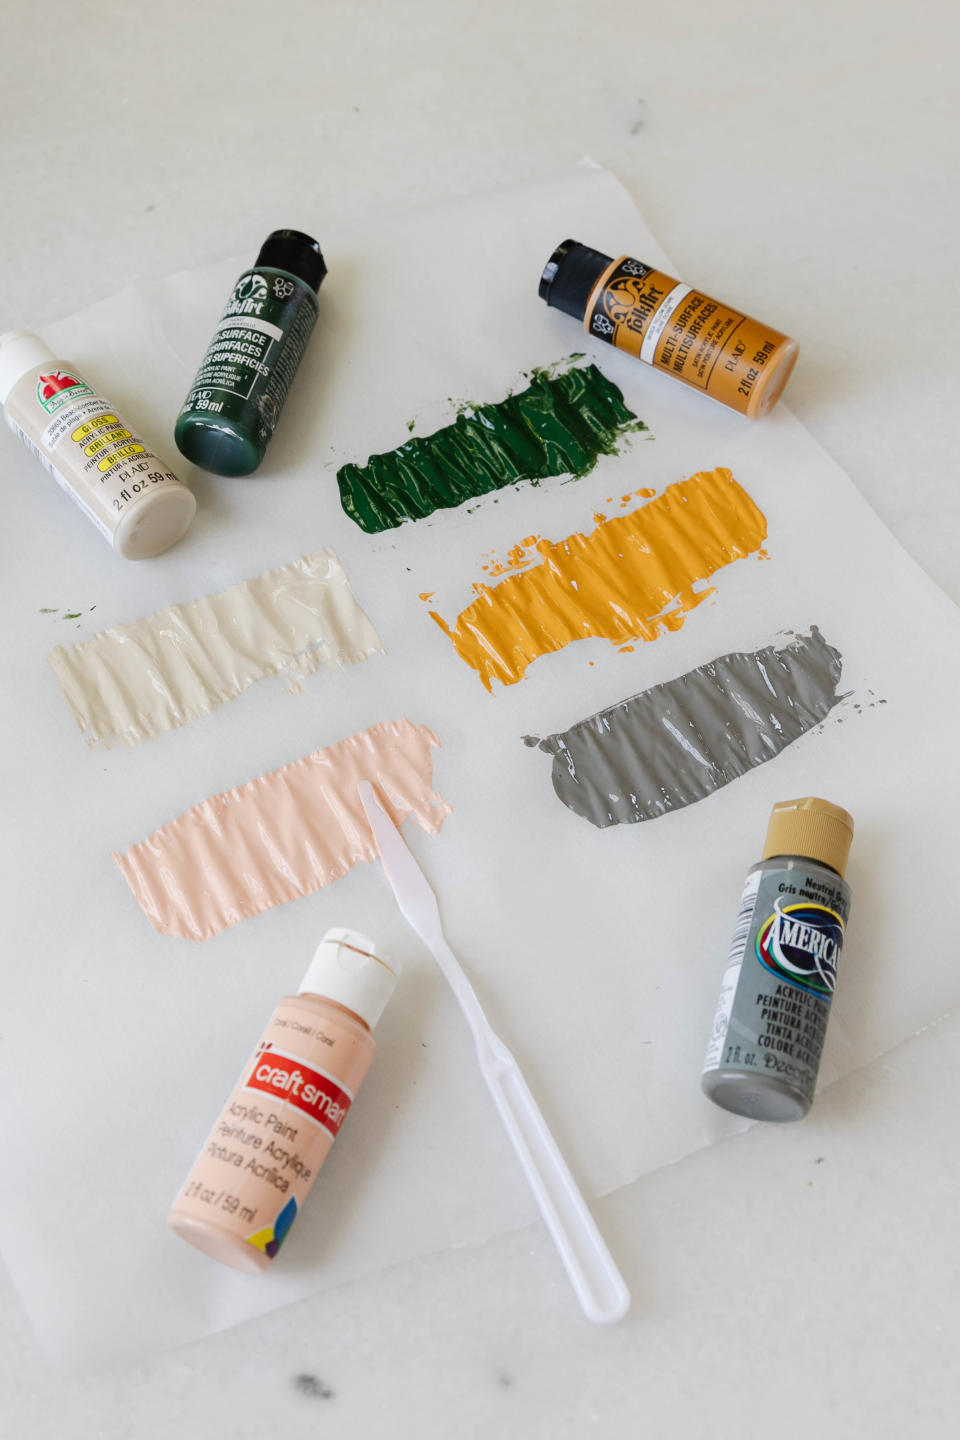
1. Using acrylic paint, dab even swatches of the colors you want to use on wax paper.
2. Allow to dry overnight. This is crucial as you want the paint to fully cure so it easily breaks apart.
3. Once dry, carefully peel the “terrazzo” swatches off the wax paper and rip into different-sized pieces.
4. Take the vase or object you want to decorate and apply two coats of white paint or whatever base color you want.
5. Once your vase is dry, use Mod Podge to apply the swatches to the vase/object.
6. Allow to dry, then apply a final coat of Mod Podge over the swatches to seal.
“Leather” Chair
If your étagère is adorned with bits and baubles aplenty, and your shelfies are styled just so, you may be looking for a bigger project. Scott’s painted “leather” chair uses three shades of paint to mimic the highlights and lowlights of a leather’s patina.
Mixing fabric softener with the paint keeps the mixture from drying too quickly. “The layers each took around 24 hours to dry, so you have a lot of time to fix any mistakes, which is really nice,” says Scott. The wait is worth it, though. Once your chair is dry, you shouldn’t have to worry about color transfer or flaky paint. “That’s the chair that I use at my desk whenever I’m doing DIY projects or filming videos, and I haven’t had any problems with it yet,” Scott says.


Drew Scott’s step-by-step instructions:
1. Start by cleaning and prepping your furniture for the painting process. Add painter’s tape to any areas you don’t want to paint and remove any pilling on the fabric.
2. For each color you want to use, mix equal parts latex paint and fabric softener for about 30 seconds until well combined, and then add to a separate spray bottle. (Scott opted for three different shades of Valspar paint—Cafe Miel, Cowboy Boots, and Natural Cork.) This mixture will be your blending agent and allow the paint to smoothly glide over the surface.
3. Apply one even coat of your lightest color to the chair. Then go back in with your darker shades and blending agent to add shadows and depth where you see fit. Let this first coat dry for a complete 24 hours.
4. If your fabric has quite a bit of texture, you may want to lightly sand in between layers of paint.
5. Apply a second coat the same way you did the first and let dry for another 24 hours.
6. Repeat the previous steps until you have your desired finish. The rougher your fabric is, the more coats of paint you will need to create a smoother final texture.

Originally Appeared on Architectural Digest

