10 essential Logic Pro for iPad tips
Whether you're considering buying or already enjoying this great iPad DAW, we have some top tips to improve your workflow and get the most from the best touch music-making experience out there.
1. Taking your first steps?
If you’re totally new to Logic Pro on the iPad, we’ll get started with a few quick tips in one go to help get you going.
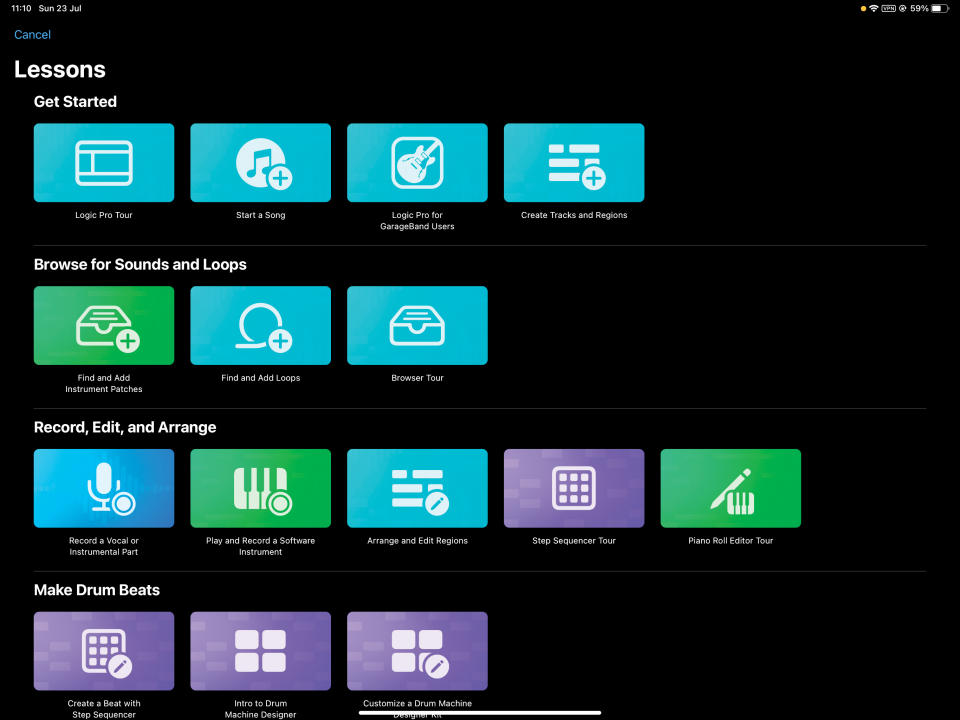
The first advice would be to make sure you take advantage of the supplied Lessons; they’re really good, so use them! If you’re a Logic desktop user, in particular, you’ll find several of these invaluable, as LPiP does these things ever so slightly differently to the way it’s done on your desktop DAW.
If you’re making the leap over from GarageBand, the good news is that there’s a dedicated Lesson for that, plus you can download a set of sounds dedicated to GB and load in its projects directly. For this, press the + icon, go to the GarageBand for iOS folder – which may be on your iCloud or iPad – and then tap a project. It should subsequently load up with all of the available third party AUv3s plugins.
2. Play Surfaces are great
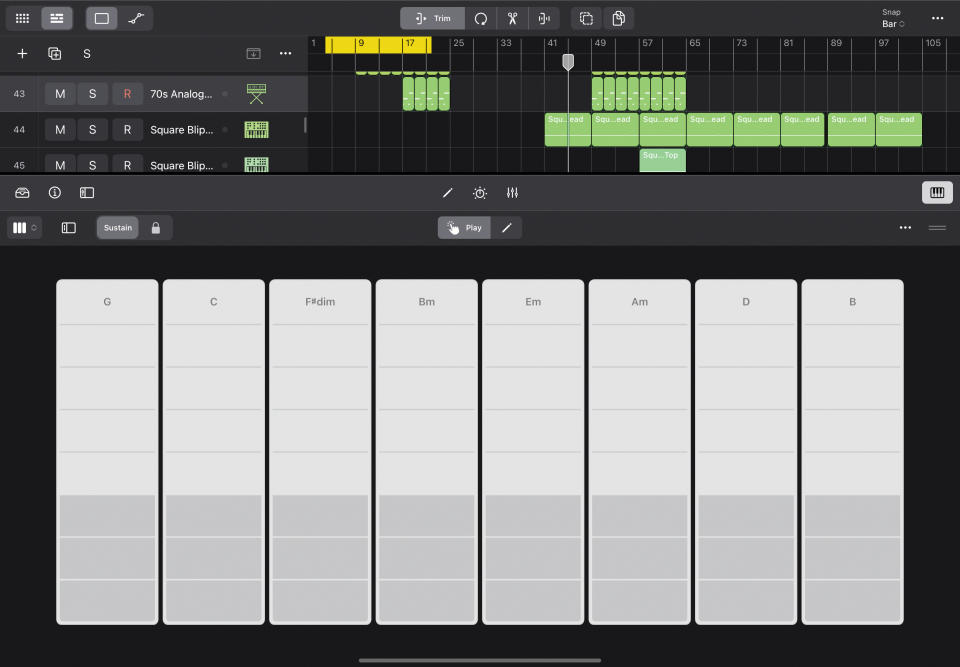
The Play Surfaces are an innovative inclusion, especially if you’re not using an external MIDI controller. Click the keyboard button on the right and then the left keyboard button for a drop-down menu to access the five Play Surfaces (Keyboard, Drum Pads, Fretboard, Chord Strips and Guitar Strips).
The Keyboard is great as you can use a scale option to lock it to your song scale so only the ‘correct’ notes are shown. The Chord Strips surface lets you perform complex chord progressions with one finger, and set the key of all the chords you play. You get higher inversions the higher up you play and when recorded, all of the MIDI notes played in that one finger chord will be there to edit.
3. Speedy display tips
One of the best features in LPiP is the ability to simply touch and drag each window to resize it, for a high degree of customisation. You can also have multiple windows open – plugins, browser, and so on – but here’s an easy tip for when you want to get back to focussing on your song arrangement.
You could manually close all other windows, but double-clicking the top bar of the Play Surface window closes everything bar the arrangement window. To get everything back, double-click the bottom bar and they will reappear!
4. Customise!
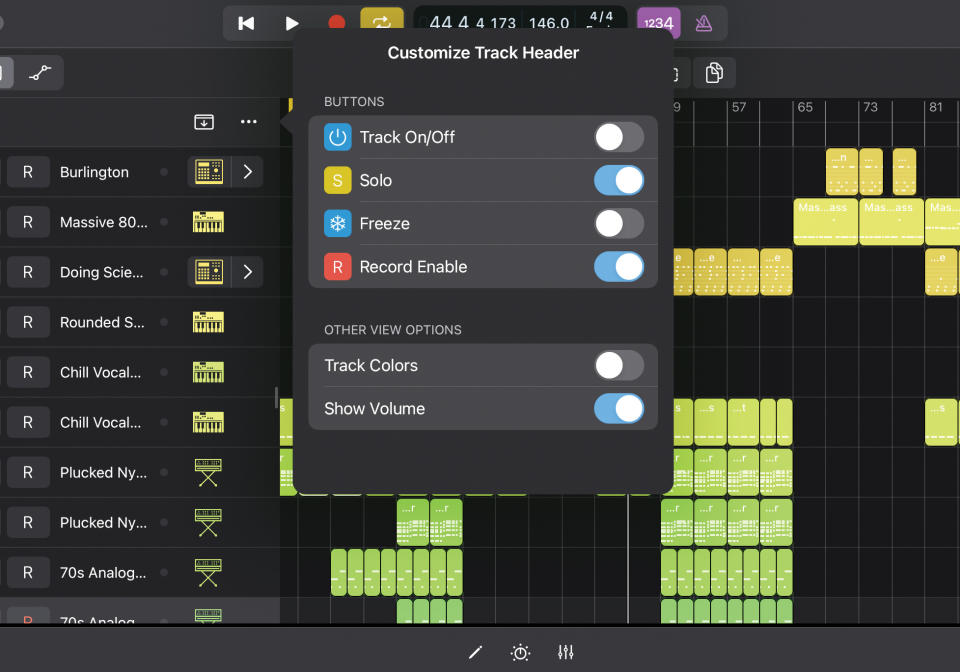
One of the best features to get into when starting a project is display customisation. Starting with editing track header info, click the three dot icons next to Panel Show box to reveal options to show/hide solo, mute, input monitoring, record enable, track freezing, track colours and volume.
In Settings (top right), you can also customise transport options (show/hide fast forward, rewind, cycle and capture recording); display options (show/hide song position, time signature, CPU and MIDI); and finally modes (for tuner, count in click and more).
5. Just browsin'
The browser in LPiP is one of its best features. For instruments, the All Filters option shows every filter so you can home in on a sound by specific instrument, synth type, genre, effects, sound pack and more, although it’s almost easier just to type what you’re after using the search function.
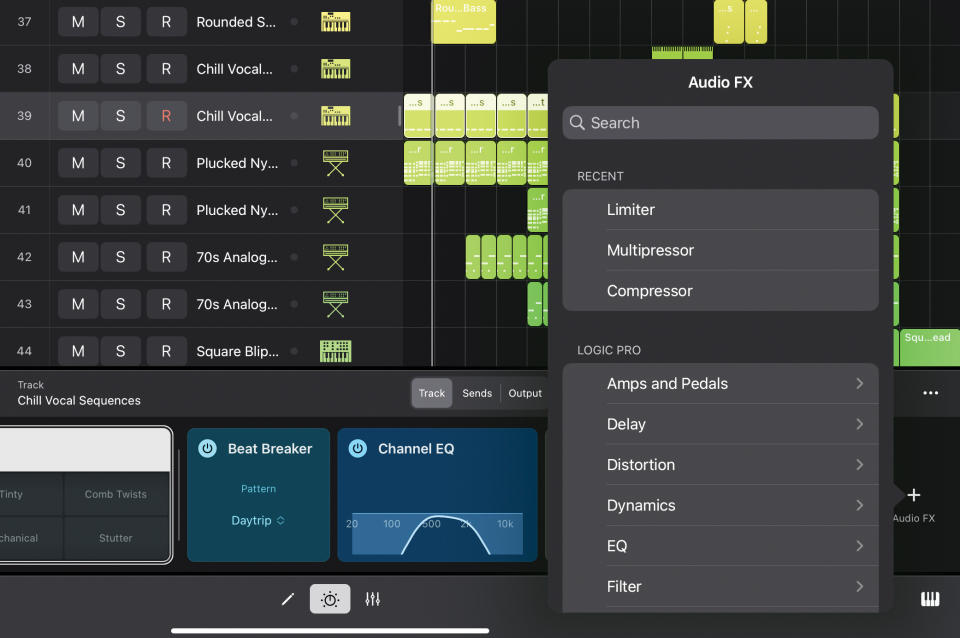
Similarly with effects, Audio Patches are great for setting up instant effect group setups: an amp combo for guitars or an effects chain for vocals, for example. Select the audio track you want effects on, hit the browser icon and select Audio Patch presets by instrument or effect type.
Read more: The beginner's guide to Logic Pro for iPad
6. Importing plugins
As you might expect, all AUv3 plugins should work with Logic – we say ‘should’, as there are issues with some which are expected to be resolved with point updates for LPiP. Third party plugins are selected in the plugin panel in the lower UI (press the ‘+’ on the right).
As with the desktop version of Logic, all available plugins are listed by those you have recently used first, then those native to LPiP, and then third-party ones listed by developer name. As with the browser, we find using the Search option to find a plugin is often quicker than going through the various menus ordered by developer.
7. Importing samples
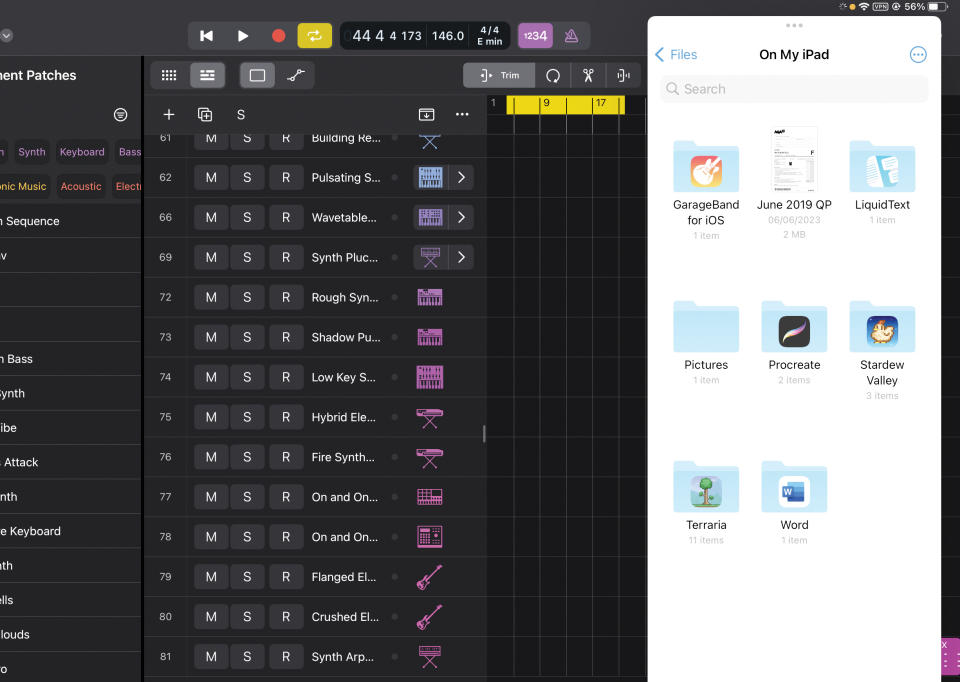
Importing samples from the LPiP’s own downloaded content is easy, obviously, but getting your own samples in is not. You’ll need to go to the Files app and use the Slide Over option so the files stored on your iPad are shown over to the right of the UI at the same time as Logic. Then it’s a matter of dragging your audio files over from the Files app into Logic.
If you drag them into the main arrangement window, a suitable track will be automatically created, or drag them into Live Loops for an instant Live-style grid playback.
8. Use Markers
One of the most useful aspects of Logic Pro for the iPad is the Marker section which lets you create song parts (intro, chorus, etc) to home in and work on. It’s accessed by tapping the Global Track Panel Show button (box with down arrow above the tracks).
Then press down the + button and your first Marker will appear wherever the playhead is. Adjust the length by grabbing the handle (right) and dragging to your desired length. Then change the name by tapping on the Inspector button (bottom left ‘i’) and edit the text in the Marker Name box. Drag your playhead to a new position and repeat the process for more song markers.
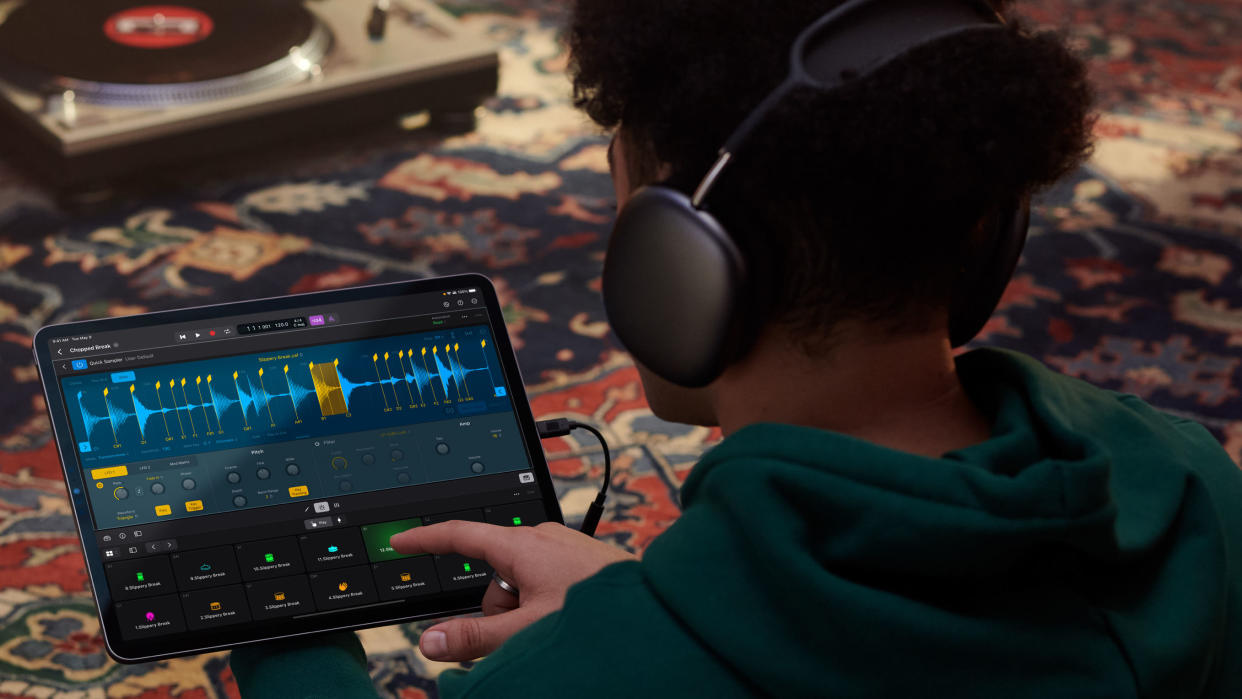
9. You can't beat Beat Breaker
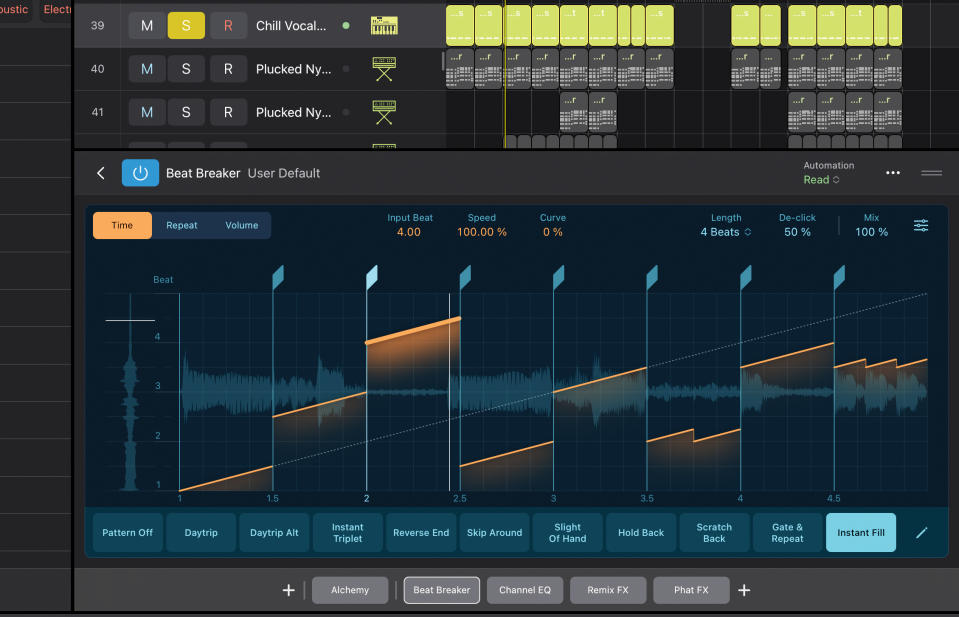
Beat Breaker is also a highlight of LPiP. It allows you to slice up audio, add effects, reorder them and more. It’s particularly happy supplying glitchy and scratchy effects – the cartoon characters of the effects world – and is surprisingly ‘out there’ for what could be seen as quite a straight DAW from a big corporation.
Our tip would be that it’s tempting to go all out and go wild with Beat Breaker, but reining it in and going down the more subtle stutter route might reap overall better rhythmic rewards.
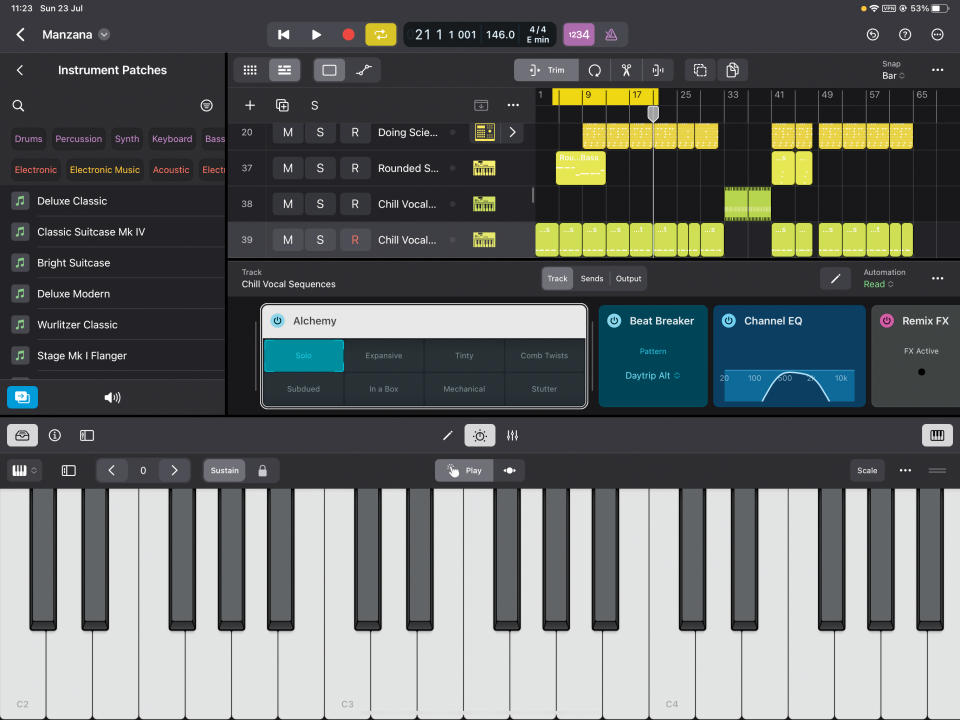
10. Sample Alchemy magic
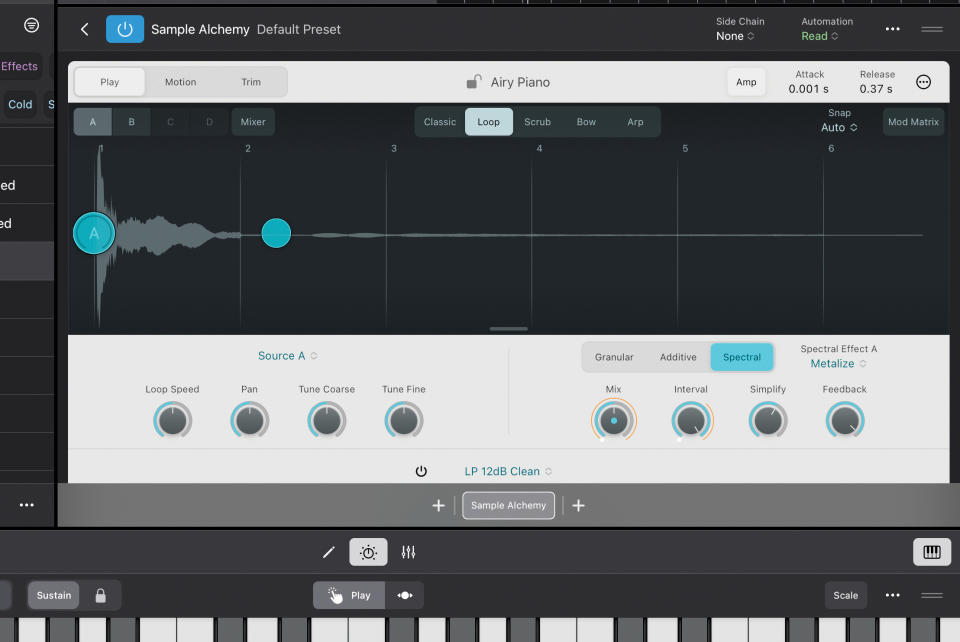
Sample Alchemy is brand new for LPiP and allows you to effectively create instruments from samples and then go into some pretty deep editing with each. It permits you to control four playheads with a variety of playback options within the sample waveform – the Bow vibrato effect is particularly great, and well worth digging deep with. Add on top of that granular, filter and spatial engines for each source and it’s one of the most creative plugins in the DAW.
Our top tip here is to experiment with the Spectral engine for instant ambience, whatever your sample might be.
Read more: Apple Logic Pro for iPad review

